

By your fellow sugar-cookie enthusiast
Picture this: it’s December 23rd, glitter covers your kitchen floor, and a tiny human wants to “help” by licking the frosting bowl clean. Sound familiar? Good. You’re in the right place.
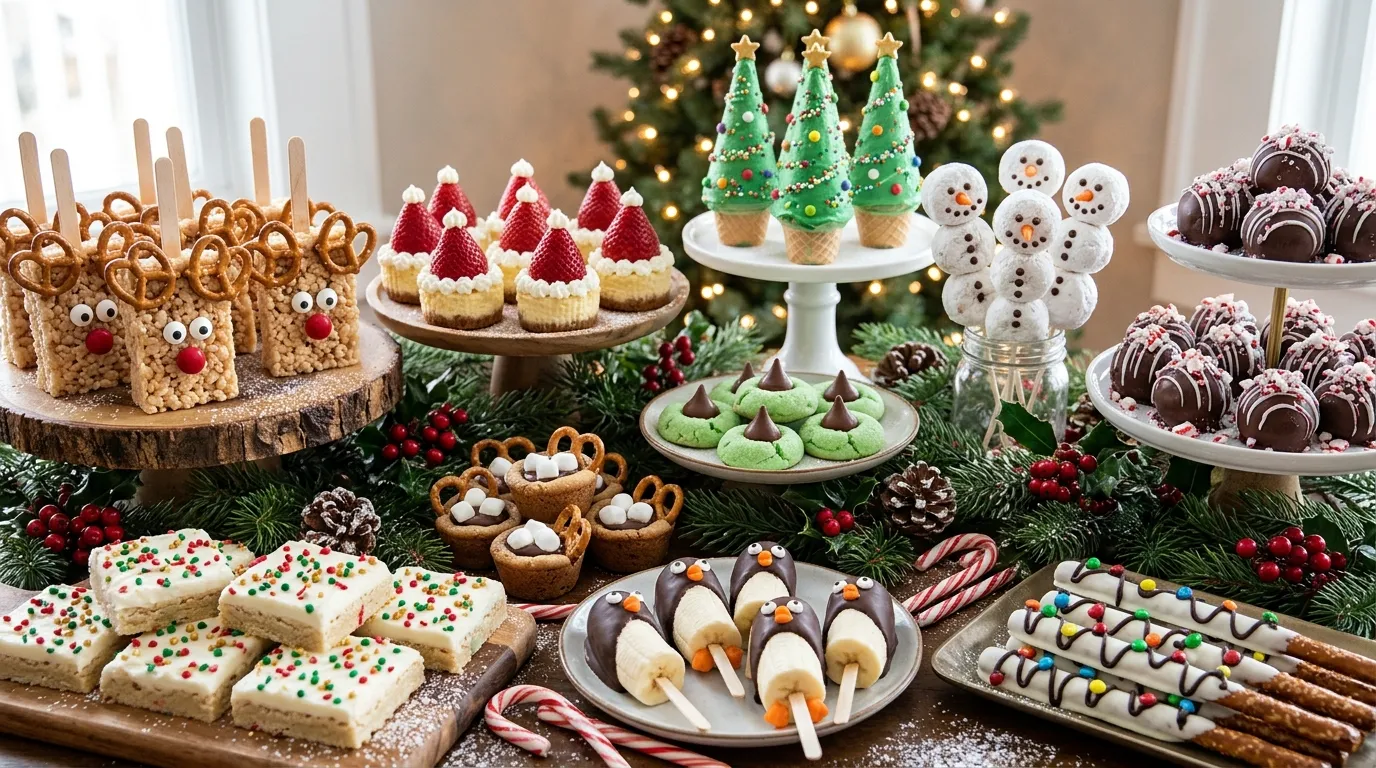
These Christmas desserts for kids work for real life. They look adorable, they use ingredients you can grab at any grocery store, and kids can pitch in without turning your kitchen into a crime scene. Most take 30 minutes or less, and a few need zero oven time. Who has time for a fussy gingerbread cathedral anyway?
I’ve tested every recipe below on my own sticky-fingered crew of nieces, nephews, and neighbors. Some got rave reviews. One got a dramatic “it looks like a sad Christmas tree” (we fixed it). Grab a mug of something warm, and let’s get baking. Or, you know, assembling. Plenty of these are just assembling.
Quick tip before you start: Line up all your sprinkles, candies, and toppings in small bowls first. Kids move fast, and a prepped station saves your sanity.
1. Reindeer Rice Krispie Treats
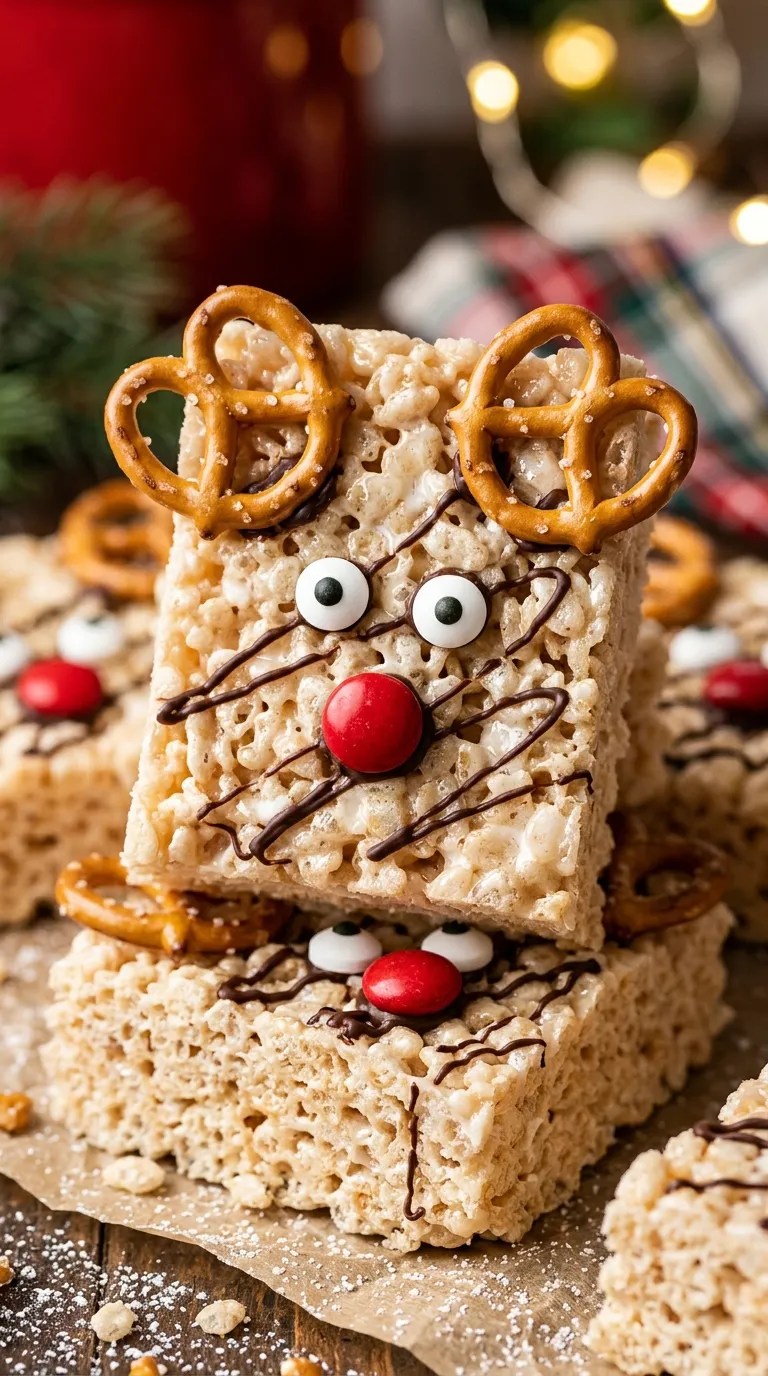
These easy Christmas treats turn a classic snack into Rudolph’s whole family. Kids love pressing on the candy eyes, and you love that nothing needs baking.
Pinterest image prompt: Vertical 9:16 extreme close-up of a stack of reindeer-faced rice cereal treats, chocolate-drizzled, with googly candy eyes, red candy noses, and pretzel antlers, glossy and colorful, holiday red-and-green background softly blurred, food fills 85% of the frame, bright natural light, shallow depth of field.
Ingredients
- 6 cups crispy rice cereal
- 10 oz mini marshmallows
- 3 tbsp butter
- 1 tsp vanilla extract
- Mini pretzel twists (for antlers)
- Candy eyes and red M&M’s (for noses)
- ½ cup melted chocolate (for glue)
Step-by-Step Instructions
- Melt the butter in a large pot over low heat.
- Stir in the marshmallows until they turn smooth and gooey.
- Remove the pot from the heat and mix in the vanilla and cereal.
- Press the mixture into a greased 9×13 pan and let it set for 20 minutes.
- Cut into rectangles.
- Dab melted chocolate on the back of each candy and stick on the eyes, nose, and pretzel antlers.
Why You’ll Love It
Pressing pretzel antlers into a treat makes kids feel like tiny pastry chefs. Grease your spatula first, because marshmallow sticks to everything, including your patience. I make these every year, and they vanish faster than the cookies Santa gets.
2. Santa Hat Strawberry Cheesecake Bites

Tiny, red, and fluffy, these bites look fancy but take 15 minutes. Nobody needs to know that.
Pinterest image prompt: Vertical 9:16 macro close-up of fresh strawberries shaped like Santa hats, piped with swirls of white cheesecake filling and topped with a dollop of cream, arranged on a white plate, sparkling sugar crystals, soft festive bokeh, food covers 90% of the frame.
Ingredients
- 24 large strawberries
- 8 oz cream cheese, softened
- ½ cup powdered sugar
- 1 tsp vanilla extract
- ½ cup whipped cream or whipped topping
Step-by-Step Instructions
- Wash the strawberries and slice off the green tops.
- Cut a thin slice off each bottom so the berries stand upright.
- Beat the cream cheese, powdered sugar, and vanilla until fluffy.
- Spoon the mixture into a piping bag with a star tip.
- Pipe a cheesecake swirl onto each berry.
- Top each swirl with a small dollop of whipped cream to make the pom-pom.
Why You’ll Love It
These taste like a cheesecake slice you can eat in two bites. Keep the berries cold until you serve them, or the filling slides right off. I once skipped the chilling step, and my Santa hats looked like they’d lost a fight with a snowblower.
3. Ice Cream Cone Christmas Trees

Flip a sugar cone upside down and you’ve got a tree. Kids call this one “the best part of Christmas,” and I refuse to argue.
Pinterest image prompt: Vertical 9:16 tight close-up of upside-down sugar cones covered in bright green frosting, decorated with colorful sprinkles, mini candies, and star-shaped candy toppers, lined up in a row, glossy frosting texture, food fills 85% of the frame, warm holiday lighting.
Ingredients
- 8 flat-bottom sugar cones (not pointed ones, trust me)
- 1 cup vanilla frosting
- Green gel food coloring
- Sprinkles, mini M&M’s, and gumdrops
- 8 star-shaped candies or yellow candy melts
Step-by-Step Instructions
- Stir green food coloring into the frosting until it looks like a pine tree.
- Set the cones upside down on a plate or parchment paper.
- Spread the frosting over each cone with a butter knife.
- Press on candies and sprinkles in any pattern your kid dreams up.
- Stick a star on top.
- Let the trees set for 10 minutes before serving.
Why You’ll Love It
Every tree comes out different, which makes them feel handmade and special. Use thick frosting, not the runny kind, so the candies actually stick. Warning: your kid will insist on decorating one “for the dog.” Say no.
4. Grinch Kiss Cookies
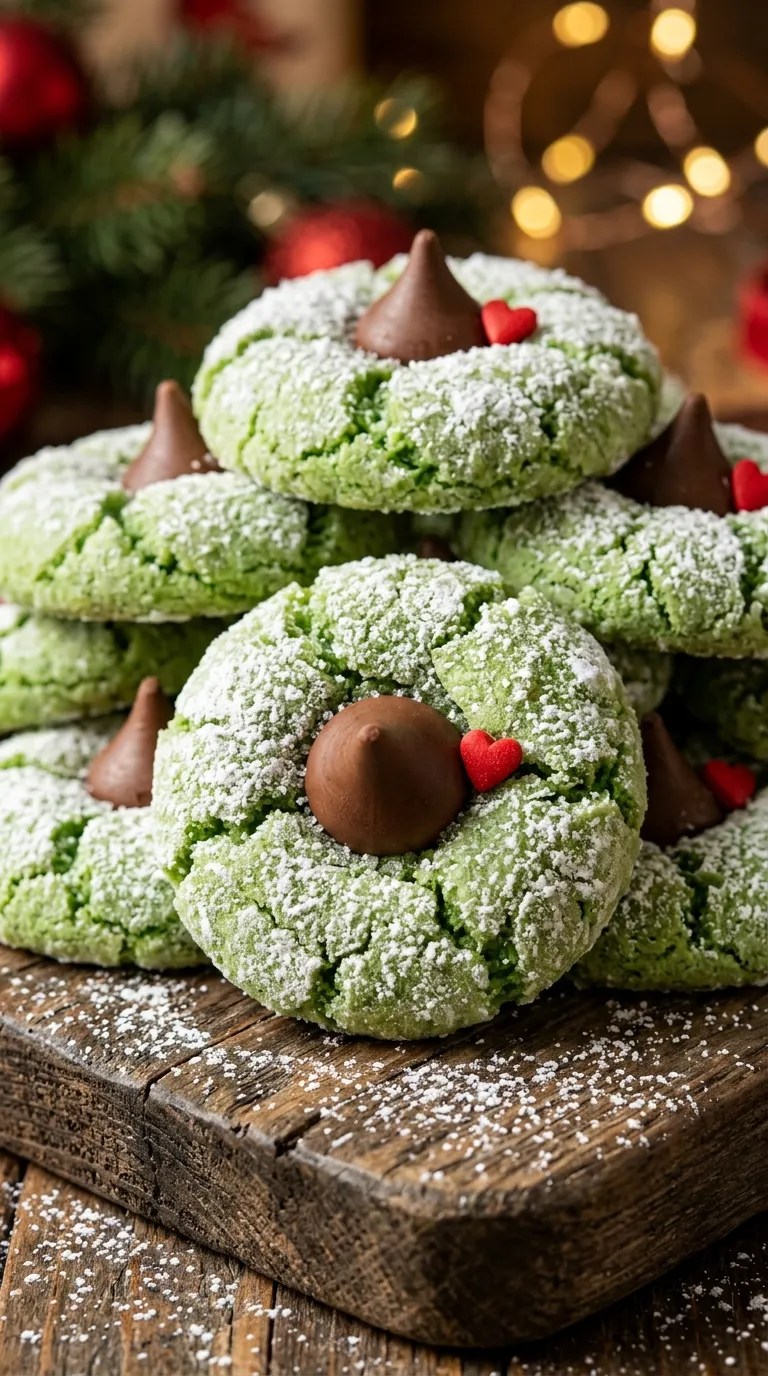
Who can resist a bright green cookie with a red heart on top? These colorful Christmas cookies bring the whole Whoville spirit.
Pinterest image prompt: Vertical 9:16 extreme close-up of soft green sugar cookies rolled in white sugar, each topped with a chocolate kiss and a small red heart candy, cracked tops, sparkly sugar texture, stacked on a rustic wooden board, food fills 90% of the frame.
Ingredients
- 1 box white cake mix
- ½ cup vegetable oil
- 2 eggs
- 1 tsp vanilla extract
- Green gel food coloring
- ½ cup powdered sugar (for rolling)
- 24 chocolate kisses
- 24 small red heart sprinkles
Step-by-Step Instructions
- Heat the oven to 350°F and line two baking sheets with parchment.
- Mix the cake mix, oil, eggs, vanilla, and green coloring into a thick dough.
- Chill the dough for 20 minutes so it doesn’t stick to your hands.
- Roll the dough into 1-inch balls, then roll each ball in powdered sugar.
- Bake for 8 to 10 minutes.
- Press a chocolate kiss into each warm cookie, then add a red heart.
Why You’ll Love It
The cake mix shortcut makes these cookies soft, chewy, and nearly impossible to mess up. Press the kiss in while the cookies are still hot, or the chocolate won’t stick. Dark chocolate kisses taste better here, IMO, but kids vote for milk chocolate every time.
5. Snowman Donut Pops
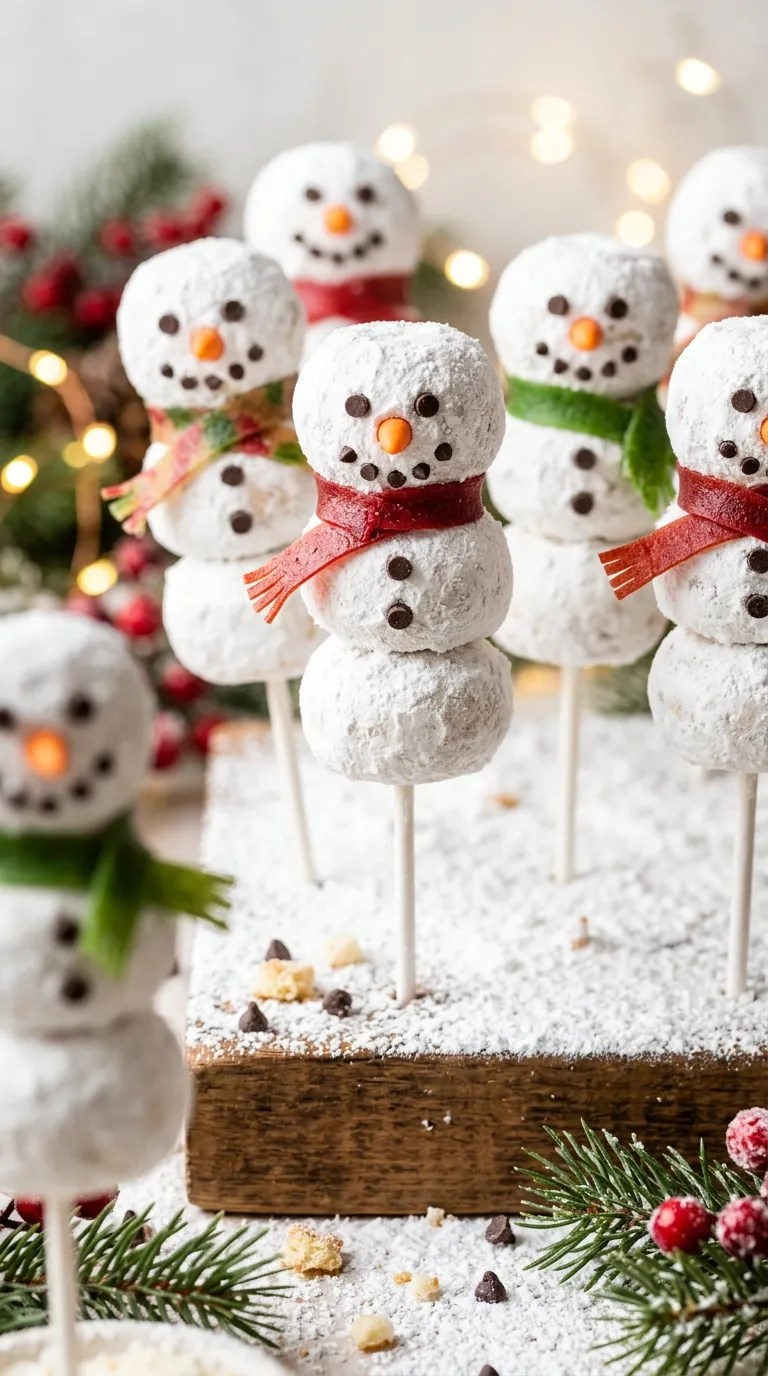
Mini donuts on a stick? Yes, please. These cute no-bake Christmas desserts need only a few minutes and a steady hand.
Pinterest image prompt: Vertical 9:16 close-up of powdered mini donuts stacked on lollipop sticks to form smiling snowmen, with orange candy noses, mini chocolate-chip faces, and tiny candy scarves, glossy white coating with sparkle, soft winter background, food fills 85% of the frame.
Ingredients
- 24 mini powdered donuts
- 8 lollipop sticks
- ½ cup white chocolate chips, melted
- Mini chocolate chips (for eyes and buttons)
- Orange sprinkles or small candy corn (for noses)
- Fruit leather strips (for scarves)
Step-by-Step Instructions
- Push one lollipop stick through three mini donuts, with the biggest donut at the bottom.
- Dab a little melted white chocolate between the donuts to hold them in place.
- Stick on mini chocolate chips for the eyes and buttons.
- Press an orange sprinkle in for the nose.
- Wrap a thin fruit leather strip around the neck as a scarf.
- Let the pops sit for 5 minutes so the chocolate sets.
Why You’ll Love It
These pops look adorable on a dessert table and take almost no skill. Work with cold donuts, because warm ones fall apart. FYI, your snowmen will lean a little. Call it “character.”
6. Peppermint Oreo Truffles
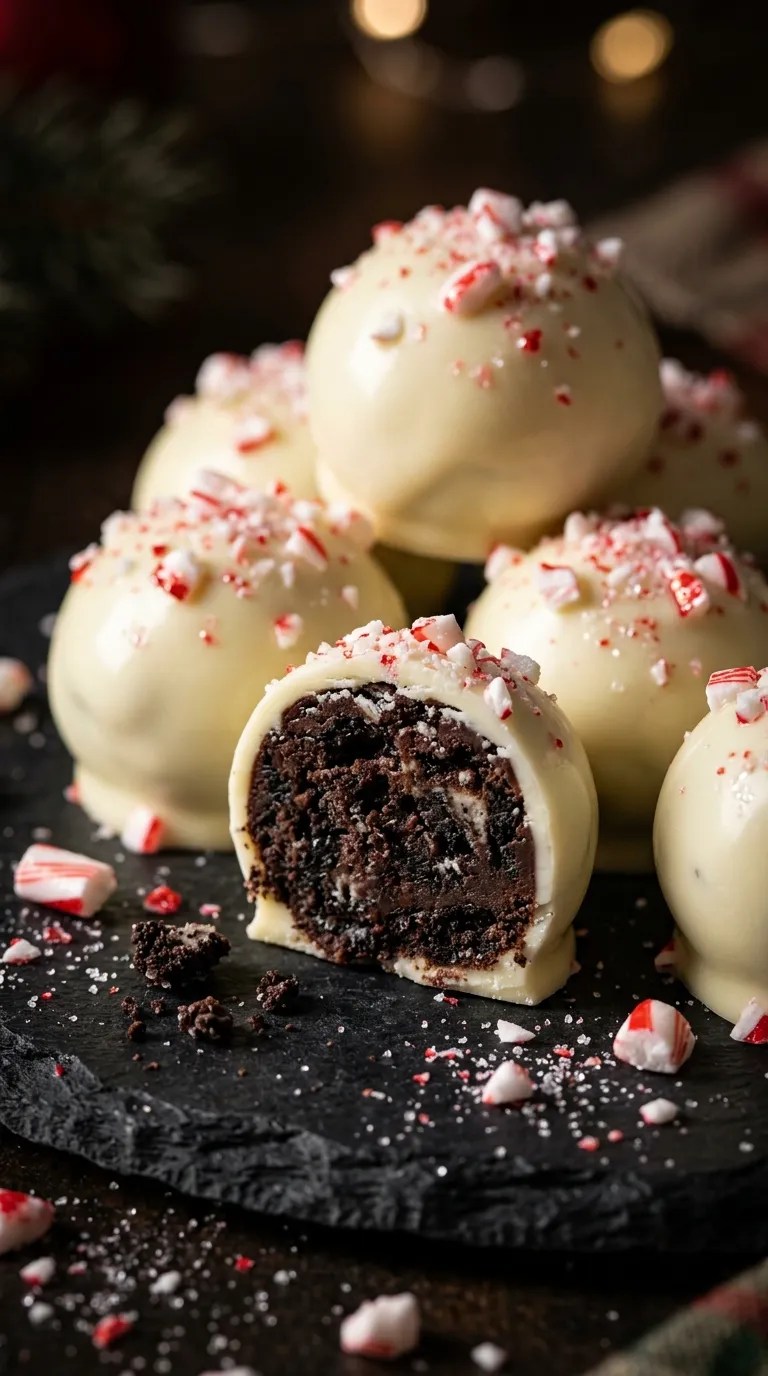
Three ingredients make these rich, fudgy, and totally addictive. Kids roll, parents dip, everybody wins.
Pinterest image prompt: Vertical 9:16 extreme close-up of glossy white chocolate-coated Oreo truffles rolled in crushed red-and-white candy cane pieces, one broken open to show the dark cookie-and-cream center, arranged on a dark slate plate, food fills 90% of the frame.
Ingredients
- 1 package (36 cookies) Oreos
- 8 oz cream cheese, softened
- 12 oz white chocolate melting wafers
- ½ tsp peppermint extract
- 4 candy canes, crushed
Step-by-Step Instructions
- Crush the Oreos into fine crumbs in a food processor, or smash them in a zip bag with a rolling pin.
- Mix in the cream cheese and peppermint extract until the dough turns smooth.
- Roll the dough into 1-inch balls and chill for 30 minutes.
- Melt the white chocolate wafers in the microwave in 30-second bursts.
- Dip each ball into the chocolate and place it on parchment paper.
- Sprinkle the crushed candy canes on top before the chocolate hardens.
Why You’ll Love It
The peppermint adds a cool, festive kick that makes these taste like Christmas morning. Don’t skip the chilling, unless you enjoy chasing melty truffles around the kitchen. Smashing the Oreos also doubles as a great outlet for kids with extra energy. 🙂
7. Funfetti Christmas Sugar Cookie Bars

Skip the cookie cutters and the rolling pin. These bars give you all the sugar cookie joy with about half the mess.
Pinterest image prompt: Vertical 9:16 macro close-up of thick sugar cookie bars topped with swirled pink and white frosting and red, green, and white sprinkles, stacked in a neat pile, soft crumb visible on the cut side, food fills 90% of the frame, cozy holiday lighting.
Ingredients
- 2½ cups all-purpose flour
- 1 cup softened butter
- 1 cup sugar
- 1 egg
- 2 tsp vanilla extract
- 1 tsp baking powder
- ½ cup Christmas sprinkles
- 1 cup vanilla frosting
- Extra sprinkles for topping
Step-by-Step Instructions
- Heat the oven to 350°F and grease a 9×13 pan.
- Cream the butter and sugar until light and fluffy.
- Beat in the egg and vanilla.
- Stir in the flour and baking powder, then fold in the sprinkles.
- Press the dough into the pan and bake for 18 to 22 minutes.
- Cool completely, spread on the frosting, and add more sprinkles.
Why You’ll Love It
Kids can press the dough into the pan themselves, which keeps little hands busy and happy. Use jimmies, not nonpareils, because nonpareils bleed color into the dough and turn everything muddy gray. I learned that the hard way. My “festive” batch looked like dishwater.
8. Hot Cocoa Cookie Cups

These cups taste like hot chocolate but come in cookie form. Kids get to drink their dessert. Sort of.
Pinterest image prompt: Vertical 9:16 extreme close-up of chocolate cookie cups filled with fluffy marshmallow cream, topped with mini marshmallows, chocolate drizzle, and red-and-green sprinkles, a few toasted marshmallow edges, rich cocoa texture, food fills 90% of the frame.
Ingredients
- 1 roll refrigerated chocolate chip cookie dough
- 1 cup marshmallow fluff
- 1 cup mini marshmallows
- ½ cup chocolate chips, melted
- Holiday sprinkles
Step-by-Step Instructions
- Heat the oven to 350°F and grease a mini muffin tin.
- Roll the dough into balls and press one into each cup.
- Bake for 10 minutes, then press the centers down with a spoon to make a well.
- Cool the cups for 10 minutes, then pop them out.
- Fill each cup with marshmallow fluff.
- Top with mini marshmallows, a chocolate drizzle, and sprinkles.
Why You’ll Love It
Store-bought dough means you save 20 minutes and still get a warm, gooey cookie. Press the centers while the cups are hot, or they won’t hold their shape. Toast the marshmallows with a kitchen torch if you want to impress the grown-ups.
9. Christmas Lights Pretzel Rods
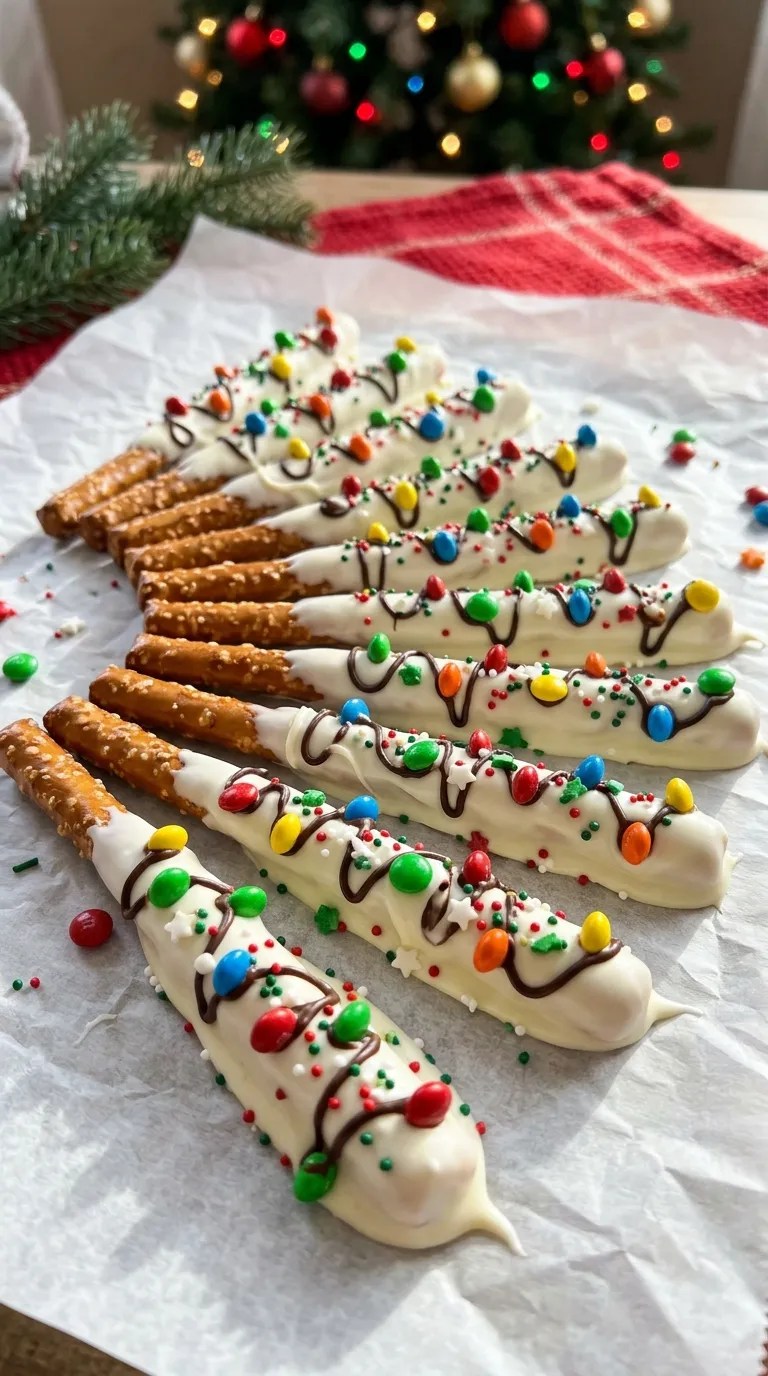
Candy-coated pretzel rods turn into edible strands of holiday lights. They also double as gifts, which makes you look way more organized than you feel.
Pinterest image prompt: Vertical 9:16 close-up of pretzel rods dipped in melted white chocolate and coated in colorful red, green, blue, and yellow candy pieces and sprinkles, arranged in a fan shape on parchment, glossy chocolate and bright candy colors, food fills 90% of the frame.
Ingredients
- 12 pretzel rods
- 12 oz white chocolate melting wafers
- ½ cup mini M&M’s or colorful candy bits
- ¼ cup holiday sprinkles
- Clear cellophane bags and ribbon (for gifting)
Step-by-Step Instructions
- Melt the white chocolate wafers in a tall, narrow glass, stirring after every 30 seconds.
- Dip each pretzel rod about two-thirds of the way into the chocolate.
- Tap off the extra chocolate.
- Roll or sprinkle the candies onto the wet chocolate.
- Lay the rods on parchment paper.
- Let them set for 15 minutes, then wrap them up if you’re gifting.
Why You’ll Love It
The salty-sweet combo hits every time, and the colors pop on a dessert table. Use a tall glass for dipping. A shallow bowl gives you messy, uneven rods, and nobody wants that. Kids love picking their own color combos, so let them go wild.
10. Penguin Banana Pops

Here’s the healthier pick, and kids still go nuts for it. These frozen penguins slide right into your “fruit counts as dessert” argument.
Pinterest image prompt: Vertical 9:16 tight close-up of banana halves on sticks dipped in dark chocolate to look like penguins, with white chocolate bellies, candy eyes, and orange candy beaks, arranged upright, glossy chocolate sheen, frosty winter backdrop, food fills 85% of the frame.
Ingredients
- 4 ripe bananas, peeled and halved
- 8 popsicle sticks
- 1 cup dark chocolate chips
- 1 tsp coconut oil
- ½ cup white chocolate chips, melted
- 16 candy eyes
- 8 orange candy pieces (for beaks)
Step-by-Step Instructions
- Push a popsicle stick into the cut end of each banana half.
- Freeze the bananas for 1 hour on a parchment-lined tray.
- Melt the dark chocolate and coconut oil together.
- Dip each frozen banana in the dark chocolate, leaving a small oval patch on the front.
- Fill in the patch with melted white chocolate for the belly.
- Stick on the eyes and beak, then freeze for 10 more minutes.
Why You’ll Love It
These pops give you a sweet treat with actual fruit inside, so you can feel smug while you hand them out. Work fast once you dip the bananas, because the chocolate hardens in seconds. My nephew named every penguin and then refused to eat them. Parent win: I ate them all.
Final Thought
There you have it: ten fun, colorful, and easy Christmas treats that kids can decorate, parents can survive, and everyone can devour. Some need an oven, some need only a microwave, and one needs a freezer and a little patience.
Pick two or three, line up your sprinkles, and let the kids take over. Perfect isn’t the goal here. Memories (and maybe a little frosting on the ceiling) are. Which one will you make first? Tell me in the comments, and send me a plate. 🙂
Happy baking, and Merry Christmas!
Leave a Reply
You must be logged in to post a comment.