

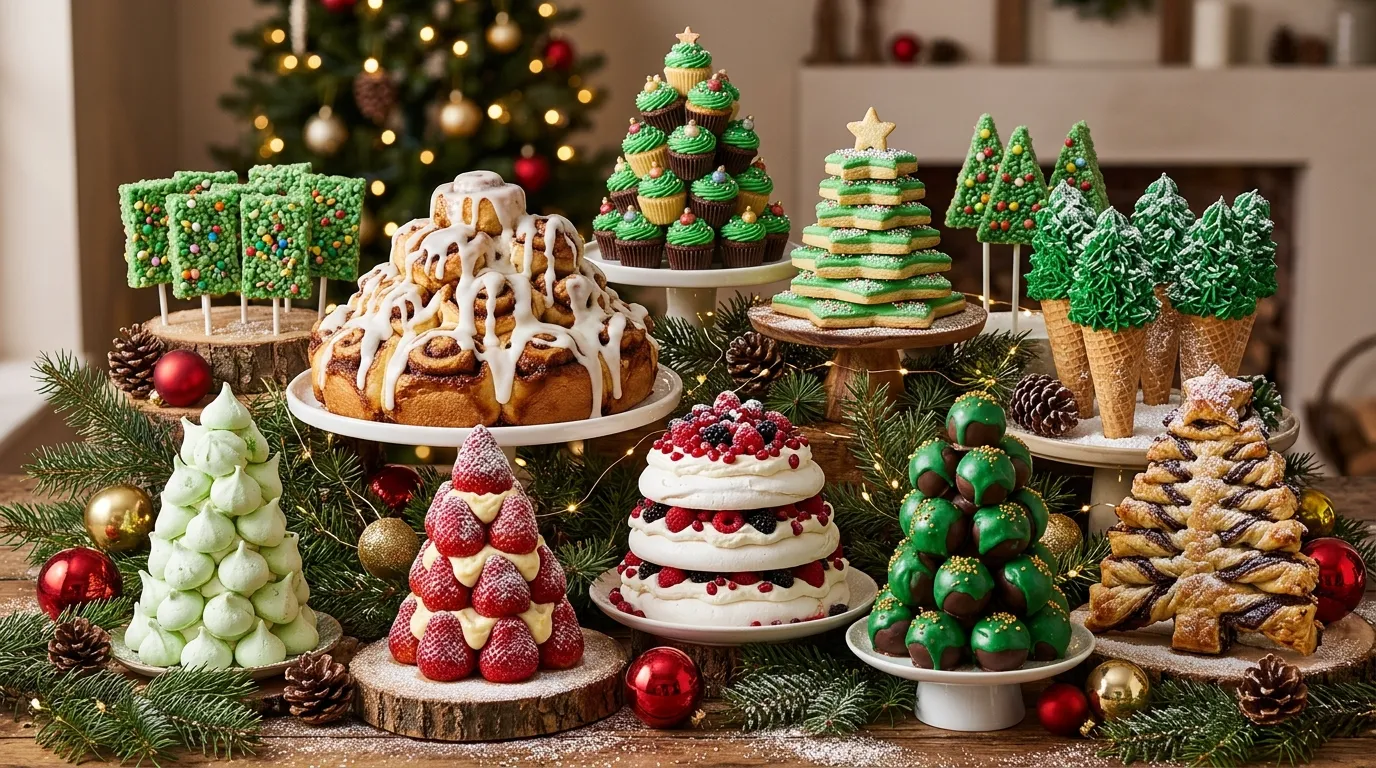
Let’s be honest: nobody wants to stare at a sad plate of store-bought cookies on Christmas Eve. You want a showstopper. You want the dessert that makes Aunt Linda stop mid-sentence and pull out her phone.
That’s exactly what these Christmas tree desserts do. Each one doubles as an edible holiday centerpiece, so you save table space and win the party. Some take 15 minutes. Some need a little patience (and maybe a glass of wine 😉). All of them look far fancier than they are.
I’ve tested every one of these in my own kitchen, usually while my family hovered nearby like seagulls at a beach picnic. Grab your apron and pick your favorite. Ready?
1. Pull-Apart Cinnamon Roll Christmas Tree

This one smells like Christmas morning and looks like a magazine cover. Canned cinnamon rolls do the heavy lifting, and nobody has to know.
Ingredients
- 2 cans (about 8 rolls each) refrigerated cinnamon rolls, with icing
- 1 tbsp melted butter
- 1 tsp cinnamon
- 2 tbsp powdered sugar
- Green sprinkles or chopped pistachios
- A few red candies for ornaments
Step-by-Step Instructions
- Heat the oven to the temperature on the can and line a baking sheet with parchment.
- Arrange the rolls in a tree shape: 1 roll on top, then 2, 3, 4, 5, and 6 in rows. Leave a small gap between rows.
- Brush the rolls with melted butter and bake for 15–18 minutes, until golden.
- Cool for 5 minutes, then drizzle with the icing.
- Sprinkle on the green topping, press in the red candies, and dust with powdered sugar “snow.”
Why You’ll Love It
It takes 25 minutes, and everyone just tears off a piece. I once added a pinch of cardamom to the butter and never went back. FYI, this works as breakfast, too.
Image prompt (9:16): Extreme close-up of a golden pull-apart cinnamon roll Christmas tree with glossy white icing, green pistachio crumbs and red candy ornaments, steam rising, shallow depth of field, rustic wooden board, food filling 85% of the frame, Pinterest-style food photography.
2. Mini Cupcake Christmas Tree
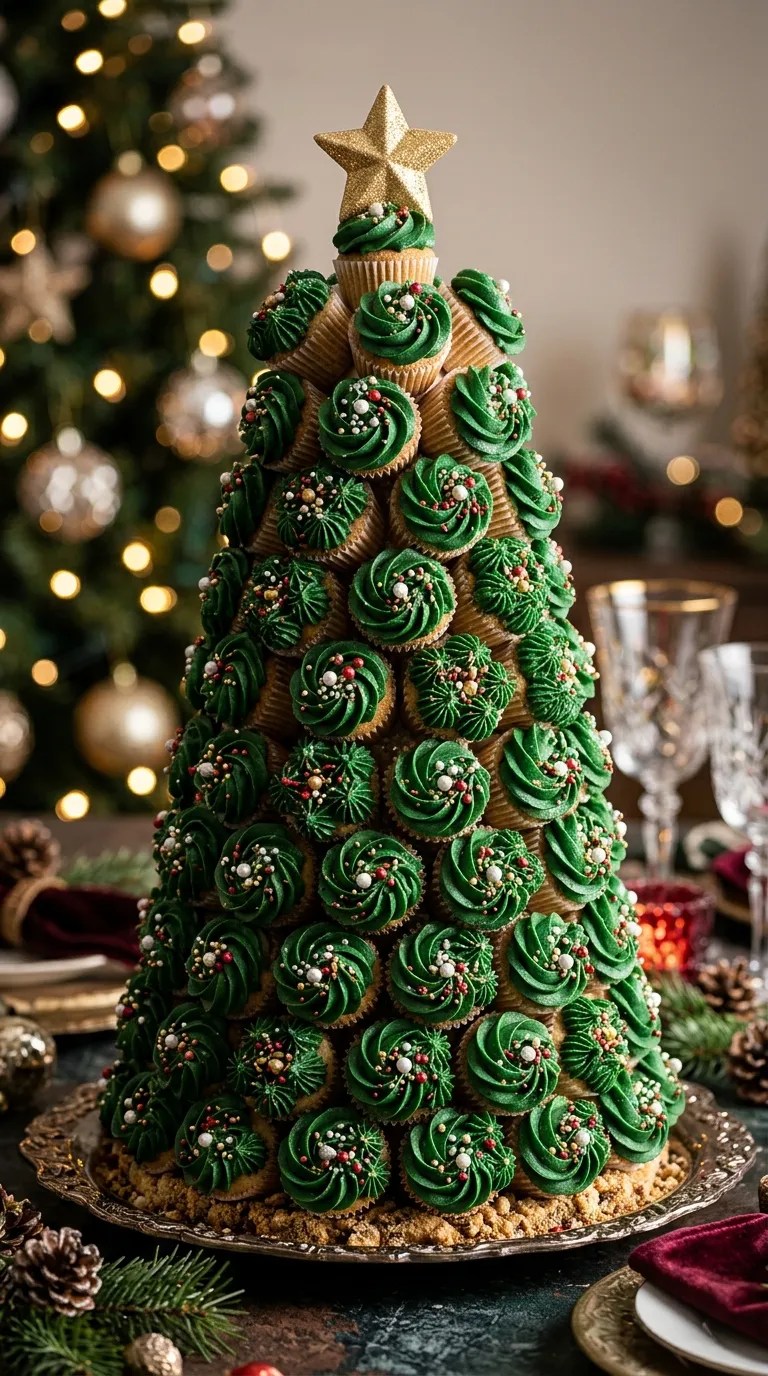
You don’t need a tower of one giant cake. Stack mini cupcakes into a tree instead, and watch people grab one every time they walk by.
Ingredients
- 24–30 mini cupcakes (box mix works fine, I won’t tell)
- 3 cups vanilla buttercream
- Green gel food coloring
- 1 star-shaped cookie or fondant star
- Edible pearls and sprinkles
- A foam or cardboard cone, covered in foil
Step-by-Step Instructions
- Tint the buttercream a rich green.
- Pipe a big swirl onto each cooled cupcake with a star tip.
- Pin the cupcakes to the cone with toothpicks, starting at the bottom and working up. Pack them snugly.
- Fill gaps with extra frosting swirls.
- Scatter pearls and sprinkles over the tree, then top it with the star.
Why You’ll Love It
People grab single servings without any slicing or plates. Pro tip: chill the cupcakes first so the frosting doesn’t smear. Skip the foam cone only if you enjoy chaos :/
Image prompt (9:16): Tight close-up of green buttercream-swirled mini cupcakes stacked into a Christmas tree, sparkling edible pearls and red sprinkles, soft holiday bokeh lights, food filling 90% of the frame, vertical Pinterest food photo.
3. Stacked Star Sugar Cookie Tree

Baking one cookie recipe in graduated star cutters gives you a tree that looks like a bakery splurge. Who knew geometry could taste this good?
Ingredients
- 3 cups flour
- 1 cup softened butter
- 1 cup sugar
- 1 egg
- 2 tsp vanilla extract
- 1 tsp baking powder
- Royal icing in green and white
- Graduated star cookie cutters (6–8 sizes)
Step-by-Step Instructions
- Cream the butter and sugar, then beat in the egg and vanilla.
- Stir in the flour and baking powder, then chill the dough for 30 minutes.
- Roll the dough to ¼ inch and cut one star in each size.
- Bake at 350°F for 8–10 minutes. Cool completely.
- Ice each star in green, let it dry, and add white snowy edges.
- Stack the stars from biggest to smallest, with a dab of icing between layers.
Why You’ll Love It
It tastes like a classic sugar cookie, and the stack photographs beautifully. I like a splash of almond extract in the dough. Too much, though, and your cookies taste like a perfume counter.
Image prompt (9:16): Macro close-up of a tower of green royal-iced star sugar cookies stacked into a Christmas tree, white icing snow edges, tiny sprinkles, crisp textures, food filling 85% of the frame, vertical Pinterest food photography.
4. Rice Krispie Treat Christmas Trees

No oven, no stress, and no excuse. These cone-shaped treats come together in 20 minutes, and kids love shaping them (adults too, if we’re honest).
Ingredients
- 6 cups crispy rice cereal
- 10 oz mini marshmallows
- 3 tbsp butter
- Green food coloring
- ½ cup white chocolate chips
- Colorful sprinkles and mini M&Ms
Step-by-Step Instructions
- Melt the butter in a large pot over low heat.
- Stir in the marshmallows until smooth, then mix in the green coloring.
- Fold in the cereal quickly.
- Butter your hands, then shape handfuls into cones on parchment.
- Melt the white chocolate and drizzle it over each tree.
- Press on the sprinkles and M&Ms before the chocolate sets.
Why You’ll Love It
They’re chewy, sweet, and nearly impossible to ruin. Butter your hands well, or you’ll wear half the batch. Learn from my sticky disaster.
Image prompt (9:16): Close-up of a cluster of glossy green Rice Krispie treat cones drizzled with white chocolate and covered in rainbow sprinkles, shallow depth of field, food filling 90% of the frame, vertical Pinterest food photography.
5. Ice Cream Cone Christmas Trees

Flip a sugar cone upside down and you have a tree. Honestly, it’s the laziest brilliant idea on this list.
Ingredients
- 12 sugar cones
- 2 cups green buttercream or cream cheese frosting
- 1 cup mini candies and sprinkles
- 12 mini cookies or wafers (for the base)
- Powdered sugar for dusting
Step-by-Step Instructions
- Spread a dab of frosting on each cookie and set a cone upside down on top.
- Frost the cones from bottom to top with an offset spatula or a piping bag.
- Make a ruffled, branch-like texture with the tip of a spoon.
- Press on the candies and sprinkles.
- Dust with powdered sugar and serve right away.
Why You’ll Love It
They’re a classroom-party hit and the easiest Christmas tree dessert for beginners. Fill the cones with a little chocolate ganache first, IMO the best secret surprise here.
Image prompt (9:16): Close-up of several upside-down sugar cones frosted as forest-green Christmas trees, sprinkled with colorful candies and powdered sugar snow, food filling 85% of the frame, vertical Pinterest food photography.
6. Meringue Kiss Christmas Tree

Light, crisp, and melt-in-your-mouth. This looks like a snow-dusted evergreen and tastes like sweet clouds.
Ingredients
- 3 egg whites, room temperature
- ¾ cup superfine sugar
- ¼ tsp cream of tartar
- ½ tsp vanilla
- Green gel coloring
- Edible silver pearls
Step-by-Step Instructions
- Heat the oven to 225°F and line two trays.
- Whip the egg whites with cream of tartar until foamy.
- Add the sugar gradually and whip until stiff and glossy.
- Fold in the vanilla and swirl a little green gel inside a piping bag.
- Pipe small kisses in a star-tip swirl.
- Bake for 1 hour, then switch off the oven and let them cool inside.
- Stack the kisses on a cone with a bit of melted white chocolate as glue.
Why You’ll Love It
They’re gluten-free, airy, and gorgeous. Don’t open the oven early, or you’ll collapse the whole batch. I did. Twice.
Image prompt (9:16): Macro close-up of green swirled meringue kisses stacked into a Christmas tree with silver pearls, delicate peaks and crisp texture, soft window light, food filling 90% of the frame, vertical Pinterest food photography.
7. Cheesecake-Stuffed Strawberry Tree
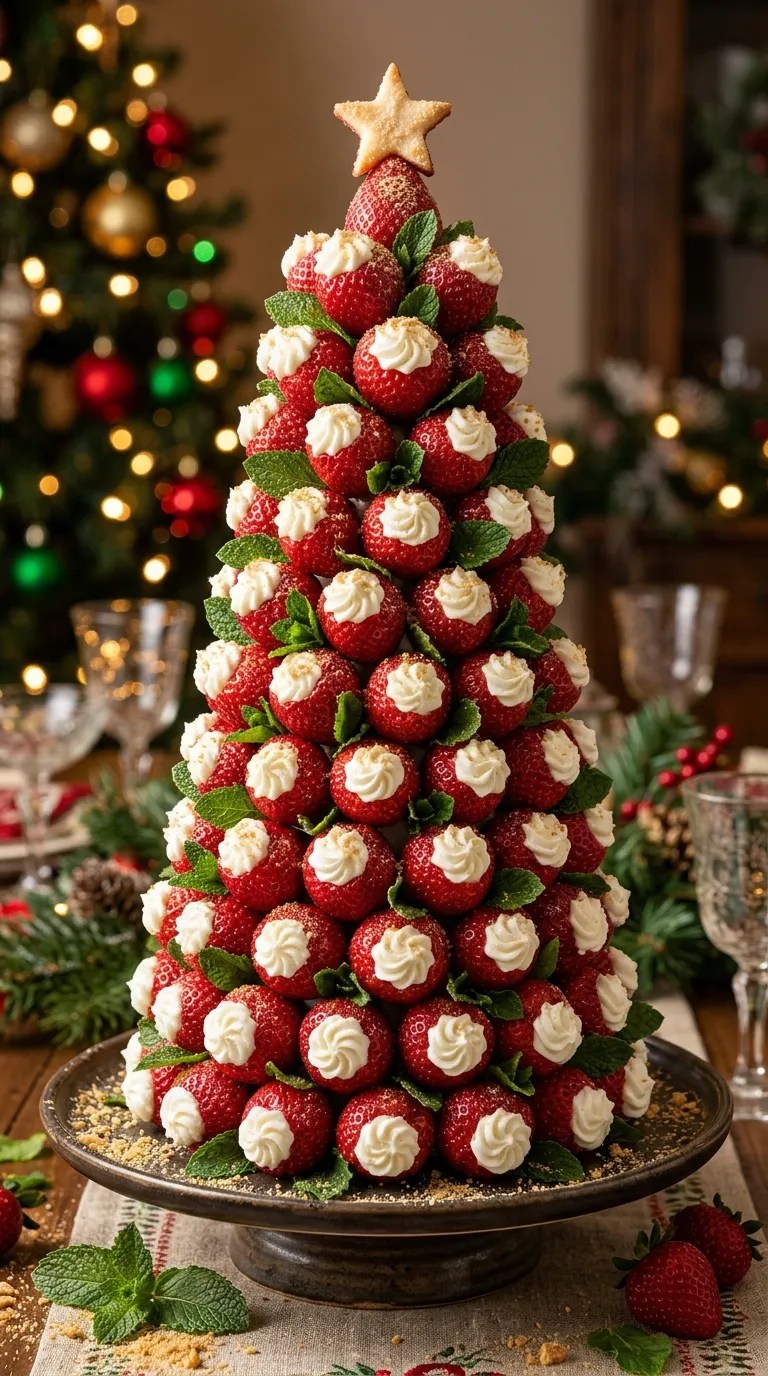
Fresh strawberries stack into a bright red-and-green tree. Fill them with cheesecake cream and nobody will miss the cake.
Ingredients
- 40–50 medium strawberries
- 8 oz cream cheese, softened
- ½ cup powdered sugar
- 1 tsp vanilla
- ½ cup whipped cream
- Mint leaves for “branches”
- Graham cracker crumbs for garnish
Step-by-Step Instructions
- Hull each strawberry and slice a tiny piece off the bottom so it stands.
- Beat the cream cheese, sugar, and vanilla until fluffy, then fold in the whipped cream.
- Pipe the filling into each berry.
- Dip the tops in graham crumbs.
- Pin the berries to a foil-wrapped cone with toothpicks, bottom to top.
- Tuck mint leaves into the gaps.
Why You’ll Love It
It’s fresh, light, and a relief after a heavy holiday dinner. Pick firm, ripe berries for the best flavor. Soft ones slump faster than my willpower near a cookie tray.
Image prompt (9:16): Vibrant close-up of a strawberry Christmas tree with cheesecake cream swirls, mint leaf accents and graham crumb dust, glossy red berries, food filling 90% of the frame, vertical Pinterest food photography.
8. Pavlova Christmas Tree

This one steals the show. Layer meringue discs into a tree, top with cream and berries, and watch the room go quiet.
Ingredients
- 4 egg whites
- 1 cup superfine sugar
- 1 tsp cornstarch
- 1 tsp white vinegar
- 2 cups whipped cream
- Raspberries, pomegranate arils, and kiwi
- Pistachios, chopped
Step-by-Step Instructions
- Heat the oven to 250°F and trace 5 circles on parchment, graduating from 7 down to 2 inches.
- Whip the egg whites to soft peaks, then add the sugar slowly until glossy.
- Fold in the cornstarch and vinegar.
- Spread the meringue inside each circle and bake for 75 minutes.
- Cool in the oven with the door ajar.
- Stack the discs with whipped cream between each layer.
- Decorate with berries, pomegranate, kiwi, and pistachios.
Why You’ll Love It
The crisp-then-marshmallowy center beats most cakes I’ve tried. Assemble within an hour of serving, or the cream softens the meringue. Worth it, though.
Image prompt (9:16): Close-up of a stacked pavlova Christmas tree with whipped cream, raspberries, pomegranate arils and pistachios, glossy fruit, food filling 85% of the frame, vertical Pinterest food photography.
9. Chocolate Truffle Christmas Tree

Rich, fudgy, and a little extra. Roll truffles into balls, stack them on a cone, and call it fancy.
Ingredients
- 12 oz dark chocolate, chopped
- ¾ cup heavy cream
- 2 tbsp butter
- 1 tsp vanilla (or a splash of rum)
- Green candy melts
- Gold sprinkles
Step-by-Step Instructions
- Heat the cream until it steams, then pour it over the chocolate.
- Whisk until smooth, stir in the butter and vanilla, then chill for 2 hours.
- Scoop and roll the mixture into 1-inch balls.
- Dip each truffle in melted green candy melts.
- Dust with gold sprinkles before the coating sets.
- Stack on a cone with a dab of melted chocolate.
Why You’ll Love It
Good chocolate makes all the difference here, so splurge. I prefer 70% cacao for balance. Milk chocolate turns these cloying fast.
Image prompt (9:16): Dramatic close-up of glossy green candy-coated chocolate truffles stacked into a Christmas tree with gold sparkle, rich dark cocoa interior visible on one truffle, food filling 90% of the frame, vertical Pinterest food photography.
10. Nutella Puff Pastry Christmas Tree

Save the best for last. Two sheets of puff pastry, one jar of hazelnut spread, and a few cuts give you a flaky, golden, twisted tree.
Ingredients
- 2 sheets puff pastry, thawed
- ¾ cup Nutella
- 1 egg, beaten
- 1 tbsp milk
- Powdered sugar
- Chopped hazelnuts
Step-by-Step Instructions
- Heat the oven to 400°F.
- Lay one pastry sheet on parchment and spread it with Nutella.
- Top with the second sheet and cut out a large triangle.
- Slice strips about 1 inch wide up both sides, leaving a center spine.
- Twist each strip, brush with egg wash, and bake for 20 minutes.
- Dust with powdered sugar and sprinkle on the hazelnuts.
Why You’ll Love It
It’s flaky, nutty, and gone in 10 minutes. Make two, because people always grab a second piece. Who can blame them? 🙂
Image prompt (9:16): Overhead-angle close-up of a golden twisted Nutella puff pastry Christmas tree with powdered sugar snow and chopped hazelnuts, melted chocolate peeking from the twists, food filling 90% of the frame, vertical Pinterest food photography.
Wrap-Up: Pick Your Tree and Go
That’s ten ways to turn dessert into the centerpiece of your holiday table. Need speed? Grab the ice cream cones or Rice Krispie trees. Want drama? Build the pavlova or the cinnamon roll tree.
Every recipe here looks impressive, tastes even better, and delivers the same reward: a table full of people who can’t stop smiling. So pick one, bake with love, and save a piece for yourself before the crowd arrives.
Happy baking, friend. Pass the sprinkles.
Leave a Reply
You must be logged in to post a comment.