

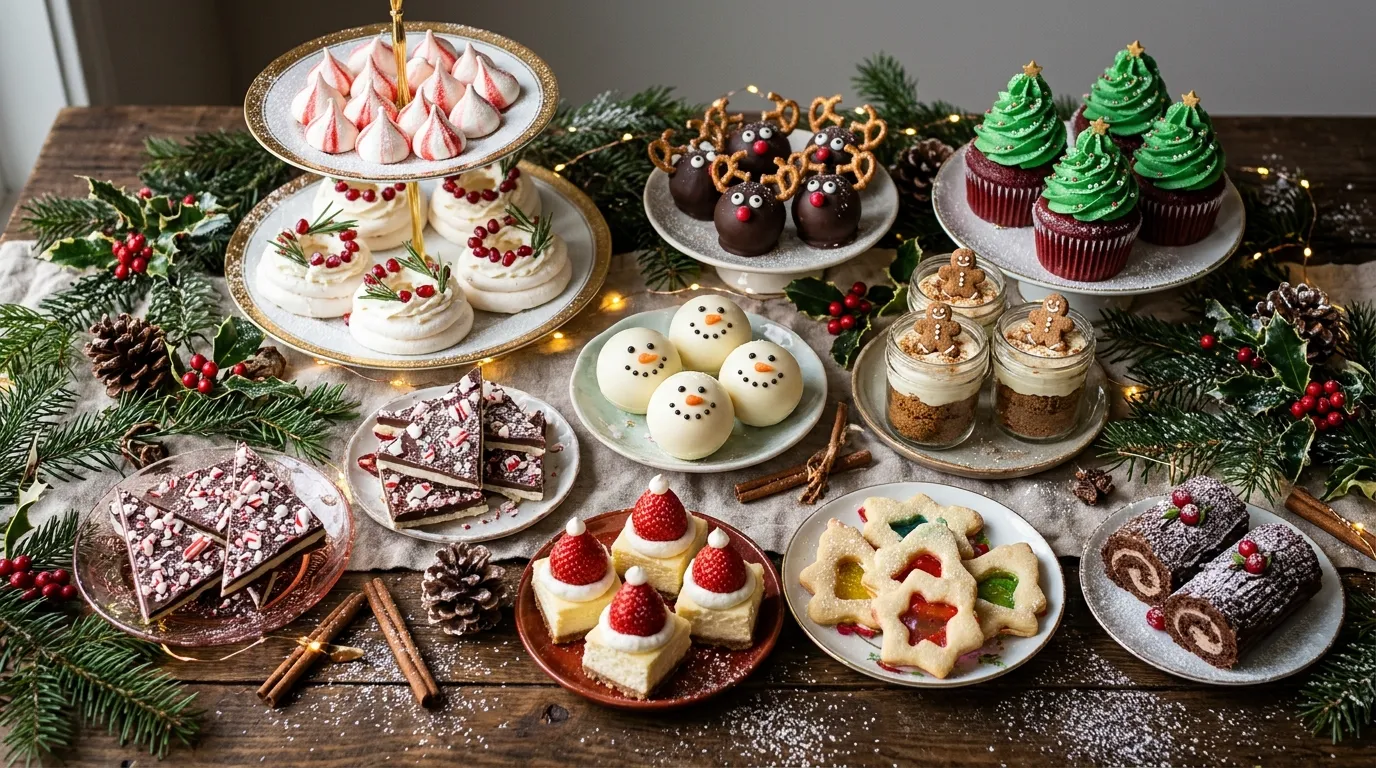
Meta description: Looking for cute Christmas desserts that wow a crowd? These 10 easy, Pinterest-worthy holiday treats look bakery-fancy but take real-life effort.
You scroll Pinterest at 11 p.m., see a dessert shaped like a tiny snowman, and think, “I could totally make that.” Then you remember your last attempt at cake pops looked like a crime scene. Same.
Here’s the good news: these cute Christmas desserts look like you hired a pastry chef, but you only need a mixer, a piping bag, and a little holiday stubbornness. I’ve included no-bake options, make-ahead options, and a couple of “kids can do this” options. Grab a coffee (or something with a little cinnamon and a lot of red wine), and pick your favorite.
Each recipe includes a 9:16 image prompt so you can generate Pinterest-ready, food-dominant photos for your pins.
1. Candy Cane Meringue Kisses

These peppermint meringue cookies crackle, melt, and disappear faster than your New Year’s resolutions. They also cost almost nothing.
Image prompt (9:16): Vertical 9:16 extreme close-up food photography of a tray of glossy white candy cane meringue kisses with red swirl stripes, sprinkled with crushed peppermint, food filling 85% of the frame, shallow depth of field, soft window light, hint of pine branch in the blurred background, Pinterest-style, ultra-detailed, photorealistic.
Ingredients
- 3 large egg whites, room temperature
- 3/4 cup granulated sugar
- 1/4 tsp cream of tartar
- 1/2 tsp peppermint extract
- Red gel food coloring
- 2 candy canes, crushed
Step-by-Step Instructions
- Heat your oven to 225°F (105°C) and line two baking sheets with parchment.
- Paint three stripes of red gel inside a piping bag fitted with a large star tip.
- Beat the egg whites and cream of tartar until foamy.
- Add the sugar one tablespoon at a time, then whip 6-8 minutes until stiff, glossy peaks form.
- Fold in the peppermint extract.
- Pipe 1.5-inch kisses onto the parchment and sprinkle with crushed candy cane.
- Bake 75 minutes, then turn off the oven and leave the door shut for 1 hour.
Why You’ll Love It
The stripes look fancy, but the piping bag does all the work. I once opened the oven early and watched every kiss deflate. Resist the urge to peek.
2. Mini Pavlova Wreaths

Crisp outside, marshmallowy inside, and covered in jewel-bright fruit. This one looks expensive, and nobody needs to know it costs under ten bucks.
Image prompt (9:16): Vertical 9:16 macro food photography of a mini pavlova wreath with piped meringue ring, billowing whipped cream, glistening pomegranate arils, raspberries and fresh mint leaves, food filling 90% of the frame, dark moody wood background barely visible, soft side lighting, Pinterest-style, photorealistic.
Ingredients
- 4 large egg whites, room temperature
- 1 cup granulated sugar
- 1 tsp cornstarch
- 1 tsp white vinegar
- 1 tsp vanilla extract
- 1 cup heavy cream plus 2 tbsp powdered sugar
- Pomegranate arils, raspberries, fresh mint
Step-by-Step Instructions
- Heat the oven to 225°F (105°C) and draw six 3-inch circles on parchment. Flip the paper over.
- Whip the egg whites to soft peaks, then add the sugar gradually until the meringue turns stiff and glossy.
- Fold in the cornstarch, vinegar, and vanilla.
- Pipe a ring on each circle with a star tip, building two layers for height.
- Bake 60 minutes, then cool in the oven with the door closed.
- Whip the cream with the powdered sugar and spoon it into the centers.
- Scatter the fruit and mint on top to create the wreath.
Why You’ll Love It
You can bake the shells three days ahead and assemble right before serving. Soggy pavlova ruins lives, so don’t add the cream early. IMO, pomegranate beats strawberry here for the color alone.
3. Reindeer Oreo Truffles

Three ingredients make the truffle, and a pretzel makes it look like a reindeer. Who knew antlers could be this easy?
Image prompt (9:16): Vertical 9:16 extreme close-up of a cluster of chocolate Oreo truffle reindeer with pretzel antlers, candy eyes and red candy noses, glossy milk chocolate coating, food filling 85% of the frame, shallow depth of field, cozy warm bokeh lights, Pinterest-style, photorealistic.
Ingredients
- 36 Oreo cookies
- 8 oz cream cheese, softened
- 12 oz milk chocolate melting wafers
- Mini pretzels (for antlers)
- Red M&Ms or red candy (for noses)
- Candy eyes
Step-by-Step Instructions
- Crush the Oreos into fine crumbs in a food processor.
- Mix in the cream cheese until the dough holds together.
- Roll the dough into 1-inch balls and freeze 15 minutes.
- Melt the chocolate wafers in 30-second bursts, stirring between each.
- Dip each ball, tap off the extra chocolate, and set it on parchment.
- Press in two pretzel halves, two candy eyes, and one red nose before the chocolate sets.
- Chill 20 minutes.
Why You’ll Love It
Kids love the decorating part, and adults love that nobody turns on the oven. I tried white chocolate once. The reindeer looked like ghosts. Stick with milk chocolate.
4. Red Velvet Christmas Tree Cupcakes

A green frosting swirl turns an ordinary cupcake into a tiny, edible tree. Red velvet underneath gives you that “surprise” when somebody bites in.
Image prompt (9:16): Vertical 9:16 close-up food photography of red velvet cupcakes topped with tall piped green buttercream Christmas tree swirls, gold star sprinkles and red nonpareils, cake crumb texture visible, food filling 85% of the frame, soft golden light, Pinterest-style, photorealistic.
Ingredients
- 12 red velvet cupcakes (from scratch or a box; I won’t tell)
- 1 cup unsalted butter, softened
- 3 cups powdered sugar
- 1 tsp vanilla extract
- 2 tbsp milk
- Green gel food coloring
- Gold star sprinkles and nonpareils
Step-by-Step Instructions
- Bake and fully cool the cupcakes.
- Beat the butter until pale and fluffy, about 3 minutes.
- Add the powdered sugar a cup at a time, then the vanilla and milk.
- Tint the frosting with green gel until you like the shade.
- Fit a piping bag with a large star tip and pipe a spiral that rises into a point.
- Top with a gold star and scatter the sprinkles like ornaments.
Why You’ll Love It
Piping a tall tree takes about ten seconds per cupcake once you find your rhythm. Cool the cupcakes completely, or the frosting slides off in sad green puddles. Ask me how I know.
5. Snowman Hot Chocolate Bombs

Drop one into hot milk and watch it melt into cocoa. You’ll feel like a wizard, and your guests will think so too.
Image prompt (9:16): Vertical 9:16 macro food photography of white chocolate snowman hot chocolate bombs with orange carrot noses, edible-marker faces and mini marshmallows spilling out, food filling 85% of the frame, steam in the background, soft winter light, Pinterest-style, photorealistic.
Ingredients
- 12 oz white chocolate melting wafers
- Silicone sphere mold (2.5-inch)
- 1/4 cup hot cocoa mix
- 1 cup mini marshmallows
- Orange sprinkles or orange fondant (for noses)
- Black edible marker
Step-by-Step Instructions
- Melt the white chocolate gently, then brush a thick layer into each mold cavity.
- Chill 10 minutes and add a second coat.
- Chill again, then pop the shells out carefully.
- Fill half the shells with cocoa mix and marshmallows.
- Warm a plate, touch the rim of the empty halves to it, and seal them onto the filled halves.
- Press on a nose and draw a face with the marker.
- Place one in a mug and pour steaming hot milk over it.
Why You’ll Love It
These make killer gifts, and people squeal when the shell collapses. Thin shells crack, so build them thick. FYI, my first batch looked like melted snowmen, which felt appropriate. 🙂
6. Gingerbread Cheesecake Jars
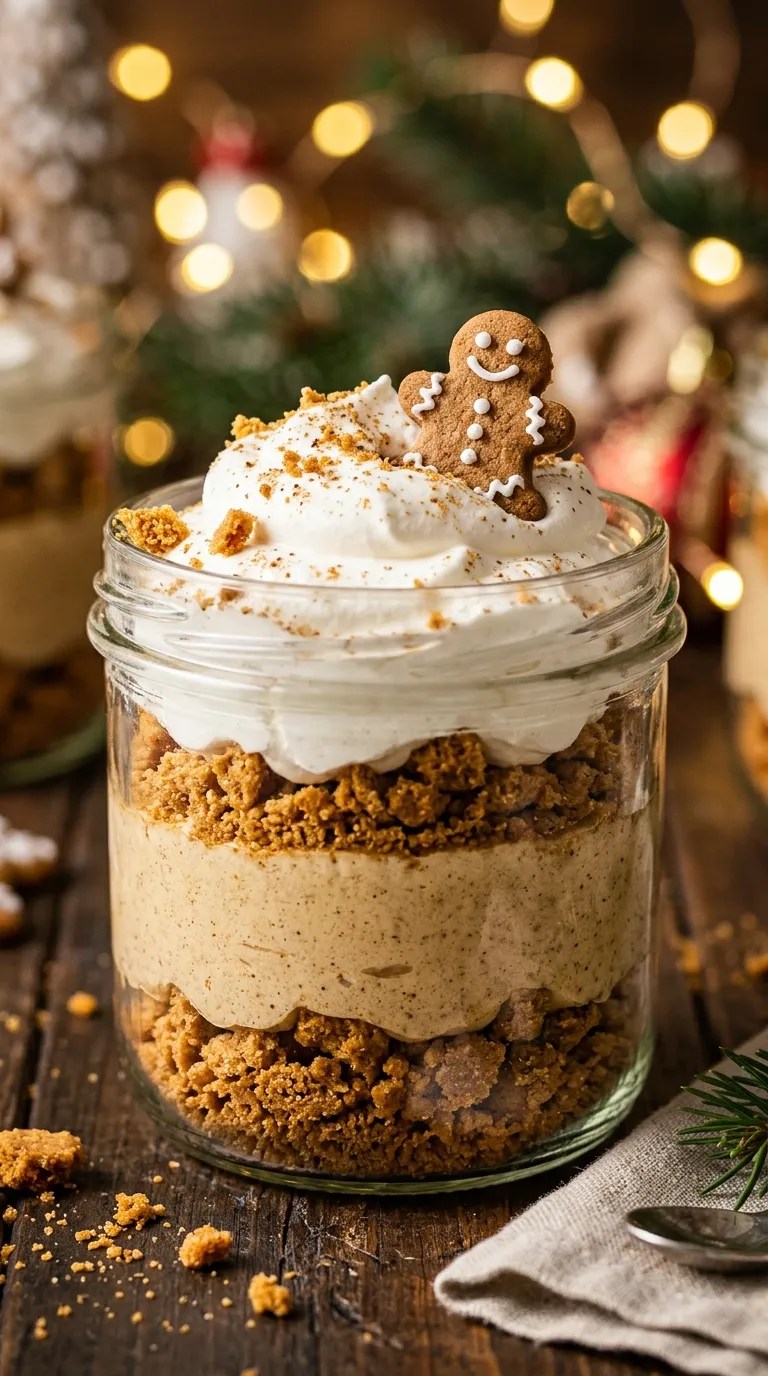
No oven, no springform pan, and no stress. Layers of spiced cream and crunchy cookie crumbs make these the easiest showstopper on the list.
Image prompt (9:16): Vertical 9:16 close-up food photography of a glass jar with distinct layers of gingersnap crumb, creamy gingerbread cheesecake and whipped cream, topped with a mini gingerbread man cookie, food filling 85% of the frame, warm bokeh holiday lights, Pinterest-style, photorealistic.
Ingredients
- 1 cup gingersnap crumbs
- 3 tbsp melted butter
- 8 oz cream cheese, softened
- 1/3 cup brown sugar
- 1 tsp ground ginger
- 1/2 tsp cinnamon
- 1 cup heavy cream, whipped to stiff peaks
- Mini gingerbread cookies (to top)
Step-by-Step Instructions
- Stir the crumbs and butter together and press 2 tablespoons into the bottom of each of six small jars.
- Beat the cream cheese, brown sugar, ginger, and cinnamon until smooth.
- Fold in half the whipped cream, then fold in the rest.
- Spoon or pipe the filling over the crumbs.
- Chill at least 2 hours.
- Top each jar with a gingerbread cookie and a pinch of crumbs.
Why You’ll Love It
You can make these two days ahead, which frees you up for the actual hard part of Christmas: relatives. Some folks add molasses. I think it overpowers the cream cheese, just saying.
7. Peppermint Bark Christmas Trees

Snap-crisp chocolate, cool peppermint, and zero baking. Cutting the bark into triangles turns it into a forest.
Image prompt (9:16): Vertical 9:16 extreme close-up of triangular peppermint bark Christmas tree pieces with dark chocolate base, white chocolate top and crushed red candy cane, glossy surface, food filling 90% of the frame, stacked on parchment, soft light, Pinterest-style, photorealistic.
Ingredients
- 12 oz dark chocolate, chopped
- 12 oz white chocolate, chopped
- 1 tsp peppermint extract
- 1/2 cup crushed candy canes
Step-by-Step Instructions
- Line a 9×13 pan with parchment.
- Melt the dark chocolate and spread it into an even layer.
- Chill 15 minutes until it firms.
- Melt the white chocolate, stir in the extract, and spread it over the dark layer.
- Sprinkle the candy cane immediately, before the white chocolate sets.
- Chill 30 minutes, then cut into triangles with a sharp knife.
- Stack and stand the triangles so they look like a tiny forest.
Why You’ll Love It
It costs little, keeps for two weeks, and looks great in a gift tin. Use real chocolate, not chips; chips don’t melt as smoothly.
8. Santa Hat Strawberry Cheesecake Bites

Fresh strawberries, a swirl of sweet cream, and a tiny white pom-pom. These disappear first at every party I’ve ever attended.
Image prompt (9:16): Vertical 9:16 macro close-up of plump red strawberries shaped like Santa hats with piped white cheesecake filling and mini marshmallow pom-poms, glossy berries, food filling 90% of the frame, soft pastel background blur, Pinterest-style, photorealistic.
Ingredients
- 24 medium strawberries
- 8 oz cream cheese, softened
- 1/2 cup powdered sugar
- 1 tsp vanilla extract
- 1/2 cup whipped topping
- Mini marshmallows
Step-by-Step Instructions
- Wash and dry the strawberries, then slice off the tops.
- Cut a thin slice from each bottom so they stand upright.
- Beat the cream cheese, powdered sugar, and vanilla until fluffy.
- Fold in the whipped topping.
- Pipe a swirl onto each berry base.
- Set the strawberry top over the swirl like a hat.
- Dab a dot of filling on top and add a marshmallow pom-pom.
Why You’ll Love It
They take 20 minutes and look adorable on a platter. Dry the berries well, or the filling slips right off. Skipped that step once and regretted it.
9. Stained Glass Sugar Cookies

Crushed hard candy melts into a glowing window right in the middle of a buttery cookie. Hang one on the tree and feel smug.
Image prompt (9:16): Vertical 9:16 close-up of translucent stained glass sugar cookies shaped like stars and trees, with red, green and gold melted candy centers glowing against the light, golden buttery edges, food filling 85% of the frame, ribbon loop at the top, Pinterest-style, photorealistic.
Ingredients
- 2 3/4 cups all-purpose flour
- 1/2 tsp baking powder
- 1 cup unsalted butter, softened
- 3/4 cup granulated sugar
- 1 large egg
- 1 tsp vanilla extract
- 10 hard candies, sorted by color and crushed
Step-by-Step Instructions
- Cream the butter and sugar, then beat in the egg and vanilla.
- Add the flour and baking powder and mix until a dough forms.
- Chill the dough 1 hour, then roll it 1/4 inch thick.
- Cut out shapes, then cut a smaller shape from each center.
- Move the cookies to a parchment-lined sheet and fill the centers with crushed candy.
- Bake at 350°F (175°C) for 10-12 minutes.
- Cool completely on the pan so the candy hardens.
Why You’ll Love It
These look like they cost a fortune, and kids go wild for the crushing step. Use a toothpick to nudge candy into corners. Don’t overfill, because the candy spreads like lava.
10. Mini Chocolate Yule Logs
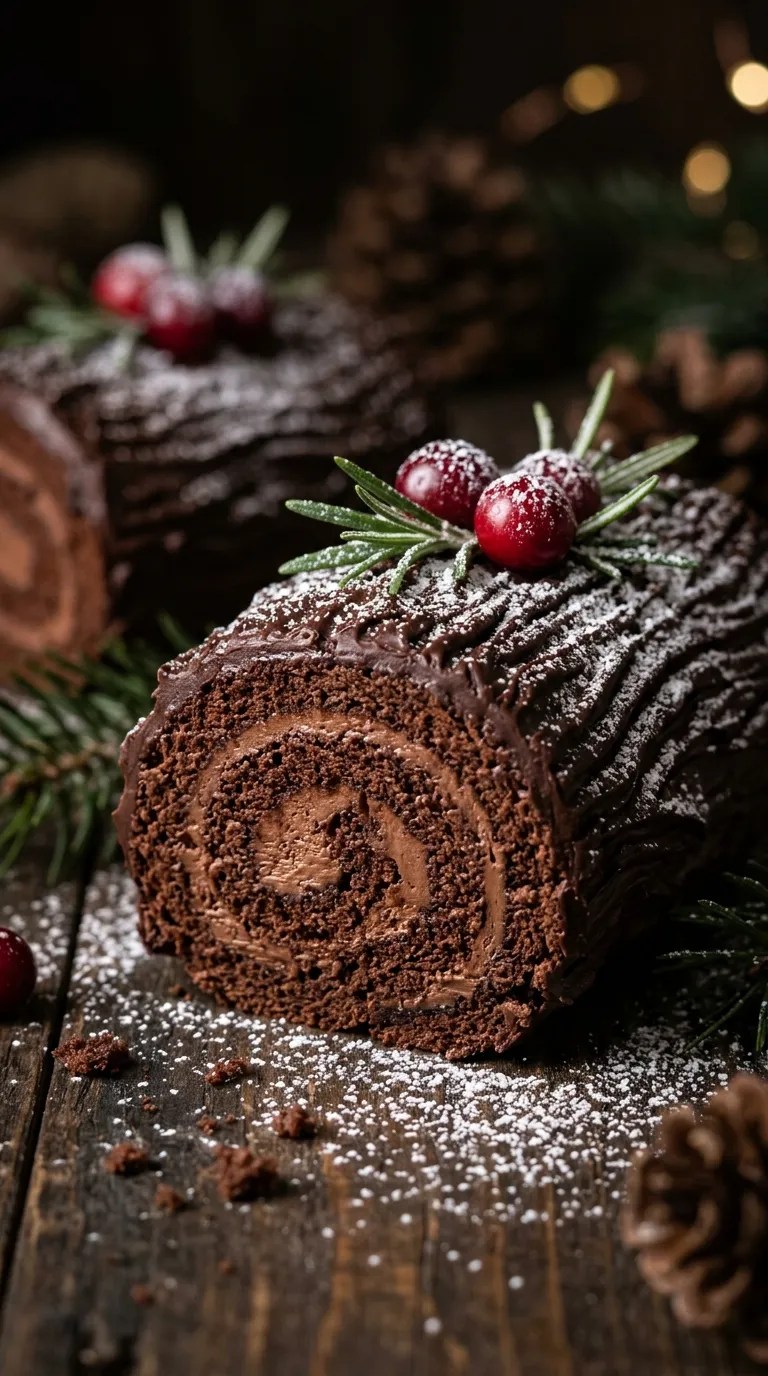
The classic French holiday cake, shrunk to bite-size and simplified with a clever shortcut. Chocolate bark on a cake? Yes, please.
Image prompt (9:16): Vertical 9:16 extreme close-up of mini chocolate yule log cakes with fork-textured ganache bark, dusted powdered sugar snow, fresh cranberries and rosemary sprigs, visible cake spiral at the cut end, food filling 90% of the frame, dark elegant background, Pinterest-style, photorealistic.
Ingredients
- 1 store-bought chocolate Swiss roll (about 10 oz)
- 8 oz semisweet chocolate, chopped
- 1 cup heavy cream
- Powdered sugar
- Fresh cranberries and rosemary sprigs
Step-by-Step Instructions
- Heat the cream until it steams, pour it over the chocolate, and stir into smooth ganache.
- Cool the ganache 20 minutes until spreadable.
- Cut the Swiss roll into 3-inch pieces.
- Slice a small piece off one end at an angle and stick it to the side with ganache to form a branch stub.
- Frost each log with ganache.
- Drag a fork along the length to create bark texture.
- Dust with powdered sugar and tuck in cranberries and rosemary.
Why You’ll Love It
A full yule log takes hours. This one takes 30 minutes and tastes just as rich. Use a good store-bought roll, because a dry cake will betray you.
Final Thought
There you have it: 10 cute Christmas desserts that look like a pastry chef made them but taste like pure holiday magic. Some need zero baking, some keep for days, and some let the kids join in. All of them photograph beautifully, which matters when Pinterest keeps score.
Pick two or three, make them ahead, and enjoy the party instead of hiding in the kitchen. Which one will you try first?
Leave a Reply
You must be logged in to post a comment.