

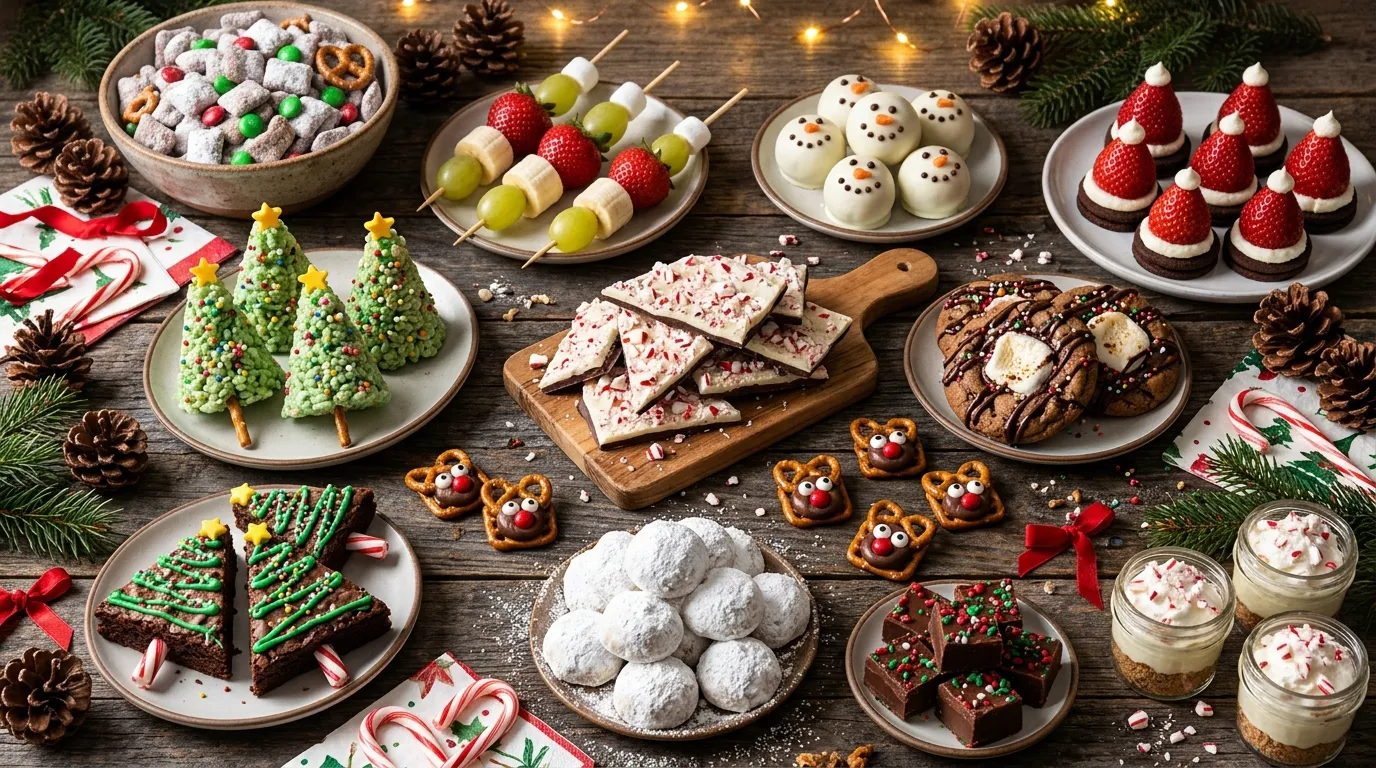
Let’s be honest: December is a lot. You have gifts to wrap, a tree that leans like it’s had too much eggnog, and kids who need something to do besides vibrate. Enter fun Christmas desserts easy enough that you can hand a six-year-old a spatula and still keep your sanity.
I’ve tested every one of these kid-friendly holiday sweets in my own sticky kitchen. Most need 5 ingredients or fewer. Several need zero baking. And none of them require you to pipe anything with a steady hand.
Ready to make your kitchen smell like peppermint and mild victory? Grab an apron. You’ll need it. Your kids will not wear one.
1. Reindeer Chow (a.k.a. Muddy Buddies in a Festive Costume)

Why it’s awesome: It takes 10 minutes, it feeds a crowd, and kids shake the bag like they’re mixing a cocktail. Zero baking, maximum snacking.
Ingredients
- 9 cups Chex cereal
- 1 cup semisweet chocolate chips
- ½ cup creamy peanut butter
- 1½ cups powdered sugar
- 1 cup red and green M&Ms
- ½ cup mini pretzels
Step-by-Step Instructions
- Pour the cereal into a big bowl.
- Melt the chocolate and peanut butter together in the microwave, 30 seconds at a time, stirring between rounds.
- Pour the chocolate mixture over the cereal and fold gently until every piece shines.
- Dump the coated cereal into a large zip bag with the powdered sugar.
- Seal the bag and let the kids shake it like they mean it.
- Toss in the M&Ms and pretzels, then spread everything on parchment to set.
Why You’ll Love It
Nobody eats just one handful, so make a double batch. I once hid a bowl for “later” and found it empty by dinner. Suspects: everyone.
2. Rice Krispie Christmas Trees

Why it’s awesome: Classic marshmallow treats, but shaped like trees. Kids feel like tiny sculptors, and you feel like a genius.
Ingredients
- 3 tbsp butter
- 10 oz marshmallows
- 6 cups crispy rice cereal
- Green food coloring
- Sprinkles and mini M&Ms for ornaments
- Pretzel sticks for trunks
Step-by-Step Instructions
- Melt the butter in a large pot over low heat.
- Stir in the marshmallows until smooth.
- Add 5 drops of green food coloring and mix.
- Fold in the cereal until it’s fully coated.
- Butter your hands (trust me), then shape the mixture into cones.
- Press a pretzel stick into the bottom of each tree.
- Decorate with sprinkles and M&Ms before the cones cool.
Why You’ll Love It
These look impressive and cost almost nothing. FYI, buttered hands are the only thing standing between you and a marshmallow-covered nightmare.
3. Oreo Snowman Truffles

Why it’s awesome: Three ingredients make the truffle base, and kids turn them into grinning snowmen. Pure holiday magic, no oven required.
Ingredients
- 1 package Oreos (about 36 cookies)
- 8 oz cream cheese, softened
- 12 oz white chocolate melts
- Mini chocolate chips for eyes and buttons
- Orange sprinkles for noses
Step-by-Step Instructions
- Crush the Oreos into fine crumbs in a food processor or zip bag.
- Mix the crumbs with the cream cheese until a dough forms.
- Roll the dough into 1-inch balls and chill for 30 minutes.
- Melt the white chocolate and dip each ball.
- Press on mini chocolate chip eyes, an orange sprinkle nose, and a button row before the coating sets.
Why You’ll Love It
Yes, the faces come out crooked. IMO, crooked snowmen have more personality. Mine looked like they’d just heard terrible news, and my nephew adored them.
4. Santa Hat Strawberries

Why it’s awesome: Fresh fruit disguised as a dessert. You win, the kids win, and the vitamin C wins quietly in the corner.
Ingredients
- 1 lb large strawberries
- 1 cup whipped cream cheese or whipped topping
- Mini marshmallows (or extra whipped cream) for hat pom-poms
Step-by-Step Instructions
- Wash and dry the strawberries thoroughly. Wet berries make the cream slide off.
- Slice off the green tops and set the berries cut-side down.
- Pipe or spoon a small dollop of cream cheese on top.
- Press a mini marshmallow onto the dollop for the pom-pom.
- Chill until you’re ready to serve.
Why You’ll Love It
These vanish first at every party, which still shocks me, because fruit usually loses to cookies. Dry your berries and thank me later.
5. Peppermint Bark

Why it’s awesome: Two layers of chocolate and a handful of crushed candy canes. It looks like a bakery gift, and a kid can make it.
Ingredients
- 12 oz dark or semisweet chocolate
- 12 oz white chocolate
- 1 tsp peppermint extract
- 4 candy canes, crushed
Step-by-Step Instructions
- Line a baking sheet with parchment.
- Melt the dark chocolate and spread it into a thin rectangle.
- Chill for 15 minutes until firm.
- Stir the peppermint extract into the melted white chocolate.
- Spread the white layer over the dark layer.
- Sprinkle the crushed candy canes on top and press them in gently.
- Chill for 1 hour, then break into jagged pieces.
Why You’ll Love It
Crushing candy canes in a bag with a rolling pin doubles as stress relief. Use real peppermint extract, not the imitation stuff. It tastes like toothpaste. Ask me how I know :/
6. Hot Cocoa Cookies
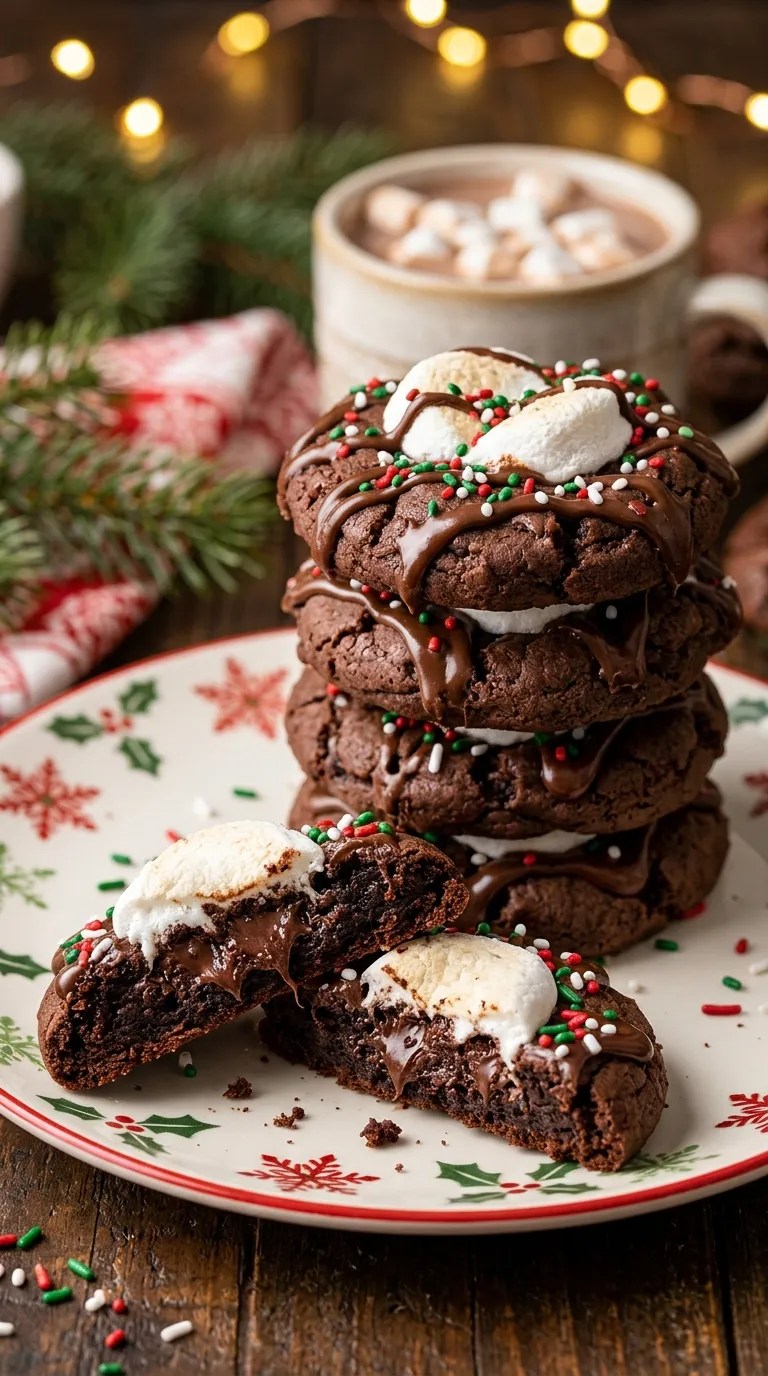
Why it’s awesome: Fudgy chocolate cookies topped with a melted marshmallow. They taste like hot chocolate you can hold.
Ingredients
- 1 box chocolate cake mix
- ½ cup vegetable oil
- 2 eggs
- 12 large marshmallows, halved
- Chocolate frosting and sprinkles for topping
Step-by-Step Instructions
- Heat the oven to 350°F.
- Mix the cake mix, oil, and eggs into a thick dough.
- Roll the dough into balls and place them 2 inches apart on a lined sheet.
- Bake for 8 minutes.
- Press a marshmallow half onto each hot cookie and bake 2 more minutes.
- Cool completely, then dab on frosting and sprinkles.
Why You’ll Love It
Shortcuts count, and a cake mix is a good one. Kids love squishing the dough, and nobody at your party will guess you skipped flour and sugar measuring.
7. Grinch Fruit Kabobs

Why it’s awesome: Green grapes, strawberries, and a marshmallow make a tiny Grinch face. They’re cute, cheap, and weirdly sophisticated.
Ingredients
- Green grapes
- Strawberries, hulled
- Banana slices
- Mini marshmallows
- Wooden skewers (cut the sharp tips off for little ones)
Step-by-Step Instructions
- Thread 4 green grapes onto a skewer.
- Add a banana slice, then a strawberry.
- Finish with a mini marshmallow at the top.
- Chill until serving.
Why You’ll Love It
Hand a kid a skewer and they’ll build a fruit parade. I like these as the healthy counterweight to the fudge, which I’ll admit is a very small counterweight.
8. Christmas Tree Brownies

Why it’s awesome: Cut brownies into triangles, add green frosting, and boom, a forest. Even store-bought mix works beautifully.
Ingredients
- 1 box brownie mix (plus ingredients on the box)
- 1 cup vanilla frosting
- Green gel food coloring
- Star sprinkles and nonpareils
Step-by-Step Instructions
- Bake the brownies according to the box and cool completely.
- Cut the slab into triangles.
- Tint the frosting green.
- Spread or pipe frosting over each triangle in zigzag layers.
- Top with a star sprinkle and scatter nonpareils for ornaments.
Why You’ll Love It
Fudgy brownies make everything better. Cool them fully before frosting, or your trees will melt into green swamp monsters. Learned that the hard way.
9. Reindeer Pretzel Bites

Why it’s awesome: Pretzel twists become antlers, and a red M&M becomes Rudolph’s nose. Salty, sweet, and adorable.
Ingredients
- Mini pretzel twists
- Round butter crackers or Oreo Thins
- Peanut butter (or sunflower butter) as glue
- Candy eyes
- Red M&Ms
Step-by-Step Instructions
- Spread peanut butter on a cracker.
- Press two pretzel twists on top as antlers.
- Stick on two candy eyes.
- Add a red M&M nose at the bottom.
- Chill briefly so everything sets.
Why You’ll Love It
These come together in about 15 minutes, even with helpers. Swap in sunflower butter if your school or party bans peanuts.
10. Snowball Cookies
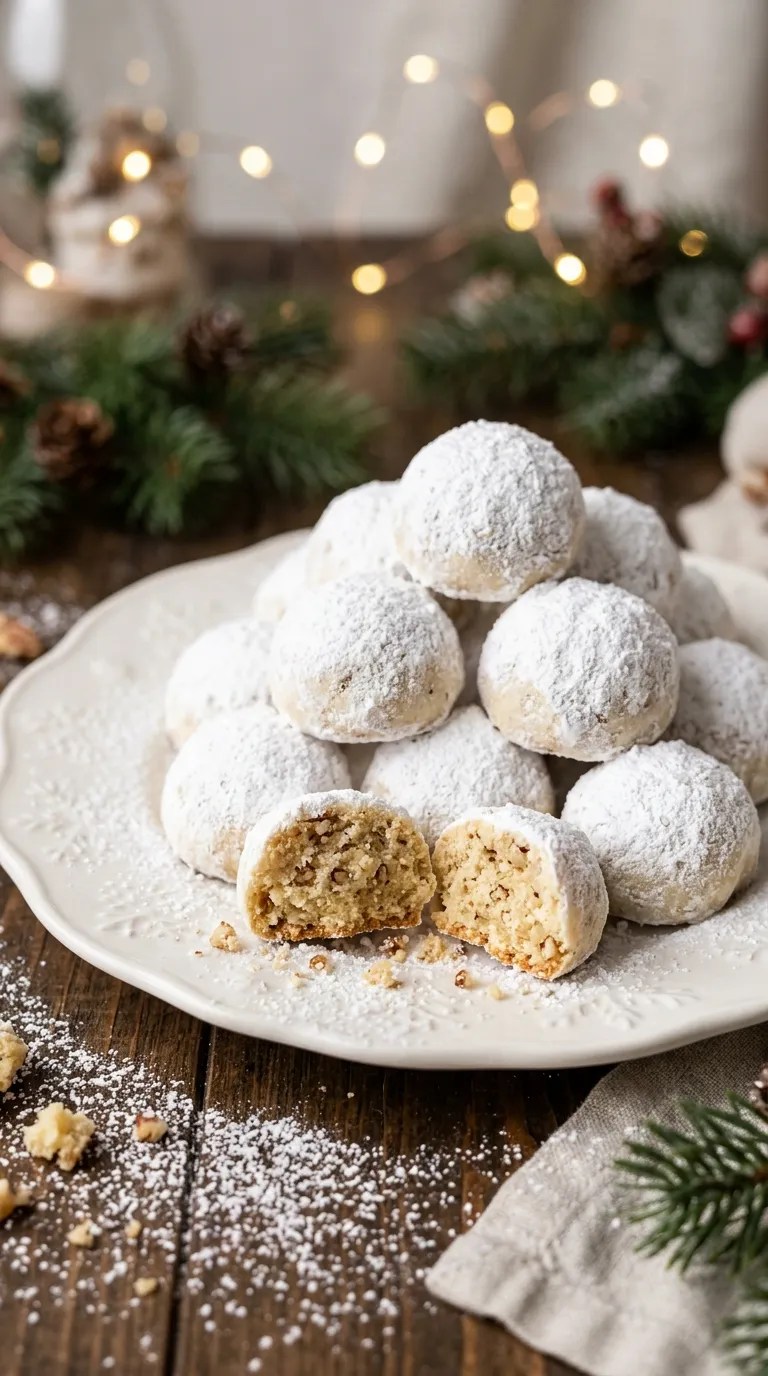
Why it’s awesome: Buttery, melt-in-your-mouth cookies buried in powdered sugar. Kids get to roll, dunk, and make a mess.
Ingredients
- 1 cup butter, softened
- ½ cup powdered sugar, plus extra for rolling
- 1 tsp vanilla
- 2¼ cups flour
- 1 cup finely chopped pecans
- ¼ tsp salt
Step-by-Step Instructions
- Heat the oven to 350°F.
- Beat the butter, sugar, and vanilla until fluffy.
- Stir in the flour, salt, and pecans.
- Roll the dough into 1-inch balls and bake for 12 minutes.
- Roll the warm cookies in powdered sugar.
- Cool, then roll them in sugar again.
Why You’ll Love It
Double-rolling gives that thick, snowy coat. Is it neat? No. Does your kitchen look like a blizzard hit? Absolutely, and it’s glorious.
11. Funfetti Christmas Fudge
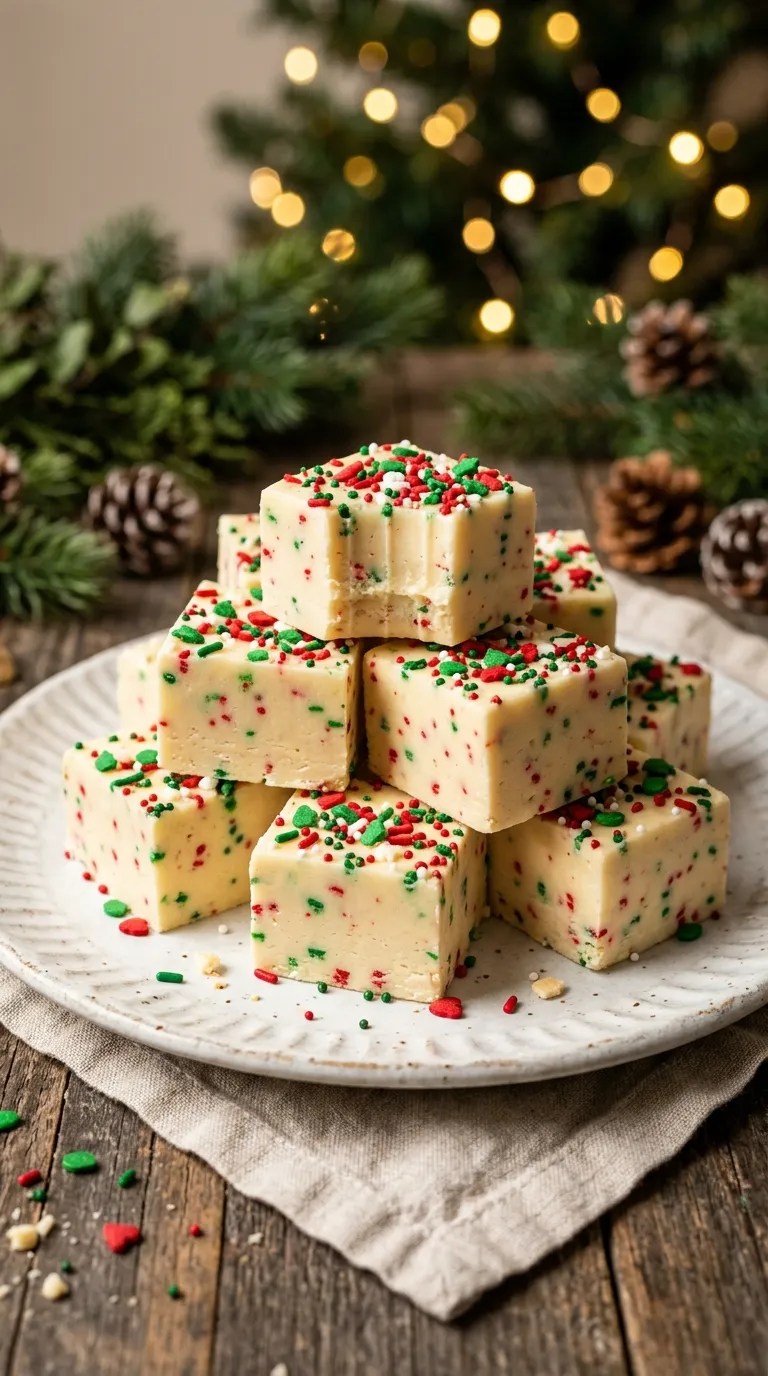
Why it’s awesome: Two ingredients plus sprinkles. If you can stir, you can make fudge.
Ingredients
- 3 cups white chocolate chips
- 1 can (14 oz) sweetened condensed milk
- 1 tsp vanilla
- ½ cup red and green sprinkles
Step-by-Step Instructions
- Line an 8×8 pan with parchment.
- Melt the chips and condensed milk together over low heat, stirring constantly.
- Remove from the heat and stir in the vanilla.
- Fold in ¼ cup of sprinkles.
- Spread into the pan and top with the remaining sprinkles.
- Chill 2 hours, then cut into squares.
Why You’ll Love It
It’s foolproof, which I appreciate, since I’ve ruined fancier fudge. Fold gently, or the sprinkle colors bleed into a sad gray. Gift it in tins and everyone thinks you tried.
12. Candy Cane Cheesecake Cups
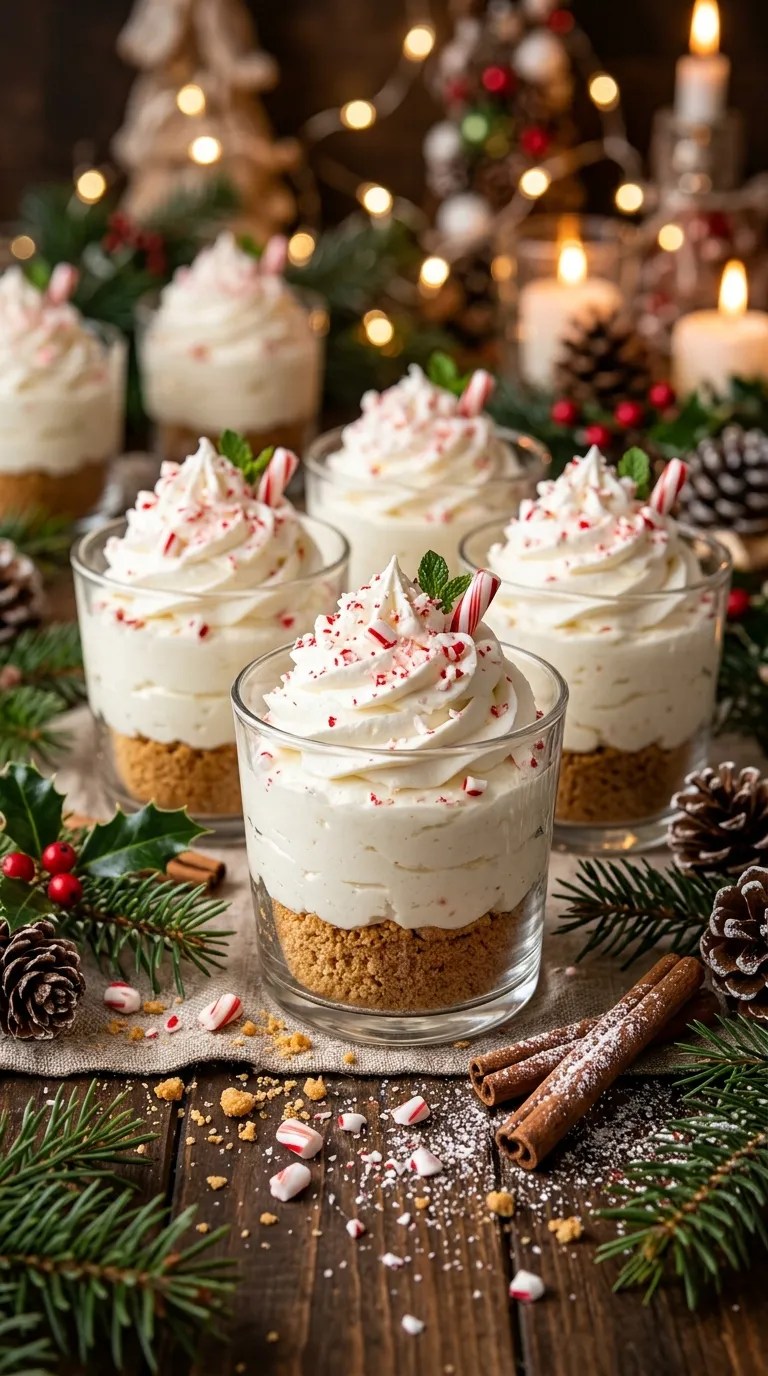
Why it’s awesome: Creamy no-bake cheesecake in individual cups. Kids love layering, and adults love how elegant it looks.
Ingredients
- 1½ cups graham cracker crumbs
- 5 tbsp melted butter
- 8 oz cream cheese, softened
- ½ cup powdered sugar
- 1 cup whipped topping
- ½ tsp peppermint extract
- Crushed candy canes
Step-by-Step Instructions
- Mix the crumbs and butter, then press a spoonful into the bottom of each cup.
- Beat the cream cheese, sugar, and peppermint extract until smooth.
- Fold in the whipped topping.
- Spoon the filling over the crusts.
- Chill for 2 hours.
- Top with crushed candy canes right before serving, so they stay crunchy.
Why You’ll Love It
It tastes fancy, but a toddler could assemble it. Add the candy canes last or they dissolve into sticky red puddles. Pretty? Sort of. Appetizing? Not really. 😉
Final Thought
There you have it: 12 Christmas desserts easy enough for kids, plus plenty of room for you to sneak a sample. Most take under 30 minutes, many skip the oven, and every one invites little hands to help.
My favorite part? These kid-friendly holiday sweets turn dessert into a family activity. The messes get memorable, the creations look charmingly lopsided, and the whole house smells like Christmas.
Pick two or three, grab the sprinkles, and start baking. Your future self, sitting happily with a mug of cocoa, will say thank you.
Leave a Reply
You must be logged in to post a comment.