

By a fellow foodie who burned the first batch so you don’t have to
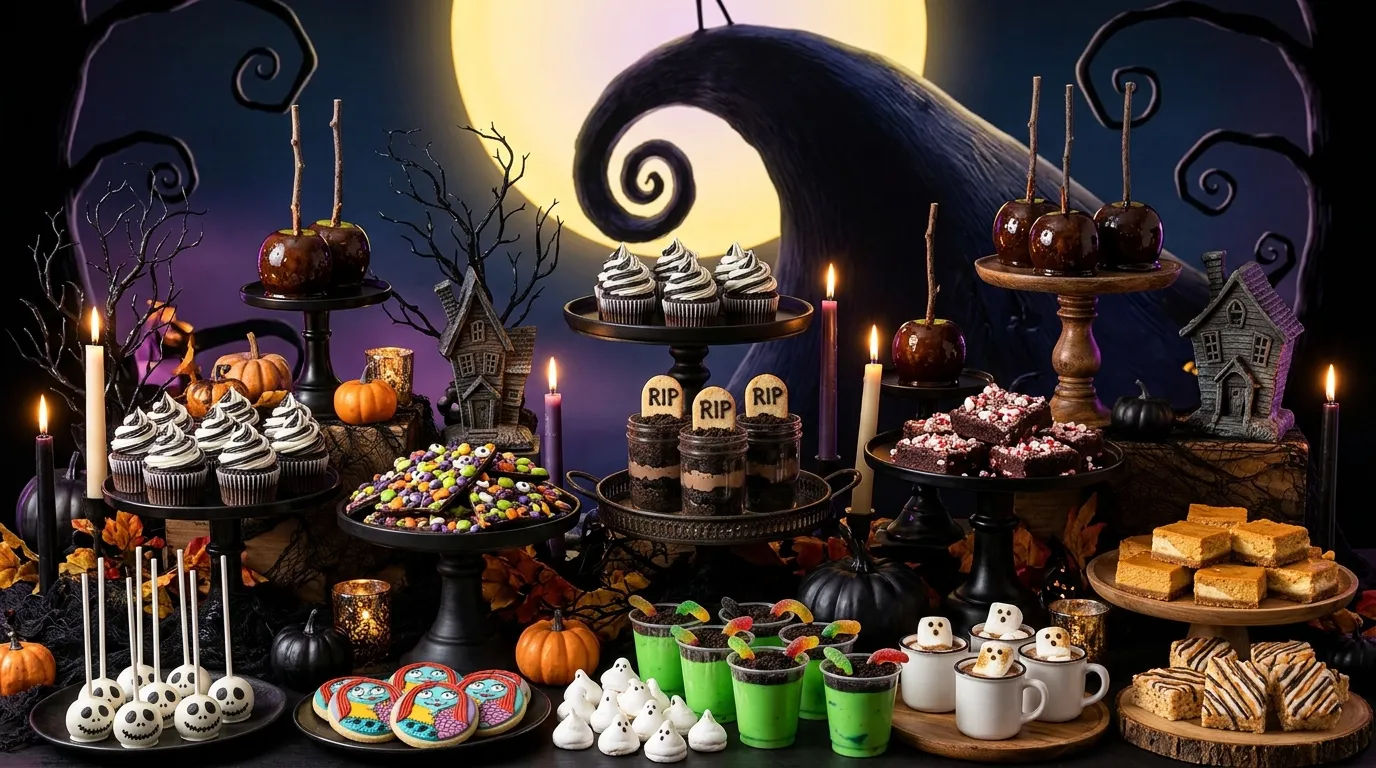
Picture this: your guests walk in, spot a graveyard dessert table, and immediately forget the appetizers. That’s the power of Nightmare Before Christmas desserts. They hit Halloween and Christmas at once, so you get double the excuses to bake.
I planned my first spooky-holiday party in a panic. I wanted something creepy, cute, and not insanely hard. These 12 recipes deliver exactly that, and most need only basic ingredients and a little patience. Ready to throw the best Halloween Town party on the block? Grab your apron and a strong coffee (or a glass of wine 😉).
1. Jack Skellington Oreo Truffle Pops

These pops look fancy, but they take three ingredients and zero baking skill. Jack’s grin does the heavy lifting.
Ingredients
- 36 Oreos, crushed to fine crumbs
- 8 oz cream cheese, softened
- 12 oz white candy melts
- Black icing or edible marker
- 24 lollipop sticks
Step-by-Step Instructions
- Mix the Oreo crumbs and cream cheese until a dough forms.
- Roll the dough into 24 balls and chill for 30 minutes.
- Melt the candy melts and dip each stick into them, then push it halfway into a ball.
- Dunk each ball in the melted white coating and tap off the excess.
- Let the pops set, then draw Jack’s eyes, nose, and stitched smile.
Why You’ll Love It
The rich chocolate-and-cream center tastes like a grown-up Oreo milkshake. Chill the balls first, or they’ll slide off the sticks. I learned that the hard way, and Jack lost his head. Literally.
2. Sally’s Patchwork Sugar Cookies
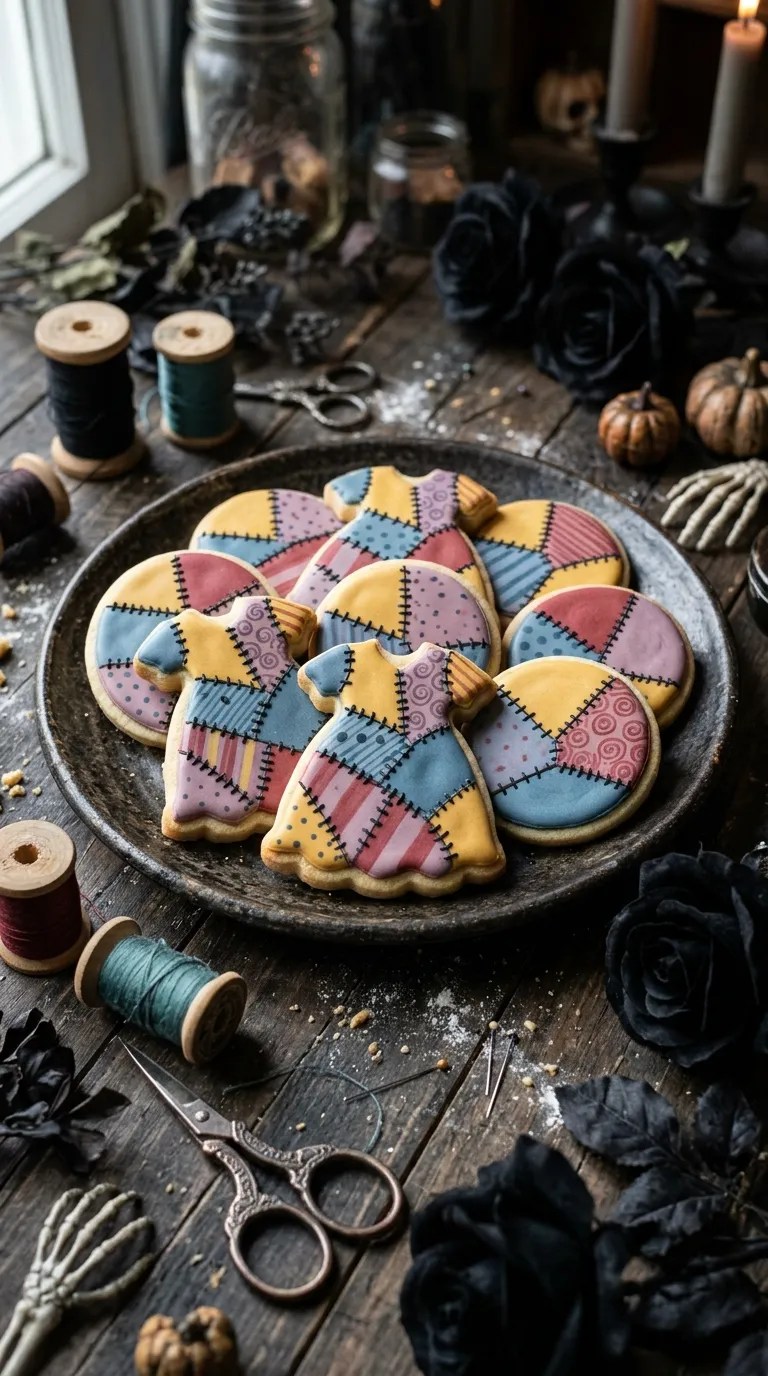
Sally stitches herself together, so your cookies should look a little mismatched too. Perfection is overrated here.
Ingredients
- 2¾ cups flour
- 1 cup softened butter
- 1 cup sugar
- 1 egg and 2 tsp vanilla
- Blue, red, and yellow gel food coloring
- Black icing for stitches
Step-by-Step Instructions
- Cream the butter and sugar, then beat in the egg and vanilla.
- Stir in the flour until a soft dough forms.
- Split the dough in three and knead a color into each portion.
- Press small patches of each color together, roll gently, and cut squares or rounds.
- Bake at 350°F for 9–11 minutes, then cool completely.
- Pipe black stitches along every seam.
Why You’ll Love It
The dough bakes up buttery and soft, and the colors look gorgeous. Use gel coloring, because liquid coloring makes the dough sticky. These cookies hide wobbly piping beautifully.
3. Oogie Boogie Slime Pudding Cups
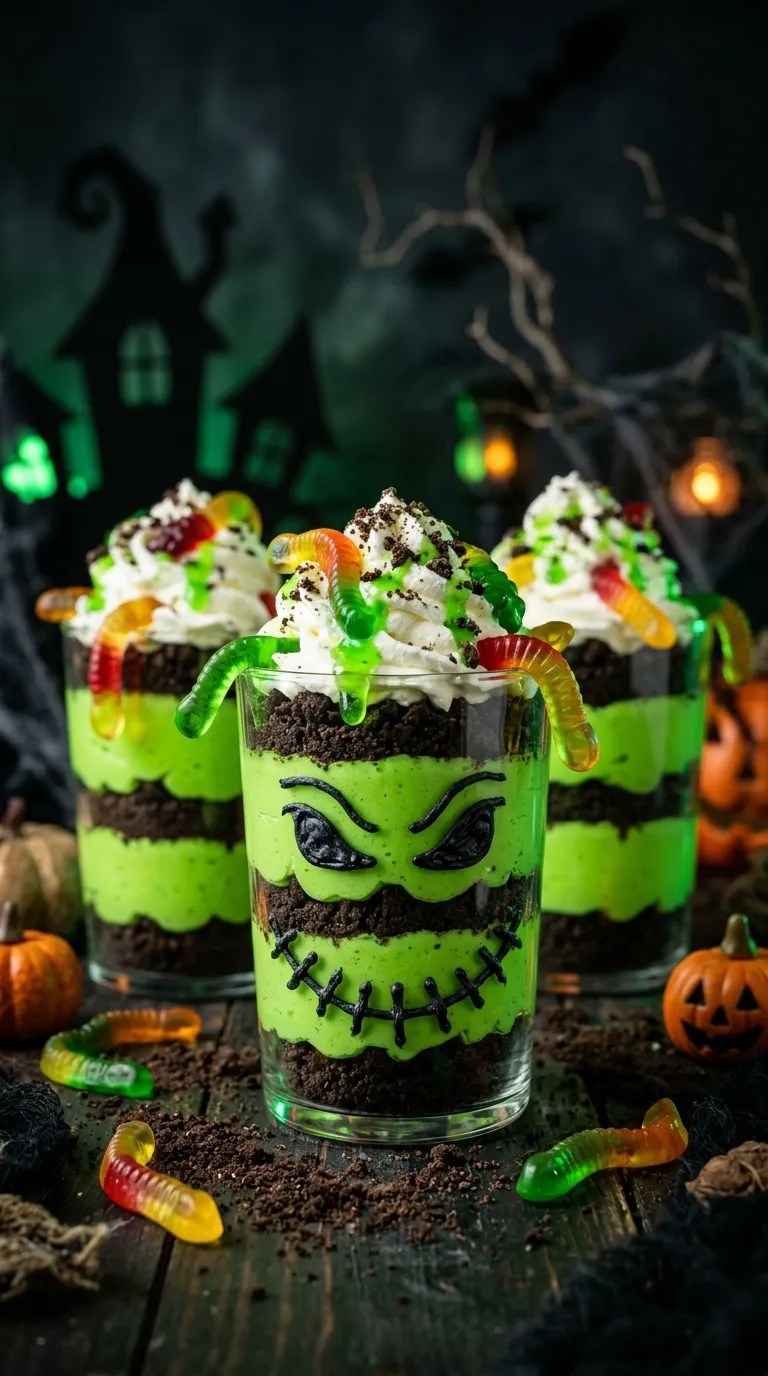
Oogie Boogie lives in a creepy lair, so give him a dessert that oozes. Who doesn’t love a treat that looks gross and tastes amazing?
Ingredients
- 1 box pistachio instant pudding
- 2 cups cold milk
- 1 cup whipped topping
- Green gummy worms and crushed chocolate cookies
- A few drops of green food coloring
Step-by-Step Instructions
- Whisk the pudding mix with the milk for two minutes.
- Fold in the whipped topping and a drop of green coloring.
- Spoon cookie crumbs into clear cups.
- Layer the pudding on top and chill for one hour.
- Top with more crumbs and let gummy worms crawl out.
Why You’ll Love It
The cool, creamy pudding balances the crunchy cookie base. It takes 10 minutes of work, and the “slime” wins every kid at the party. FYI, clear cups show off the layers best.
4. Zero’s Ghost Meringue Cookies

Zero floats around Halloween Town like a happy little ghost. These airy meringues float right off the plate.
Ingredients
- 4 egg whites, room temperature
- 1 cup sugar
- ½ tsp cream of tartar
- 1 tsp vanilla
- Mini chocolate chips for eyes
Step-by-Step Instructions
- Beat the egg whites and cream of tartar until foamy.
- Add the sugar a spoonful at a time and beat until stiff, glossy peaks form.
- Fold in the vanilla.
- Pipe ghost shapes onto a parchment-lined tray, with a tall swirl on top.
- Press in two chocolate chip eyes.
- Bake at 200°F for 90 minutes, then leave them in the oven with the heat off for another hour.
Why You’ll Love It
They melt on your tongue and taste like sweet clouds. Never let a drop of yolk touch the whites, or they won’t whip. I ruined two batches before I believed that rule. 🙂
5. Pumpkin King Cheesecake Bars

Jack is the Pumpkin King, so pumpkin must appear on the menu. These bars cover the cozy, spiced side of your party.
Ingredients
- 2 cups graham cracker crumbs
- ½ cup melted butter
- 16 oz cream cheese
- ¾ cup pumpkin puree
- ¾ cup sugar, 2 eggs, and 1 tsp pumpkin pie spice
Step-by-Step Instructions
- Mix the crumbs and butter, then press them into a lined 9×9 pan.
- Bake the crust at 350°F for 8 minutes.
- Beat the cream cheese, pumpkin, sugar, eggs, and spice until smooth.
- Pour the filling over the crust.
- Bake for 35 minutes, until the center barely jiggles.
- Cool, chill for four hours, and slice.
Why You’ll Love It
Creamy, tangy, and perfectly spiced, these bars feel like a holiday hug. Chill them overnight for clean slices. Top each one with a tiny chocolate pumpkin stem if you feel fancy.
6. Spiral Hill Black-and-White Cupcakes

The famous spiral hill in the movie gets its own cupcake. The swirl looks tricky, but a piping bag makes it easy.
Ingredients
- 1 box chocolate cake mix (plus its listed eggs, oil, and water)
- 2 cups vanilla buttercream
- 2 cups chocolate buttercream
- Black sprinkles
- Piping bag with a large star tip
Step-by-Step Instructions
- Bake the cupcakes by the box directions and cool them fully.
- Fill one side of a piping bag with vanilla buttercream and the other side with chocolate.
- Pipe a tall, curling swirl on each cupcake.
- Finish with black sprinkles.
Why You’ll Love It
Boxed mix saves you serious time, and nobody has to know. Use a thick buttercream so the stripes hold their shape. IMO, the two-tone swirl steals the whole dessert table.
7. Lock, Shock, and Barrel Candy Bark

These three trick-or-treating troublemakers inspire a bark that comes together in minutes. Think of it as chaos you can snap.
Ingredients
- 12 oz semisweet chocolate
- 8 oz white chocolate
- ½ cup candy corn
- ½ cup pretzel pieces
- Halloween sprinkles
Step-by-Step Instructions
- Melt the semisweet chocolate and spread it on a lined baking sheet.
- Melt the white chocolate and drizzle it over the top.
- Drag a toothpick through the chocolates to make marbled swirls.
- Scatter candy corn, pretzels, and sprinkles over the surface.
- Chill for one hour, then break the bark into jagged shards.
Why You’ll Love It
Sweet, salty, and crunchy, this bark disappears fast. Press toppings in gently so they stick. It also makes a cute party favor in a cellophane bag.
8. Halloween Town Graveyard Dirt Cups

This dessert looks like a tiny cemetery, and kids adore digging into it. Adults sneak back for seconds. I’ve watched it happen.
Ingredients
- 1 box chocolate pudding mix and 2 cups cold milk
- 1 cup whipped topping
- 15 chocolate sandwich cookies, crushed
- Milano cookies for headstones
- Black icing
Step-by-Step Instructions
- Whisk the pudding and milk, then fold in the whipped topping.
- Layer crushed cookies and pudding in cups.
- Finish with a thick layer of cookie “dirt.”
- Write “RIP” on each Milano with black icing.
- Plant a headstone in every cup.
Why You’ll Love It
It tastes like chocolate heaven in a cup. Make these a day ahead, and the cookies turn soft and cake-like. Add gummy worms for extra gross-out points.
9. Sandy Claws Peppermint Brownies

Santa Claus gets mangled in the movie, but his holiday spirit lives on in these brownies. Peppermint brings the Christmas half of your party.
Ingredients
- 1 box fudge brownie mix (plus its listed ingredients)
- 1 tsp peppermint extract
- 1 cup white chocolate chips
- ½ cup crushed candy canes
- Red and white sprinkles
Step-by-Step Instructions
- Stir the peppermint extract into the brownie batter.
- Bake by the box directions and cool completely.
- Melt the white chocolate and spread it over the brownies.
- Sprinkle candy cane pieces on top before it sets.
- Chill for 20 minutes and cut into squares.
Why You’ll Love It
Fudgy brownies and cool mint taste fantastic together. Go easy on the extract, because too much turns them into toothpaste. :/ Trust me on this one.
10. Skellington Stripe Rice Krispie Treats

Jack’s pinstripe suit makes a perfect pattern for crispy treats. They look dramatic and take almost no effort.
Ingredients
- 6 cups crispy rice cereal
- 10 oz marshmallows
- 3 tbsp butter
- 8 oz white chocolate, melted
- Black icing or melted dark chocolate
Step-by-Step Instructions
- Melt the butter and marshmallows together in a large pot.
- Stir in the cereal until everything coats evenly.
- Press the mixture into a greased pan with buttered hands.
- Cool, then cut into rectangles.
- Dip each rectangle in white chocolate.
- Pipe thin black stripes across the top.
Why You’ll Love It
These treats stay chewy, crunchy, and satisfyingly sweet. Press lightly, because packing the mixture down makes them hard as bricks. Nobody wants a brick for dessert.
11. Halloween Town Caramel Apples

Caramel apples capture that crisp autumn spookiness. Dress them up like the characters you love.
Ingredients
- 6 small tart apples (Granny Smith works best)
- 14 oz caramels
- 2 tbsp cream
- Mini chocolate chips, crushed pretzels, and orange sprinkles
- 6 wooden sticks
Step-by-Step Instructions
- Wash and thoroughly dry the apples, then push a stick into each one.
- Melt the caramels with the cream over low heat.
- Dip each apple and twirl it to coat.
- Roll the apples in your toppings right away.
- Set them on parchment and chill for 30 minutes.
Why You’ll Love It
Sweet, sticky caramel meets tart crunch in every bite. Dry the apples completely, or the caramel slides right off. I skipped that step once and wore half my dessert.
12. Moonlit Hot Chocolate with Spooky Marshmallows

Every party needs a warm finale. This hot chocolate keeps your guests cozy and happy.
Ingredients
- 4 cups whole milk
- ½ cup dark chocolate chips
- ¼ cup cocoa powder
- ¼ cup sugar
- 1 tsp vanilla
- Marshmallows and black icing for ghost faces
Step-by-Step Instructions
- Heat the milk over medium-low heat until steaming.
- Whisk in the cocoa powder, sugar, and chocolate chips until smooth.
- Stir in the vanilla and keep the heat gentle.
- Draw tiny ghost faces on the marshmallows with black icing.
- Pour the hot chocolate into mugs and float the ghosts on top.
Why You’ll Love It
It tastes rich, velvety, and deeply chocolatey. Never let it boil, because scorched milk ruins everything. This one works as a make-ahead drink too, so keep it warm in a slow cooker.
Final Thought
These Nightmare Before Christmas desserts deliver big flavor with minimal fuss. Pick three or four for a small party, or bake all 12 and build a full Halloween Town buffet. The no-bake options save your sanity, and the fancier bakes impress the crowd.
So which recipe will you try first? Whatever you choose, enjoy the mess, laugh at the lopsided ghosts, and watch the plates empty fast. Happy haunting, friend!
Leave a Reply
You must be logged in to post a comment.