

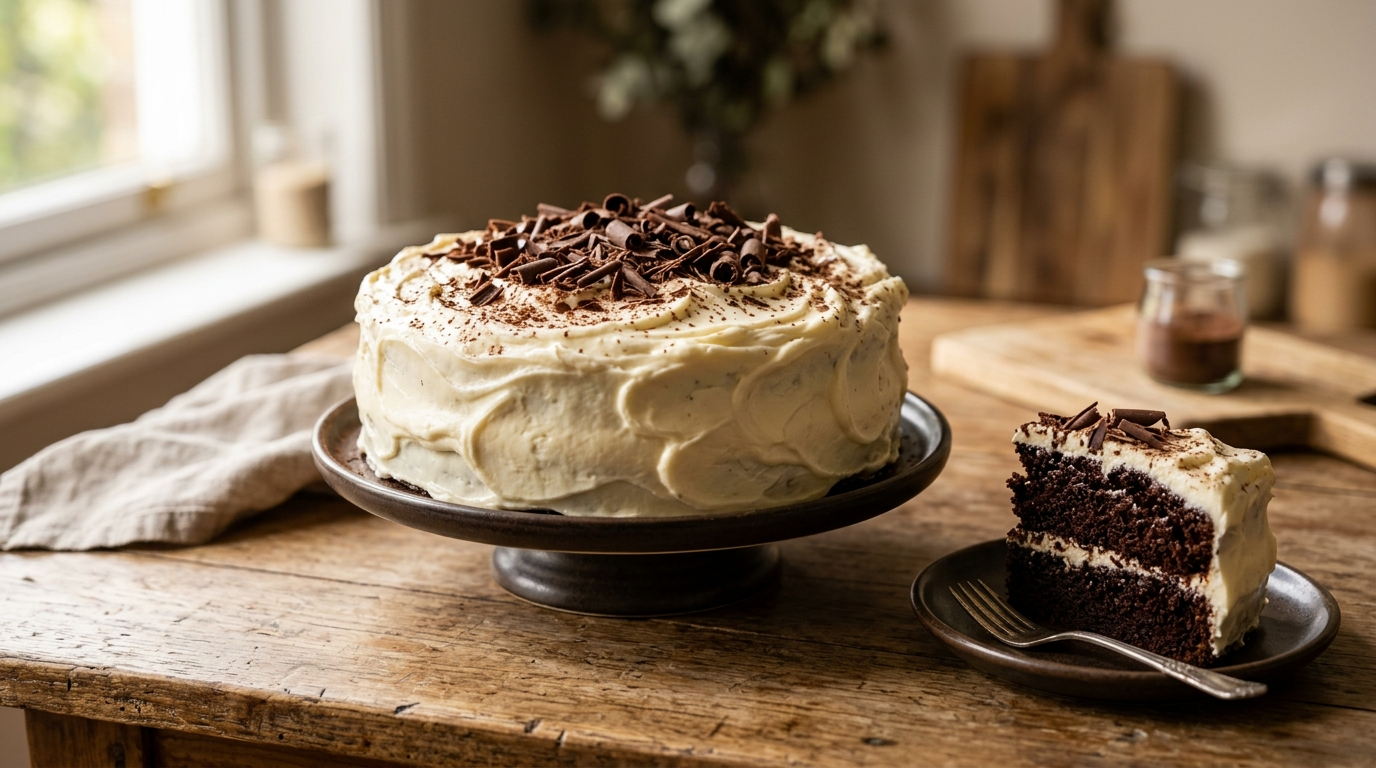
Here are cakes you make because you need dessert, and then there are cakes you make because you want everyone in the kitchen to suddenly become very interested in what smells so good.
This Kahlua Cake with Cream Cheese Frosting belongs firmly in the second category.
I first made this cake for a small get-together when I wanted something chocolatey but a little more grown-up than my usual chocolate cake. I had some Kahlúa sitting in the cabinet, and I figured, why not? That little experiment turned into one of those recipes I kept coming back to.
The cake comes out incredibly moist, deeply chocolatey, and wonderfully rich without tasting overwhelmingly boozy. Then comes the cream cheese frosting. Tangy, creamy, and just sweet enough, it cuts through all that chocolate beautifully.
One thing I learned after making this cake a few times: don’t rush the cooling process. I once frosted the cake while it was still slightly warm because, apparently, patience had left the building that day. The frosting softened, slid around, and looked like a tiny frosting landslide.
It still tasted fantastic, but it definitely didn’t win any beauty contests.
So now I let the cake cool completely, make the frosting while I wait, and enjoy a cup of coffee. Much less drama.
Why You’ll Love This Recipe

- Rich chocolate flavor: Kahlúa adds a subtle coffee note that makes the chocolate taste even deeper.
- Moist for days: The combination of oil, sour cream, and Kahlúa keeps the crumb soft.
- Cream cheese frosting: The tangy frosting balances the rich chocolate cake perfectly.
- Great for celebrations: Birthday parties, dinner parties, holidays, and weekend baking all work beautifully.
- Easy enough for beginners: You don’t need fancy decorating skills or complicated equipment.
- Make-ahead friendly: You can bake the cake ahead and frost it later.
- A little different: It’s familiar enough for chocolate-cake lovers but has that extra coffee-and-chocolate twist.
Ingredients

For the Kahlua Chocolate Cake
- 2 cups all-purpose flour
- 1 ¾ cups granulated sugar
- ¾ cup unsweetened cocoa powder
- 1 ½ teaspoons baking soda
- 1 teaspoon baking powder
- ½ teaspoon salt
- 2 large eggs, room temperature
- 1 cup sour cream
- ½ cup vegetable oil
- ¾ cup Kahlúa coffee liqueur
- ½ cup strong brewed coffee, cooled slightly
- 2 teaspoons pure vanilla extract
For the Cream Cheese Frosting
- 8 ounces full-fat cream cheese, softened
- ½ cup unsalted butter, softened
- 3 cups powdered sugar
- 2 teaspoons pure vanilla extract
- 1–2 tablespoons heavy cream or milk, if needed
- Pinch of salt
Optional Garnish
- Chocolate shavings
- Cocoa powder
- Mini chocolate chips
- Finely chopped toasted pecans
For the best frosting texture, I recommend full-fat cream cheese. Reduced-fat cream cheese can make the frosting softer, especially if your kitchen runs warm.
If you don’t have Kahlúa, you can use another coffee liqueur. If you prefer not to use alcohol, use strong brewed coffee in its place. The cake will still have a lovely coffee-chocolate flavor.
Step-by-Step Instructions

1. Prepare the Pan
Preheat your oven to 350°F (175°C).
Grease a 9×13-inch baking pan with butter or nonstick cooking spray. You can also line the bottom with parchment paper if you want an especially easy release.
I like using a light-colored metal pan because it helps the cake bake evenly without getting too dark around the edges.
2. Mix the Dry Ingredients
In a large mixing bowl, whisk together the flour, sugar, cocoa powder, baking soda, baking powder, and salt.
Take a minute to break up any cocoa lumps.
You don’t want to discover a little dry cocoa island in the middle of your finished cake.
3. Combine the Wet Ingredients
In another bowl, whisk together the eggs, sour cream, vegetable oil, Kahlúa, brewed coffee, and vanilla extract.
Make sure your coffee has cooled slightly before adding it.
The mixture will look smooth and fairly thin, which is exactly what you want.
4. Bring Everything Together
Pour the wet ingredients into the dry ingredients.
Use a whisk or rubber spatula to gently combine everything. Mix just until you no longer see streaks of dry flour.
Don’t overmix.
A few tiny lumps won’t hurt anything, but aggressive mixing can make the cake less tender.
5. Pour the Batter Into the Pan
Pour the batter into your prepared pan and gently spread it into an even layer.
Give the pan one or two gentle taps on the counter to release large air bubbles.
Don’t go overboard here. We’re making cake, not trying to flatten a carpet.
6. Bake the Cake
Place the pan in the preheated oven and bake for approximately 32–38 minutes.
Start checking around the 30-minute mark because ovens vary.
Insert a toothpick into the center. It should come out with a few moist crumbs attached but no wet batter.
Try not to overbake this cake. That’s one of the easiest ways to lose the wonderfully soft texture.
7. Cool Completely
Place the cake on a wire rack and let it cool completely in the pan.
Give it at least 1 hour, depending on your kitchen temperature.
This step matters.
If you spread cream cheese frosting over a warm cake, the frosting can soften and slide instead of sitting beautifully on top.
8. Make the Cream Cheese Frosting
While the cake cools, beat the softened cream cheese and butter together with a hand mixer or stand mixer.
Beat for about 2–3 minutes, until smooth and creamy.
Add the powdered sugar gradually, mixing on low speed at first so your kitchen doesn’t suddenly look like it has experienced a powdered-sugar snowstorm.
Add the vanilla and salt.
Beat for another 1–2 minutes until fluffy.
If the frosting feels too thick, add heavy cream or milk one tablespoon at a time.
If it feels too soft, refrigerate it for 15–20 minutes before spreading.
9. Frost the Cake
Once the cake has cooled completely, spread the cream cheese frosting evenly over the top.
You can leave it rustic and swirly, or smooth it with an offset spatula.
For an easy finishing touch, sprinkle a little cocoa powder or add chocolate shavings.
10. Chill and Serve
For cleaner slices, refrigerate the frosted cake for about 30 minutes before cutting.
Let individual slices sit at room temperature for about 10–15 minutes before serving.
That little rest softens the frosting and brings the chocolate flavor back to life.
Pro Tips & Tricks

Don’t Overbake It
This is probably my biggest tip.
Chocolate cake can look finished before it actually feels finished, so use a toothpick to check the center. Pull it from the oven when the tester shows a few moist crumbs.
Use Room-Temperature Ingredients
Room-temperature eggs, sour cream, butter, and cream cheese blend more smoothly.
Especially with the frosting, cold cream cheese can leave you with little lumps that refuse to cooperate.
Measure Cocoa Powder Properly
Don’t scoop cocoa powder directly with a measuring cup and pack it down.
Instead, spoon it into the measuring cup and level the top. Too much cocoa can make the cake taste dry and slightly bitter.
Cool the Cake Completely
I know the smell will tempt you.
I know you’ll want to frost it immediately.
Don’t.
Let it cool. Your frosting will thank you.
Keep the Frosting Chilled
Cream cheese frosting softens quickly at room temperature.
If you’re preparing this cake for a party, keep it refrigerated until reasonably close to serving time.
Make It Ahead
You can bake the cake one day ahead. Let it cool completely, cover it tightly, and refrigerate it.
Make the frosting separately and store it in the refrigerator. Let the frosting sit at room temperature briefly before spreading so it becomes easier to work with.
Variations & Substitutions
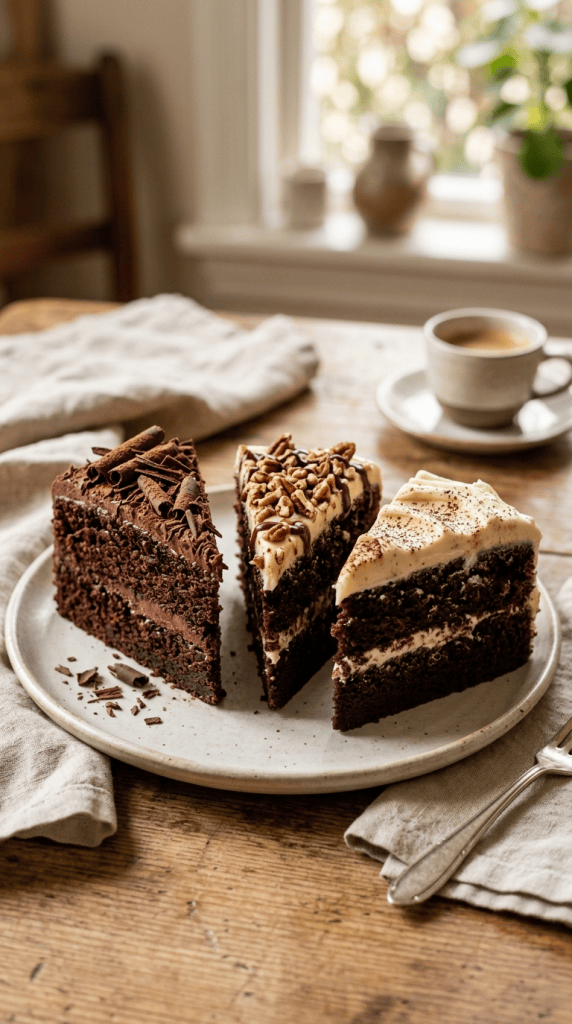
Kahlúa-Free Chocolate Cake
If you don’t want to use coffee liqueur, replace the Kahlúa with an equal amount of cooled strong coffee.
You’ll lose the liqueur’s flavor, but the coffee will still give the chocolate a wonderful depth.
Chocolate Chip Kahlua Cake
Fold about ¾ cup of semi-sweet chocolate chips into the batter before baking.
I especially like mini chocolate chips because they spread throughout the cake instead of sinking heavily toward the bottom.
Add a Nutty Crunch
Stir ½ cup of finely chopped toasted pecans into the batter, or sprinkle them over the frosting.
The crunchy texture works beautifully with the soft cake.
Mocha Frosting
For an extra coffee kick, mix 1–2 teaspoons of instant espresso powder into the cream cheese frosting.
Start with a small amount and taste before adding more.
Make It a Layer Cake
You can divide the batter between two greased 8-inch round cake pans and adjust the baking time.
Let the layers cool completely before frosting. Add cream cheese frosting between the layers and on top for a more dramatic dessert.
Serving Suggestions

I love serving this cake slightly chilled with a hot cup of coffee.
The warm coffee and cold, creamy frosting make a ridiculously good combination.
For a dinner party, serve each slice with a small spoonful of whipped cream and a few chocolate shavings.
You can also add fresh berries for a little color and freshness.
This cake works particularly well for:
- Birthday celebrations
- Dinner parties
- Holiday desserts
- Girls’ night gatherings
- Christmas and New Year’s celebrations
- Weekend family desserts
- Coffee-and-cake afternoons
If you’re serving adults at a dinner party, you can also pair the cake with a small glass of coffee liqueur.
Remember that the cake contains Kahlúa, so label it clearly when serving guests and keep children away from the alcoholic version.
FAQ’s
Can I make Kahlúa Cake without alcohol?
Yes. Replace the Kahlúa with strong brewed coffee.
You’ll still get the delicious combination of chocolate and coffee, although the final flavor won’t have the same liqueur character.
How should I store Kahlua Cake with Cream Cheese Frosting?
Because the frosting contains cream cheese, store the frosted cake in the refrigerator.
Cover the cake tightly and enjoy it within about 3–4 days for the best texture and flavor.
Let slices sit at room temperature for 10–15 minutes before serving.
Can I freeze this cake?
Yes.
For the easiest results, freeze the unfrosted cake. Wrap it tightly in plastic wrap, then place it inside a freezer-safe bag or container.
Freeze for up to 2–3 months.
Thaw it overnight in the refrigerator, then frost it before serving.
You can also freeze individual frosted slices, although the frosting texture may change slightly after thawing.
Can I make the cake ahead of time?
Absolutely.
Bake the cake up to one day ahead and keep it tightly covered.
You can also prepare the frosting ahead of time and refrigerate it. Let it soften slightly before spreading.
Why did my cream cheese frosting turn runny?
The most common culprit is overly soft cream cheese or butter.
Warm kitchens can also make frosting lose its structure.
Try refrigerating the frosting for 15–30 minutes. If it still feels too loose, gradually add a little more powdered sugar until you reach a spreadable consistency.
Why did my cake turn out dry?
Overbaking usually causes a dry chocolate cake.
Start checking the cake before the recipe’s full baking time. Also measure your flour and cocoa carefully rather than packing them into measuring cups.
Final Thoughts
This Kahlua Cake with Cream Cheese Frosting has become one of those desserts I make when I want something that feels special without spending the entire afternoon decorating a cake.
The chocolate cake stays wonderfully soft, the coffee liqueur adds a subtle grown-up twist, and that tangy cream cheese frosting brings everything together.
And honestly, you don’t need perfect decorating skills here.
Spread the frosting on, make a few casual swirls with a spatula, add some chocolate shavings, and call it beautiful. Homemade cakes don’t need to look like they came from a bakery window to make people happy.
If you give this cake a try, cut yourself a generous slice, grab a cup of coffee, and enjoy it while it’s fresh. And if your family suddenly starts asking when you’re making it again, don’t say I didn’t warn you.
Leave a Reply
You must be logged in to post a comment.