


Meta description: Need easy Christmas desserts that look impressive? These 10 quick holiday treats take minutes, need almost no baking skill, and will steal the dessert table.
Let’s be honest. By December 23rd, your energy is gone, your oven is booked solid, and someone just asked what’s for dessert. Again.
I’ve been there, standing in the kitchen at 9 p.m. with a half-wrapped present in one hand and a panicked look on my face. That’s exactly why I collect easy Christmas desserts that look like you spent all day on them. Spoiler: you didn’t.
These 10 quick Christmas desserts need minutes of hands-on time, a handful of ingredients, and zero fancy skills. Most skip the oven entirely. A few use store-bought shortcuts, and I’ll tell you exactly where to cheat without anyone noticing.
Who needs a pastry degree when you’ve got a microwave and a bag of chocolate chips? Grab your coffee (or that glass of wine 😉) and pick your favorites.
Quick tip before you start: read each recipe once, then gather everything on the counter. It saves you from the classic “where did I put the vanilla?” meltdown.
1. Peppermint Bark
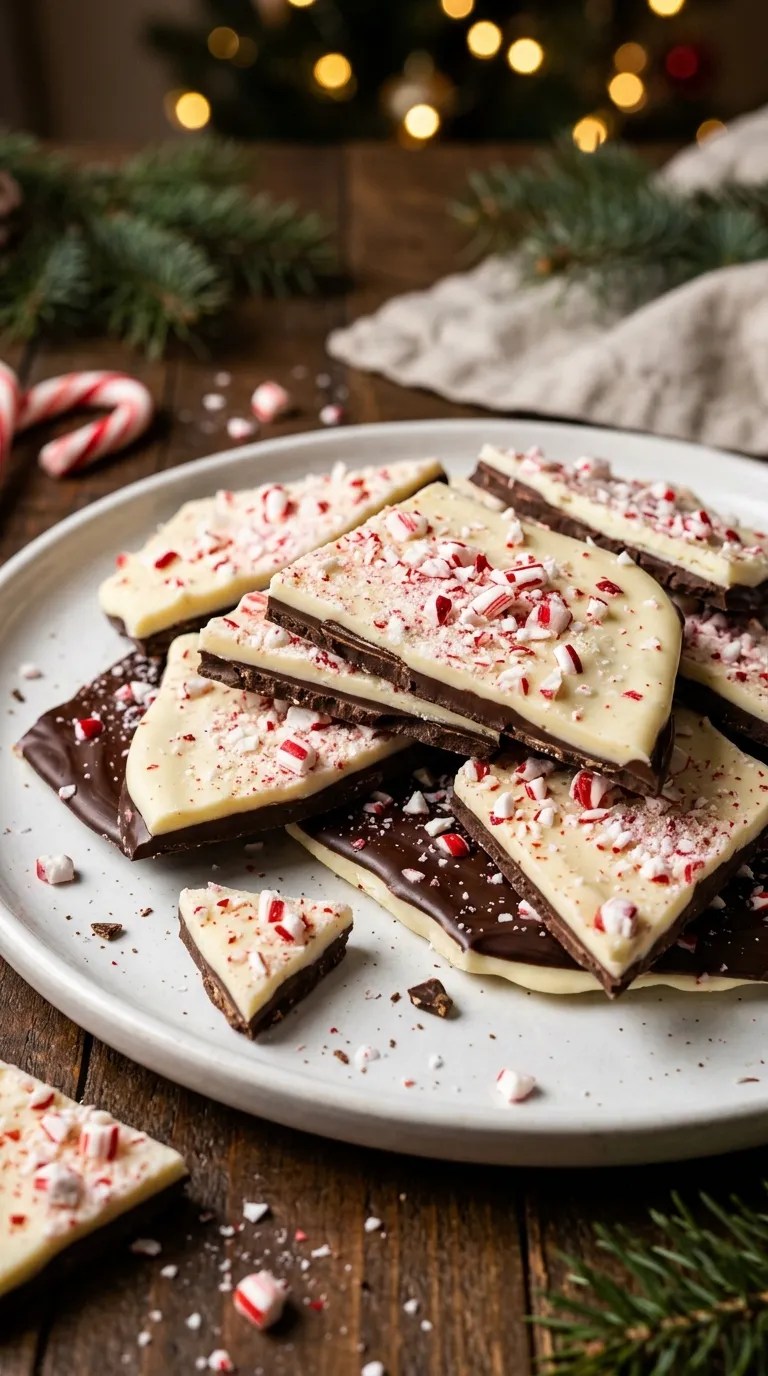
This is the ultimate impressive holiday dessert for beginners. Two layers, one crunchy topping, and a result that looks straight out of a gift shop.
Ingredients
- 12 oz semisweet chocolate, chopped or chips
- 12 oz white chocolate, chopped or chips
- 1/2 teaspoon peppermint extract
- 4 candy canes, crushed (about 1/2 cup)
Step-by-Step Instructions
- Line a baking sheet with parchment paper.
- Melt the semisweet chocolate in the microwave in 30-second bursts, stirring between each one.
- Spread the chocolate into a thin, even rectangle, then freeze for 10 minutes.
- Melt the white chocolate the same way and stir in the peppermint extract.
- Pour the white chocolate over the firm dark layer and smooth it out.
- Sprinkle the crushed candy canes on top right away, pressing them in lightly.
- Chill for 20 minutes, then break into jagged shards.
Why You’ll Love It
The hands-on time is about 10 minutes, and the shards look gorgeous piled in a jar. I once skipped the freezer step and ended up with marbled swirls instead of layers. Tasty? Yes. Pretty? Not so much.
2. Strawberry Santa Hats

Tiny, adorable, and almost too cute to eat. Almost.
Ingredients
- 12 large strawberries, washed and thoroughly dried
- 1 cup heavy cream, cold
- 2 tablespoons powdered sugar
- 1/2 teaspoon vanilla extract
- Mini chocolate chips or sprinkles for the eyes
Step-by-Step Instructions
- Slice the green tops off each strawberry and set the tops aside for snacking.
- Whip the cream, sugar, and vanilla until stiff peaks form.
- Spoon the whipped cream into a piping bag (or a zip-top bag with a snipped corner).
- Pipe a small dollop on each strawberry base, then set the strawberry cone on top.
- Pipe a tiny dot of cream on the tip for the pom-pom.
- Press two mini chips into the front, if you want a little face.
Why You’ll Love It
Dry strawberries make or break this one. Wet berries slide around like hockey pucks, and nobody wants a runaway Santa. They take about 15 minutes and always get an “aww” from the crowd.
3. Puff Pastry Nutella Christmas Tree

This one looks like a bakery showpiece, and store-bought puff pastry does all the heavy lifting. IMO, it’s the best return on effort in this entire list.
Ingredients
- 2 sheets puff pastry, thawed
- 1/2 cup Nutella (or any chocolate-hazelnut spread)
- 1 egg, beaten with a splash of water
- Powdered sugar for dusting
Step-by-Step Instructions
- Heat the oven to 400°F (200°C).
- Lay one pastry sheet on parchment and spread the Nutella over it, leaving a small border.
- Place the second sheet on top and press the edges.
- Cut a tree shape (a big triangle works fine), leaving a small trunk.
- Slice strips from the edges toward the center, then twist each strip twice.
- Brush with the egg wash.
- Bake for 15 to 18 minutes until golden, then dust with powdered sugar.
Why You’ll Love It
People pull the twists off one by one, and that interactive bit makes it a party favorite. Don’t overthink the cutting. Wonky trees look charming, and you can blame the oven if anyone complains.
4. Eggnog Trifle Cups

Layers look fancy. Layers also hide the fact that you assembled them in 10 minutes flat.
Ingredients
- 1 pound cake, store-bought, cubed
- 1 1/2 cups eggnog
- 1 small box instant vanilla pudding mix
- 1 cup whipped topping or whipped cream
- 1/2 teaspoon nutmeg
- Crushed gingersnaps for crunch
Step-by-Step Instructions
- Whisk the pudding mix with the eggnog for 2 minutes until it thickens.
- Fold in half the whipped cream.
- Spoon a layer of cake cubes into clear cups or jars.
- Add a layer of eggnog pudding.
- Repeat once more.
- Top with the remaining whipped cream, a dusting of nutmeg, and the gingersnap crumbs.
Why You’ll Love It
It tastes like Christmas in a cup, and you can make it a day ahead. FYI, the gingersnaps add a spicy crunch that plain cookies can’t match. Use real eggnog, because the shelf-stable stuff tastes sad.
5. Cranberry Cheesecake Jars

No oven, no water bath, no cracked tops. Who wouldn’t take that deal?
Ingredients
- 8 oz cream cheese, softened
- 1/3 cup powdered sugar
- 1 cup whipped cream
- 1 teaspoon vanilla
- 1 cup crushed graham crackers mixed with 3 tablespoons melted butter
- 1/2 cup cranberry sauce
- Fresh cranberries or orange zest for garnish
Step-by-Step Instructions
- Press the graham mixture into the bottom of 4 small jars.
- Beat the cream cheese, powdered sugar, and vanilla until smooth.
- Fold in the whipped cream gently so it stays fluffy.
- Spoon the filling over the crust.
- Top each jar with a generous spoonful of cranberry sauce.
- Chill for at least 30 minutes, then garnish.
Why You’ll Love It
The tart cranberry cuts through the creamy filling beautifully. Whip the cream cheese before adding anything else, or you’ll fight lumps for the rest of your life. Okay, maybe just five minutes. :/
6. Peppermint Oreo Truffles

Three ingredients. That’s it. These look like they came from a chocolatier.
Ingredients
- 1 package Oreos (about 36 cookies)
- 8 oz cream cheese, softened
- 12 oz chocolate melting wafers
- Crushed candy canes for topping
Step-by-Step Instructions
- Pulverize the Oreos in a food processor until they look like fine sand.
- Mix in the cream cheese until a dough forms.
- Roll the dough into 1-inch balls and place them on a lined tray.
- Freeze for 15 minutes so they firm up.
- Melt the wafers and dip each ball, letting the excess drip off.
- Sprinkle with candy cane bits before the coating sets.
Why You’ll Love It
Dipping feels messy at first, but a fork makes it painless. I once tried skipping the freezer and watched my truffles melt into the chocolate bath. Learn from my mistakes, friend.
7. Cranberry Orange Pavlova Nests

Here’s my favorite cheat: buy store-bought meringue nests. Nobody checks, and nobody cares.
Ingredients
- 8 mini meringue nests
- 1 cup heavy cream
- 2 tablespoons powdered sugar
- 1 tablespoon orange zest
- 1/2 cup cranberry sauce
- Pomegranate seeds or fresh rosemary for garnish
Step-by-Step Instructions
- Whip the cream with the powdered sugar and orange zest until soft peaks form.
- Place the meringue nests on a platter.
- Fill each nest with a big spoonful of cream.
- Spoon the cranberry sauce on top.
- Scatter pomegranate seeds over everything.
- Serve right away so the meringue stays crisp.
Why You’ll Love It
The crunchy shell, soft cream, and tangy fruit hit every texture at once. The red-and-white color scheme basically decorates itself. Assemble these at the last minute, and you’ll look like a calm, collected host.
8. Gingerbread Affogato

Take a plain scoop of ice cream and turn it into a grown-up holiday moment.
Ingredients
- 4 scoops vanilla ice cream
- 4 shots hot espresso (or strong coffee)
- 4 gingerbread cookies, crumbled
- Whipped cream and a pinch of cinnamon
Step-by-Step Instructions
- Scoop the ice cream into small glasses or mugs.
- Brew the espresso while the glasses sit in the freezer for 2 minutes.
- Sprinkle the gingerbread crumbs over the ice cream.
- Pour the hot espresso over each scoop at the table.
- Add a dollop of whipped cream and dust with cinnamon.
Why You’ll Love It
It takes about 5 minutes, and the pour-at-the-table drama is half the fun. Skip the coffee? Use hot chocolate or warm caramel sauce instead. Both taste fantastic, though I’ll always vote for espresso.
9. Coconut Snowballs
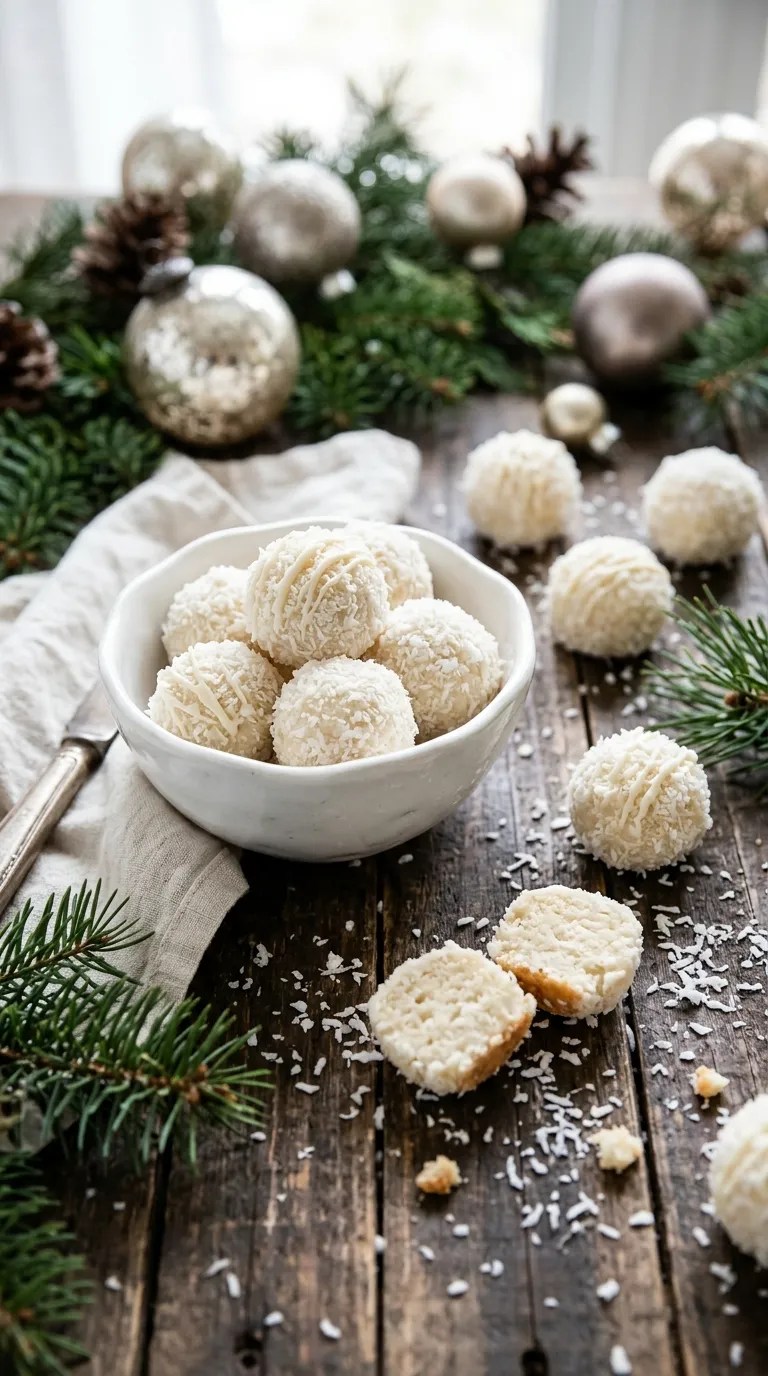
These fluffy white bites look like tiny snowdrifts, and they require absolutely no baking.
Ingredients
- 2 cups shredded coconut, divided
- 1 can (14 oz) sweetened condensed milk
- 1 teaspoon vanilla extract
- Pinch of salt
- White chocolate chips, optional for a drizzle
Step-by-Step Instructions
- Stir 1 1/2 cups coconut with the condensed milk, vanilla, and salt.
- Chill the mixture for 10 minutes so it firms up.
- Roll tablespoon-sized portions into balls.
- Roll each ball in the remaining coconut until fully coated.
- Drizzle with melted white chocolate if you want extra flair.
Why You’ll Love It
They taste like a chewy macaroon without the oven. Wet your hands slightly, and the sticky dough stops clinging to your fingers. Pile them on a cake stand and watch them vanish in minutes.
10. Sparkling Cranberry Sorbet Floats

The finale looks like a cocktail and tastes like a dessert. Dessert for the win.
Ingredients
- 4 scoops raspberry or lemon sorbet
- 2 cups sparkling cranberry juice (or prosecco for the grown-ups)
- Fresh cranberries and rosemary sprigs
- Sugar for rimming the glasses
Step-by-Step Instructions
- Dip each glass rim in water, then in sugar.
- Drop one scoop of sorbet into each glass.
- Pour the sparkling juice slowly over the sorbet.
- Garnish with a few cranberries and a rosemary sprig.
- Serve with a long spoon and a straw.
Why You’ll Love It
It takes 3 minutes and looks like you hired a bartender. The sorbet fizzes up beautifully, so pour slowly unless you want a sticky countertop. Trust me on that one.
Final thought
There you have it: 10 quick Christmas desserts that look impressive and take minutes, not hours. Some need only a microwave, others just a spoon and a little confidence.
My advice? Pick two or three and make them ahead. Chill the bark, roll the truffles, and assemble the trifle cups the night before. Then spend Christmas Day with your people instead of a mixing bowl.
Which one will you try first? Whatever you choose, enjoy the compliments. You earned them. 🙂
Leave a Reply
You must be logged in to post a comment.