

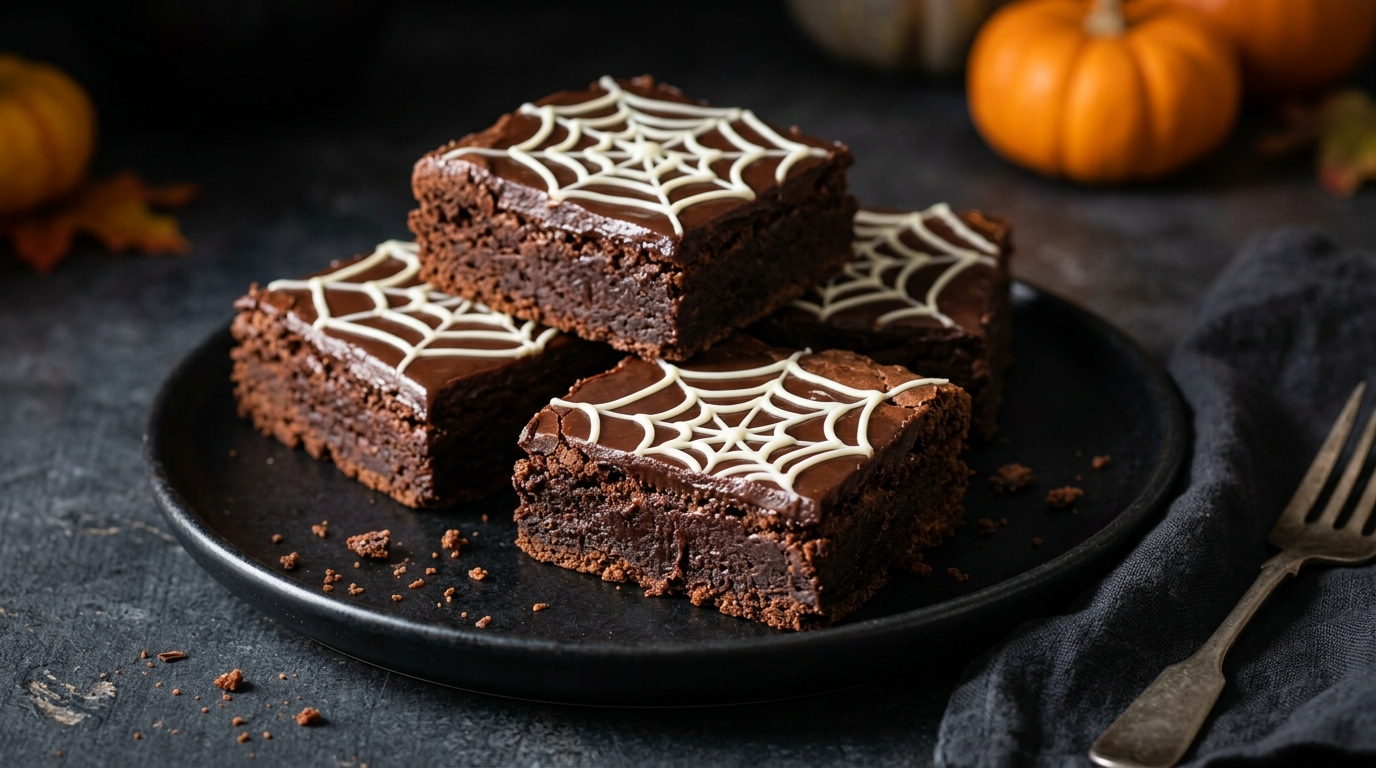
Every Halloween party needs something chocolatey, a little spooky, and delicious enough that guests come back for seconds. For me, brownies are always a winner. They’re easy to prepare, simple to transport, and much less stressful than desserts that require complicated decorating skills.
One of my favorite Halloween dessert ideas for a party is spiderweb chocolate brownies. Picture a tray of rich, fudgy brownies topped with delicate white chocolate spiderwebs. They look impressive on a party table, but you don’t need professional baking skills or a cupboard full of fancy decorating tools to make them.
I love this dessert because it combines everything I want in a Halloween treat: deep chocolate flavor, a soft center, slightly crisp edges, and a spooky design that takes only a few extra minutes. You can make the brownies a day ahead, decorate them when they cool, and spend more time enjoying the party instead of standing in the kitchen.
The best part? You can turn an ordinary brownie recipe into a Halloween showstopper with melted white chocolate and a toothpick. Even if your spiderwebs look a little wonky, nobody will complain while eating a fudgy brownie!
Why You’ll Love This Halloween Dessert Idea for a Party

-
Easy to decorate: You only need melted white chocolate and a toothpick to create the spiderweb effect.
-
Perfect for sharing: One pan makes 16 brownies, so you can serve a crowd without preparing individual desserts.
-
Rich chocolate flavor: Cocoa powder and chocolate chips give every bite a delicious, fudgy texture.
-
Make-ahead friendly: Bake the brownies the day before your Halloween party and decorate them when you’re ready.
-
Budget-friendly ingredients: You can find most ingredients in an ordinary grocery store without buying special Halloween baking supplies.
These brownies also work for school celebrations, office parties, family gatherings, and Halloween movie nights. Arrange them on a dark serving tray, and they’ll look right at home beside your other spooky snacks.
Ingredients
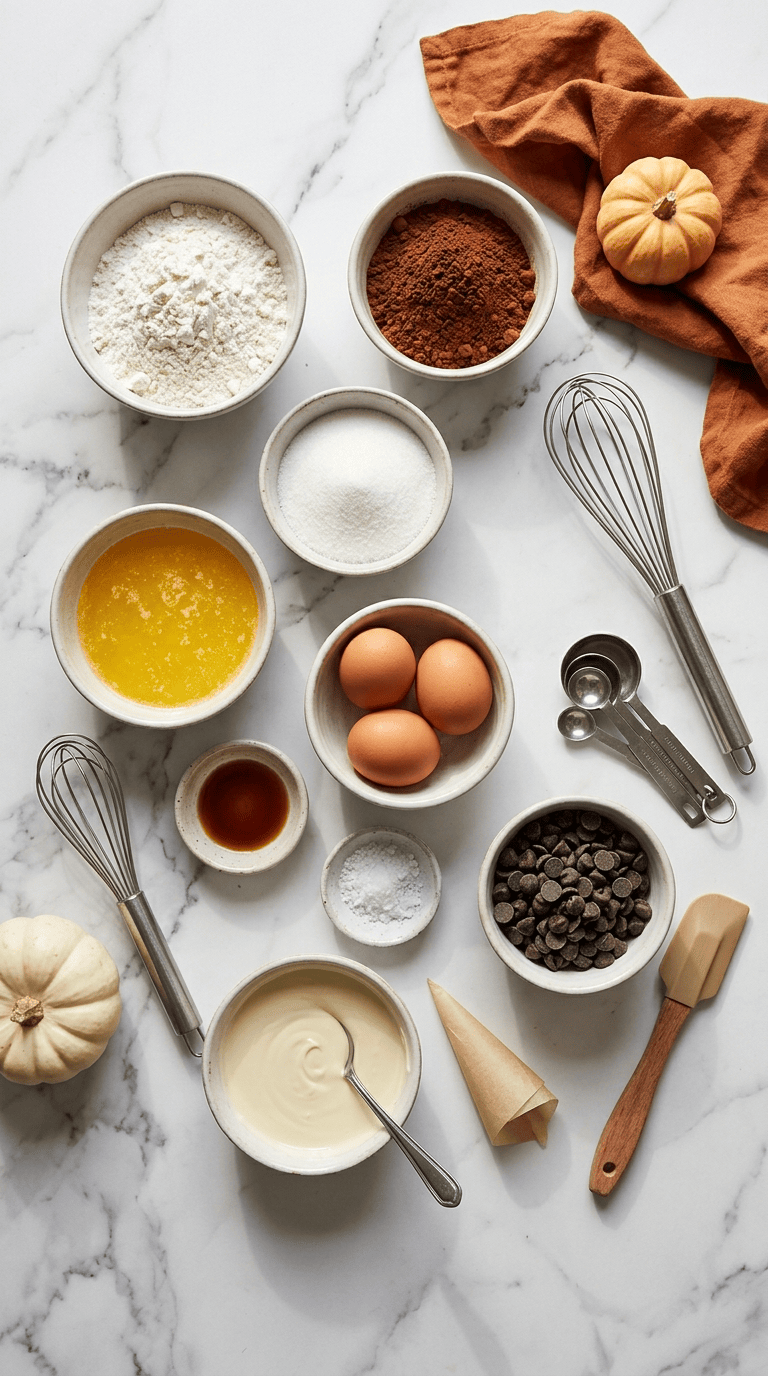
You don’t need anything unusual for this recipe. The brownie batter uses everyday baking ingredients, while white chocolate creates the spiderweb decoration.
Preparation time: 15 minutes; Baking time: 25–32 minutes; Cooling time: 45–60 minutes; Decoration time: 10 minutes; Total time: Approximately 1 hour 35 minutes to 1 hour 55 minutes; Servings: 16 brownies; Course: Dessert; Cuisine: American-inspired; Oven temperature: 350°F (175°C)
For the Brownies
-
½ cup (113 g) unsalted butter
-
1 cup (200 g) granulated sugar
-
2 large eggs, at room temperature
-
1 teaspoon vanilla extract
-
⅓ cup (35 g) unsweetened cocoa powder
-
½ cup (65 g) all-purpose flour
-
¼ teaspoon salt
-
¼ teaspoon baking powder
-
½ cup (85 g) semi-sweet chocolate chips
For the Spiderweb Decoration
-
½ cup (85–90 g) white chocolate chips or chopped white chocolate
-
1 teaspoon neutral vegetable oil, if needed to thin the chocolate
-
Optional: A few Halloween-themed sprinkles for the serving platter
Helpful Ingredient Notes
Butter: Unsalted butter gives you better control over the flavor. If you only have salted butter, use it and reduce the added salt slightly.
Cocoa powder: Natural unsweetened cocoa powder works well here. Avoid sweetened hot chocolate powder because it changes the sweetness and texture of the batter.
Chocolate chips: Semi-sweet chocolate chips provide little pockets of chocolate throughout the brownies. You can use dark chocolate chips if you prefer a less sweet dessert.
White chocolate: Choose good-quality white chocolate that melts smoothly. If your chocolate becomes too thick for decorating, stir in a little neutral oil, about ¼ teaspoon at a time.
Gluten-free option: Replace the all-purpose flour with a good-quality measure-for-measure gluten-free baking blend. Check that your other ingredients meet your dietary needs.
Step-by-Step Instructions
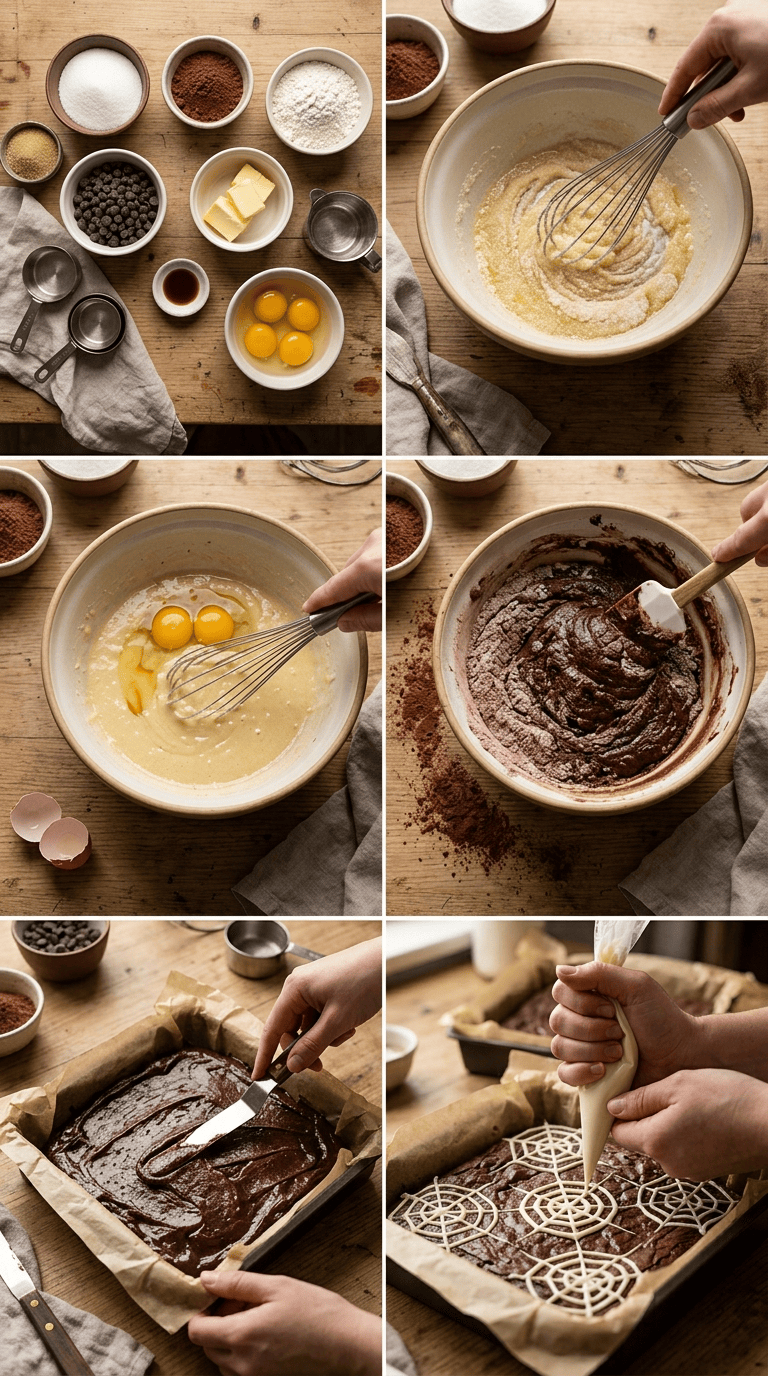
Follow these steps for brownies with a rich chocolate flavor, a soft middle, and a festive spiderweb topping.
Step 1: Prepare Your Baking Pan
Time: 5 minutes
Preheat your oven to 350°F (175°C). Line an 8-inch square baking pan with parchment paper, leaving a little overhang on two sides.
The overhang will help you lift the brownies out of the pan after they cool. Lightly grease the parchment if it tends to stick.
An 8-inch pan gives you thick brownies with a lovely fudgy center. If you use a larger pan, the brownies will spread thinner and may finish baking sooner.
Step 2: Melt the Butter and Mix the Sugar
Time: 3–5 minutes
Place the butter in a microwave-safe bowl and heat it in short intervals until it melts. You can also melt it in a small saucepan over low heat.
Let the butter cool for a minute or two, then whisk in the granulated sugar.
The mixture should look glossy and thick. Don’t worry if it doesn’t become completely smooth; the sugar won’t dissolve entirely at this stage.
Step 3: Add the Eggs and Vanilla
Time: 2 minutes
Add the eggs one at a time, whisking well after each addition. Stir in the vanilla extract.
Whisk until the mixture looks glossy and slightly thicker. This step helps create a pleasant brownie texture without requiring a stand mixer.
Avoid adding eggs to extremely hot butter. Let the butter cool slightly first so the eggs don’t begin to cook.
Step 4: Combine the Dry Ingredients
Time: 2 minutes
In a separate bowl, whisk together the cocoa powder, all-purpose flour, salt, and baking powder.
Add the dry mixture to the butter and egg mixture. Use a spatula to fold everything together until you no longer see dry flour.
Don’t keep mixing once the ingredients come together. Overmixing can make brownies tougher than you want.
Fold in the semi-sweet chocolate chips, spreading them evenly through the batter.
Step 5: Spread the Batter in the Pan
Time: 2 minutes
Scrape the batter into your prepared pan and spread it into an even layer with a spatula.
The batter will feel thicker than a typical cake batter. That’s normal, so resist the temptation to add extra liquid.
Gently tap the pan on the counter once or twice to help settle the batter.
Step 6: Bake Until the Center Sets
Time: 25–32 minutes
Place the pan on the middle oven rack and bake for 25–32 minutes.
Start checking at the 25-minute mark. The edges should look set, while the center should remain slightly soft. Insert a toothpick into the middle; it should come out with a few moist crumbs, not a coating of raw batter.
Don’t wait for the toothpick to come out completely clean. That usually means you’ve baked away some of the fudgy texture.
Remember that ovens vary, so use the appearance of the brownies as your guide rather than relying only on the timer.
Step 7: Cool the Brownies Completely
Time: 45–60 minutes
Remove the pan from the oven and place it on a cooling rack.
Let the brownies cool completely before decorating them. Warm brownies will melt the white chocolate, making the spiderwebs run into messy white patches.
If you’re preparing these for a party the next day, let them cool, cover the pan, and store the undecorated brownies in an airtight container at room temperature.
Step 8: Melt the White Chocolate
Time: 2–3 minutes
Place the white chocolate in a dry, microwave-safe bowl. Heat it in 15-second intervals, stirring between each interval until it melts smoothly.
White chocolate can scorch easily, so don’t heat it continuously for a long time.
If the melted chocolate feels too thick to pipe, stir in a small amount of neutral vegetable oil. Add only enough to make it flow easily.
Transfer the chocolate to a piping bag or a small zip-top bag. Snip off a tiny corner to create a narrow opening.
Step 9: Draw the Spiderwebs
Time: 5–7 minutes
Start by piping several thin concentric circles over the cooled brownies. Space the circles evenly, but don’t worry if they’re not perfect.
Next, drag a toothpick from the center outward through the circles at regular intervals. Wipe the toothpick between strokes if chocolate builds up on it.
This motion creates the classic spiderweb pattern. For a more decorative look, make some lines thicker than others or add a few small chocolate spiders using dark chocolate.
Work at a comfortable pace. If the white chocolate starts to harden inside the piping bag, gently warm it again in short intervals.
Step 10: Cut and Serve
Time: 5 minutes
Allow the chocolate decoration to set before cutting the brownies.
Use the parchment overhang to lift the brownie slab from the pan. With a sharp knife, cut it into 16 squares.
For neat edges, wipe the knife with a warm, damp cloth between cuts and dry it before slicing again.
Arrange the brownies on a platter, add a few Halloween sprinkles around the edges, and serve. Your spooky chocolate dessert is ready for the party!
Pro Tips & Tricks
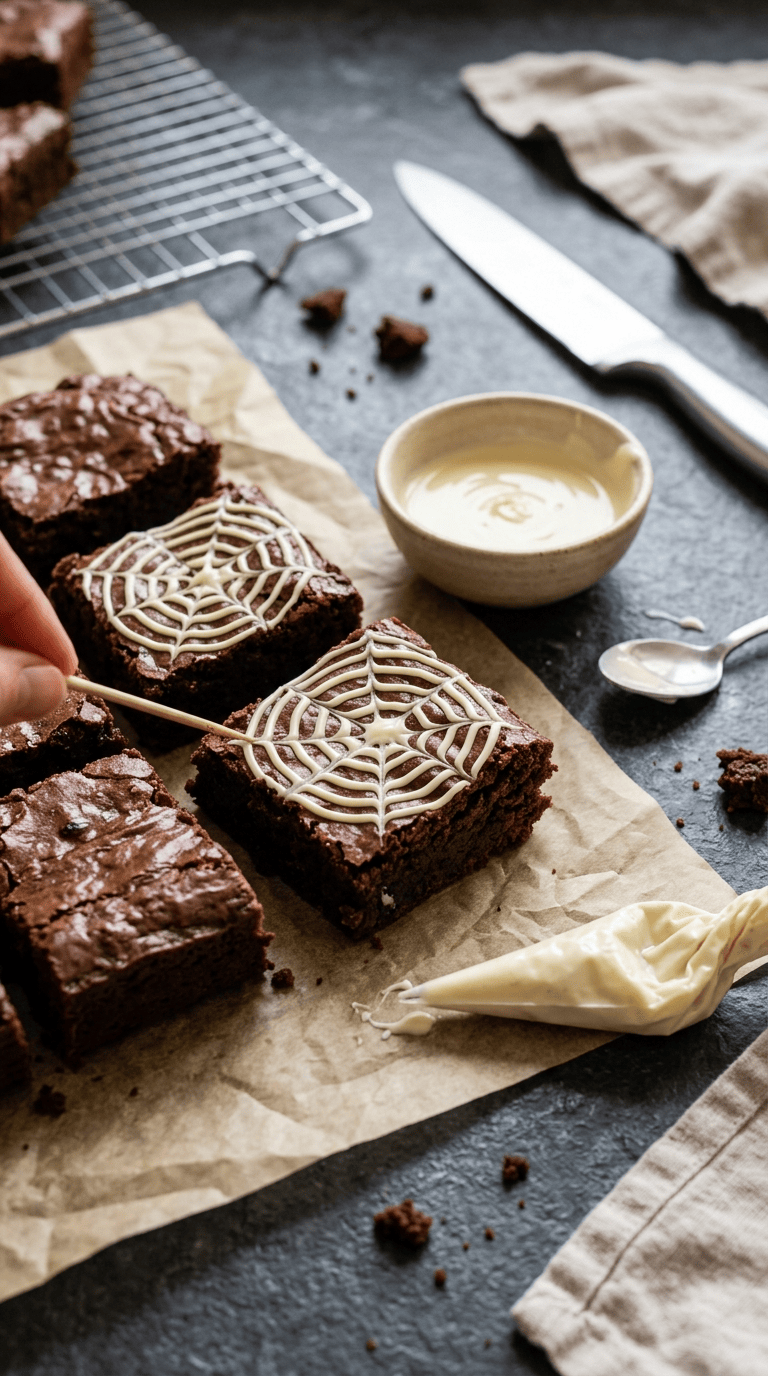
A few simple tricks can make the difference between brownies that taste wonderful and brownies that look as good as they taste.
Don’t Overbake the Brownies
The most common brownie mistake is leaving the pan in the oven until the center looks completely dry.
Brownies continue cooking slightly after you remove them from the oven. Pull them out when the edges have set and the center still looks a little soft.
If your oven runs hot, begin checking a few minutes early.
Let the Brownies Cool Before Decorating
This tip saves a surprising amount of frustration.
White chocolate melts quickly when it touches a warm surface. If you pipe the spiderwebs too soon, the lines may spread and lose their shape.
Give the brownies enough time to cool completely. If necessary, let them sit longer before decorating.
Use a Small Opening in Your Piping Bag
Thick chocolate lines can cover the brownie surface and hide the spiderweb pattern.
Snip off just a tiny corner of the bag. You can always make the opening larger later, but you can’t make it smaller once you’ve cut too much.
If you don’t have a piping bag, a zip-top bag works perfectly well.
Make the Brownies Ahead
You can bake the brownies one day before your Halloween party. Once they cool, store them in an airtight container at room temperature.
For the best appearance, decorate them on the day you plan to serve them or the evening before. Keep the finished brownies covered and away from warm areas.
Use Parchment Paper for Easier Cutting
Greasing the pan alone may not make it easy to remove thick brownies.
Parchment paper with overhanging edges gives you handles for lifting the entire slab out of the pan. This also makes it easier to cut clean squares without scraping the bottom of your baking pan.
Don’t Worry About Perfect Spiderwebs
Your spiderwebs don’t need to look like they came from a professional bakery.
If the lines wobble a little, the brownies will still look festive. You can even turn an imperfect web into a spooky design by adding a chocolate spider or extra white chocolate dots.
Variations & Substitutions
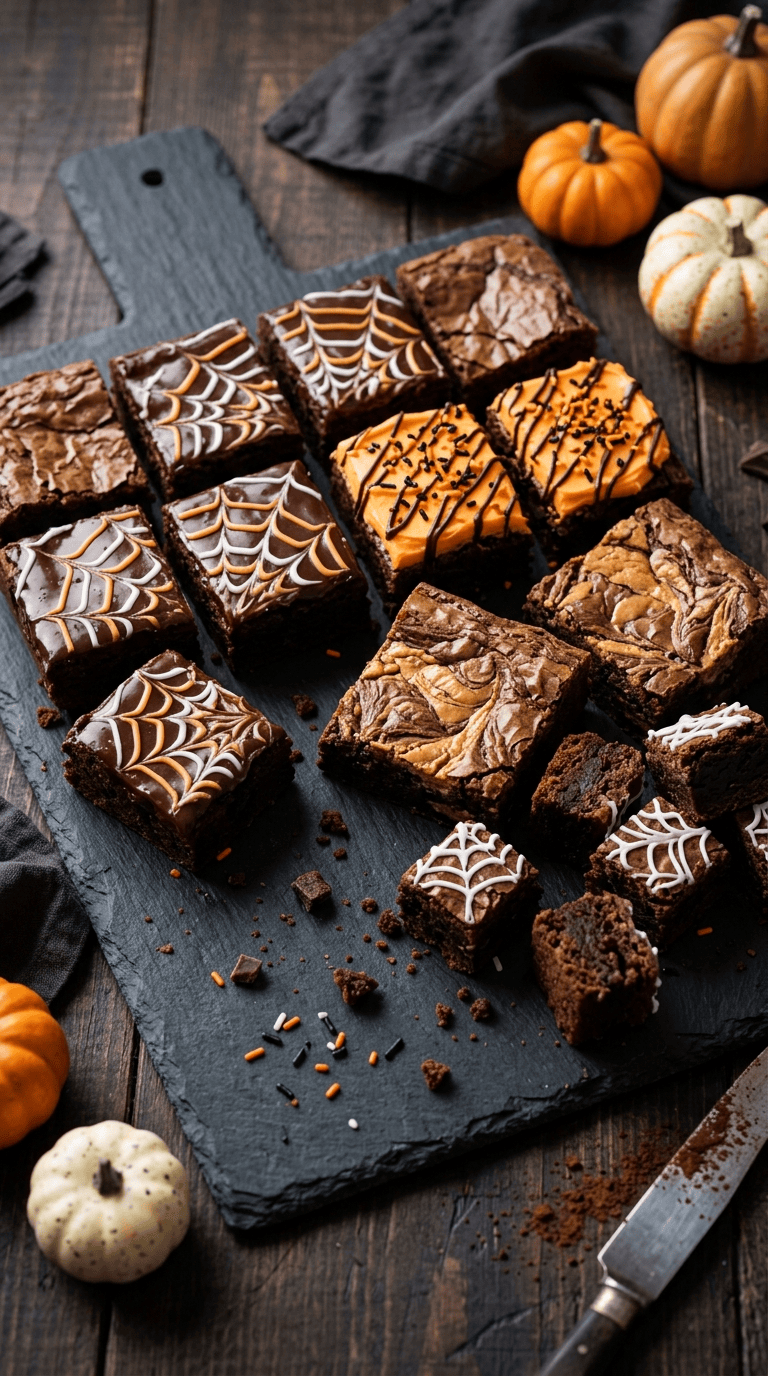
One reason I enjoy making Halloween brownies is how easily you can change the decoration and flavor without learning an entirely new recipe.
1. Orange and Black Halloween Brownies
For a classic Halloween color combination, add orange candy melts or orange-colored white chocolate alongside the white chocolate.
Pipe orange and white circles over the brownies, then drag a toothpick through the lines to create a two-color spiderweb.
You can also sprinkle a few black or orange Halloween sprinkles over the top. Use food coloring designed for chocolate if you plan to tint melted white chocolate, because ordinary water-based coloring can make it seize.
2. Peanut Butter Swirl Brownies
If you love chocolate and peanut butter together, gently warm ¼ cup of creamy peanut butter until it becomes easy to drizzle.
Drop small spoonfuls over the brownie batter before baking, then swirl the peanut butter through the top with a knife.
Bake as directed, checking the center for doneness. Let the brownies cool completely before adding your spiderweb decoration.
If you’re serving guests with food allergies, clearly label the peanut butter version and keep it separate from other desserts.
3. Dairy-Free Halloween Brownies
You can adapt the recipe with dairy-free baking ingredients.
Use a plant-based butter alternative suitable for baking, dairy-free chocolate chips, and dairy-free white chocolate or a suitable decorating alternative.
Check each package carefully because ingredients and allergen warnings vary by brand. The texture may differ slightly from brownies made with regular butter, so avoid changing several ingredients at once.
4. Halloween Brownie Bites
For a party with lots of finger foods, cut the cooled brownies into 25 smaller squares instead of 16.
Make smaller spiderwebs over each piece, or decorate only a few and serve the rest with orange and black sprinkles.
Smaller portions are convenient for dessert tables where guests want to sample several treats.
Serving Suggestions

These spiderweb brownies make an excellent centerpiece for a Halloween dessert table, but you can make the presentation even more fun with a few simple additions.
Serve Them on a Dark Platter
A black, charcoal, or dark wooden serving tray makes the white chocolate spiderwebs stand out. Arrange the brownies in neat rows or place them in a loose pile for a more casual party look.
Add a few food-safe Halloween decorations around the platter, keeping non-edible decorations away from the food itself.
Pair Them With Other Halloween Treats
Brownies pair beautifully with a variety of sweet snacks, including:
-
Chocolate-covered strawberries decorated like little monsters.
-
Pumpkin-shaped sugar cookies.
-
Popcorn mixed with candy-coated chocolates.
-
Mini cupcakes with orange frosting.
-
Caramel apples cut into easy-to-eat slices.
You don’t need to prepare every dessert yourself. One homemade centerpiece alongside a few simple store-bought treats can make a party spread look generous without keeping you in the kitchen all day.
Offer Drinks to Balance the Chocolate
Serve the brownies with cold milk, hot chocolate, coffee, or apple cider. For a children’s Halloween party, a colorful fruit punch adds a festive touch.
If you serve hot drinks, keep them in a separate area from children’s activities and the dessert table.
Make Them Part of a Halloween Movie Night
Cut the brownies into smaller squares and arrange them on individual plates. Serve them alongside popcorn and your favorite Halloween movie.
This setup works especially well when guests want something sweet they can grab without interrupting the fun.
FAQ’s
Can I Make Halloween Spiderweb Brownies the Day Before a Party?
Yes! Bake the brownies a day ahead, let them cool completely, and store them in an airtight container at room temperature in a cool place.
You can decorate them the same day you bake them or wait until the next day. Decorating closer to serving time can help the spiderwebs look fresh and tidy.
How Should I Store Leftover Halloween Brownies?
Keep the brownies in an airtight container at room temperature for about 3–4 days, provided your kitchen stays cool and the ingredients and storage conditions allow it.
If your kitchen becomes very warm, store them in the refrigerator. Refrigeration can make brownies firmer, so allow them to sit at room temperature briefly before serving.
Discard brownies if you notice mold, unusual odors, or other signs of spoilage.
Can I Freeze Spiderweb Brownies?
Yes, you can freeze the brownies, although the decoration may not look quite as perfect after thawing.
For the best appearance, freeze the undecorated brownie slab or individual portions in a freezer-safe container with parchment between the layers. Use them within about 2–3 months for good quality.
Thaw them in the refrigerator or at room temperature while covered, then add fresh spiderweb decorations if needed.
How Do I Keep My Brownies Fudgy Instead of Dry?
Measure the flour accurately, avoid overmixing the batter, and check the brownies before the maximum baking time.
A few moist crumbs on a toothpick usually indicate that the brownies have reached the right stage. A toothpick covered in wet batter means they need more time.
Also, remember that brownies firm up as they cool, so don’t judge their final texture while they’re still hot.
What Can I Use Instead of White Chocolate for the Spiderwebs?
You can use white candy melts, which often make decorating easier because they melt smoothly and set firmly.
For a different look, pipe dark chocolate spiderwebs over a light-colored drizzle or use orange candy melts for a Halloween-inspired design.
Choose a decorating ingredient that pipes easily through a small opening and sets before you cut the brownies.
Can I Make These Brownies Without a Piping Bag?
Absolutely. Put the melted chocolate into a small zip-top bag and snip off one tiny corner.
You can also use a spoon to drizzle thin lines over the brownies, although the spiderweb pattern may look less precise. If you don’t have a toothpick, a thin wooden skewer works well for dragging lines through the circles.
Why Did My White Chocolate Become Thick or Grainy?
White chocolate can overheat or seize when moisture gets into it.
Use a completely dry bowl and spoon, heat the chocolate in short intervals, and stir frequently. If it becomes slightly thick but remains smooth, a little neutral oil may help loosen it.
If it turns grainy and stiff because moisture entered the bowl, it may not return to a smooth consistency suitable for delicate piping. Starting with a fresh batch is often the easiest solution.
Final Thoughts:
Halloween desserts don’t need complicated techniques or expensive ingredients to make an impression. A simple pan of chocolate brownies, a little melted white chocolate, and a few minutes of decorating can create something guests will remember.
I especially like this recipe for busy party days because you can prepare most of it in advance. Once the brownies cool, the spiderweb decoration adds the Halloween touch without turning dessert preparation into a big project.
Whether you’re hosting a family gathering, planning a school celebration, or putting together a spooky movie night, these spiderweb brownies deserve a place on your dessert table.
Give them a try, have fun with the decorations, and don’t worry if every spiderweb looks a little different. Sometimes those imperfect homemade touches make party desserts even more charming.
If you make these Halloween spiderweb brownies, share how they turned out and tell me which decorations you used. I’d love to hear how you made them your own!
Leave a Reply
You must be logged in to post a comment.