

A Sweet Little Halloween Tradition
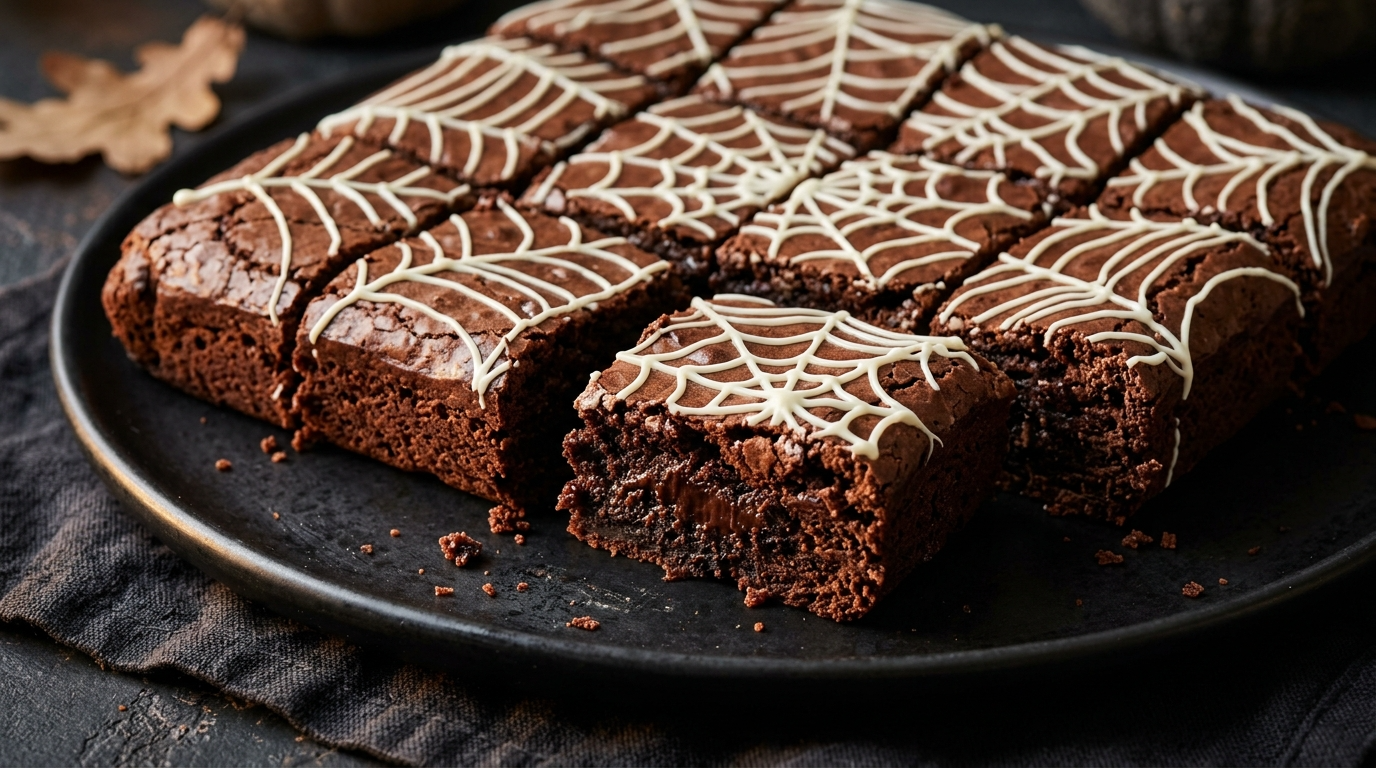
Every Halloween party needs a dessert that looks spooky but tastes absolutely delicious. I always lean toward chocolate treats because, honestly, it’s hard to go wrong with a rich, fudgy brownie. Add a few white chocolate spiderwebs, and suddenly an everyday dessert looks ready for a Halloween celebration.
These Halloween spiderweb brownies are one of my favorite dessert ideas for parties. They use simple ingredients, require no special decorating skills, and look impressive on a dessert table. You can make them for a family gathering, a school party, or a Halloween movie night with friends.
The first time I decorated brownies with white chocolate, I made the lines far too thick. They looked more like random circles than spiderwebs! After a little practice, I discovered that a tiny piping hole and a toothpick make the job much easier.
The secret is to keep things simple. You don’t need perfect decorations or expensive baking equipment. A good brownie recipe, melted white chocolate, and a little creativity are all you need.
Why You’ll Love These Halloween Spiderweb Brownies

-
Easy to make: Simple ingredients and beginner-friendly steps make this recipe approachable.
-
Perfect for parties: Cut the brownies into squares, arrange them on a platter, and let everyone grab one.
-
Budget-friendly: Use pantry staples or save time with a boxed brownie mix.
-
Fun to decorate: Kids and adults can help create the spiderweb patterns.
-
Make-ahead friendly: Bake the brownies a day before your Halloween celebration to save time.
Another thing I love about this dessert is how easy it is to customize. You can add orange sprinkles, candy eyes, or tiny chocolate spiders to match your party theme.
Ingredients for Halloween Spiderweb Brownies

This recipe makes 12 brownies and uses an 8-inch square baking pan.
For the Brownies
-
1/2 cup (113 g) unsalted butter, melted
-
1 cup (200 g) granulated sugar
-
2 large eggs
-
1 teaspoon vanilla extract
-
1/3 cup (30 g) unsweetened cocoa powder
-
1/2 cup (65 g) all-purpose flour
-
1/4 teaspoon salt
-
1/4 teaspoon baking powder
For the Spiderweb Decoration
-
1/2 cup (85 g) white chocolate chips or chopped white chocolate
-
1/2 teaspoon vegetable oil, if needed
-
2 tablespoons Halloween sprinkles, optional
-
12 pairs of candy eyes, optional
-
12 mini chocolate candies, optional, for little spider decorations
Helpful Ingredient Swaps
You can use salted butter instead of unsalted butter. Simply reduce the added salt to suit your taste.
If you don’t have white chocolate chips, finely chopped white chocolate works well. Orange candy melts also make a fun Halloween decoration.
For a shortcut, use a boxed brownie mix and follow the package instructions. Let the brownies cool completely before adding the spiderweb design.
Step-by-Step Instructions
Step 1: Prepare the Baking Pan
Time: 5 minutes
Preheat your oven to 350°F (175°C).
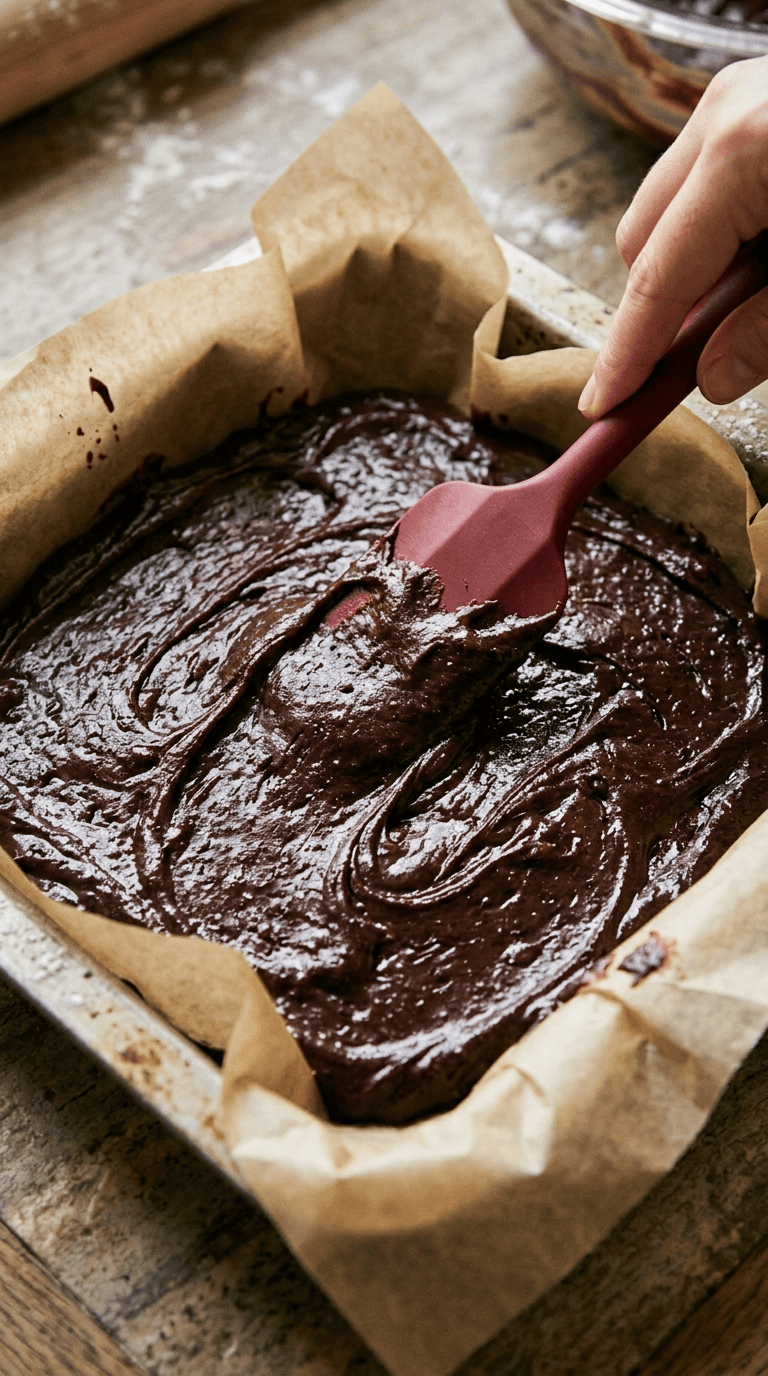
Line an 8-inch square baking pan with parchment paper. Leave a little paper hanging over two sides so you can lift the brownies out easily.
Lightly grease any exposed areas of the pan. This small step helps prevent sticking and makes cleanup easier.
Gather your ingredients before starting. Brownie batter comes together quickly, so measuring everything first helps you avoid rushing.
Step 2: Mix the Butter, Sugar, and Eggs
Time: 3 minutes
Place the melted butter and sugar in a medium mixing bowl. Whisk until combined.
Add the eggs and vanilla extract. Whisk for about 30–60 seconds, until the mixture looks smooth and slightly glossy.
Let the butter cool a little before adding the eggs. Very hot butter can partially cook them, which may affect the texture.
You don’t need an electric mixer for this recipe. A regular whisk and a sturdy mixing bowl work perfectly well.
Step 3: Add the Dry Ingredients
Time: 2 minutes
Add the cocoa powder, flour, salt, and baking powder to the wet mixture.
Use a spatula or wooden spoon to fold everything together. Stop mixing once you no longer see dry flour.
The batter should look thick, dark, and chocolatey. Avoid overmixing, because too much mixing can make the brownies tougher.
If you’re used to making cake batter, don’t worry when this mixture looks thicker. Brownie batter usually has a denser consistency.
Step 4: Bake the Brownies
Time: 20–25 minutes
Spread the batter evenly in the prepared pan. Smooth the top with a spatula.
Bake for 20–25 minutes, checking the brownies at the 20-minute mark.
Insert a toothpick into the center. It should come out with a few moist crumbs rather than wet batter.
If the toothpick comes out covered in liquid batter, bake for another 2–3 minutes before checking again.
Don’t wait until the toothpick looks completely clean. That can mean you’ve overbaked the brownies, leaving them dry instead of fudgy.
Step 5: Let the Brownies Cool
Time: 30–45 minutes
Remove the pan from the oven and place it on a wire cooling rack.
Allow the brownies to cool completely before decorating them. The center should feel cool rather than warm when you touch it gently.
This step makes a big difference. If you add white chocolate while the brownies are warm, the chocolate may melt and spread instead of forming neat lines.
Once cool, lift the brownies out using the parchment paper and place them on a cutting board.
Step 6: Melt the White Chocolate
Time: 2–3 minutes
Place the white chocolate in a microwave-safe bowl.
Heat it in 15-second intervals, stirring after each interval. Continue until the chocolate melts and becomes smooth.
White chocolate burns easily, so don’t rush this step. Stop heating when a few small pieces remain and stir until the residual heat melts them.
If the chocolate feels too thick for piping, stir in a little vegetable oil. Start with 1/2 teaspoon and add more only if necessary.
Transfer the melted chocolate into a piping bag or a small zip-top bag. Snip a tiny corner from the bag to create a narrow opening.
Step 7: Create the Spiderweb Pattern
Time: 5–10 minutes
Pipe a small circle of white chocolate in the center of the brownie slab. Draw two or three larger circles around it.
Take a toothpick and gently drag it from the center toward the outer edge. Repeat around the circles, spacing the lines evenly.
The chocolate will pull into a spiderweb pattern as you drag the toothpick through it.
Keep your lines thin. Thick lines can cover too much of the brownie and make the design harder to recognize.
If one line looks uneven, don’t worry. A slightly imperfect spiderweb still looks festive and homemade.
Let the chocolate set before cutting the brownies.
Step 8: Cut and Serve
Time: 5 minutes
Use a sharp knife to cut the brownie slab into 12 squares.
For cleaner edges, wipe the knife with a warm, damp cloth between cuts, then dry it before using it again.
Add candy eyes or mini chocolate spiders if you want extra decorations. You can also scatter a few orange sprinkles around the edges.
Arrange the brownies on a serving platter, and your Halloween dessert is ready.
Pro Tips and Tricks
1. Avoid Overbaking
The easiest way to ruin a good brownie is to leave it in the oven too long.
Check the center a few minutes before the suggested baking time ends. Remember that the brownies will continue to firm up as they cool.
2. Keep the Piping Hole Small
A small opening gives you better control over the white chocolate.
Start with a tiny cut in your piping bag. If the chocolate won’t flow, make the opening slightly larger.
You can always enlarge the hole, but you can’t make it smaller again without changing bags.
3. Decorate Only After Cooling
Warm brownies and melted chocolate don’t make a good decorating team.
Let the brownies cool completely before piping the spiderwebs. If your kitchen feels warm, allow extra cooling time.
4. Prepare Them Before Party Day
You can bake the brownies a day ahead and store them in an airtight container.
Decorate them once they’ve cooled, then keep them in a cool place away from direct sunlight and heat. This approach leaves you more time to prepare the rest of your Halloween menu.
5. Use Parchment for Easy Cutting
Parchment paper lets you lift the entire brownie slab out of the pan.
That makes decorating easier and helps you cut more even squares without scraping the bottom of the pan.
Variations and Substitutions
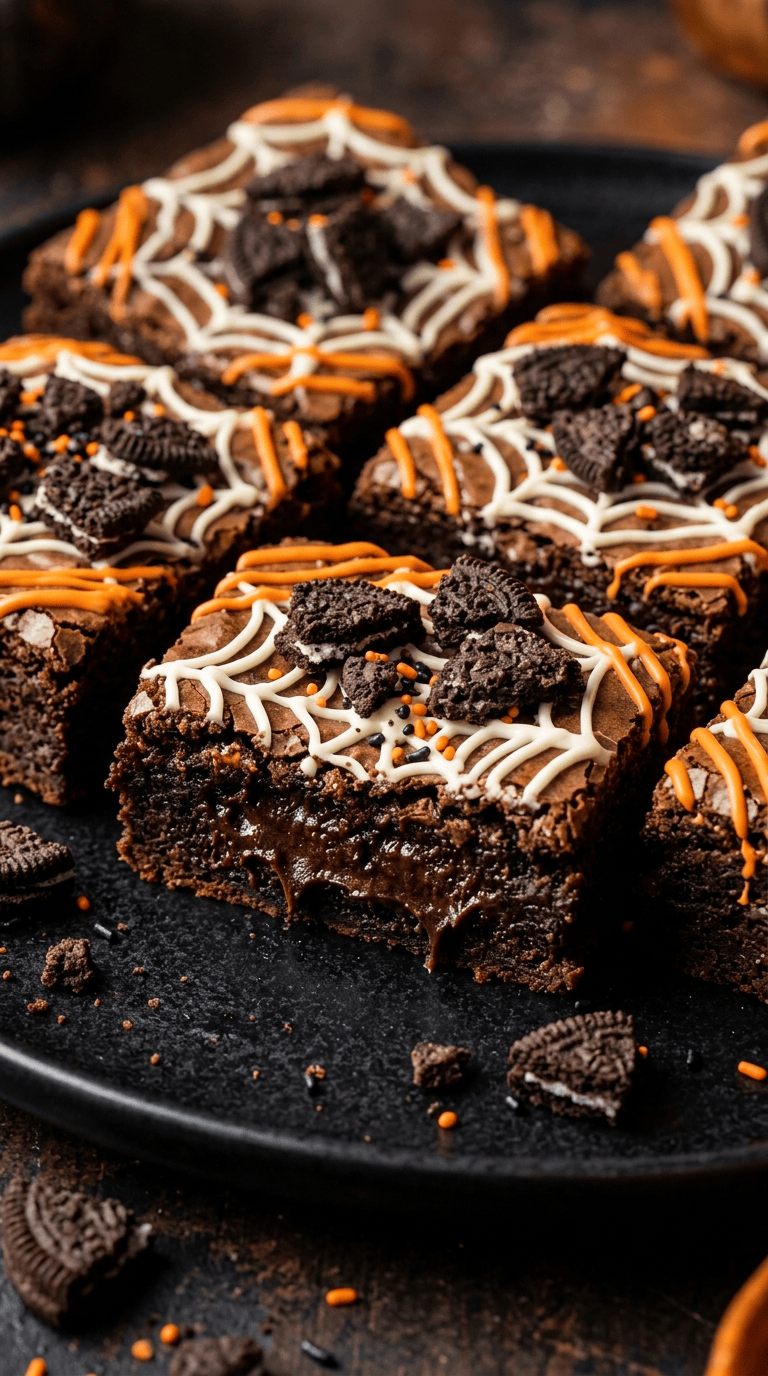
You can change the decorations and flavors to create a different Halloween dessert without learning a whole new recipe.
Orange and Black Halloween Brownies
Replace the white chocolate with orange candy melts. Once the orange layer sets, add a few black chocolate lines or Halloween sprinkles.
This version looks especially striking on a black serving platter.
Oreo Spiderweb Brownies
Crush four or five chocolate sandwich cookies and fold them into the brownie batter before baking.
You can also sprinkle cookie crumbs around the edges after decorating. They add a little crunch and extra chocolate flavor.
Peanut Butter Spiderweb Brownies
Drizzle a small amount of melted peanut butter over the cooled brownies before adding the white chocolate decoration.
You can create a peanut butter web or simply add a few thin lines. Keep the amount modest so it doesn’t overpower the chocolate flavor.
If you serve these at a party, clearly label the peanut butter variation because of potential food allergies.
Gluten-Free Brownies
Use a gluten-free brownie mix or a tested gluten-free brownie recipe. Follow the package or recipe directions, then use the same decorating technique.
Check the labels of your chocolate and decorations if you’re baking for someone with celiac disease or a serious food allergy.
Serving Suggestions

These brownies fit almost any Halloween gathering, from a casual movie night to a larger costume party.
Here are a few easy ways to serve them:
-
On a Halloween dessert table: Arrange them on a black platter with orange napkins and a few small decorative pumpkins.
-
At a school party: Place individual brownie squares in paper cupcake liners for easier serving.
-
During a movie night: Serve them with vanilla ice cream or a glass of cold milk.
-
At a dessert buffet: Pair them with sugar cookies, chocolate-dipped pretzels, or pumpkin-shaped treats.
-
For a children’s party: Let the kids choose candy eyes and sprinkles for their own brownie decorations.
For drinks, try apple cider, hot chocolate, cold milk, or a nonalcoholic Halloween punch.
If you’re taking the brownies to someone else’s house, arrange them in a sturdy container in a single layer. Let the chocolate decorations set completely before packing them to prevent smudges.
You can also cut them into smaller pieces if you’re serving several desserts. Smaller portions allow guests to sample more than one treat without wasting food.
FAQ’s
Can I make spiderweb brownies the day before a party?
Yes. Bake the brownies one day ahead, let them cool, and store them in an airtight container. You can decorate them that evening or the next day.
Keep the finished brownies away from heat and direct sunlight so the chocolate decorations hold their shape.
How do I store leftover Halloween brownies?
Store the brownies in an airtight container in a cool, dry place for up to three days, provided the ingredients and room conditions allow safe room-temperature storage.
If your kitchen is very warm, refrigerate them. Let refrigerated brownies sit at room temperature briefly before serving if you prefer a softer texture.
Can I freeze these brownies?
Yes. Freeze the cooled brownies in a freezer-safe container for up to two or three months for best quality.
For the neatest decoration, freeze the brownies without the spiderwebs. Thaw them while protected in their container, then decorate once they reach room temperature.
Can I use a boxed brownie mix?
Absolutely. Prepare the mix according to its package directions and bake it in the recommended pan.
Let the brownies cool completely before adding the white chocolate spiderwebs. This shortcut works especially well when you’re preparing several party desserts.
Why did my white chocolate become thick or grainy?
White chocolate can become thick if it overheats or comes into contact with water.
Heat it in short intervals and stir frequently. Make sure your bowl and utensils are dry.
If the chocolate has simply cooled and thickened, gentle reheating may help. If it has seized, it may no longer work well for fine piping.
How can I make neat spiderwebs without special tools?
Use a small zip-top bag instead of a piping bag. Fill it with melted white chocolate, snip off a tiny corner, and pipe the circles.
A regular toothpick works well for pulling the lines outward. You don’t need professional decorating tools to create a fun design.
Final Thoughts
Halloween desserts should be fun to make, easy to serve, and delicious enough that guests come back for another piece. These spiderweb brownies tick all three boxes without requiring complicated techniques or expensive ingredients.
I love that you can prepare the brownies ahead of time and decorate them in whatever style suits your party. Keep the classic white spiderwebs, add orange candy melts, or turn the brownies into little chocolate spiders.
Most importantly, don’t worry about making every detail perfect. A homemade Halloween dessert should look fun, taste delicious, and bring people together.
Give these spiderweb brownies a try for your next Halloween party. I’d love to hear which decorations you choose and how your batch turns out!
Leave a Reply
You must be logged in to post a comment.