
These cheesecake jars hit different. One bite of the creamy filling and you forget you just spent thirty minutes max. No oven, no stress, just pure party perfection in a jar you can grab and go.
I’ve made these for backyard BBQs, baby showers, and random Tuesday nights when I wanted dessert without the cleanup. They slice up clean, travel like champs, and look so fancy it makes people think you hired a chef. Plus, you can customize the heck out of them with whatever toppings you’ve got lying around.
Why Cheesecake Jars Crush It for Parties

You know those parties where everyone raids the dessert table, and you’re stuck cutting slices? Not with these. Each jar holds one perfect portion, so guests dig right in. They look cute stacked on a tray, they stay cool without melting, and you can prep them hours ahead.
I love how the individual size stops anyone from going overboard and ruining the dessert for everybody. IMO, nothing beats the fun of watching guests swirl their own toppings like it’s a salad bar. They even survive picnics and potlucks because nothing leaks in sealed jars.
Plus, the no-bake part means you stay cool in the kitchen while the party heats up outside. These jars turn ordinary gatherings into something everyone talks about long after the last bite.
Ingredients You Need for Six Jars

You don’t need a fancy list or a trip to the specialty store. Everything works with stuff most people already have.
Grab these basics, and you’re set:
- 2 tablespoons unsalted butter, melted
- 1 cup graham cracker crumbs (about 8 crackers)
- 1 cup heavy cream, straight from the fridge
- 8 ounces full-fat cream cheese, softened to room temperature
- ⅓ cup granulated sugar
- 2 tablespoons sour cream, at room temperature
- 1 teaspoon fresh lemon juice
- ½ teaspoon pure vanilla extract
That’s it for the base. For toppings, you can go wild: fresh berries, chocolate sauce, lemon curd, crushed cookies, or even a drizzle of caramel. The beauty is the flexibility. I keep a few topping options in the fridge so I’m never scrambling at the last minute.
Step-by-Step: Assemble Your Crust in Record Time
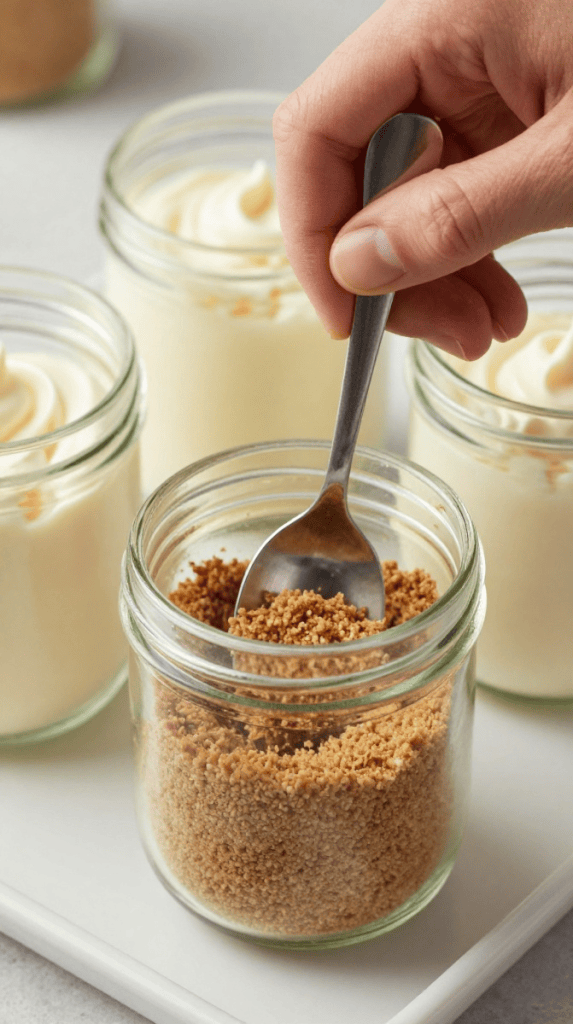
Start simple. Melt the butter in the microwave for ten seconds or on the stove. Stir in the graham cracker crumbs until the mix looks like wet sand. This is your crust, and it smells way better than it sounds.
Spoon about 2 tablespoons of the crumb mix into each 8-ounce jar. Use the back of a spoon or your fingers to press it firmly into the bottom. Don’t skip this step or the filling will slide around later. Leave a small lip at the top so the layers stack nicely.
Pro tip: Have all your jars lined up before you start. It makes the rest way less stressful. These little presses add that perfect texture and hold everything together without any fancy equipment.
Whip Up the Dreamy Filling That Actually Tastes Homemade
The magic happens here. Whip the cold heavy cream with a hand mixer until you hit stiff peaks. That takes just three to four minutes and feels like cheating. You’ll have this airy, voluminous cream that makes the whole dessert feel fancy.
While that whips, beat the softened cream cheese, sugar, sour cream, lemon juice, and vanilla until everything is smooth and no lumps remain. I usually go medium-high speed for two full minutes. It should look like the creamiest cloud you’ve ever seen.
Now comes the gentle step. Fold the whipped cream into the cream cheese mixture in three batches. Use a spatula and go slow so you don’t deflate the air. The result? A cheesecake filling that’s light, fluffy, and actually tastes like real cheesecake instead of something you bought from the store.
Quick Tips for Perfect Folding

- Work in a big enough bowl so you don’t spill the volume.
- If your cream cheese isn’t room temperature, the lumps will fight you.
- Use full-fat cream cheese for the richest texture. Light versions turn watery.
- Make sure your heavy cream is ice cold. Warm cream = wonky peaks.
Layer It Up and Chill Like a Pro

Spoon the filling on top of the crust in each jar. Aim for about ¼ cup per jar. Don’t press it down hard. Just let it settle. You want that pretty little space at the top for your topping.
Pop the jars in the fridge for at least thirty minutes. Longer than that and the filling firms up just right. I like to make the whole batch ahead and let them chill while I set up the party bar. When guests arrive, you can grab one and add toppings on the spot. Pure theater.
They hold up beautifully in the fridge for up to three days, so you have time to throw a party and still have leftovers.
Party-Perfect Toppings That Take It Over the Top
This is where the fun starts. Keep a few bowls out and let people build their own. I go for a mix of tart and sweet so nobody gets bored.
Classic berry combos work every time: fresh strawberries sliced thin, blueberries, and a sprinkle of mint. For something extra, drizzle on some lemon curd or chocolate ganache made from melted chocolate and cream. Crushed Oreos on top? Yes, please. Caramel sauce from the jar? Instant win.
People love making their own. It turns the dessert into an activity. Kids get excited about choosing the colors. Adults pretend they’re baristas. And the best part? Everything stays neat because the jar design keeps the layers separate until the very last second.
Make-Ahead Strategies That Keep You Chill

Want to be the hero of the party? Assemble everything except the final toppings ahead. Crust and filling can sit in the fridge for two days, no problem. Just grab them out thirty minutes before serving and add the fun stuff right there.
If you’re feeding a crowd, prep the jars on trays the night before and cover with plastic wrap. They look fancy even cold. When the party kicks off, you’re ready to roll. No last-minute sweat, no oven chaos, just smiles all around.
I always keep extra topping bowls on hand. Guests get creative, the dessert looks Instagram-ready, and you actually have time to enjoy the night too.
FAQ’s
How far in advance can I make these cheesecake jars?
You can assemble the crust and filling up to two days ahead and keep them in the fridge. Add the toppings right before guests arrive so the berries stay fresh. They stay perfect for three days total, which gives you plenty of time for parties without rushing.
Can I use different jars or sizes?
Absolutely. Smaller 4-ounce jars work great for bite-size portions or kids. Larger 8-ounce ones are ideal for big appetites. The recipe scales easily, so just adjust the amounts to match your jar size and you’re good to go.
Are these jars gluten-free?
Yes, if you swap the graham cracker crumbs for your favorite gluten-free alternative. The rest of the recipe stays the same, so you get the creamy filling without missing a beat. Many people love the texture difference in the crust.
How do I store leftovers?
Keep the jars sealed in the fridge for up to three days. The filling holds its shape perfectly. When you’re ready to eat, let them sit out for ten minutes so the layers separate nicely. Just add a fresh topping before serving again.
What if I don’t have a hand mixer?
No problem. Use a stand mixer if you have one. Or grab a whisk and some elbow grease. A balloon whisk works surprisingly well for the cream and cream cheese. The important part is mixing until smooth. It takes a couple extra minutes, but you still end up with restaurant-quality results.
Can kids help make these?
Yes! Let them help crush the graham crackers or stir the topping. They get excited about choosing berries and feeling the texture. It turns a simple dessert into a bonding activity that everyone remembers.
Why These Jars Are My Go-To Party Dessert
After years of making desserts that either burn the house down or leave a sink full of dishes, these cheesecake jars became my secret weapon. They deliver creamy, tangy perfection with zero hassle. You get individual servings, beautiful presentation, and endless customization options.

