

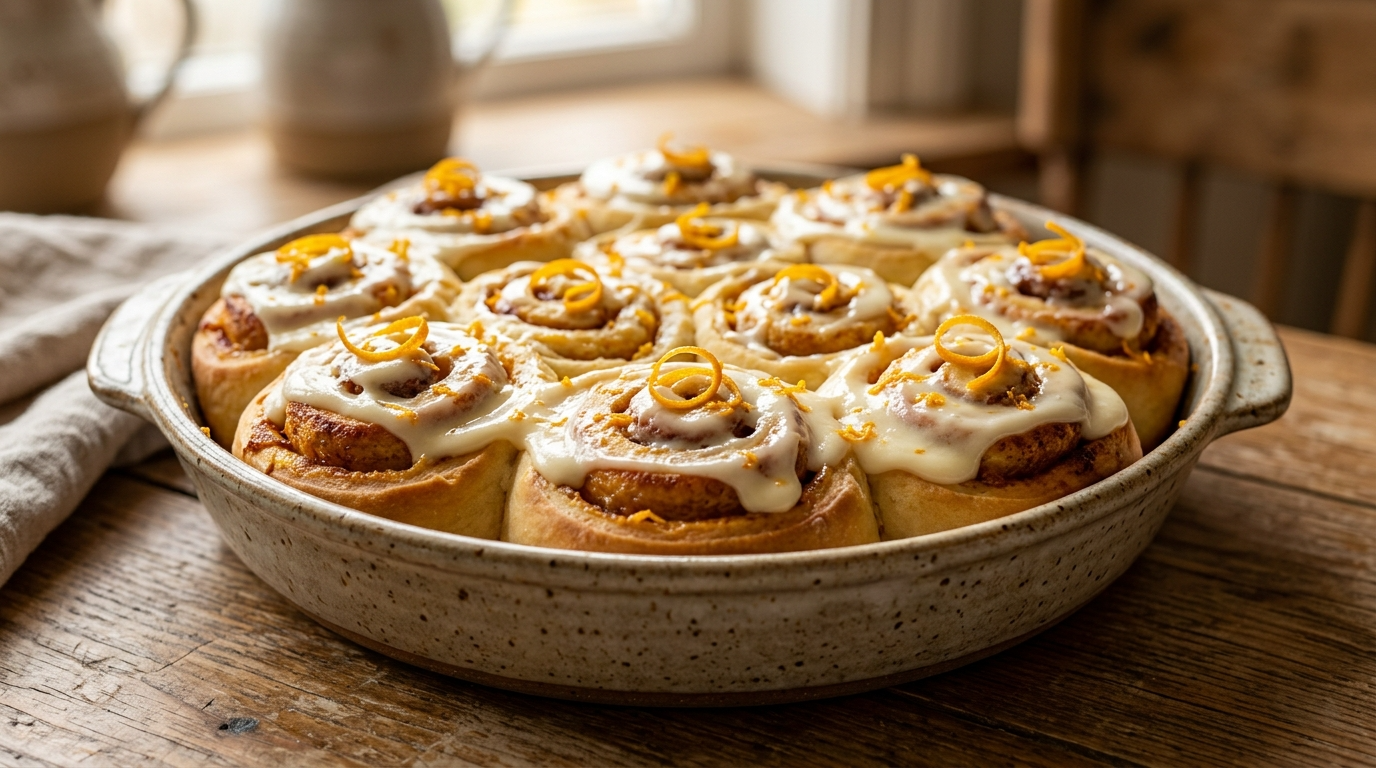
The first time I made orange rolls, I expected them to taste like cinnamon rolls with a little orange flavor thrown in. I was very wrong—in the best possible way.
The kitchen smelled like fresh orange zest, warm butter, and sweet yeast dough. I pulled the pan from the oven, spread the cream cheese frosting over the warm rolls, and watched it slowly melt into all those soft swirls. One bite later, I knew I had found a breakfast recipe worth repeating.
I have made these rolls quite a few times since then, and I have learned one important lesson: do not rush the dough. I once tried to hurry the rising time because everyone was waiting for breakfast. The rolls still tasted good, but they lacked that fluffy, cloud-like texture I wanted. Now I give the dough plenty of time to rise, and the difference is huge.
These orange rolls feel special enough for a holiday breakfast but simple enough for a lazy Sunday morning. The fresh citrus keeps them from tasting overly heavy, while the cream cheese frosting adds that rich, tangy finish that makes it nearly impossible to stop at one.
Why You’ll Love This Recipe

- Fresh orange flavor: Real orange zest and juice give the rolls a bright citrus taste.
- Soft and fluffy: The enriched yeast dough bakes up tender and pillowy.
- Creamy frosting: The cream cheese topping melts beautifully over warm rolls.
- Perfect for sharing: One baking dish makes enough for breakfast guests or family.
- Make-ahead friendly: You can prepare the rolls ahead and bake them when you need them.
- Cozy but refreshing: They have all the comfort of homemade sweet rolls without feeling quite as heavy.
Ingredients

For the Orange Roll Dough
- ¾ cup warm whole milk
- 2¼ teaspoons active dry yeast
- ¼ cup granulated sugar
- 1 large egg
- ¼ cup unsalted butter, melted and slightly cooled
- 1 tablespoon fresh orange zest
- 2 tablespoons fresh orange juice
- ½ teaspoon salt
- 3 to 3½ cups all-purpose flour
For the Orange Filling
- ½ cup unsalted butter, softened
- ¾ cup packed light brown sugar
- 1½ tablespoons fresh orange zest
- 2 tablespoons fresh orange juice
- ½ teaspoon vanilla extract
For the Cream Cheese Frosting
- 4 ounces cream cheese, softened
- 3 tablespoons unsalted butter, softened
- 1½ cups powdered sugar
- 1 teaspoon fresh orange zest
- 1½ tablespoons fresh orange juice
- ½ teaspoon vanilla extract
- Pinch of salt
A Few Ingredient Notes
Use fresh oranges whenever possible. Bottled orange juice works in a pinch, but fresh zest gives these rolls much more personality.
For the flour, start with 3 cups rather than dumping the entire amount into the bowl. Depending on the humidity and the size of your measuring cups, you may need another ½ cup.
I usually use whole milk because it creates a richer dough, but 2% milk works perfectly well.
For the cream cheese, full-fat block-style cream cheese gives the smoothest frosting. Avoid the soft spreadable kind sold in tubs if you want a thick frosting.
Step-by-Step Instructions

1. Wake Up the Yeast — 5 Minutes
Pour the warm milk into a large mixing bowl.
The milk should feel comfortably warm when you touch it, not hot. If it feels like bathwater, you’re in the right neighborhood.
Stir in the granulated sugar and active dry yeast. Let the mixture sit for about 5 minutes.
You should see a light layer of foam developing on top. That tells you the yeast has started working.
If nothing happens, check your yeast before continuing. Dead yeast means dense rolls, and nobody invited dense rolls to breakfast.
2. Mix the Wet Ingredients — 3 Minutes
Add the egg, melted butter, orange zest, orange juice, and salt to the yeast mixture.
Whisk everything together until the mixture looks smooth.
The orange zest will already make the kitchen smell fantastic. That’s your first warning that you might eat one straight from the pan.
3. Add the Flour — 5 Minutes
Add 3 cups of flour gradually, mixing after each addition.
Once the dough starts coming together, transfer it to a lightly floured counter if you’re kneading by hand.
Knead for about 7–9 minutes.
If you use a stand mixer fitted with a dough hook, knead on low to medium-low speed for about 5–6 minutes.
The dough should feel soft and slightly tacky but shouldn’t cling heavily to your fingers.
Add the remaining flour, 1 tablespoon at a time, only if the dough feels excessively sticky.
You want a soft dough rather than a stiff one. Too much flour can make the finished rolls heavy.
4. Let the Dough Rise — 60–90 Minutes
Place the dough in a lightly greased bowl.
Turn it once so the surface gets a thin coating of oil or butter.
Cover the bowl with plastic wrap or a clean kitchen towel and place it somewhere warm.
Let the dough rise for about 60–90 minutes, or until it doubles in size.
The exact timing depends on your kitchen temperature. On a chilly day, mine sometimes takes closer to 90 minutes.
Don’t judge the dough by the clock alone. Judge it by its size.
5. Make the Orange Filling — 5 Minutes
While the dough rises, mix the softened butter, brown sugar, orange zest, orange juice, and vanilla in a small bowl.
Stir until you get a soft, spreadable mixture.
The filling should feel easy to spread but shouldn’t be runny.
If your butter feels too firm, let it sit at room temperature for a little longer instead of melting it completely.
6. Roll Out the Dough — 5 Minutes
Once the dough has doubled, gently punch it down to release excess air.
Transfer it to a lightly floured surface.
Roll it into roughly a 15 x 10-inch rectangle.
It doesn’t need to look perfectly measured. Mine certainly never does.
Try to keep the thickness fairly even so the rolls bake at the same rate.
7. Add the Orange Filling — 3 Minutes
Spread the orange filling evenly over the dough.
Leave a small border around the edges so the filling doesn’t squeeze out immediately when you roll everything up.
Take your time here. An even layer gives every roll a good amount of buttery orange sweetness.
8. Roll and Slice — 8 Minutes
Starting from one long side, roll the dough tightly into a log.
Don’t crush it, but don’t leave big air pockets either.
Use a sharp knife or unflavored dental floss to cut the log into 12 equal pieces.
Place the rolls cut-side up in a greased 9 x 13-inch baking dish.
Leave a little space between them because they’ll expand during the second rise.
9. Let the Rolls Rise Again — 30–45 Minutes
Cover the baking dish loosely and let the rolls rise again for 30–45 minutes.
They should look noticeably puffier and should begin touching each other.
This second rise makes a big difference.
I used to skip it when I was impatient. The rolls baked faster, sure, but they didn’t have the same soft, pull-apart texture.
10. Bake Until Golden — 22–27 Minutes
Preheat your oven to 350°F (175°C).
Bake the orange rolls for about 22–27 minutes.
Look for lightly golden tops and a center that looks cooked but still soft.
Don’t wait until the tops become deeply brown. Overbaking can dry out the rolls.
If the tops brown too quickly, loosely cover the baking dish with aluminum foil for the remaining baking time.
11. Make the Cream Cheese Frosting — 5 Minutes
While the rolls bake, beat the softened cream cheese and butter together until smooth.
Add the powdered sugar gradually.
Then mix in the orange zest, orange juice, vanilla, and a small pinch of salt.
Beat until creamy and smooth.
If you want a thinner glaze-like frosting, add another teaspoon of orange juice. If you want thicker frosting, add a little more powdered sugar.
12. Frost While Warm — 2 Minutes
Let the rolls cool for about 5–10 minutes after removing them from the oven.
Spread the cream cheese frosting over the warm rolls.
It should soften and melt slightly into the spirals without completely disappearing.
This is the moment when I usually make the mistake of “just tasting one.”
Somehow, that taste test has never stayed at one.
Pro Tips & Tricks

Use Fresh Orange Zest
The zest provides a concentrated orange flavor that orange juice alone can’t match.
When zesting, only grate the bright orange outer layer. Stop before you reach the white pith underneath because it can taste bitter.
Don’t Add Too Much Flour
This remains one of the biggest mistakes people make with homemade sweet rolls.
A little stickiness is okay. If you keep adding flour until the dough feels completely dry, you’ll probably end up with firmer rolls.
The dough should feel soft, elastic, and slightly tacky.
Give the Dough Enough Time
Your dough doesn’t know that you’re hungry.
If your kitchen runs cold, rising may take longer than the recipe’s estimated time. Look for the dough to double in size rather than forcing it to follow the clock.
Don’t Overbake
The rolls should look lightly golden, not deeply browned.
The centers should feel soft when you gently press them.
Remember that the rolls continue cooking slightly from residual heat after you remove them from the oven.
Frost Them While Warm
Warm rolls and cream cheese frosting belong together.
Wait a few minutes after baking so the frosting doesn’t instantly turn into a puddle, but don’t let the rolls cool completely before frosting.
Store Them Properly
Keep leftover orange rolls covered in the refrigerator because of the cream cheese frosting.
They should keep well for about 3–4 days.
For the best texture, warm individual rolls briefly in the microwave before serving.
Variations & Substitutions

Lemon-Orange Citrus Rolls
For a stronger citrus flavor, replace half of the orange zest with fresh lemon zest.
The lemon adds a little extra brightness without completely taking over the orange flavor.
Cranberry Orange Rolls
Add about ½ cup finely chopped dried cranberries to the filling before rolling the dough.
The tart cranberries pair beautifully with the sweet orange filling and cream cheese frosting.
For a holiday breakfast, this version looks especially pretty.
Nutty Orange Rolls
Sprinkle ½ cup finely chopped pecans or walnuts over the orange filling.
Press them gently into the filling before rolling the dough.
The nuts add a lovely crunch and make the rolls feel a little more bakery-style.
Dairy-Free Option
Use your favorite unsweetened plant-based milk and dairy-free butter.
For the frosting, use a dairy-free cream cheese alternative and dairy-free butter.
Keep in mind that different brands behave differently, especially when you make the frosting.
Gluten-Free Option
You can try a good-quality 1-to-1 gluten-free baking flour designed for yeast recipes.
Follow the flour manufacturer’s recommendations because gluten-free dough can behave differently from traditional wheat dough.
Serving Suggestions

These orange rolls make a beautiful weekend breakfast with a hot cup of coffee.
I especially like serving them with fresh fruit such as strawberries, blueberries, grapes, or sliced melon. The fruit adds a fresh contrast to the buttery rolls.
For brunch, pair them with scrambled eggs, crispy breakfast potatoes, or a simple yogurt-and-fruit bowl.
They’re also wonderful for:
- Christmas morning breakfast
- Easter brunch
- Mother’s Day breakfast
- Baby or bridal showers
- Weekend family breakfasts
- Holiday brunch tables
- Potluck breakfasts
- Afternoon coffee gatherings
If you’re serving them at a brunch buffet, keep the rolls in the baking dish and frost them shortly before serving.
For an extra pretty finish, sprinkle a little fresh orange zest over the frosting just before bringing them to the table.
FAQ’s
Can I Make Orange Rolls the Night Before?
Yes. Prepare the dough, fill it, roll it, and cut the rolls.
Place them in the greased baking dish, cover tightly, and refrigerate overnight.
The next morning, let the rolls sit at room temperature for about 45–75 minutes, depending on how cold your refrigerator is.
They should look puffy before you bake them.
Can I Freeze Orange Rolls?
Yes. You can freeze baked orange rolls for about 2–3 months when wrapped well.
For the best texture, freeze them without the cream cheese frosting.
Thaw them overnight in the refrigerator, warm them gently, and add fresh frosting before serving.
Why Did My Orange Rolls Turn Out Dense?
Several things can cause dense rolls.
You may have added too much flour, used inactive yeast, skipped enough rising time, or kneaded the dough incorrectly.
Start by checking your yeast and then focus on the dough texture. Keep it soft rather than stiff.
Can I Use Bottled Orange Juice?
Yes, but fresh orange juice gives the rolls a brighter flavor.
I strongly recommend using fresh orange zest even if you use bottled juice. The zest adds much more noticeable citrus aroma.
How Do I Reheat Leftover Orange Rolls?
Place one roll on a microwave-safe plate and warm it for about 10–15 seconds.
Add another few seconds if needed.
You want it warm and soft, not piping hot. Too much microwave time can make the dough chewy.
Can I Prepare the Frosting Ahead?
Absolutely.
Make the frosting up to 2–3 days ahead and keep it covered in the refrigerator.
Let it soften at room temperature before spreading it over the warm rolls.
Final Thoughts
There is something wonderfully old-fashioned about pulling a pan of homemade sweet rolls from the oven and watching everyone suddenly appear in the kitchen.
These orange rolls have become one of my favorite ways to make an ordinary morning feel a little more special. The dough stays soft, the orange filling brings a fresh citrus kick, and that creamy frosting ties everything together.
If your first batch doesn’t look bakery-perfect, don’t worry. Mine didn’t either. Homemade rolls have personality, and a slightly wonky swirl still tastes fantastic.
Give the dough time, don’t go crazy with the flour, use plenty of fresh orange zest, and enjoy the process.
And if you make these orange rolls, don’t forget to grab one while they’re still warm. You know—strictly for quality control.
Leave a Reply
You must be logged in to post a comment.