


Every December, I seem to develop the same little kitchen problem: I make a generous batch of Christmas cookies, fill a tin, and somehow the tin becomes mysteriously empty before Christmas Day.
These cookies are usually the reason.
I started making this particular Christmas cookie recipe when I wanted something festive without spending an entire afternoon fussing over complicated dough. After a few batches, I learned that the small details matter more than fancy decorating. Chilling the dough, measuring the flour carefully, and pulling the cookies from the oven while the centers still look slightly soft makes a surprisingly big difference.
I also learned not to judge them straight from the oven. The cookies continue to set as they cool, so that slightly underdone-looking center is exactly what I want.
The result is a tender, buttery sugar cookie with lightly crisp edges and a soft center. Add colorful sprinkles or a simple glaze, and suddenly a basic cookie becomes the star of the holiday cookie platter.
This Christmas cookie recipe has become one of my favorite things to bake when family or friends are coming over. The dough comes together with everyday ingredients, kids can help decorate, and the finished cookies look cheerful without requiring professional decorating skills.
Why You’ll Love This Recipe

- Simple ingredients: You probably have most of them in your kitchen already.
- Beginner-friendly: The dough doesn’t require complicated techniques.
- Easy to decorate: Sprinkles, icing, or a dusting of powdered sugar all work beautifully.
- Great for sharing: One batch makes plenty for a cookie tray, gift tin, or holiday gathering.
- Make-ahead friendly: You can prepare the dough ahead of time and bake it when you need it.
Ingredients You’ll Need
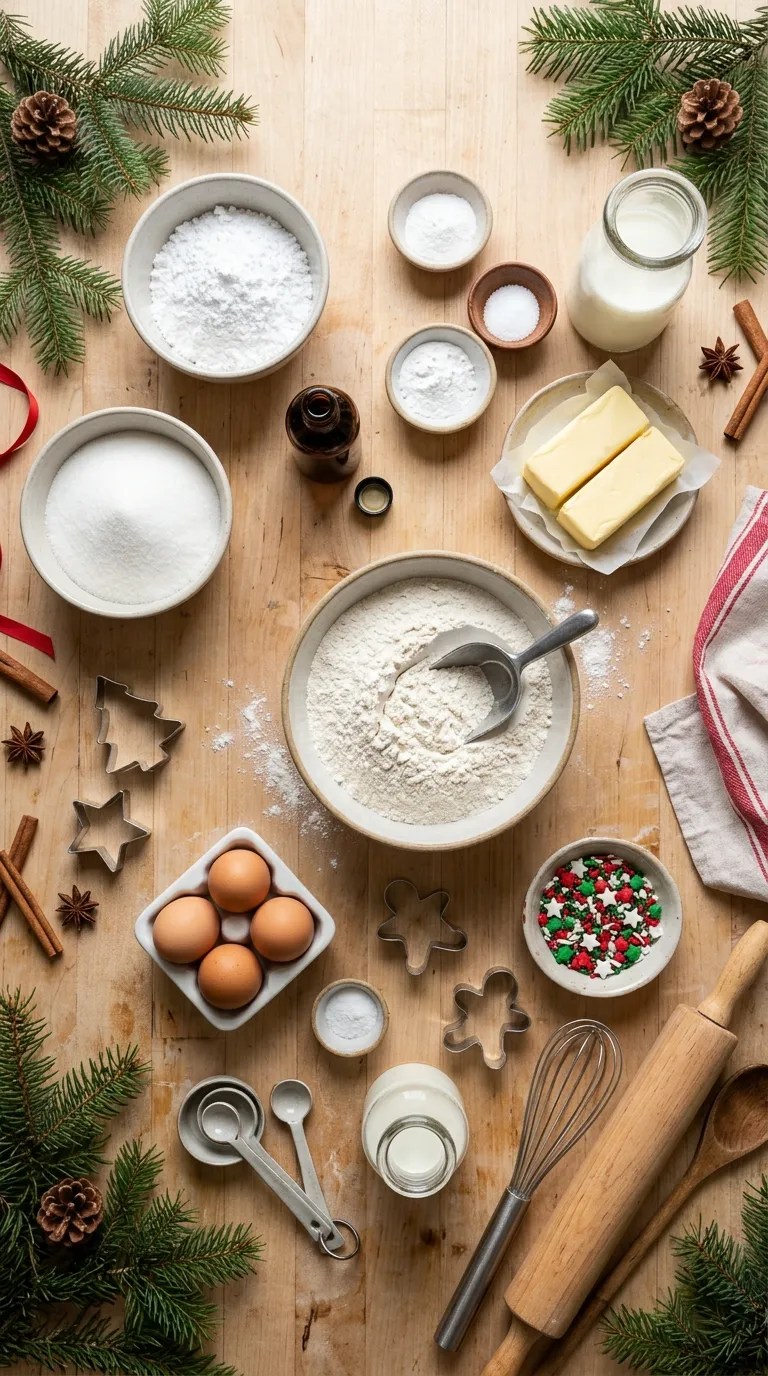
This recipe makes about 30–36 cookies, depending on the size of your cookie cutter.
For the Cookies
- 1 cup (226 g) unsalted butter, softened
- 1 cup (200 g) granulated sugar
- 1 large egg, room temperature
- 2 teaspoons vanilla extract
- 2 ¾ cups (345 g) all-purpose flour
- 1 teaspoon baking powder
- ½ teaspoon salt
For Decorating
- 1–2 tablespoons granulated sugar, for sprinkling if desired
- Holiday sprinkles, as needed
- 1 cup (120 g) powdered sugar, for a simple glaze
- 1–2 tablespoons milk
- ½ teaspoon vanilla extract
- Food coloring, optional
You can use salted butter if that’s what you have. If you do, reduce the added salt slightly.
For a richer vanilla flavor, pure vanilla extract works wonderfully, but imitation vanilla also works perfectly well in this recipe.
If you don’t have holiday sprinkles, don’t worry. Colored sugar, crushed peppermint candies, or a simple vanilla glaze can give the cookies plenty of Christmas charm.
Step-by-Step Instructions
1. Soften the Butter — About 30–60 Minutes
Take the butter out of the refrigerator and let it soften at room temperature.
You want the butter soft enough that a finger can make a gentle indentation, but you don’t want it melted or greasy.
This matters because softened butter blends smoothly with the sugar. Melted butter can make the dough too loose and change the final texture.
2. Cream the Butter and Sugar — 2–3 Minutes
Add the softened butter and granulated sugar to a large mixing bowl.
Using a hand mixer or a stand mixer fitted with the paddle attachment, beat them together until the mixture looks pale, smooth, and fluffy.
Don’t worry if it doesn’t look dramatically different. A couple of minutes of mixing does the job.
One mistake I made early on was beating the mixture for far too long because I thought “fluffy” meant almost whipped. You don’t need to go that far.
3. Add the Egg and Vanilla — 1 Minute
Add the egg and vanilla extract to the butter mixture.
Beat just until everything combines and the mixture looks smooth.
Scrape down the sides of the bowl with a rubber spatula so you don’t leave a pocket of butter and sugar behind.
4. Mix the Dry Ingredients — 2 Minutes
In a separate bowl, whisk together the flour, baking powder, and salt.
Adding the dry ingredients separately helps distribute the baking powder and salt throughout the flour before they reach the dough.
Gradually add the dry mixture to the wet ingredients.
Mix on low speed just until the flour disappears. Stop as soon as the dough comes together.
The dough should feel soft and pliable rather than sticky. If you press it gently with a fingertip, it should have the texture of a soft ball of play dough.
5. Chill the Dough — 30–60 Minutes
Divide the dough into two portions and flatten each portion into a thick disk.
Wrap the disks in plastic wrap and refrigerate for at least 30 minutes.
Don’t skip this step if you can help it.
Chilling firms up the butter and makes the dough much easier to roll. It also helps the cookies hold their shape instead of spreading too much in the oven.
If you’re baking on a busy holiday schedule, you can refrigerate the dough overnight.
6. Heat the Oven and Prepare the Baking Sheets — 10 Minutes
Preheat your oven to 350°F (175°C).
Line two baking sheets with parchment paper or reusable silicone baking mats.
I prefer parchment because it makes cleanup almost effortless.
If you’re using dark baking sheets, keep a closer eye on the first batch because they can brown cookies more quickly underneath.
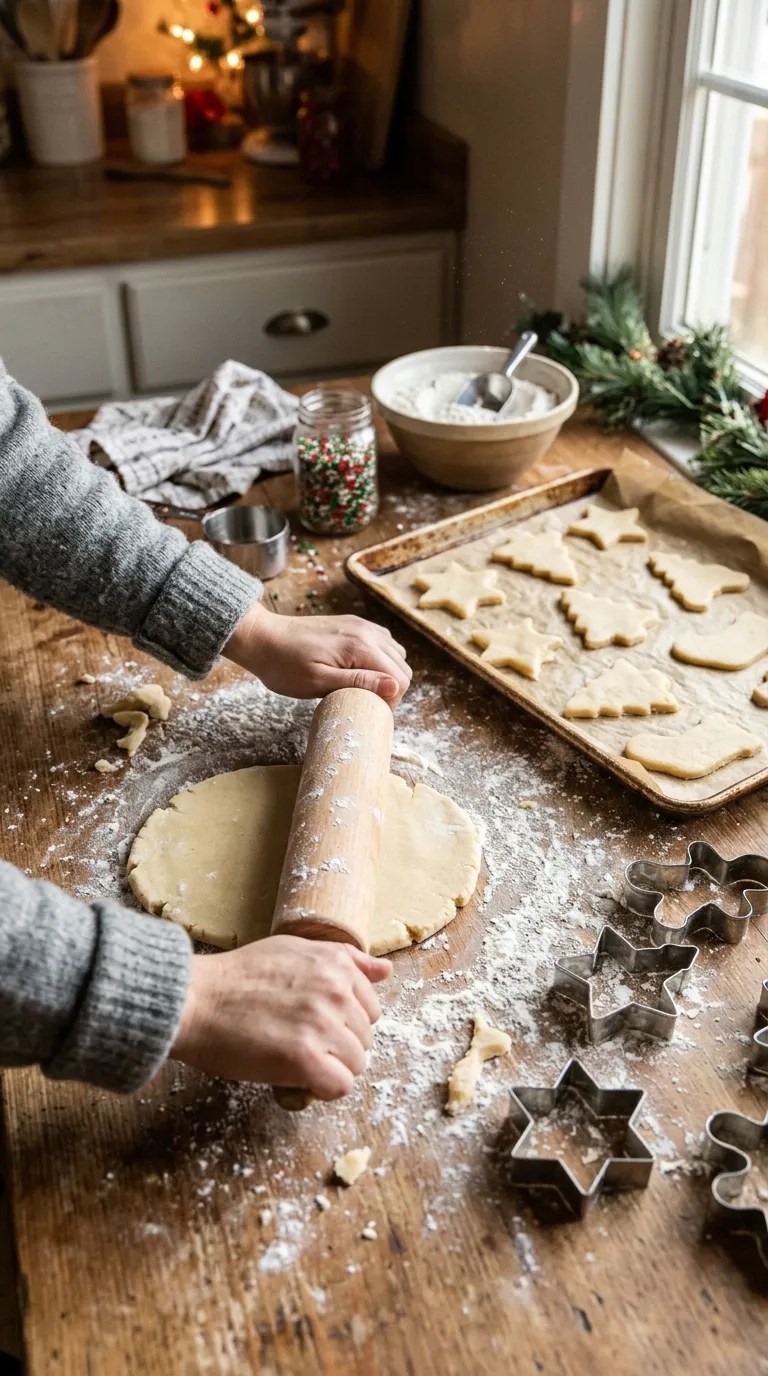
7. Roll Out the Dough — About 10 Minutes
Lightly flour your work surface and rolling pin.
Take one chilled dough disk from the refrigerator and roll it to about ¼ inch (6 mm) thick.
Try to keep the thickness fairly even. If some cookies are paper-thin while others are much thicker, they won’t finish baking at the same time.
If the dough starts sticking badly, add a small amount of flour to the surface. Don’t bury the dough in flour, though. Too much extra flour can make the cookies tougher.
8. Cut the Cookies — 5–10 Minutes
Use your favorite Christmas cookie cutters to cut out shapes.
Stars, trees, candy canes, snowflakes, and simple circles all work.
Transfer the shapes to the prepared baking sheets, leaving about 1 inch of space between them.
Gather the scraps, gently press them together, and roll them again.
Try not to knead the scraps repeatedly. The more you work the dough, the more likely the cookies are to become firm instead of tender.
9. Add Sprinkles — 1–2 Minutes
If you’re using sprinkles or colored sugar, add them before baking.
Press them gently into the surface so they stay attached.
For cookies you’re planning to glaze after baking, leave them plain for now.
10. Bake — 8–11 Minutes
Place one baking sheet in the center of the oven.
Bake the cookies for 8–11 minutes, depending on their size and thickness.
Watch the edges rather than waiting for the entire cookie to turn golden brown.
The edges should look set, while the centers can still appear slightly soft.
That’s the moment I look for.
If you wait until the centers look completely firm and browned, you may end up with a crispier cookie than intended.
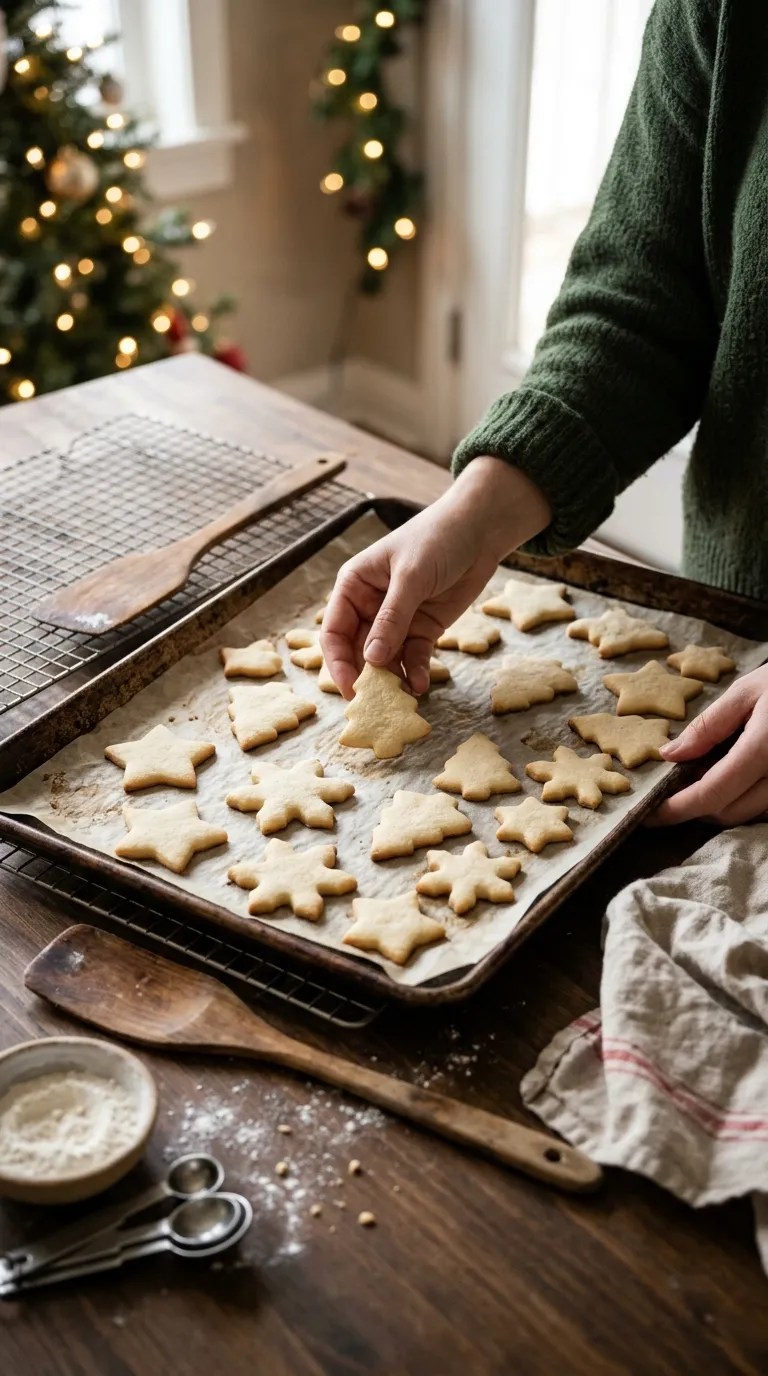
11. Cool the Cookies — About 15 Minutes
Let the cookies rest on the baking sheet for about 5 minutes after removing them from the oven.
Then transfer them to a wire cooling rack.
They’ll become firmer as they cool.
Give them at least another 10 minutes before decorating with glaze. Otherwise, the warm cookies can make the icing slide right off.
12. Make a Quick Vanilla Glaze — 2 Minutes
For a simple glaze, whisk together the powdered sugar, milk, and vanilla extract.
Start with 1 tablespoon of milk and add more a tiny bit at a time until you reach the consistency you want.
For drizzling, make the glaze slightly thin.
For spreading, keep it thicker.
You can divide the glaze between small bowls and tint each one with a tiny amount of food coloring.
13. Decorate and Let Set — 20–30 Minutes
Spread or drizzle the glaze over completely cooled cookies.
Add sprinkles while the glaze is still wet.
Then let the cookies sit uncovered until the glaze sets.
This usually takes around 20–30 minutes, although thicker icing can take longer.
And now comes the difficult part: resisting the urge to eat half the batch while you’re decorating.
Pro Tips & Tricks
Don’t Add Too Much Flour
This is probably the biggest lesson I’ve learned from making these cookies repeatedly.
A little flour on the counter prevents sticking. A mountain of flour changes the dough.
If your dough feels slightly tacky, chill it again for 10–15 minutes before reaching for more flour.
Chill the Dough Again If It Gets Too Soft
Holiday baking kitchens can get surprisingly warm, especially when the oven runs for hours.
If your cut-out shapes become difficult to move or start losing their definition, put the tray in the refrigerator for about 10–15 minutes.
Cold dough handles much better.
Bake One Test Cookie
This trick saves an entire batch.
Bake one cookie first and check the result. If it spreads more than you like, chill the dough longer. If it stays thick and pale, you may need another minute or two in the oven.
Ovens vary, and cookie cutters vary, so a test cookie gives you useful information before you commit the whole tray.
Don’t Overmix After Adding Flour
Once the flour disappears, stop mixing.
Overworking the dough can make the cookies tougher. You want just enough mixing to bring everything together.
Cool Before Decorating
I know it feels tempting to decorate as soon as the cookies come out.
Don’t.
Warm cookies can soften icing and cause decorations to slide. Give them time to cool completely.
Store Them in an Airtight Container
Once the cookies and icing have fully set, place them in an airtight container.
Layer them between sheets of parchment paper if you’re stacking decorated cookies.
They generally keep well at room temperature for about 5–7 days when stored properly.
Variations & Substitutions

Add a Little Citrus
For a brighter holiday flavor, add 1 teaspoon of finely grated orange zest to the butter and sugar mixture.
Orange and vanilla pair beautifully, and the citrus gives these cookies a slightly more festive flavor without making the recipe complicated.
Make Chocolate Christmas Cookies
Replace ¼ cup of the flour with ¼ cup of unsweetened cocoa powder.
The dough will become chocolatey while remaining easy to cut into shapes.
Chocolate stars with vanilla glaze make a particularly nice addition to a mixed cookie tray.
Use Almond Flavor
For a bakery-style variation, replace ½ teaspoon of the vanilla with ½ teaspoon of almond extract.
Almond extract has a strong flavor, so a little goes a long way.
If you’re serving the cookies to people with food allergies, check your extract and sprinkle labels carefully.
Make Them Gluten-Free
Use a 1:1 gluten-free all-purpose flour blend designed to replace regular wheat flour.
Different blends behave differently, so check the package instructions. If the dough feels unusually dry, avoid adding a lot of liquid immediately. Give it a few minutes to hydrate first.
Serving Suggestions

These cookies fit almost any holiday occasion.
Set them beside mugs of hot chocolate, coffee, or tea for an easy afternoon treat. They also make a cheerful addition to a Christmas brunch or dessert table.
For a cookie exchange, cut the dough into several different shapes and decorate each shape differently. You can make one batch look like several varieties without changing the base recipe.
They also work nicely as homemade gifts.
Pack cooled cookies into small food-safe boxes or tins with parchment between the layers. Add a ribbon and a handwritten note, and you’ve got a simple homemade present.
If you’re making cookies for a school, community, or family gathering, label common allergens such as wheat, egg, and dairy when appropriate.
And if you’re building a larger dessert spread, don’t feel like every cookie needs elaborate decoration. A tray filled with simple glazed stars and sprinkle-covered circles can look just as inviting as professionally decorated cookies.
Related Recipes:
- Best Fall Cookie Recipes for Holiday Baking
- Cream Cheese Desserts for Holidays and Parties
- Easy Holiday Desserts for Every Celebration
- How to Make Butter Pecan Pie From Scratch
FAQ’s
Can I make the cookie dough ahead of time?
Yes. Prepare the dough, divide it into disks, wrap it well, and refrigerate it for up to 2 days.
Let it sit at room temperature for a few minutes before rolling if it becomes very firm.
Can I freeze Christmas cookie dough?
Yes. Wrap the dough tightly and place it in a freezer-safe container or bag.
For the best quality, use it within about 2–3 months.
Thaw it in the refrigerator before rolling and cutting.
Why did my cookies spread in the oven?
The most common culprit is warm dough.
If the butter becomes too soft, the cookies can spread before their structure sets.
Chill the cut cookies for 10–15 minutes before baking if your kitchen feels warm.
Also make sure you measured the flour accurately and didn’t accidentally reduce the amount.
Why are my Christmas cookies hard?
They may have baked a little too long or picked up too much flour during rolling.
Start checking them at the lower end of the baking time. The centers should look set but still somewhat soft when you remove the tray from the oven.
Remember that the cookies firm up as they cool.
Can I decorate these cookies before baking?
Absolutely.
Sprinkles, colored sugar, and some types of decorative sugar work well before baking.
For icing or glaze, wait until the cookies cool completely.
How should I store decorated cookies?
Let the icing dry completely first.
Then place the cookies in an airtight container with parchment paper between layers. Keep them at room temperature away from heat and direct sunlight.
For the best texture, enjoy them within about a week.
Final Thought
There are plenty of elaborate Christmas desserts that look impressive, but sometimes the recipe I reach for most often is the simple one.
These cookies don’t require unusual ingredients, specialized equipment, or hours of decorating. They give you a buttery dough that’s easy to work with and plenty of room to make the recipe your own.
My favorite part is still the decorating table. I put out bowls of sprinkles, make a quick batch of vanilla glaze, and let everyone choose their own colors and designs. The cookies never come out perfectly identical, and that’s exactly what makes them feel homemade.
If you make this Christmas cookie recipe, don’t worry about getting every shape or sprinkle arrangement perfect. Put on some holiday music, make a little floury mess, and enjoy the process.
And if your cookie tin mysteriously empties before Christmas, well, I won’t be surprised.
Leave a Reply
You must be logged in to post a comment.