


There is something special about the smell of a homemade dessert filling the kitchen during Christmas. The soft glow of holiday lights, Christmas music playing in the background, and the sweet aroma of vanilla, butter, and chocolate make the whole house feel a little more festive.
I always think Christmas desserts should be fun to make, not another stressful task on an already busy holiday schedule. Between decorating the house, wrapping presents, preparing dinner, and welcoming family and friends, nobody wants to spend hours making an elaborate dessert.
That’s exactly why I love this Christmas Dessert Recipe. It’s an easy holiday treat that looks beautiful on the dessert table, tastes wonderful, and doesn’t require professional baking skills.
For this recipe, we’re making soft, buttery Christmas cookie bars with white chocolate chips, colorful holiday sprinkles, and a delicious vanilla flavor. They have slightly crisp edges, a soft center, and just the right amount of sweetness.
The first time I made cookie bars for a holiday gathering, I originally planned to bake individual Christmas cookies. However, I quickly realized that rolling, cutting, and baking several batches would take much longer than I expected.
So I pressed the dough into a baking pan instead.
That little kitchen discovery changed the way I approach holiday baking. I got the same delicious cookie flavor without spending the afternoon shaping individual cookies.
Now, these festive cookie bars are one of my favorite treats to prepare when I want something homemade, colorful, and easy to share.
Whether you’re hosting Christmas dinner, attending a holiday party, or simply craving something sweet with your afternoon tea, this recipe deserves a place on your holiday baking list.
Why You’ll Love This Christmas Dessert Recipe

There are plenty of reasons to add these Christmas cookie bars to your holiday menu.
- Easy to prepare: You don’t need complicated techniques, special baking experience, or expensive equipment.
- Perfect for Christmas: Red and green sprinkles, white chocolate chips, and a golden cookie base give these bars a cheerful holiday appearance.
- Great for sharing: One baking pan makes enough treats for a family gathering, school celebration, or Christmas party.
- Budget-friendly: Most ingredients are everyday baking staples that you may already have in your kitchen.
- Easy to customize: Change the chocolate chips, add nuts, or use different seasonal sprinkles to create your own version.
Another thing I appreciate is that these cookie bars travel well. You can arrange them in a festive container, cover them, and take them to a holiday gathering without worrying about individual cookies breaking or losing their shape.
They also make a lovely homemade gift. A few neatly cut bars in a decorative Christmas box can feel much more personal than a store-bought dessert.
Ingredients for Easy Christmas Cookie Bars
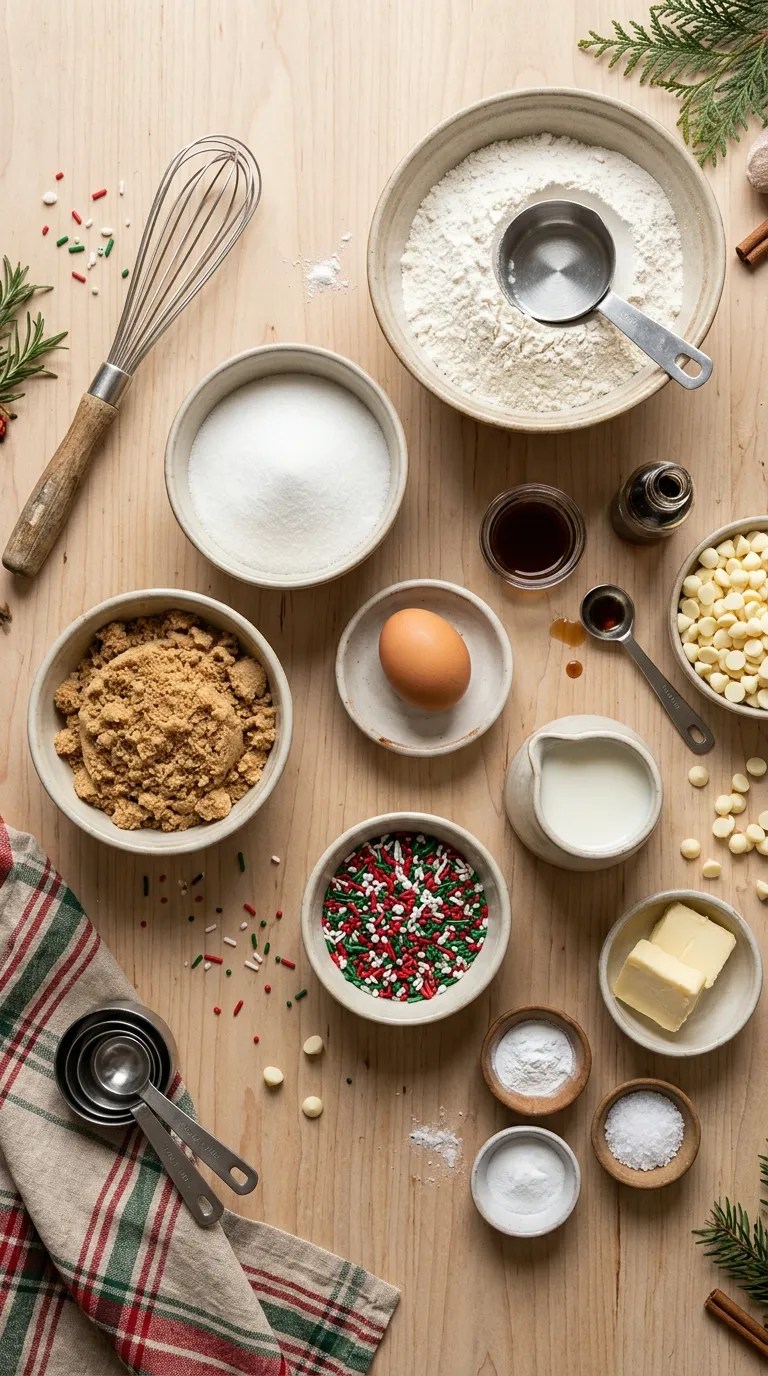
The beauty of this Christmas dessert recipe comes from its simple ingredients. You don’t need anything unusual, and most grocery stores carry everything you’ll need.
The quantities below make approximately 16 cookie bars, depending on how large you cut them.
Dry Ingredients
- 2 cups (250 g) all-purpose flour
- 1 teaspoon baking powder
- ½ teaspoon baking soda
- ¼ teaspoon salt
The flour gives the bars their structure, while baking powder and baking soda help create a soft, tender texture.
If you only have plain flour and baking powder, make sure you measure everything carefully rather than adding extra flour to the dough.
Wet Ingredients
- ¾ cup (170 g) unsalted butter, softened
- ¾ cup (150 g) granulated sugar
- ¼ cup (55 g) packed light brown sugar
- 1 large egg, at room temperature
- 2 teaspoons pure vanilla extract
- 2 tablespoons milk
I like using a combination of white and brown sugar. White sugar adds sweetness, while brown sugar contributes a slightly richer flavor and helps keep the bars tender.
Unsalted butter gives you better control over the saltiness. If you only have salted butter, reduce the additional salt slightly.
Christmas Add-Ins
- ½ cup (85 g) white chocolate chips
- ¼ cup red and green Christmas sprinkles
- 2 tablespoons extra white chocolate chips for decorating
White chocolate adds creamy sweetness that works beautifully with the vanilla cookie base.
You can use milk chocolate chips instead if that’s what you have available.
For the sprinkles, choose small holiday-themed varieties. Avoid adding too many large decorative candies because they can make the bars harder to cut neatly.
Optional Vanilla Glaze
If you want your Christmas dessert to look a little more special, prepare this simple glaze.
- ½ cup (60 g) powdered sugar
- 1 tablespoon milk
- ¼ teaspoon vanilla extract
Mix everything in a small bowl until smooth. Add a few extra drops of milk if the mixture feels too thick.
You can drizzle the glaze over the cooled cookie bars for an extra festive finish.
Step-by-Step Instructions for Christmas Cookie Bars
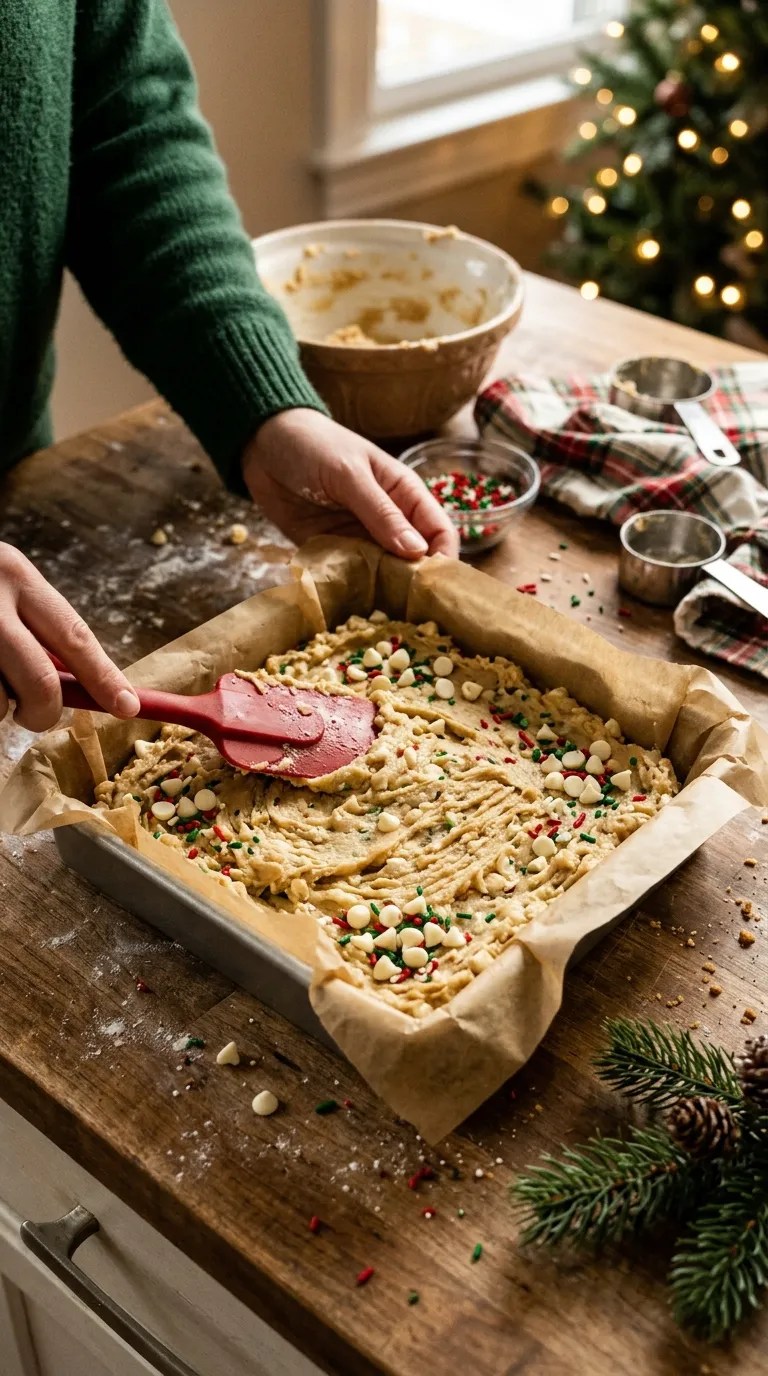
Don’t worry if this is your first time making cookie bars. The process is straightforward, and I’ll walk you through each stage.
Preparation time: 15 minutes
Baking time: 22–27 minutes
Cooling time: 45–60 minutes
Total time: Approximately 1 hour 30 minutes
Servings: 16 bars
Difficulty: Easy
Step 1: Prepare Your Baking Pan (5 Minutes)
Start by preheating your oven to 350°F (175°C).
Take an 8-by-8-inch square baking pan and line it with parchment paper. Leave a little extra paper hanging over two opposite sides.
This creates convenient handles that help you lift the baked cookie bars out of the pan later.
Lightly grease the parchment paper with butter or a little cooking spray.
I used to skip this step and ended up struggling to remove my cookie bars neatly. A little preparation makes a big difference!
Step 2: Combine the Dry Ingredients (3 Minutes)
Take a medium-sized mixing bowl.
Add the all-purpose flour, baking powder, baking soda, and salt.
Whisk everything together until the ingredients look evenly combined.
Set the bowl aside.
This small step helps distribute the raising agents throughout the flour, so you don’t end up with uneven pockets in your finished dessert.
Step 3: Cream the Butter and Sugars (3–4 Minutes)
In a separate large bowl, add the softened butter, granulated sugar, and brown sugar.
Use a hand mixer or stand mixer fitted with a paddle attachment.
Beat everything on medium speed for approximately 2–3 minutes.
The mixture should look creamy, fluffy, and slightly lighter in color.
If you don’t own an electric mixer, a sturdy wooden spoon and some patience will work too.
Just make sure your butter feels soft enough to mix easily without looking melted or greasy.
Step 4: Add the Egg and Vanilla (2 Minutes)
Crack the egg into the butter mixture.
Add the vanilla extract and milk.
Beat again until everything combines smoothly.
Scrape down the sides of the bowl with a silicone spatula if necessary.
At this point, the mixture should look creamy and slightly thick.
Don’t worry if it doesn’t look perfectly smooth. The dry ingredients will bring everything together.
Step 5: Add the Dry Ingredients (2 Minutes)
Gradually add your flour mixture to the wet ingredients.
Mix on low speed until the flour disappears into the dough.
Stop mixing as soon as everything combines.
This is important because overmixing can develop too much gluten, which may leave your cookie bars tough instead of soft.
The dough should feel thick, soft, and easy to spread.
If it looks slightly sticky, that’s perfectly normal.
Step 6: Fold in the Chocolate Chips and Sprinkles (2 Minutes)
Add the white chocolate chips and Christmas sprinkles.
Use a spatula to gently fold them into the dough.
Try to distribute the colorful sprinkles evenly throughout the mixture.
Save a small handful of chocolate chips and sprinkles for the top.
This simple trick gives the finished dessert a more attractive appearance because the decorations remain visible after baking.
Step 7: Transfer the Dough to the Baking Pan (3 Minutes)
Spoon the cookie dough into your prepared baking pan.
Use a spatula or the back of a spoon to spread it evenly.
The dough may feel thick, so take your time and push it gently toward the corners.
Sprinkle the reserved white chocolate chips and Christmas decorations over the surface.
Press them lightly into the dough so they stay in place.
Try to keep the thickness reasonably even across the pan. Otherwise, one side may bake faster than the other.
Step 8: Bake Until Golden (22–27 Minutes)
Place the pan on the middle rack of your preheated oven.
Bake for approximately 22–27 minutes.
Start checking around the 22-minute mark because ovens vary.
Look for these signs:
- The edges should turn lightly golden.
- The center should look set rather than wet.
- A toothpick inserted near the center should come out without raw batter, although a few moist crumbs are fine.
Don’t wait for the entire surface to become dark golden brown.
The bars will continue to firm up as they cool, and overbaking can make them dry.
If your oven has hot spots, rotate the pan carefully near the middle of baking.
Step 9: Cool Completely (45–60 Minutes)
Remove the pan from the oven and place it on a wire cooling rack.
Let the cookie bars cool in the pan for approximately 15–20 minutes.
Then use the parchment paper handles to lift the whole slab onto the cooling rack.
Allow it to cool completely before cutting.
I know it’s tempting to slice into warm cookie bars immediately, especially when the kitchen smells wonderful.
However, waiting makes a huge difference. Warm cookie bars can crumble or break when you cut them.
Step 10: Add the Vanilla Glaze and Cut (5 Minutes)
If you’re using the optional glaze, whisk the powdered sugar, milk, and vanilla extract in a small bowl.
Transfer the glaze into a piping bag or simply use a spoon to drizzle it over the cooled cookie bars.
Allow the glaze to set for a few minutes.
Use a sharp knife to cut the slab into 16 squares.
For cleaner edges, wipe the knife between cuts.
Arrange the bars on a Christmas serving plate, and your homemade holiday dessert is ready!
Pro Tips and Tricks for Perfect Christmas Dessert Bars
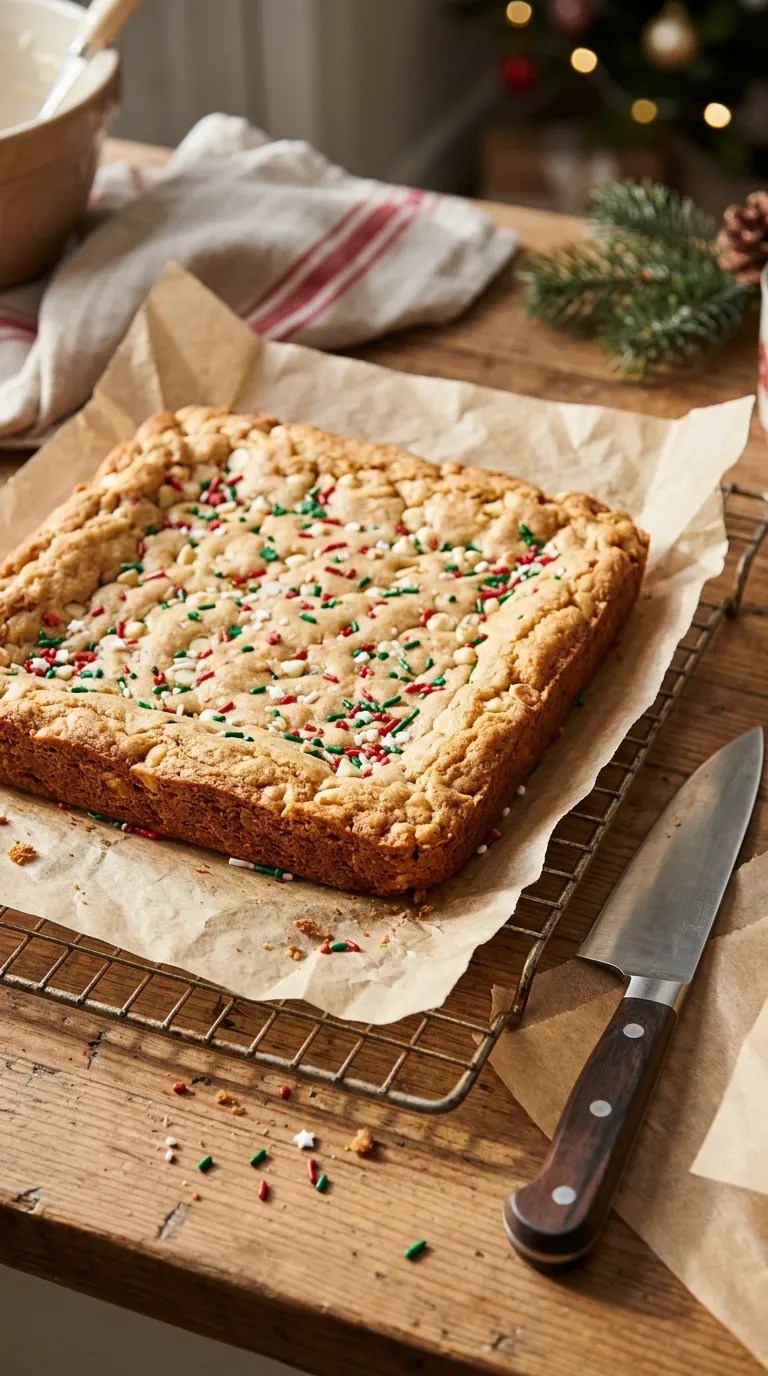
A simple recipe can still benefit from a few little tricks. These are the things I would tell a friend before they start baking.
1. Use Properly Softened Butter
Butter temperature matters more than many beginner bakers realize.
Your butter should feel soft when you press it gently, but it shouldn’t look oily or melted.
If you use melted butter, the dough may spread differently, and the finished texture can change.
Take the butter out of the refrigerator ahead of time to let it soften naturally.
2. Don’t Add Too Much Flour
One common mistake is packing flour tightly into a measuring cup.
That can add more flour than the recipe needs, leaving you with dry, crumbly cookie bars.
For the most consistent results, use a kitchen scale and measure 250 grams of flour.
If you use measuring cups, lightly spoon the flour into the cup and level the top with a straight edge.
3. Avoid Overbaking
This is probably the most important tip.
You want soft centers and lightly golden edges.
If you wait until the center looks completely firm and dry, you may end up with harder cookie bars after cooling.
Start checking early and remember that every oven behaves a little differently.
4. Let the Bars Cool Before Cutting
I learned this one through experience.
The first time I tried making cookie bars, I cut them while they were still warm. They tasted delicious, but the pieces looked messy.
Now I always allow them to cool completely.
A sharp knife also helps create neat, attractive squares.
5. Store Them Properly
Once the bars have cooled, place them in an airtight container.
Keep them at room temperature for up to 4 days in a cool environment.
If your kitchen feels particularly warm, refrigeration can help preserve their texture, especially if you add a milk-based glaze.
For longer storage, freeze them in a suitable airtight container.
Variations and Substitutions
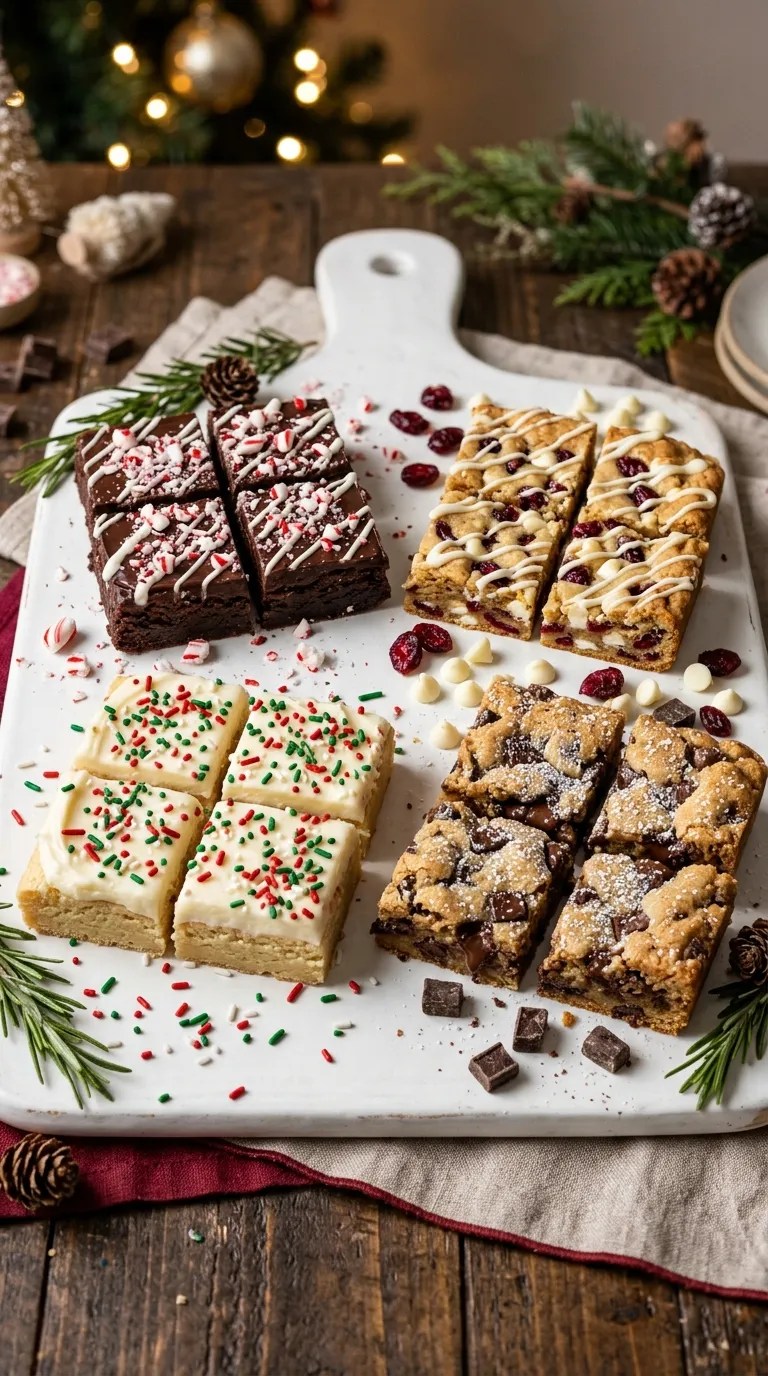
One of my favorite things about this Christmas dessert recipe is how easily you can change it.
You don’t have to follow the exact same combination every time. A few ingredient swaps can create an entirely different holiday treat.
1. Chocolate Christmas Cookie Bars
If your family loves chocolate, replace the white chocolate chips with milk or semi-sweet chocolate chips.
You can also add 2 tablespoons of unsweetened cocoa powder to the dry ingredients.
For the best results, reduce the flour by approximately 2 tablespoons to balance the added cocoa.
Finish with extra chocolate chips on top before baking.
These bars have a richer flavor and pair wonderfully with warm milk.
2. Cranberry and White Chocolate Bars
For a slightly fruity holiday version, add ⅓ cup dried cranberries along with the white chocolate chips.
The cranberries provide a pleasant tartness that balances the sweetness.
You can also add a little orange zest to the dough for a fresh citrus aroma.
This combination works especially well if you prefer desserts that aren’t overwhelmingly sweet.
3. Gluten-Free Christmas Cookie Bars
You can try replacing the all-purpose flour with a good-quality gluten-free baking flour blend designed for a 1:1 substitution.
Choose a blend that already contains xanthan gum, or follow the manufacturer’s instructions if it doesn’t.
Check the packaging of your chocolate chips, sprinkles, and other ingredients for gluten-related labeling.
The texture may differ slightly depending on the flour blend, so allow the bars to cool completely before cutting.
4. Dairy-Free Holiday Bars
For a dairy-free version, replace the butter with a suitable plant-based baking butter.
Use an unsweetened plant-based milk instead of regular milk.
Choose dairy-free chocolate chips and check that your sprinkles meet your dietary requirements.
The final flavor and texture will depend on the specific substitutes you choose.
5. Peppermint Christmas Bars
For a festive peppermint variation, replace half the white chocolate chips with dark chocolate chips.
Add ¼ teaspoon peppermint extract to the wet ingredients.
You can finish the cooled bars with a little melted chocolate and crushed peppermint candy.
Be careful with peppermint extract because its flavor can become overpowering if you add too much.
Serving Suggestions for Your Christmas Dessert

Once your Christmas cookie bars are ready, it’s time to make them part of the holiday celebration.
Although they’re delicious straight from the serving plate, a few simple presentation ideas can make them look even more inviting.
Serve With Hot Chocolate
A warm cup of hot chocolate and a soft Christmas cookie bar make a lovely winter afternoon combination.
You can add whipped cream, mini marshmallows, or a little cinnamon to the hot chocolate.
It’s an easy treat to enjoy while watching a Christmas movie.
Add Them to a Christmas Dessert Platter
Arrange the cookie bars on a large serving tray with other small treats.
You can include:
- Chocolate truffles
- Gingerbread cookies
- Shortbread biscuits
- Chocolate-covered pretzels
- Mini brownies
- Festive sugar cookies
Use a mixture of shapes, colors, and textures to create an attractive dessert spread.
Serve After Christmas Dinner
These cookie bars make a convenient dessert after a large holiday meal.
Cut them into smaller squares if you’re serving several desserts.
Guests can enjoy a little sweet treat without needing a large slice of cake.
Package Them as Homemade Gifts
Place completely cooled cookie bars into small food-safe gift boxes or decorative tins.
Separate the layers with parchment paper to prevent sticking.
Tie the box with a festive ribbon and add a small handwritten holiday message.
It’s a thoughtful homemade gift for neighbors, friends, teachers, and family members.
Enjoy Them With Tea or Coffee
If you prefer something less sweet to drink, serve these bars with black tea, coffee, or a mild spiced tea.
The buttery cookie flavor and white chocolate chips pair particularly well with unsweetened drinks.
Related Recipes:
- Christmas Punch Recipe Non Alcoholic
- Christmas Dinner Recipe – Easy Holiday Favorite
- Christmas Appetizer Recipes – Easy Holiday Bites
- Christmas Brunch Recipe
FAQ’s
Here are answers to a few common questions that may come up while preparing these holiday cookie bars.
Can I Make Christmas Cookie Bars Ahead of Time?
Absolutely!
You can bake the bars a day or two before your Christmas gathering.
Allow them to cool completely, then store them in an airtight container.
For the freshest appearance, add the optional glaze shortly before serving.
You can also prepare the dough ahead of time and refrigerate it in a covered container for up to 24 hours.
Let the dough soften slightly if it becomes too firm to spread easily.
How Long Do Christmas Cookie Bars Last?
These cookie bars generally stay fresh for up to 4 days at room temperature when you store them in an airtight container in a cool environment.
Refrigeration can extend their storage time, although it may make the texture firmer.
Always allow refrigerated bars to come closer to room temperature before serving if you prefer a softer texture.
If you notice unusual odors, visible mold, or other signs of spoilage, discard them.
Can I Freeze Christmas Cookie Bars?
Yes!
These cookie bars freeze well when you package them properly.
Allow them to cool completely before freezing.
For convenient portions, cut them into individual squares and place parchment paper between the layers.
Transfer everything to a freezer-safe airtight container or bag.
For the best quality, enjoy them within approximately 2 months.
Thaw the bars in the refrigerator or at room temperature while keeping them covered.
If you plan to freeze the bars, I recommend leaving off the vanilla glaze until you’re ready to serve them.
Why Did My Cookie Bars Turn Out Dry?
Dry cookie bars usually result from too much flour or excessive baking time.
Measure the flour carefully, preferably using a kitchen scale.
Also, check your oven temperature because some ovens run hotter than their displayed setting.
Remember that the bars continue to firm up as they cool, so you don’t need to bake them until the center feels completely hard.
Can I Make This Recipe Without an Electric Mixer?
Yes!
A hand whisk or sturdy wooden spoon works perfectly for this recipe.
Use softened butter so you can combine it easily with the sugars.
You may need a little extra time and effort to achieve a creamy mixture, but a stand mixer isn’t essential.
What Can I Use Instead of White Chocolate Chips?
You have several options.
Milk chocolate chips, semi-sweet chocolate chips, dark chocolate chunks, or chopped baking chocolate all work nicely.
For a fruity flavor, try dried cranberries or chopped dried cherries.
You can also leave out the chocolate entirely and add a few extra festive sprinkles.
How Do I Stop the Cookie Bars From Crumbling?
The easiest solution is to let them cool completely before cutting.
Make sure you don’t add too much flour or bake them for too long.
Use parchment paper to lift the baked slab from the pan, then cut it with a sharp knife.
If the bars still feel very crumbly, check whether you measured the flour correctly the next time you bake them.
Can I Make These Christmas Bars Without Sprinkles?
Of course!
Sprinkles add color and a festive appearance, but they don’t play an essential role in the structure of the recipe.
You can use chopped nuts, dried cranberries, chocolate chips, or simply leave the top plain.
A light vanilla glaze also makes a lovely decoration.
Final Thought
Christmas baking doesn’t have to involve complicated recipes, expensive ingredients, or hours of preparation.
Sometimes, the simplest homemade treats become the ones everyone remembers.
That’s what makes these Christmas cookie bars such a lovely addition to the holiday season. They combine a soft, buttery texture with creamy white chocolate and colorful sprinkles, creating a dessert that looks festive without requiring much effort.
I also love how flexible this recipe is. You can change the chocolate, add cranberries, experiment with peppermint, or prepare a gluten-free variation depending on what your family enjoys.
If you’re planning a Christmas party, preparing a dessert table, or simply looking for something sweet to enjoy with your family, give these easy holiday treats a try.
And don’t worry if your first batch doesn’t look perfectly neat. A little extra chocolate, a few uneven edges, and homemade decorations are all part of the fun.
After all, Christmas baking is about more than making beautiful desserts. It’s about creating happy moments, sharing something delicious, and enjoying time with the people who matter.
Happy holiday baking, and may your kitchen be filled with warmth, laughter, and plenty of delicious Christmas treats!
Leave a Reply
You must be logged in to post a comment.