

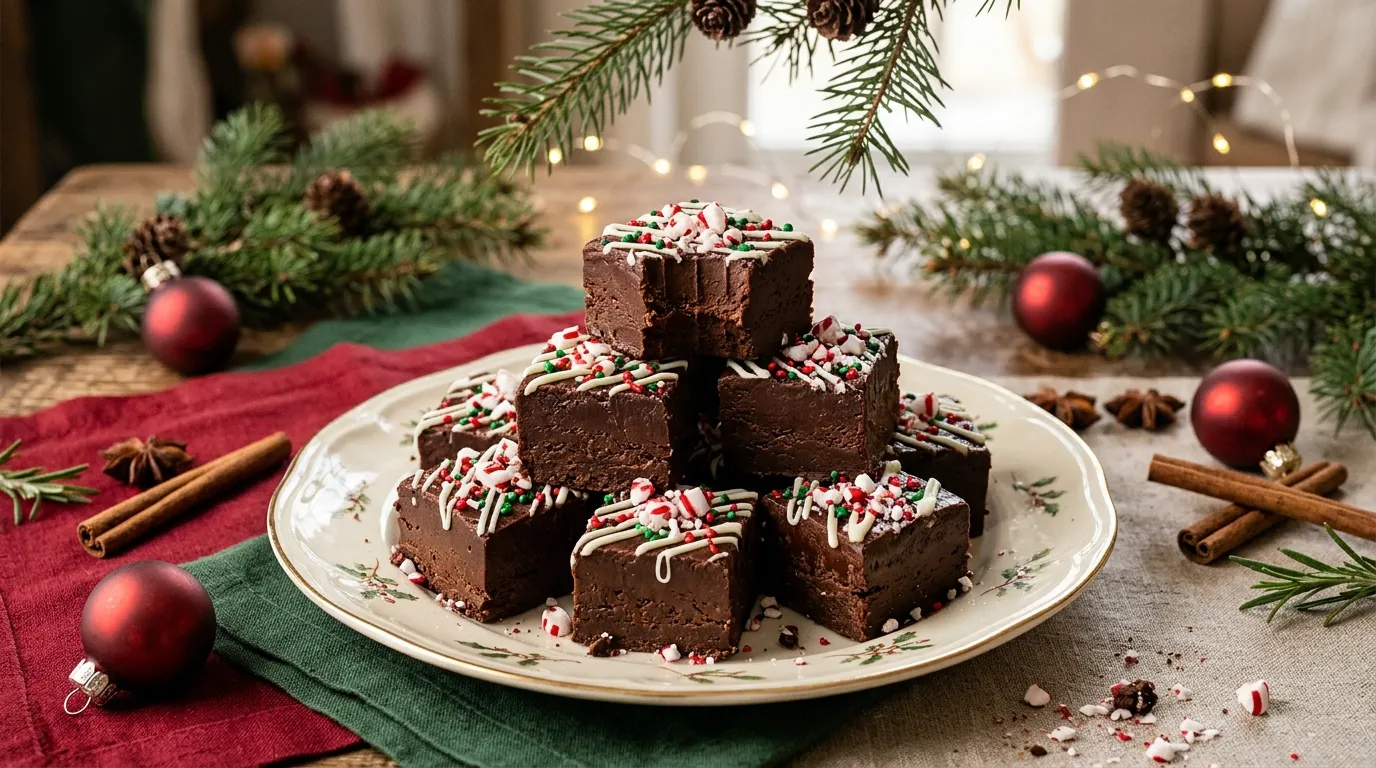
There’s something about Christmas that makes even the simplest homemade sweets feel extra special. Maybe it’s the twinkling lights, the smell of cookies baking, or the excitement of putting together little boxes of treats for family and friends.
One of my favorite holiday traditions is making a batch of homemade fudge. I love how a few everyday ingredients can turn into something that looks beautiful enough for a Christmas dessert table. And the best part? You don’t need a candy thermometer, fancy equipment, or hours of kitchen time.
This Christmas Fudge Recipe Easy is one I reach for whenever I want a festive treat without spending the entire afternoon in the kitchen. It combines creamy chocolate, sweetened condensed milk, butter, and vanilla to create rich, smooth squares that practically melt in your mouth.
I like to finish mine with colorful red and green sprinkles. Sometimes I add crushed peppermint candies or a little white chocolate drizzle when I want to make the batch look extra festive.
The first time I made this version, I nearly added all the sprinkles while the chocolate was still piping hot. A few of them started losing their color, so now I let the mixture cool slightly before decorating. It’s a small trick, but it makes the finished fudge look much prettier!
Whether you’re preparing Christmas dessert trays, filling homemade gift boxes, or looking for something sweet to share after dinner, this easy holiday fudge deserves a place in your kitchen.
Why You’ll Love This Christmas Fudge Recipe

There are plenty of reasons to add this recipe to your holiday baking list. Here are a few things that make it a favorite in my kitchen.
- Super easy to prepare: You only need a handful of everyday ingredients and a saucepan or microwave.
- No candy thermometer required: This is a beginner-friendly fudge recipe that doesn’t require complicated candy-making techniques.
- Perfect for Christmas gifting: Cut the fudge into neat squares, arrange them in decorative paper cups, and place them in a festive gift box.
- Easy to customize: Add peppermint, nuts, caramel, or white chocolate to create different flavors.
- Make-ahead friendly: Prepare it a day or two before your holiday gathering and keep it chilled until serving.
Another thing I appreciate is how well this recipe works for a crowd. A single batch makes plenty of small squares, and you can easily double the ingredients when you’re preparing treats for a larger family gathering.
Ingredients
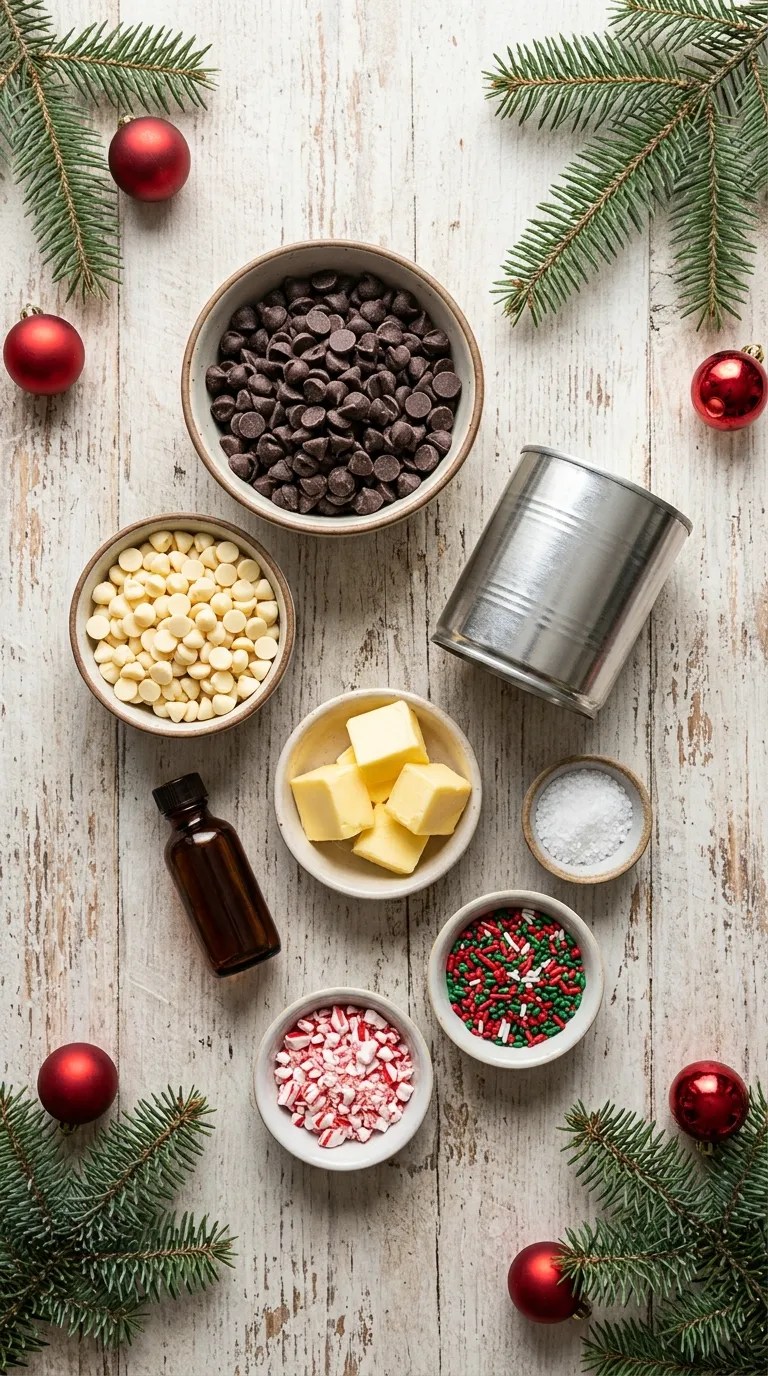
You don’t need a long shopping list to make delicious homemade fudge. Most of these ingredients are easy to find at a regular grocery store.
The quantities below make approximately 25–36 small squares, depending on how you cut them.
For the Chocolate Fudge
- 3 cups (510 g) semi-sweet chocolate chips: These create the rich chocolate flavor. You can use chopped semi-sweet chocolate bars instead.
- 1 can (14 ounces/397 g) sweetened condensed milk: This gives the fudge its creamy texture and sweetness. Make sure you use sweetened condensed milk, not evaporated milk.
- 2 tablespoons (28 g) unsalted butter: Butter adds richness and helps create a smooth finish.
- 1 teaspoon vanilla extract: A little vanilla rounds out the chocolate flavor.
- 1 small pinch of salt: This balances the sweetness and makes the chocolate taste even better.
For the Christmas Decorations
- 2 tablespoons red and green holiday sprinkles: Choose your favorite festive shapes and colors.
- 2 tablespoons crushed peppermint candies: Optional, but they add a lovely holiday flavor.
- ¼ cup white chocolate chips: Optional, for a decorative drizzle.
- 1 teaspoon vegetable oil or neutral oil: Only needed if you want to make the white chocolate drizzle a little thinner.
Helpful Ingredient Notes
Chocolate chips: Semi-sweet chocolate gives this fudge a balanced flavor. If you prefer sweeter fudge, use milk chocolate, but remember that milk chocolate may create a softer result.
Sweetened condensed milk: This ingredient plays an important role in the recipe. It provides sweetness and moisture while helping the chocolate set into a sliceable fudge.
Butter: I prefer unsalted butter because it lets me control the saltiness. If you only have salted butter, simply skip the additional pinch of salt.
Sprinkles: Use decorations designed for baking or confectionery. Some inexpensive sprinkles bleed their colors when they touch warm chocolate, so wait until the mixture cools slightly before adding them.
Step-by-Step Instructions for Christmas Fudge
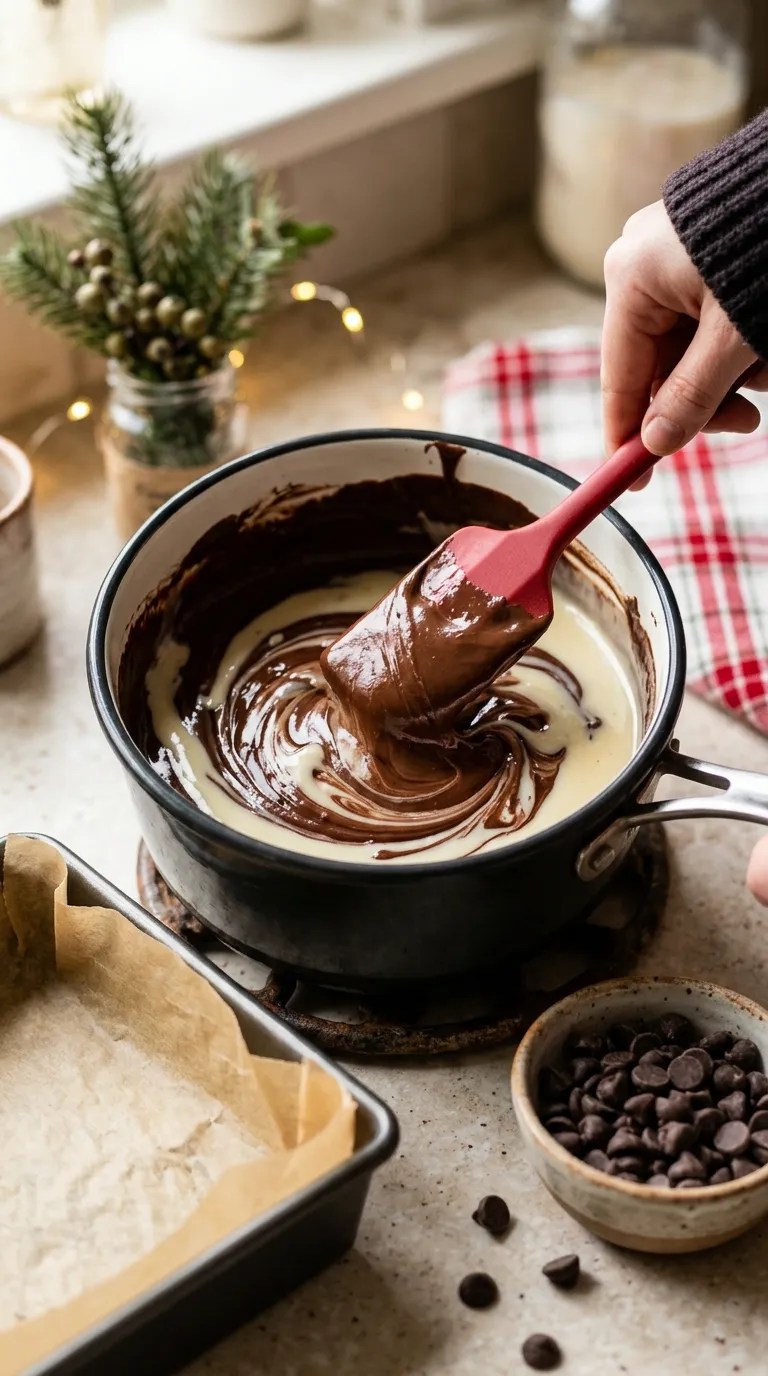
Now comes the fun part! This recipe doesn’t involve complicated candy-making steps, but a little patience makes a big difference.
Before starting, gather your ingredients and prepare your baking pan. Once the chocolate melts, everything moves fairly quickly.
Step 1: Prepare Your Baking Pan
Time: 5 minutes
Choose an 8-inch square baking pan. If you want slightly thinner fudge pieces, you can use a 9-inch square pan.
Line the pan with parchment paper, leaving a little extra hanging over two opposite sides. These paper handles will make removing the fudge much easier later.
Lightly grease the parchment with a little butter if you want extra insurance against sticking.
Set the prepared pan aside while you melt the chocolate.
My tip: Don’t skip the parchment paper. I learned this the hard way after trying to lift a chilled batch straight out of a pan. Even when the fudge looks firm, getting clean edges without parchment can be frustrating.
Step 2: Melt the Chocolate and Butter
Time: 3–5 minutes
Place the chocolate chips and butter in a medium saucepan.
Set the pan over low heat and stir gently with a silicone spatula.
Keep stirring until the chocolate starts melting and the mixture looks glossy. Avoid turning up the heat to speed things along. Chocolate can scorch easily, and overheated chocolate may turn thick or grainy.
If you prefer using a microwave, place the chocolate chips and butter in a microwave-safe bowl.
Heat in 20-second intervals, stirring between each interval until smooth.
You want melted chocolate that looks silky, without any visible lumps.
Step 3: Add the Sweetened Condensed Milk
Time: 2–3 minutes
Slowly pour the sweetened condensed milk into the melted chocolate.
Stir continuously until the mixture becomes thick, smooth, and evenly combined.
At first, the mixture may look slightly separated or unusually thick. Don’t panic. Keep stirring gently, and it should come together into a uniform chocolate mixture.
Add the vanilla extract and a small pinch of salt.
Stir again until everything blends together.
What you’re looking for: The fudge mixture should look shiny and thick enough to fall slowly from your spatula. It shouldn’t look watery or runny.
Remove the saucepan from the heat once everything combines smoothly.
Step 4: Transfer the Fudge to the Pan
Time: 3–5 minutes
Pour the warm chocolate mixture into your prepared baking pan.
Use a silicone spatula or the back of a spoon to spread it evenly into the corners.
Try to keep the surface level so your finished fudge pieces have a consistent thickness.
If you notice a few small air pockets, gently tap the pan against your countertop once or twice.
Don’t worry if the surface isn’t absolutely perfect. You’ll decorate it in the next step!
Step 5: Add the Christmas Decorations
Time: 3–5 minutes
While the fudge remains slightly warm, scatter the red and green sprinkles over the surface.
Add crushed peppermint candies if you enjoy a refreshing minty flavor.
For a more decorative finish, melt the white chocolate chips in a microwave-safe bowl using short 15–20-second intervals. Stir between each interval.
If the white chocolate feels too thick, add a little neutral oil and stir until it becomes easier to drizzle.
Use a spoon to create thin white chocolate lines across the fudge.
I like to keep the decorations slightly irregular. They give the fudge a homemade look that feels especially charming during Christmas.
Step 6: Chill Until Firm
Time: 2–3 hours
Place the pan in the refrigerator and allow the fudge to chill until completely firm.
For the best texture, give it at least 2 hours. If your kitchen is warm or your fudge layer is thick, it may need a little longer.
Avoid cutting it while the center still feels soft. Otherwise, the pieces may lose their shape.
Once firm, lift the fudge out of the pan using the parchment paper handles.
Place it on a clean cutting board.
Step 7: Cut and Serve
Time: 5 minutes
Use a large, sharp knife to cut the fudge into small squares.
For cleaner cuts, warm the knife under hot water, dry it completely, and slice through the fudge. Wipe the blade between cuts.
Arrange the squares on a Christmas serving plate or place them in small paper candy cups.
Your homemade Christmas fudge is ready!
The finished squares should feel firm enough to hold while remaining soft and creamy when you bite into them.
Pro Tips & Tricks for Perfect Christmas Fudge
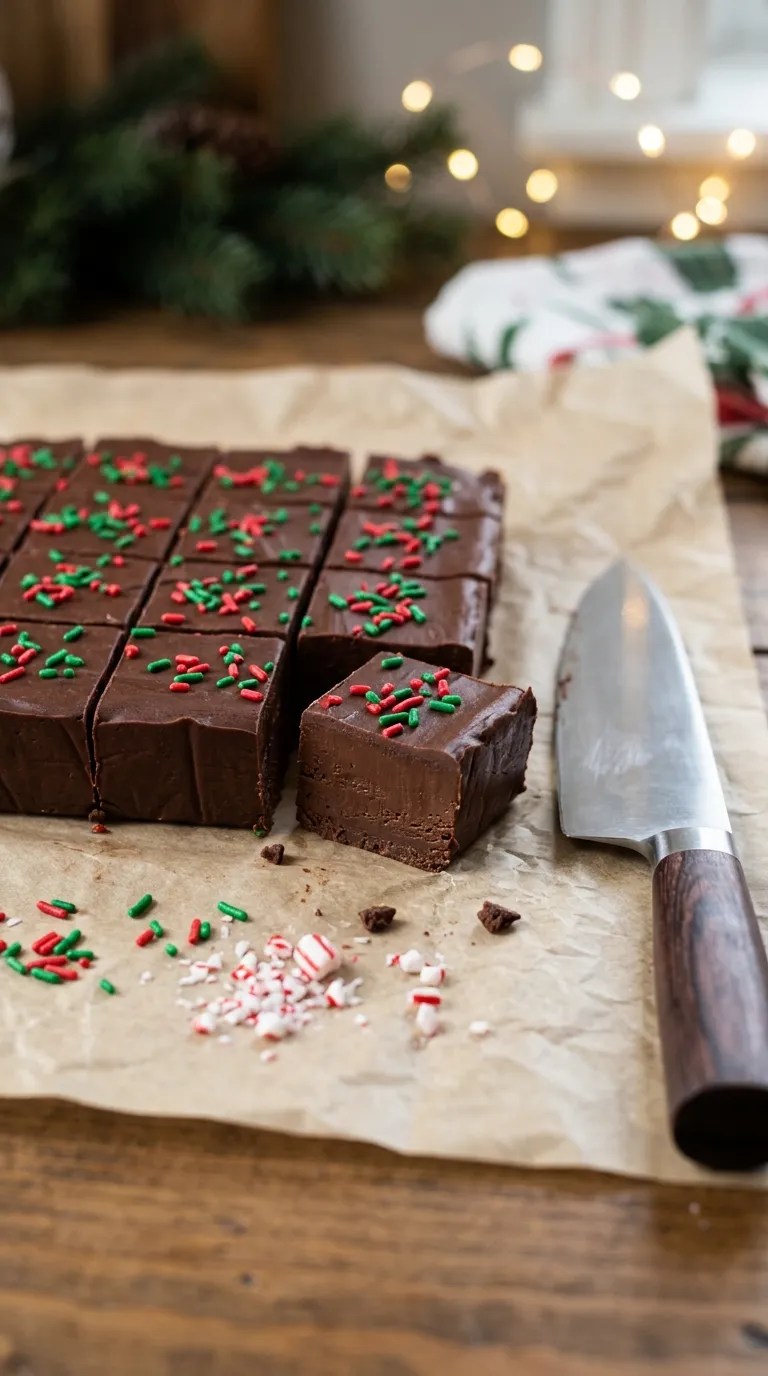
After making this recipe several times, I’ve discovered that a few small details can make the difference between beautiful, creamy fudge and a batch that doesn’t quite turn out as expected.
Here are the tips I’d share with a friend before they start.
1. Never Rush the Chocolate-Melting Process
Chocolate doesn’t need high heat to melt properly.
Use low heat on the stovetop or short microwave intervals. Stir frequently, even when the chocolate still looks mostly solid.
Residual heat will help melt the remaining pieces.
If you overheat chocolate, it can become thick, dry, or grainy. Starting slowly saves you from that problem.
2. Choose Good-Quality Chocolate
Chocolate is the main flavor in this recipe, so it deserves a little attention.
I usually reach for semi-sweet chocolate chips from brands such as Ghirardelli or Nestlé Toll House. Chopped baking chocolate also works well.
Avoid using chocolate products that don’t melt smoothly, such as some candy coatings or chocolate-flavored baking pieces, unless the package specifically recommends them for melting.
3. Don’t Add Decorations Too Early
Sprinkles can lose their color when they sit on very hot chocolate.
Let the fudge mixture cool for about 2–3 minutes after spreading it into the pan. It should still feel soft enough for the decorations to stick.
Then add your toppings.
If you want crushed peppermint to stay crunchy, add it shortly before the fudge finishes setting.
4. Use a Warm Knife for Neat Squares
This is one of my favorite little tricks.
A cold knife can drag through the fudge and create messy edges. A warm, completely dry knife glides through more easily.
Clean the blade after every few cuts, especially if you’re making small squares for Christmas gift boxes.
5. Make It Ahead for Less Holiday Stress
You don’t need to prepare this fudge on Christmas morning.
Make it one or two days ahead, let it set completely, and store it in an airtight container in the refrigerator.
This gives you one less dessert to worry about when the kitchen gets busy.
For longer storage, freeze the fudge in a suitable airtight container with parchment paper between the layers.
Variations & Substitutions
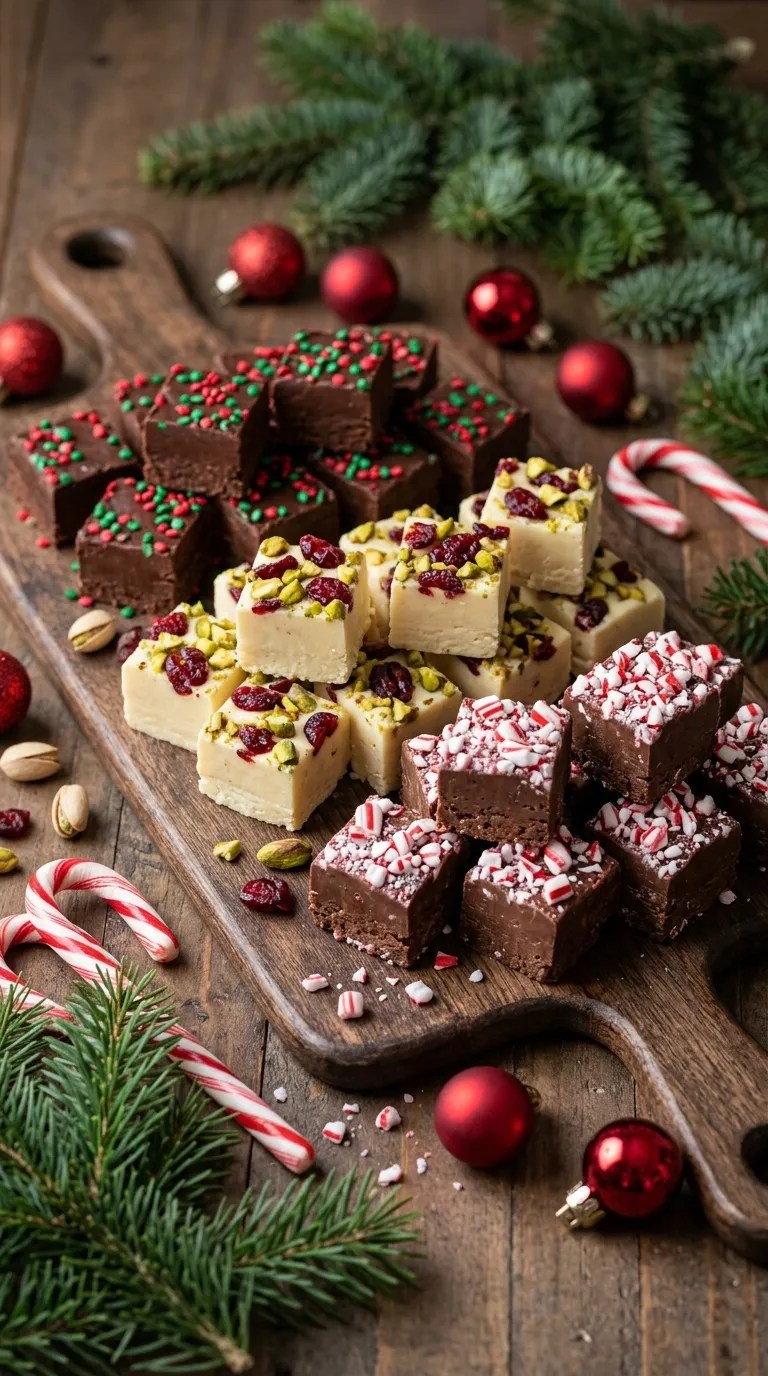
One of the things I enjoy most about homemade fudge is how easily you can change the flavor.
The basic chocolate mixture gives you a reliable starting point, but you can create several festive versions without making an entirely different recipe.
Peppermint Christmas Fudge
If you love the combination of chocolate and mint, this variation is worth trying.
Add ¼ teaspoon peppermint extract to the chocolate mixture along with the vanilla. Sprinkle 2 tablespoons of crushed candy canes over the top.
Start with a small amount of peppermint extract. Its flavor can become quite strong, and too much may overpower the chocolate.
This version tastes especially lovely during the holiday season.
White Chocolate Christmas Fudge
For a lighter-looking dessert platter, replace the semi-sweet chocolate with approximately 510 g of white chocolate chips.
Follow the same general method, melting the chocolate gently with the condensed milk and butter.
White chocolate behaves differently from semi-sweet chocolate, so use a good-quality product intended for melting and avoid overheating it.
Decorate with red and green sprinkles, dried cranberries, or tiny pieces of peppermint candy.
The result looks beautiful beside traditional dark chocolate fudge.
Chocolate Walnut Fudge
For a little crunch, stir ½ cup of chopped toasted walnuts into the finished chocolate mixture before transferring it to the pan.
Pecans or almonds work nicely too.
I especially like walnuts because their slightly earthy flavor balances the sweetness of the fudge.
If you’re serving this at a gathering, mention the nuts clearly so guests can choose accordingly.
Cranberry and Pistachio Fudge
This variation looks particularly pretty on a Christmas dessert table.
Add ⅓ cup dried cranberries and ⅓ cup chopped pistachios to the chocolate mixture.
The red cranberries and green pistachios create a natural Christmas color combination without needing many extra decorations.
You can use white chocolate as the base if you prefer a sweeter, lighter flavor.
Serving Suggestions for Christmas Fudge

Homemade fudge tastes wonderful on its own, but I love serving it alongside other holiday favorites.
Here are a few simple ways to enjoy it.
With hot chocolate: Serve a small fudge square with a mug of hot cocoa. The rich chocolate flavors complement each other beautifully.
On a Christmas dessert platter: Arrange fudge squares with gingerbread cookies, shortbread, chocolate truffles, and peppermint bark. Add a few fresh cranberries for a festive finishing touch.
As homemade Christmas gifts: Place individual squares in small paper candy cups and arrange them in a decorative gift box. Add parchment between layers to keep everything neat.
After Christmas dinner: Serve a small selection of fudge pieces with coffee, tea, or espresso. Since fudge is quite rich, smaller portions work perfectly.
For holiday parties: Arrange several fudge flavors on a large serving tray. Mixing dark chocolate, white chocolate, and peppermint varieties gives guests plenty of choices.
If you’re preparing gift boxes, keep the fudge refrigerated until you’re ready to package it. You can also include a small note explaining that the treats need refrigeration.
Related Recipes:
- Easy Christmas Recipe – Simple Holiday Favorite
- Christmas Fudge Recipe – Easy & Festive Sweet
- Christmas Shot Recipes – Festive Holiday Drinks
- Christmas Martini Recipes – Festive Holiday Drinks
FAQ’s
Here are answers to some common questions that might come up while preparing your first batch.
1. How long does homemade Christmas fudge last?
Homemade Christmas fudge generally keeps for about 1–2 weeks in the refrigerator when you store it in an airtight container.
Keep the container away from strong-smelling foods because chocolate can absorb surrounding odors.
For the best flavor and texture, enjoy it within the first week.
2. Can I make Christmas fudge without a candy thermometer?
Absolutely!
This recipe doesn’t require a candy thermometer because it uses sweetened condensed milk rather than a traditional sugar syrup that needs to reach a specific temperature.
Simply melt the chocolate gently, stir in the condensed milk, and chill the mixture until firm.
That’s one of the reasons I recommend this recipe to beginners.
3. Why didn’t my fudge set properly?
Several things can cause soft or runny fudge.
You may have used evaporated milk instead of sweetened condensed milk, added too much liquid, or used chocolate that doesn’t firm up well.
Warm storage conditions can also make fudge feel softer.
First, refrigerate the mixture for another 2–3 hours. If it still doesn’t firm up, check the ingredient measurements and chocolate type before trying the recipe again.
4. Can I freeze Christmas fudge?
Yes! Freezing works very well for this recipe.
Cut the fully chilled fudge into squares and arrange them in a freezer-safe airtight container. Place parchment paper between the layers to prevent sticking.
Freeze for up to 2–3 months for best quality.
When you’re ready to serve it, transfer the container to the refrigerator and allow the fudge to thaw gradually.
Keep the container closed while the fudge warms slightly to help prevent condensation from forming directly on the chocolate.
5. Can I make this Christmas fudge ahead of time?
Yes, and I actually recommend it!
You can prepare the fudge 1–2 days before your Christmas gathering and store it in the refrigerator.
You can also make it several weeks ahead and freeze it.
For the freshest-looking decorations, add delicate sprinkles or peppermint toppings before serving if you plan to freeze the fudge for an extended period.
6. Can I use milk chocolate instead of semi-sweet chocolate?
Yes, but expect a sweeter flavor.
Milk chocolate contains more sugar and milk solids than semi-sweet chocolate, and different brands can produce different textures.
Choose good-quality milk chocolate intended for melting. If you want to balance the sweetness, add a small pinch of salt and consider using toasted nuts as a topping.
7. How do I get clean, even fudge squares?
Start with completely chilled fudge.
Lift it out of the pan using the parchment paper, place it on a cutting board, and use a large sharp knife.
Warm the knife slightly under hot water, dry it thoroughly, and make firm, straight cuts.
Wipe the knife between slices to keep the edges looking neat.
8. Can I make Christmas fudge in the microwave?
Yes!
Place the chocolate chips and butter in a microwave-safe bowl. Heat in 20-second intervals, stirring after each interval.
Once the chocolate melts, stir in the sweetened condensed milk, vanilla, and salt until smooth.
Transfer the mixture to your prepared pan, decorate, and refrigerate until firm.
Keep the microwave intervals short because chocolate can overheat surprisingly quickly.
Final Thought
Christmas always seems to bring a little extra joy into the kitchen, and homemade treats are one of my favorite ways to share that feeling.
This easy Christmas fudge is simple enough for a quiet afternoon at home but pretty enough to serve at a holiday party or give as a homemade gift.
I love that you can prepare the basic chocolate version and then decorate it in different ways. A little peppermint here, some white chocolate there, or a handful of festive sprinkles can make every batch feel special.
Don’t worry if your first few squares aren’t perfectly shaped. Homemade fudge doesn’t need to look like it came from a candy shop. Sometimes those slightly uneven pieces are the ones everyone reaches for first!
So grab your chocolate, prepare your baking pan, and make a batch for the people you love.
And if you try this Christmas Fudge Recipe Easy, I’d love to hear how it turned out. Did you choose peppermint, walnuts, white chocolate, or classic red and green sprinkles? Share your favorite variation and make this little holiday tradition your own!
Leave a Reply
You must be logged in to post a comment.