

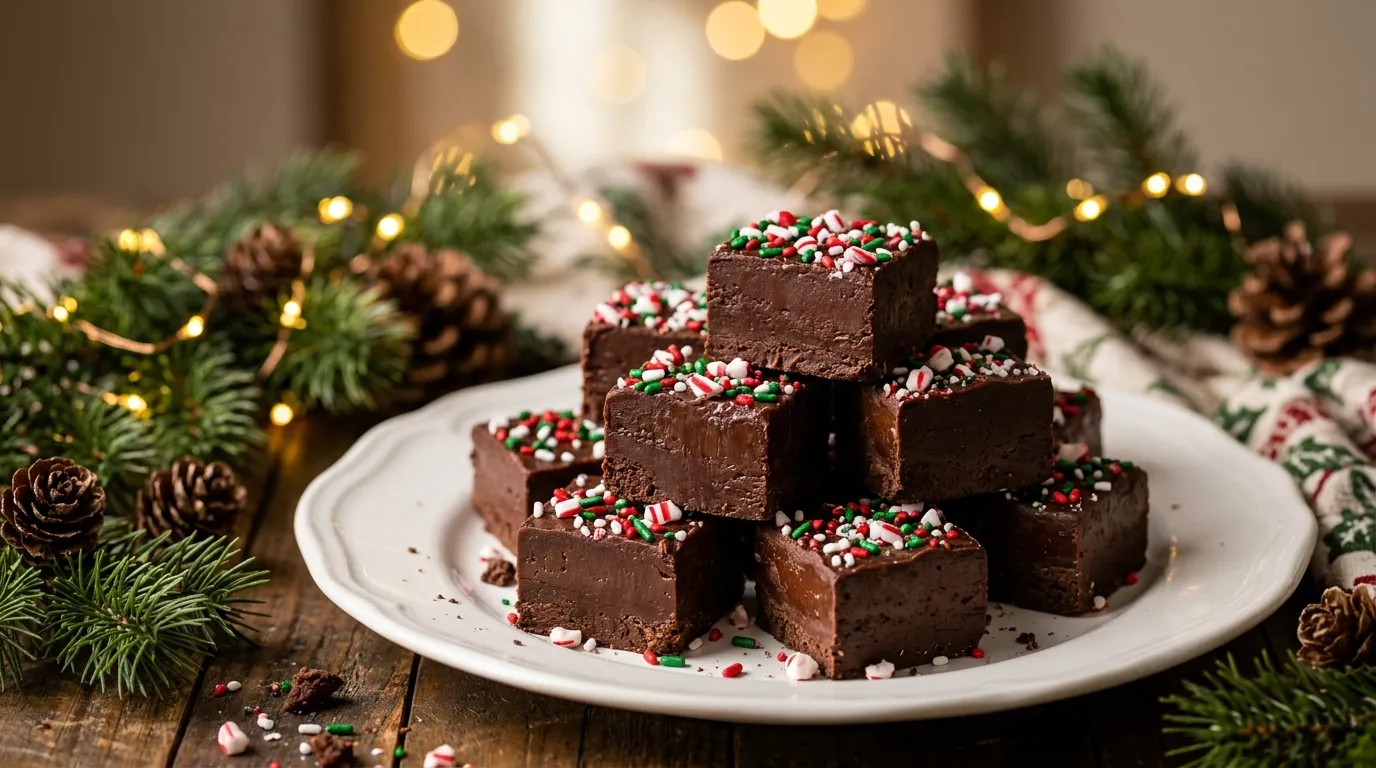
There is something about Christmas that makes homemade sweets feel extra special. Maybe it is the smell of chocolate filling the kitchen, the colorful decorations on the counter, or the excitement of putting together little treat boxes for family and friends. Whatever it is, Christmas always feels like the perfect excuse to make something delicious.
One of my favorite holiday treats is a batch of homemade Christmas fudge. I love how a few simple ingredients can turn into something that looks beautiful and tastes like it came straight from a little holiday candy shop.
The first time I made Christmas fudge, I wanted something festive but didn’t want to spend the afternoon standing over a hot stove. I tried a simple chocolate fudge recipe with condensed milk, chocolate chips, vanilla, and a handful of colorful sprinkles. It turned out so creamy and rich that I immediately knew it would become part of my holiday baking routine.
What I love most about this Christmas Fudge Recipe is that you don’t need a candy thermometer, complicated techniques, or special candy-making equipment. You simply melt, mix, pour, decorate, and chill.
The hardest part is waiting for the fudge to set!
This recipe makes beautiful little squares with a smooth, creamy texture and plenty of chocolate flavor. The festive sprinkles add a cheerful Christmas touch, making each piece look lovely on a holiday dessert table.
Whether you’re preparing Christmas gifts, planning a family gathering, or simply craving a sweet homemade treat, this easy Christmas fudge deserves a place on your holiday menu.
Why You’ll Love This Christmas Fudge Recipe

There are plenty of reasons to add this festive fudge to your Christmas baking list.
- Super easy to make: You only need a handful of everyday ingredients and a saucepan or microwave.
- No candy thermometer required: The condensed milk method makes homemade fudge much less intimidating.
- Perfect for holiday gifting: Cut it into neat squares, place them in small gift boxes, and add a festive ribbon.
- Beautiful and colorful: Red, green, and white sprinkles give the fudge a cheerful Christmas appearance.
- Make-ahead friendly: Prepare it a day or two before your celebration and keep it chilled until serving.
Another thing I appreciate is how easy this recipe is to customize. You can use dark chocolate, white chocolate, nuts, crushed peppermint, or different holiday toppings without changing the basic method.
It is also a wonderful recipe to make with children. They can help measure the sprinkles, decorate the fudge, and choose their favorite toppings. Just keep the hot saucepan and melted chocolate away from little hands.
Ingredients for Easy Christmas Fudge
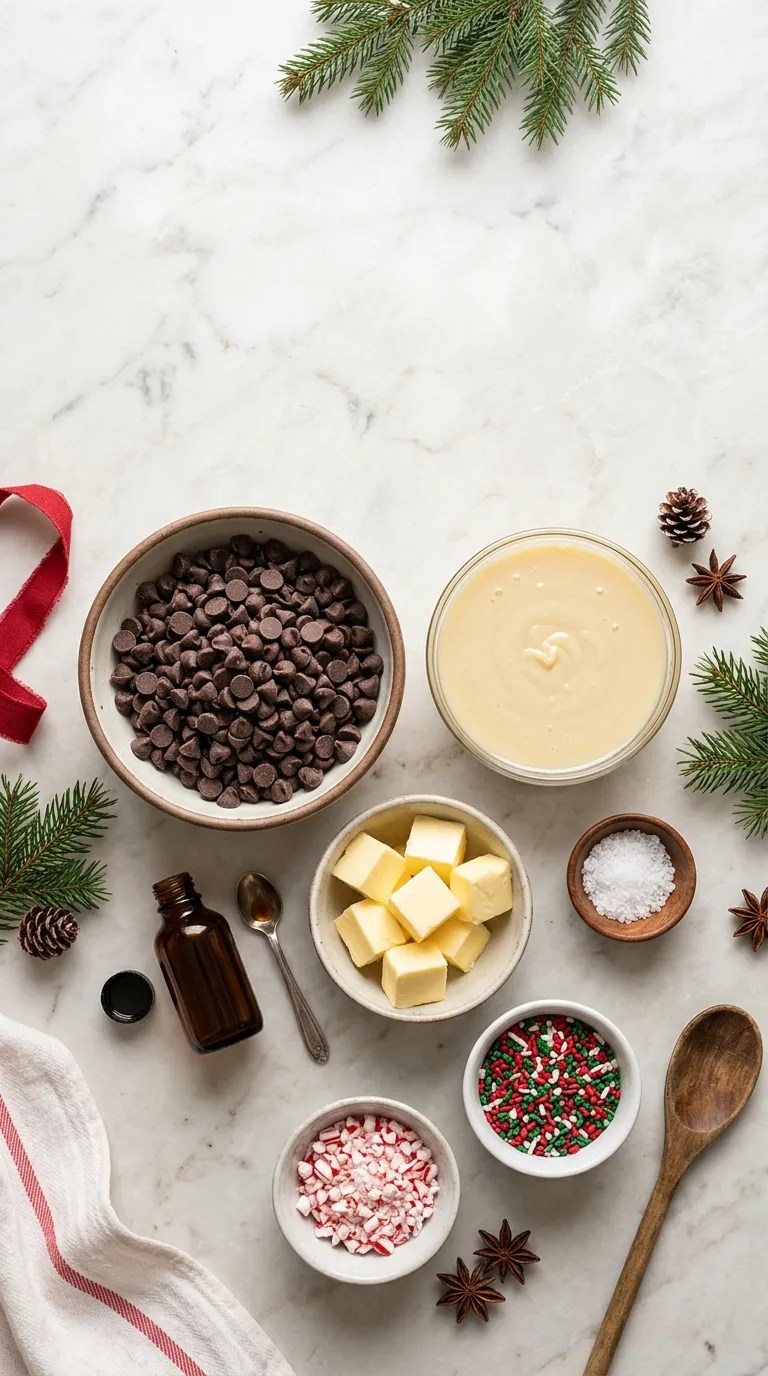
Best Christmas Fudge Recipe – How To Make Christmas Fudge
You don’t need a long shopping list for this recipe. Most ingredients are easy to find in a regular grocery store, especially during the holiday season.
The quantities below make approximately 36 small squares, depending on how you cut them.
For the Chocolate Fudge
- 3 cups (510 g) semi-sweet chocolate chips: These create the rich chocolate flavor and help the fudge set. Choose good-quality chocolate chips for the best result.
- 1 can (14 oz / 397 g) sweetened condensed milk: This provides sweetness and gives the fudge its creamy texture. Make sure you use sweetened condensed milk, not evaporated milk.
- 2 tablespoons (28 g) unsalted butter: Butter adds richness and helps create a smooth, silky texture.
- 1 teaspoon vanilla extract: A little vanilla makes the chocolate flavor taste warmer and more rounded.
- 1/8 teaspoon salt: Salt balances the sweetness and brings out the chocolate flavor.
For the Christmas Decoration
- 2–3 tablespoons red and green Christmas sprinkles: These give the fudge its festive appearance.
- 2 tablespoons crushed peppermint candy (optional): Add this if you enjoy a little minty crunch.
- 2 tablespoons mini white chocolate chips (optional): These create a pretty contrast against the dark chocolate.
Equipment You’ll Need
Gather these simple kitchen tools before starting:
- An 8-inch square baking pan.
- Parchment paper.
- A medium-sized saucepan or microwave-safe bowl.
- A silicone spatula.
- Measuring cups and spoons.
- A sharp knife for cutting the fudge.
I prefer an 8-inch square metal baking pan because it produces nicely thick pieces. A glass baking dish also works well.
A quick ingredient tip: If your chocolate chips taste waxy or don’t melt smoothly, try using chopped baking chocolate instead. Good-quality chocolate makes a noticeable difference in the finished fudge.
Step-by-Step Instructions for Christmas Fudge
Microwave Chocolate Fudge Recipe Review – Parade
Doces tradicionais brasileiros na confeitaria – Casacha
How to Make Creamy, Melty Fudge (The Best Last-Minute Gift)
9
Now comes the fun part! This recipe takes about 10–15 minutes of active preparation, followed by approximately 3–4 hours of chilling time.
Take your time while melting the chocolate. Gentle heat is the secret to smooth, creamy fudge.
Step 1: Prepare Your Baking Pan (5 Minutes)
Start by lining an 8-inch square baking pan with parchment paper.
Leave a little extra parchment hanging over two opposite sides. These overhanging edges will act like handles when you remove the chilled fudge later.
Lightly butter the parchment if you want extra insurance against sticking, although good-quality parchment usually does the job on its own.
Set the pan aside while you prepare the chocolate mixture.
Step 2: Combine the Chocolate and Condensed Milk (2 Minutes)
Place the chocolate chips, sweetened condensed milk, and butter in a medium-sized saucepan.
Make sure you use a saucepan with a heavy bottom if possible. It helps distribute the heat more evenly and reduces the chance of scorching the chocolate.
Add the salt as well.
At this stage, everything should look separate and slightly messy. Don’t worry about that. The ingredients will come together as they warm.
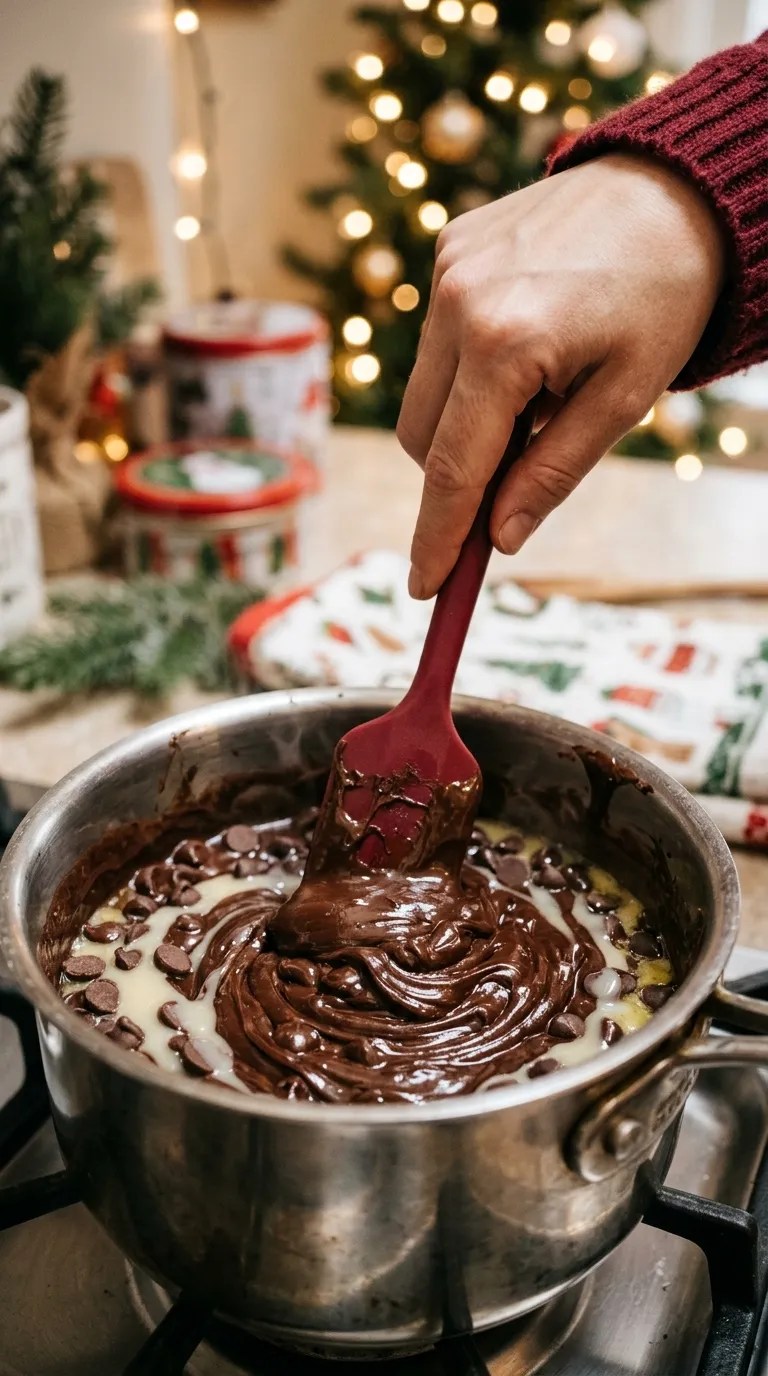
Step 3: Melt Everything Gently (5–8 Minutes)
Place the saucepan over low heat.
Stir continuously with a silicone spatula, making sure to scrape along the bottom and sides of the pan.
After a few minutes, the chocolate chips will begin to soften. The butter will melt, and the condensed milk will blend with the chocolate.
Keep stirring until the mixture looks glossy, thick, and completely smooth.
Don’t rush this step by increasing the heat. Chocolate can scorch surprisingly quickly, and overheated chocolate may become grainy or seize.
What you’re looking for: The mixture should fall slowly from your spatula in a thick ribbon. You shouldn’t see any dry chocolate chips or separate streaks of condensed milk.
Once everything melts, remove the saucepan from the heat.
Microwave alternative: Place the chocolate chips, condensed milk, and butter in a microwave-safe bowl. Heat in 20–30-second intervals, stirring thoroughly after each interval. Repeat until the mixture becomes smooth. Avoid overheating it.
Step 4: Add the Vanilla (1 Minute)
Let the chocolate mixture rest for about 30 seconds.
Stir in the vanilla extract until it blends evenly.
I like adding vanilla near the end because it keeps its lovely aroma and makes the fudge taste even more delicious.
If you’re adding mini chocolate chips or chopped nuts inside the fudge, let the mixture cool slightly before stirring them in. This prevents smaller chocolate pieces from melting completely.
Step 5: Transfer the Fudge to the Pan (2 Minutes)
Pour the warm chocolate mixture into your prepared baking pan.
Use your silicone spatula to scrape every last bit from the saucepan. We don’t want to waste any of that chocolate goodness!
Spread the mixture evenly into the corners of the pan.
Gently tap the pan against your countertop a couple of times to help settle the fudge and remove any large air pockets.
The surface should look smooth and level.
Step 6: Add the Christmas Decorations (2 Minutes)
Best Christmas Fudge Recipe – How To Make Christmas Fudge
While the fudge is still warm, scatter red and green Christmas sprinkles evenly over the surface.
If you enjoy peppermint, sprinkle a little crushed candy cane over the top too.
For a prettier finish, I like combining several toppings rather than covering the entire surface with just one kind.
Gently press larger decorations into the fudge so they stay in place after chilling.
This is a great moment to get creative. You can make different sections with different toppings if you want to give everyone a little variety.
Step 7: Chill Until Firm (3–4 Hours)
Place the pan in the refrigerator for approximately 3–4 hours, or until the fudge feels firm when you gently press the center.
For the cleanest slices, I usually prefer chilling it overnight.
Avoid covering the pan while the fudge still feels warm. Let it cool first, then cover it loosely with plastic wrap or a lid.
The fudge should become firm enough to lift out of the pan without bending or losing its shape.
Step 8: Cut Into Squares and Serve (5–10 Minutes)
Best Christmas Fudge Recipe – How To Make Christmas Fudge
Once the fudge has completely set, use the parchment paper handles to lift it out of the pan.
Place it on a clean cutting board.
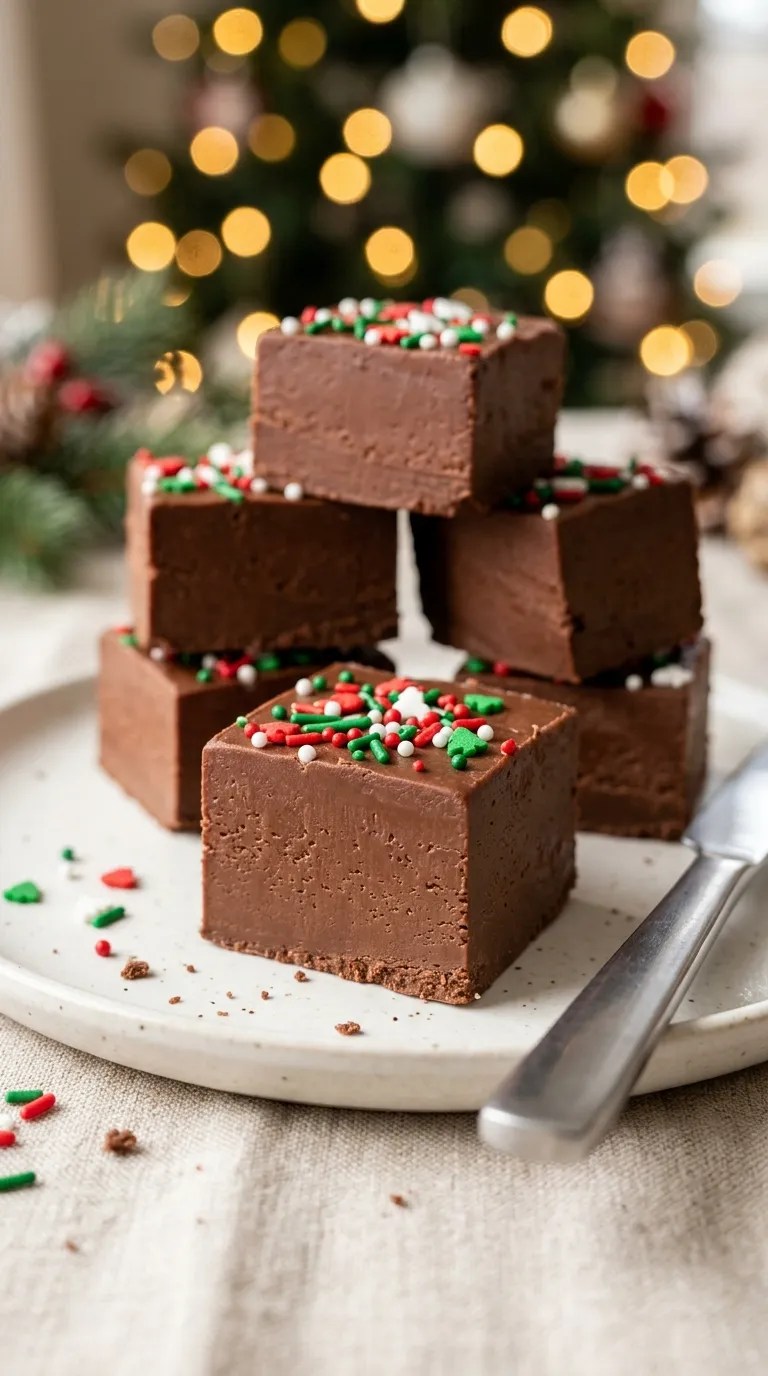
Take a large, sharp knife and cut the fudge into small squares. For approximately 36 pieces, cut six rows in each direction.
Here’s a little trick I discovered: Warm your knife under hot water, wipe it completely dry, and then make your cuts. The warm blade moves through the fudge more easily and creates smoother edges.
Wipe the knife between cuts if chocolate starts sticking to it.
Arrange your finished squares on a festive plate or transfer them into little Christmas treat boxes.
Your homemade Christmas fudge is ready!
Pro Tips & Tricks for Perfect Christmas Fudge
Best Christmas Fudge Recipe – How To Make Christmas Fudge
Even though this is a simple recipe, a few small details can make a big difference in the final texture.
Here are the tricks I would share with anyone making homemade fudge for the first time.
1. Never Rush the Melting Process
This is probably the most important tip.
Chocolate doesn’t respond well to excessive heat. If you turn the burner too high, the chocolate can scorch before the condensed milk and butter blend properly.
Keep the heat low and stir patiently.
If you’re using a microwave, short heating intervals work much better than one long heating session.
2. Choose the Right Chocolate
Your chocolate determines much of the flavor.
Semi-sweet chocolate chips create a balanced fudge that isn’t overwhelmingly sweet. If you prefer a richer taste, use dark chocolate with around 60–70% cocoa.
Avoid using chocolate that you wouldn’t enjoy eating on its own.
3. Don’t Skip the Parchment Paper
I once tried making fudge without lining the pan because I thought a little butter would be enough.
Getting that fudge out of the pan was much harder than it needed to be!
Parchment paper makes removal simple and keeps the edges neat. Leave enough overhang so you can lift the entire slab out comfortably.
4. Add Decorations Before the Fudge Sets
Sprinkles stick best while the chocolate mixture remains slightly warm.
If you wait until the fudge becomes firm, the decorations may fall off when you cut it.
For peppermint candy, remember that crushed pieces can soften slightly when they sit on a moist surface. Add them shortly before chilling for the best texture.
5. Store It Properly
Keep the fudge in an airtight container in the refrigerator.
Place parchment or wax paper between layers to prevent the squares from sticking together.
For gifting, let the pieces stay chilled until you’re ready to pack them. Choose a food-safe container and avoid leaving the fudge in a warm car or sunny spot.
Christmas Fudge Variations & Substitutions
10 Homemade Holiday Food Gifts To Give Friends And Family This Season
9
One of the best things about this recipe is that you can change the flavor without learning a completely new technique.
Here are a few variations worth trying.
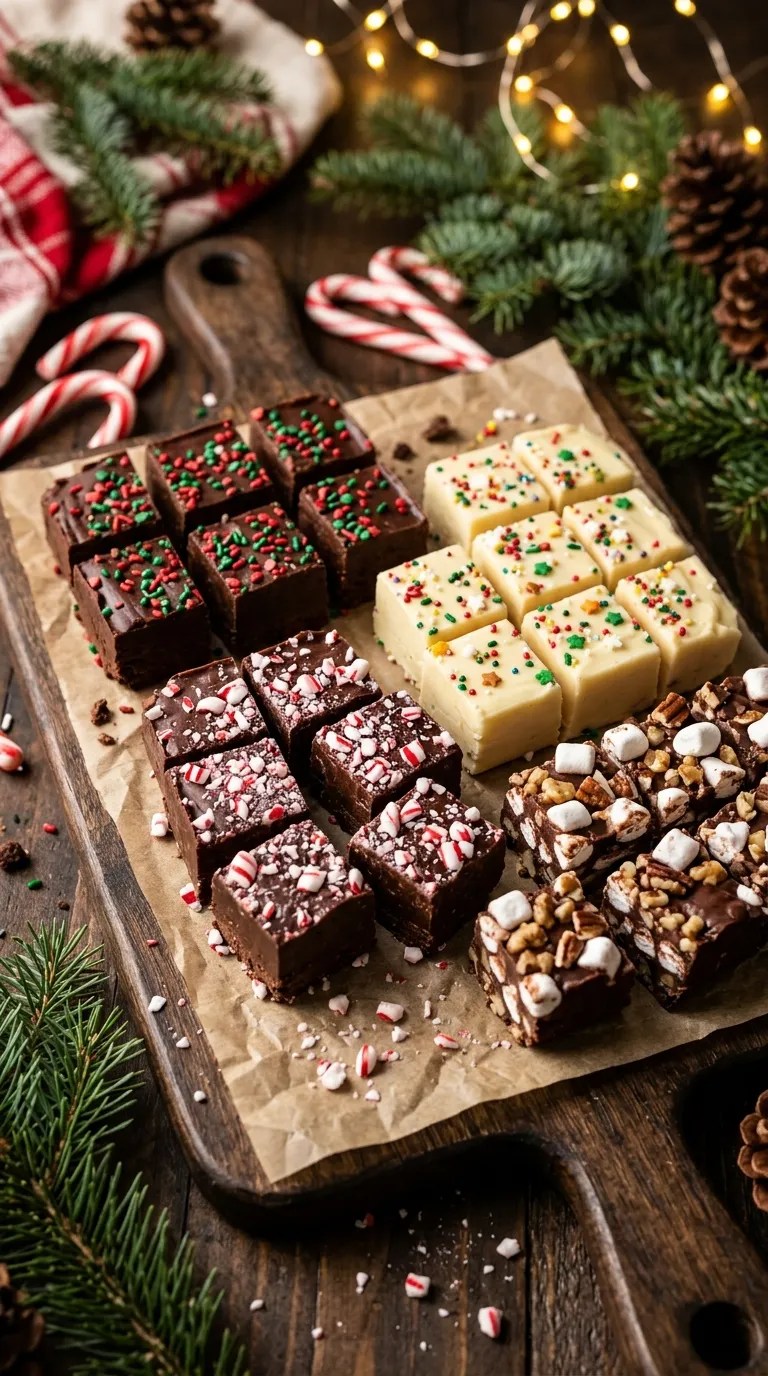
1. White Chocolate Christmas Fudge
If you love sweeter, creamier treats, try making a white chocolate version.
Replace the semi-sweet chocolate chips with 3 cups (approximately 510 g) of white chocolate chips.
Keep the condensed milk, butter, vanilla, and salt the same.
Decorate with red and green sprinkles, dried cranberries, or crushed peppermint.
White chocolate melts differently from semi-sweet chocolate, so use low heat and stir carefully. If the mixture looks unusually thick, avoid adding extra liquid; give it a little more gentle stirring instead.
2. Peppermint Chocolate Fudge
This version tastes like Christmas in every bite.
Follow the original recipe, but add 1/4 teaspoon peppermint extract along with the vanilla.
You can increase it slightly if you enjoy a stronger mint flavor, but start small. Peppermint extract can quickly overpower the chocolate.
Finish with crushed candy canes and a few white chocolate chips.
The combination of smooth chocolate and crunchy peppermint makes this version especially nice for holiday dessert platters.
3. Christmas Rocky Road Fudge
If you prefer a little crunch in your sweets, rocky road fudge is a lovely choice.
Stir the following ingredients into the melted chocolate mixture after removing it from the heat:
- 1/2 cup mini marshmallows.
- 1/3 cup chopped almonds or walnuts.
- 1/4 cup dried cranberries.
Fold everything together gently, then spread the mixture into your prepared pan.
Add a few extra marshmallows and festive sprinkles on top.
The result is a delicious combination of creamy chocolate, chewy fruit, soft marshmallows, and crunchy nuts.
Allergy note: If you’re making fudge for a party or gifting it, mention any nuts or other common allergens in your ingredients.
Serving Suggestions for Christmas Fudge

Christmas fudge tastes wonderful straight from the refrigerator, but a little thought goes into making it look extra special when serving.
Here are some of my favorite ways to enjoy it.
Serve It on a Christmas Dessert Platter
Arrange fudge squares alongside gingerbread cookies, shortbread, chocolate truffles, and sugar cookies.
Use a festive serving tray and add a few candy canes or edible decorations around the edges.
The different shapes, colors, and textures make the platter look beautiful without requiring much extra work.
Pair It With Hot Chocolate
A small square of rich chocolate fudge goes wonderfully with a warm cup of hot chocolate.
You can serve it with whipped cream, marshmallows, or a little cinnamon on top of the drink.
It makes a lovely afternoon treat on a cold winter day.
Package It as a Homemade Christmas Gift
This is probably my favorite way to share homemade fudge.
Cut the fudge into small, even squares and place them in food-safe paper cups inside a decorative gift box.
Separate the layers with parchment paper and finish the box with a ribbon.
You can also add a small handwritten label with the flavor and storage instructions.
Homemade gifts don’t have to be complicated. Sometimes a little box of chocolate fudge makes someone happier than an expensive present.
Serve It at Holiday Parties
Place small fudge squares on a dessert table during Christmas dinner, office parties, family gatherings, or holiday movie nights.
Because the fudge is rich, small pieces are usually enough.
I recommend cutting it into bite-sized squares so guests can enjoy a little sweetness without feeling overwhelmed.
Related Recipes:
- Christmas Appetizer Recipes – Easy Holiday Bites
- Christmas Trash Mix Recipe
- Christmas Bread Recipe – Easy Holiday Favorite
- Christmas Simmer Pot Recipe Gift
FAQ’s
1. How long does homemade Christmas fudge last?
When stored in an airtight container in the refrigerator, homemade Christmas fudge generally keeps its best quality for about 2 weeks.
Keep it away from strong-smelling foods because chocolate can absorb surrounding odors.
For the best flavor and texture, serve it within the first week whenever possible.
2. Can I make Christmas fudge ahead of time?
Absolutely!
This recipe works beautifully as a make-ahead holiday dessert.
You can prepare the fudge 2–3 days before Christmas, let it set completely, and store it in an airtight container in the refrigerator.
I actually prefer making it the day before a celebration. That gives me one less thing to worry about when the kitchen gets busy.
3. Can I freeze Christmas fudge?
Yes, you can freeze this fudge.
First, allow it to set completely and cut it into individual squares.
Place parchment paper between the layers and transfer the pieces into a freezer-safe airtight container or freezer bag.
Freeze for up to 2–3 months for good quality.
When you’re ready to serve, transfer the container to the refrigerator and let the fudge thaw gradually. This helps reduce condensation on the surface.
4. Why didn’t my Christmas fudge set properly?
There are a few possible reasons.
You may have used evaporated milk instead of sweetened condensed milk, added too much liquid, or used chocolate that didn’t provide enough structure.
The mixture may also need more chilling time.
If the fudge still feels soft after several hours, leave it in the refrigerator overnight before deciding that something went wrong.
For your next batch, measure the ingredients carefully and stick to the recommended chocolate-to-condensed-milk ratio.
5. Can I make this recipe without a stovetop?
Yes!
A microwave works perfectly well for this recipe.
Combine the chocolate chips, condensed milk, and butter in a microwave-safe bowl. Heat for 20–30 seconds at a time, stirring between intervals.
Continue until the mixture melts into a smooth, glossy consistency.
Don’t microwave the mixture for too long without stirring because chocolate can overheat quickly.
6. How do I get clean, even fudge squares?
The secret is to let the fudge become completely firm before cutting.
Lift it out of the pan using the parchment paper, then place it on a flat cutting board.
Use a large, sharp knife warmed under hot water and dried thoroughly.
Make steady cuts rather than pressing down repeatedly. Clean the blade between cuts for the neatest results.
7. Can I use regular milk instead of condensed milk?
No, regular milk isn’t a direct substitute.
Sweetened condensed milk contains concentrated milk solids and sugar, which help create the fudge’s creamy texture and structure.
Regular milk has a much thinner consistency and doesn’t provide the same result.
If you don’t have condensed milk, it’s better to choose a different fudge recipe designed specifically for the ingredients you have.
Final Thought
There is something genuinely satisfying about making a homemade Christmas treat that looks beautiful, tastes delicious, and doesn’t take hours in the kitchen.
This Christmas Fudge Recipe has everything I want in a holiday sweet: rich chocolate flavor, a creamy texture, colorful decorations, and a simple preparation method that even beginner cooks can manage.
I especially love that I can prepare it ahead of time and keep it ready for unexpected guests, family celebrations, or little homemade gifts.
And don’t worry if your first batch doesn’t have perfectly straight edges. Homemade fudge doesn’t need to look like it came from a professional candy shop. A little sprinkle here and an uneven corner there simply make it feel homemade.
Try the classic chocolate version first, then experiment with peppermint, white chocolate, or rocky road. You might even discover a new family favorite along the way.
If you make this festive Christmas fudge, I’d love to hear how it turns out! Leave a comment with your favorite topping or tell me which variation you tried.
Happy Christmas baking, and enjoy every sweet little bite!
Leave a Reply
You must be logged in to post a comment.