

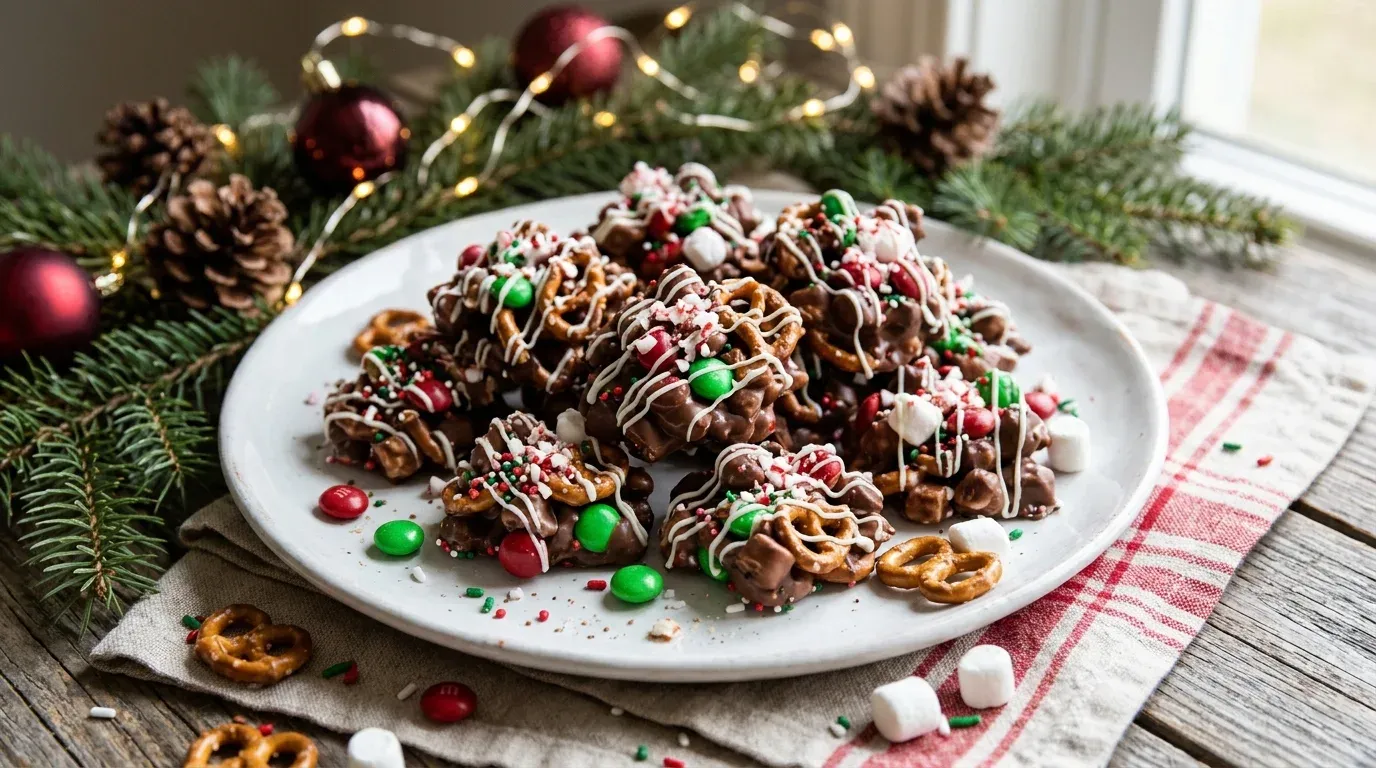
There is something special about the smell of sweet treats filling the kitchen during Christmas. The moment I start melting chocolate, mixing colorful candies, and reaching for the holiday sprinkles, the whole house starts to feel a little more festive.
One of my favorite things about Christmas baking is that it doesn’t have to involve complicated recipes or hours of preparation. Sometimes, the simplest treats bring the biggest smiles. That’s exactly why I love making these Christmas Goodies.
I first started putting together this easy holiday treat when I wanted something festive to share with family and friends without spending an entire afternoon in the kitchen. I had chocolate, mini marshmallows, pretzels, and a few leftover Christmas candies in the pantry. Instead of making several separate desserts, I combined everything into one delicious batch of chocolate Christmas goodies.
The result was better than I expected!
These little bites combine smooth melted chocolate, crunchy pretzels, colorful holiday candies, and soft marshmallows. Every bite offers a different texture, and the festive colors make them look beautiful on a Christmas dessert table.
What I especially love is how forgiving this recipe is. You don’t need special baking equipment, advanced cooking skills, or even an oven. Just gather your ingredients, melt some chocolate, mix everything together, and let the refrigerator handle the rest.
Whether you’re preparing a Christmas party, filling holiday gift boxes, making treats with children, or simply craving something sweet during the festive season, these Christmas Goodies deserve a place on your holiday menu.
Why You’ll Love This Christmas Goodies Recipe

There are plenty of reasons to add these easy Christmas treats to your holiday baking list.
- Quick and easy: You can prepare the mixture in about 15 minutes, and the refrigerator does most of the remaining work.
- No oven required: You don’t need to preheat anything or worry about complicated baking instructions.
- Budget-friendly: Basic ingredients like chocolate, pretzels, marshmallows, and candies create a generous batch.
- Perfect for sharing: Package the goodies in small bags or festive boxes for thoughtful homemade Christmas gifts.
- Easy to customize: Change the chocolate, toppings, or mix-ins to match your family’s favorite flavors.
Another reason I keep coming back to this recipe is that it works beautifully when I have unexpected holiday guests. I can prepare a batch ahead of time and keep it chilled until everyone is ready for dessert.
Ingredients for Easy Christmas Goodies
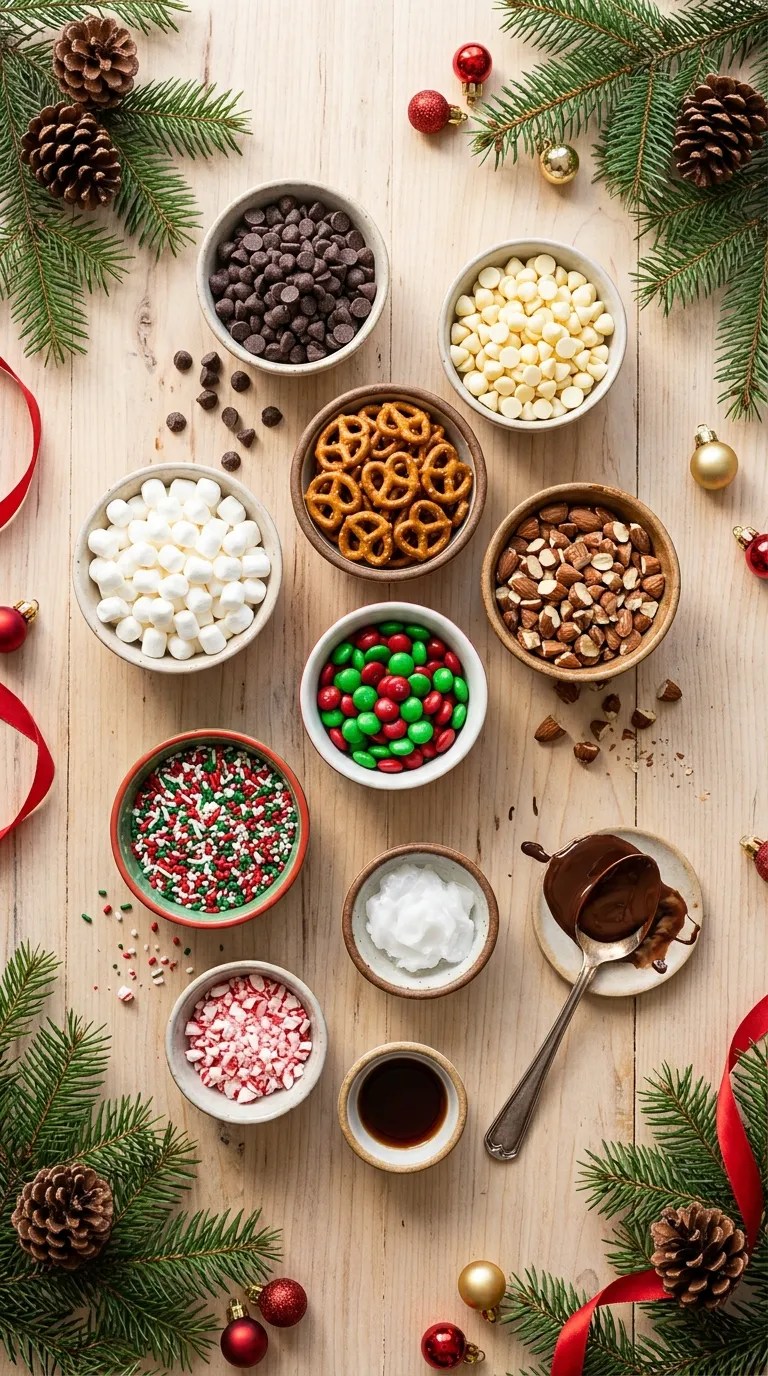
This recipe makes approximately 24–30 small Christmas treats, depending on how large you make each portion.
Main Ingredients
- 2 cups (340 g) semi-sweet chocolate chips
- 1 cup (170 g) white chocolate chips
- 1 tablespoon coconut oil or vegetable shortening
- 1 cup mini pretzels, roughly broken into smaller pieces
- 1 cup mini marshmallows
- ½ cup red and green chocolate candies
- ½ cup roasted peanuts or chopped almonds (optional)
- ½ teaspoon vanilla extract
Festive Toppings
- ¼ cup Christmas sprinkles
- 2 tablespoons crushed peppermint candy
- 2 tablespoons extra red and green candies
- 2 tablespoons melted white chocolate for drizzling
Ingredient Substitutions
You don’t need to follow the ingredient list perfectly. That’s one of the nicest things about homemade Christmas goodies.
Chocolate: Semi-sweet chocolate gives these treats a pleasant balance of sweetness. However, milk chocolate works if you prefer a sweeter result. Dark chocolate is another lovely option.
Pretzels: If you don’t have pretzels, use crispy rice cereal, broken digestive biscuits, or plain cornflakes. Each option gives the treats a different crunch.
Marshmallows: Mini marshmallows work best because they distribute evenly throughout the mixture. You can cut regular marshmallows into smaller pieces if that’s what you have.
Nuts: Pecans, walnuts, almonds, and peanuts all work well. Leave them out if you prefer a nut-free recipe, and check the packaging of your other ingredients for potential cross-contact warnings.
Candy: Red and green chocolate candies create a traditional Christmas appearance, but you can use any colorful candy-coated chocolates.
Coconut oil: This helps the chocolate melt smoothly. You can leave it out if your chocolate already has a good melting consistency.
Step-by-Step Instructions for Christmas Goodies
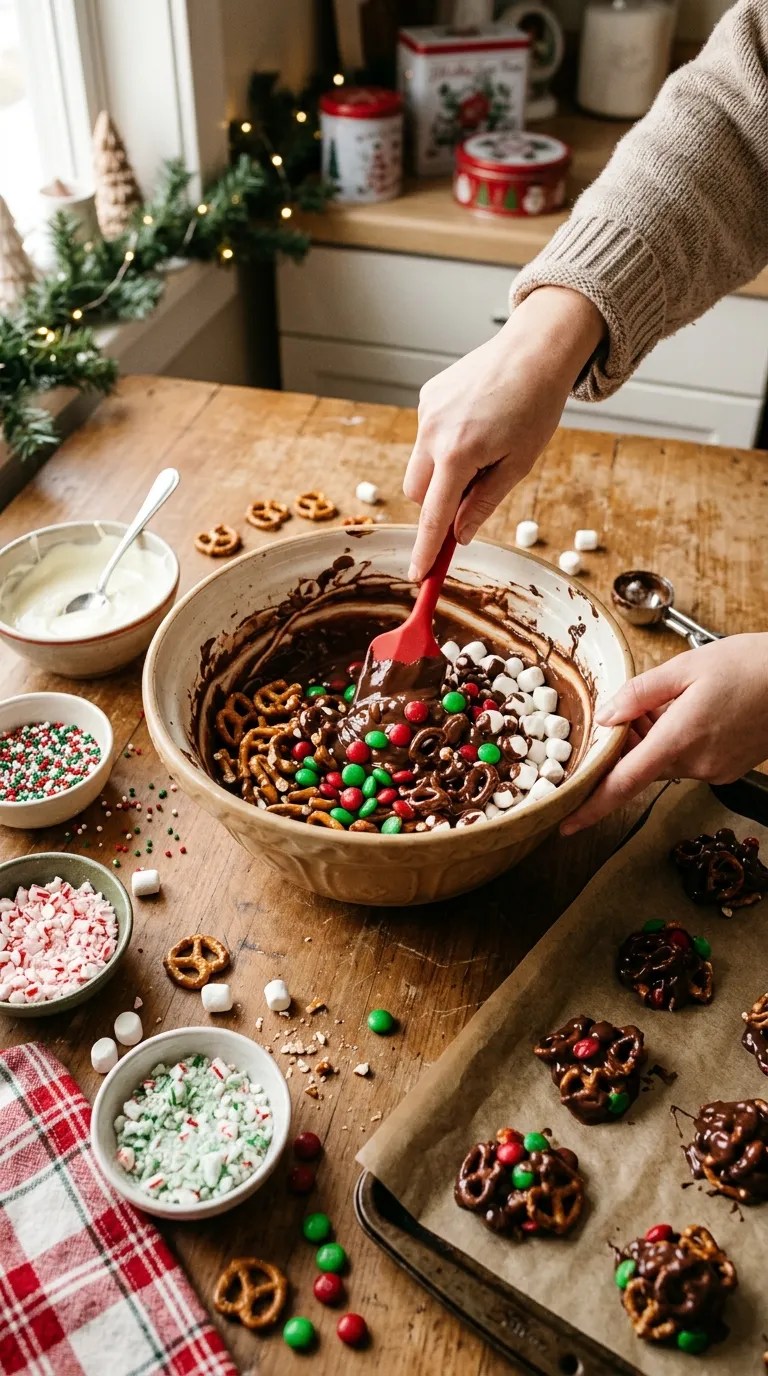
The best part of this recipe is how little effort it requires. Take your time melting the chocolate, and don’t rush the chilling process. Those two details make a big difference.
Step 1: Prepare Your Baking Tray (5 Minutes)
Start by lining a large baking tray or flat baking sheet with parchment paper.
Make sure the paper covers the surface so the chocolate mixture won’t stick. If you don’t have parchment paper, a silicone baking mat works just as well.
Measure your ingredients before melting the chocolate. Break the pretzels into bite-sized pieces, prepare the candies, and set the marshmallows aside.
I like keeping everything in separate bowls because the mixing process moves quickly once the chocolate melts.
Step 2: Melt the Chocolate (3–5 Minutes)
Place the semi-sweet chocolate chips in a microwave-safe bowl.
Add the coconut oil and microwave the chocolate in 20-second intervals. Stir thoroughly between each interval.
Keep doing this until the chocolate looks smooth and glossy. Don’t microwave it for too long at once because chocolate can scorch easily.
If you prefer using a stovetop, place the chocolate and coconut oil in a heatproof bowl over a saucepan containing gently simmering water. Make sure the bottom of the bowl doesn’t touch the water.
Stir until the chocolate melts completely.
Once the chocolate looks silky, add the vanilla extract and stir gently.
Step 3: Melt the White Chocolate (2–3 Minutes)
Place the white chocolate chips in another microwave-safe bowl.
Heat them in short 15–20-second intervals, stirring between each round. White chocolate needs extra attention because it can overheat and become thick or grainy.
Once it melts smoothly, set it aside.
You’ll use this chocolate for mixing and decorating.
Step 4: Combine the Crunchy Ingredients (2 Minutes)
Take a large mixing bowl and add the broken pretzels, mini marshmallows, red and green chocolate candies, and chopped nuts if you’re using them.
Give everything a gentle stir.
Don’t crush the pretzels too much. You want small crunchy pieces rather than fine crumbs.
One small discovery I made while testing this recipe was that adding the marshmallows before the chocolate cools slightly can make them softer than expected. Let the melted chocolate sit for a minute or two before combining everything.
Step 5: Mix Everything Together (3 Minutes)
Pour the melted semi-sweet chocolate over the pretzel and marshmallow mixture.
Use a silicone spatula to fold everything together gently.
Keep mixing until the ingredients receive an even chocolate coating. You should still see colorful candies, marshmallows, and pretzel pieces throughout the mixture.
Don’t stir too aggressively, or the pretzels may break into tiny pieces.
The mixture should look thick and chunky rather than runny.
Step 6: Shape the Christmas Goodies (5–7 Minutes)
Use a tablespoon or small cookie scoop to place portions of the mixture onto your prepared baking tray.
Leave a little space between each portion. They don’t need to look perfectly round. In fact, I think their slightly irregular shapes make them look more homemade and inviting.
If you prefer larger treats, use a bigger scoop.
You can also spread the entire mixture into a parchment-lined square baking pan and cut it into pieces after chilling.
Step 7: Add the Festive Decorations (3 Minutes)
Now comes the fun part!
Drizzle the melted white chocolate over each portion using a spoon.
While the chocolate is still soft, sprinkle Christmas sprinkles, crushed peppermint candy, and extra red and green candies over the top.
Try different combinations to make each piece look colorful.
For a traditional Christmas appearance, use red, green, and white decorations. For a more elegant dessert platter, add a little extra white chocolate and crushed peppermint.
Step 8: Chill Until Firm (30–45 Minutes)
Place the baking tray in the refrigerator for approximately 30–45 minutes.
The Christmas goodies are ready when the chocolate feels firm and the treats lift easily from the parchment paper.
If your kitchen is particularly warm, they may need a little extra chilling time.
Avoid stacking the treats before the chocolate sets completely. Otherwise, they may stick together.
Step 9: Serve and Enjoy!
Once the goodies have hardened, remove them from the baking tray.
Arrange them on a festive serving plate, add a few extra Christmas decorations around the edges, and serve.
You can also place them in small treat bags or decorative gift boxes.
And that’s it! You have a delicious batch of homemade Christmas goodies without turning on your oven.
Pro Tips & Tricks for Perfect Christmas Goodies
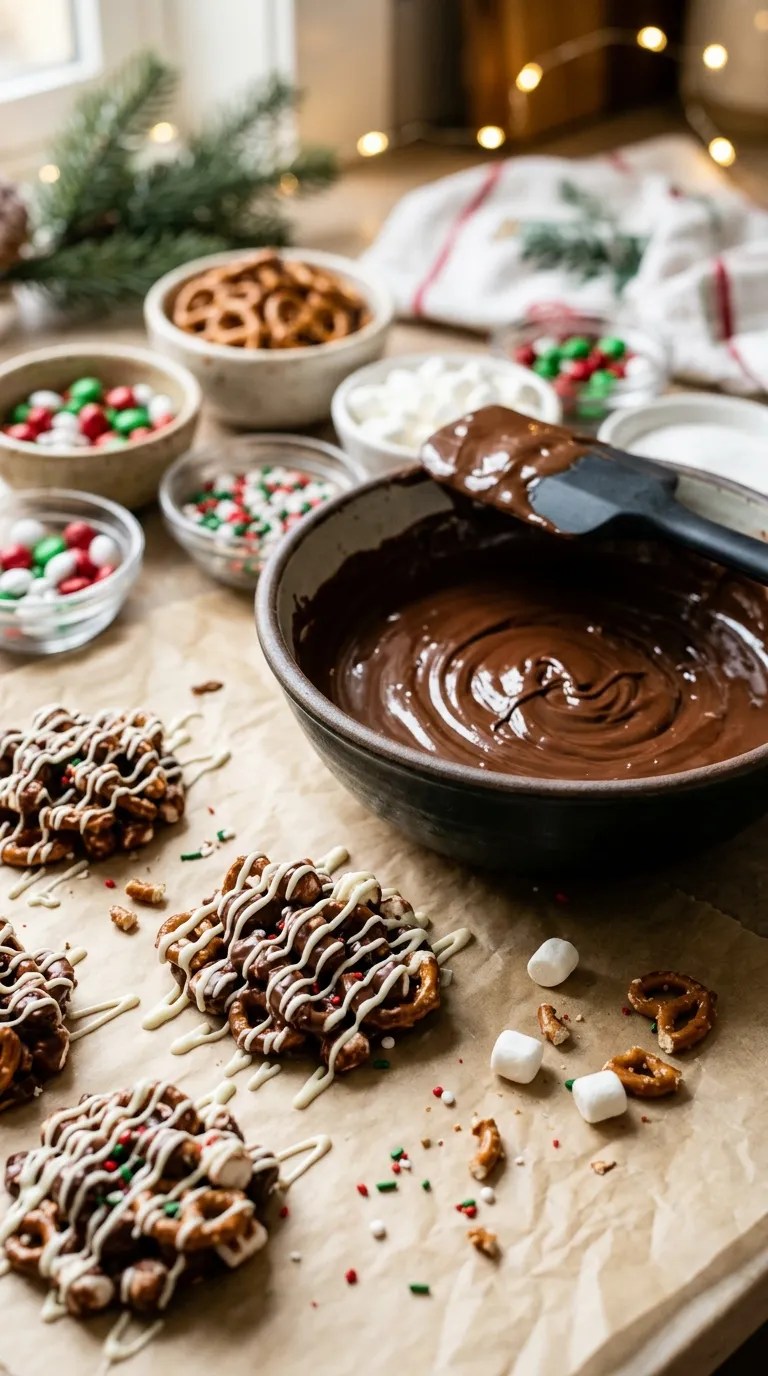
A few small details can make this simple recipe even better. These are the tips I’d share with anyone making their first batch.
1. Never Rush the Chocolate
Chocolate needs gentle heat. If you microwave it continuously for a long period, it can burn or develop a thick texture.
Use short heating intervals and stir frequently. The remaining chocolate often melts from its own warmth after a good stir.
2. Keep Water Away From Melted Chocolate
Even a small amount of water can cause melted chocolate to seize and turn thick.
Make sure your bowls, spoons, and spatulas are completely dry before you begin.
This matters especially when you use a double-boiler method.
3. Let the Chocolate Cool Slightly Before Adding Marshmallows
Very hot chocolate can soften mini marshmallows and make them lose their shape.
Allow the melted chocolate to cool briefly before mixing it with the other ingredients. It should remain fluid but shouldn’t feel extremely hot.
4. Use a Cookie Scoop for Even Portions
A small cookie scoop helps create treats that look similar in size.
This makes serving easier and helps when you’re preparing gift boxes. If you don’t have one, an ordinary tablespoon works perfectly.
5. Store Them Properly
Keep the finished Christmas goodies in an airtight container in the refrigerator.
Place parchment paper between layers to prevent sticking.
For the best texture, take them out shortly before serving so the chocolate can soften slightly.
Make-Ahead Tip
You can prepare these treats two or three days before Christmas and store them in an airtight container in the refrigerator.
This is particularly helpful when you’re planning a large holiday meal and want to finish dessert preparations early.
Variations & Substitutions
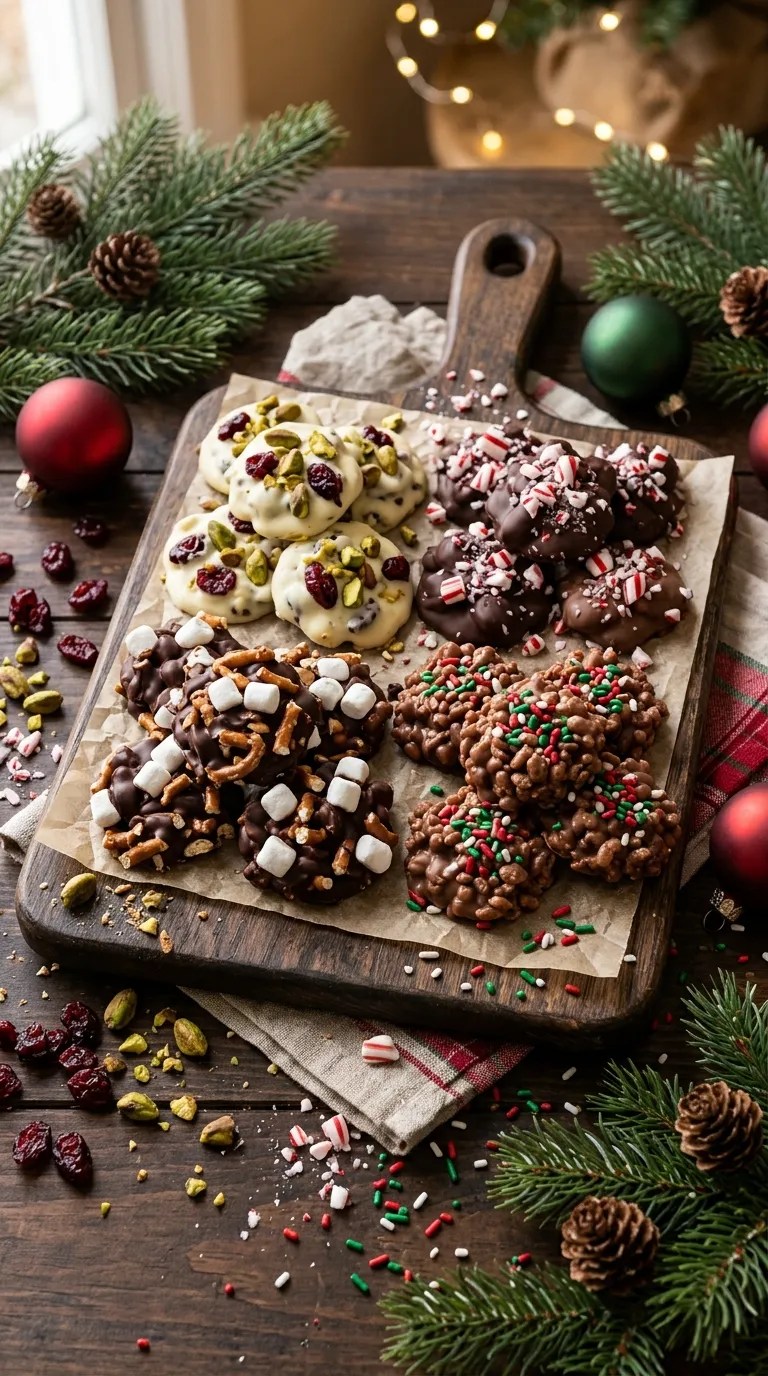
One of the things I enjoy most about homemade Christmas goodies is how easily you can change the recipe.
Here are a few variations worth trying.
1. White Chocolate Christmas Goodies
If you love sweeter treats, replace the semi-sweet chocolate with white chocolate.
Use approximately 500–550 g of white chocolate in total, adjusting the amount according to how much you need to coat your mix-ins.
Add dried cranberries, mini marshmallows, pretzels, and pistachios.
The combination of white chocolate, red cranberries, and green pistachios creates a beautiful festive appearance.
White chocolate can be a little more sensitive to heat, so melt it slowly and stir frequently.
2. Peppermint Christmas Goodies
For a classic holiday flavor, add crushed peppermint candies.
Use about ¼ cup of crushed peppermint and sprinkle a little extra over the top before the chocolate sets.
You can also add ¼ teaspoon peppermint extract to the melted chocolate.
Be careful with the extract because peppermint flavor can quickly become overpowering.
These treats pair especially well with a mug of hot chocolate.
3. Gluten-Free Christmas Goodies
You can make a gluten-free version by replacing regular pretzels with certified gluten-free pretzels.
Check the labels on the chocolate, candies, marshmallows, and other ingredients too.
Use the same quantities and follow the same preparation instructions.
You’ll still get the delicious combination of crunchy, chewy, and chocolatey textures.
4. Nut-Free Version
If you want to avoid nuts, simply leave out the peanuts or almonds.
Add another ½ cup of pretzels or crispy rice cereal instead.
This keeps the mixture crunchy without changing the basic preparation method.
Always check ingredient labels and choose products that meet the needs of anyone who will enjoy the treats.
Serving Suggestions

Christmas goodies look lovely on their own, but you can make them part of a beautiful holiday dessert spread.
Here are a few ways to serve them.
Add Them to a Christmas Dessert Platter
Arrange the goodies on a large serving plate alongside sugar cookies, gingerbread biscuits, brownies, and chocolate truffles.
Use small bowls of extra Christmas candies to fill empty spaces.
The different colors and textures make the platter look inviting without requiring complicated decoration.
Serve With Hot Chocolate
These chocolate treats pair wonderfully with hot chocolate.
Serve them with whipped cream, marshmallows, or a sprinkle of cinnamon for a cozy winter dessert.
Coffee and warm milk also make lovely accompaniments.
Package Them as Homemade Christmas Gifts
Homemade food gifts always feel thoughtful.
Place a few completely set treats in clear cellophane bags or small decorative boxes. Tie each package with a ribbon and add a handwritten holiday message.
If you plan to give them away, include a small ingredient note, especially if the recipe contains nuts or other common allergens.
Keep the gifts cool during transport so the chocolate doesn’t soften.
Add Them to a Christmas Party Table
These goodies work particularly well at holiday gatherings because guests can pick them up easily.
Place them in small paper cupcake liners to make serving simple and reduce sticky fingers.
They’re also a nice addition to school celebrations, family get-togethers, and festive movie nights, provided the ingredients suit the guests.
Related Recipes:
- Christmas Punch Recipe Non Alcoholic
- Christmas Dinner Recipe – Easy Holiday Favorite
- Christmas Appetizer Recipes – Easy Holiday Bites
- Christmas Brunch Recipe
FAQ’s
1. How Long Do Christmas Goodies Last?
When you store them in an airtight container in the refrigerator, these Christmas goodies generally keep their best texture and flavor for around 7 days.
Keep them away from strong-smelling foods because chocolate can absorb surrounding odors.
For the best experience, enjoy them within the first few days.
2. Can I Make Christmas Goodies Ahead of Time?
Absolutely!
You can prepare them two or three days before your Christmas celebration.
Once the chocolate sets completely, transfer the treats to an airtight container and refrigerate them.
This gives you more time to prepare other holiday dishes on the day of your gathering.
3. Can I Freeze These Christmas Treats?
Yes. You can freeze the finished goodies for approximately 2 months in a freezer-safe, airtight container.
Place parchment paper between layers to prevent sticking.
When you’re ready to serve them, transfer the container to the refrigerator and allow the treats to thaw gradually. Avoid leaving them in a warm room immediately after removing them from the freezer, as condensation can affect the chocolate’s appearance.
4. Why Did My Melted Chocolate Become Thick?
Chocolate often becomes thick when it overheats or comes into contact with water.
Always use dry utensils and heat it slowly.
If the chocolate becomes grainy or seizes, it may not work well for this particular coating recipe. Starting again with fresh chocolate usually gives better results.
5. Can I Use a Different Type of Chocolate?
Yes!
Semi-sweet, milk, and dark chocolate all work well.
White chocolate also works, although it melts differently and usually produces a sweeter treat.
You can even use a combination of milk and dark chocolate to balance the sweetness.
6. Can I Make These Christmas Goodies Without a Microwave?
Of course.
Use a double boiler instead.
Fill a saucepan with a small amount of water and bring it to a gentle simmer. Place a heatproof bowl over the saucepan, making sure the bowl doesn’t touch the water.
Add the chocolate and stir until it melts.
This method gives you good control over the temperature.
7. What Can I Use Instead of Pretzels?
You have several options.
Crispy rice cereal, cornflakes, broken digestive biscuits, and crunchy gluten-free cereal all provide a pleasant texture.
Choose something crisp that won’t become too soft when you mix it with the melted chocolate.
8. How Do I Stop the Christmas Goodies From Sticking Together?
Allow the chocolate to set completely before moving the treats into a storage container.
Then place parchment paper between each layer.
Keep the container refrigerated, especially if your kitchen gets warm.
Final though
Christmas doesn’t need complicated desserts or expensive ingredients to feel special.
Sometimes, a simple homemade treat is all you need to bring a little extra happiness to the holiday season. That’s what makes these Christmas Goodies such a lovely recipe to keep around.
I love how easily you can change the ingredients, add your favorite decorations, and create something that looks festive without spending hours in the kitchen.
They’re wonderful for family gatherings, Christmas parties, homemade gift boxes, or those evenings when everyone wants something sweet after dinner.
My favorite way to serve them is on a large platter with a mixture of chocolate treats, cookies, and a few candy canes. Add a warm drink, gather everyone around the table, and enjoy the little moments that make Christmas memorable.
Give this easy Christmas Goodies recipe a try, make it your own, and don’t be afraid to experiment with different toppings.
If you make a batch, I’d love to hear which chocolate and toppings you chose. Share your favorite combination and let other readers discover a new holiday treat to enjoy!
Happy Christmas baking, and may your holiday season be filled with sweetness, laughter, and plenty of delicious homemade goodies.
Leave a Reply
You must be logged in to post a comment.