

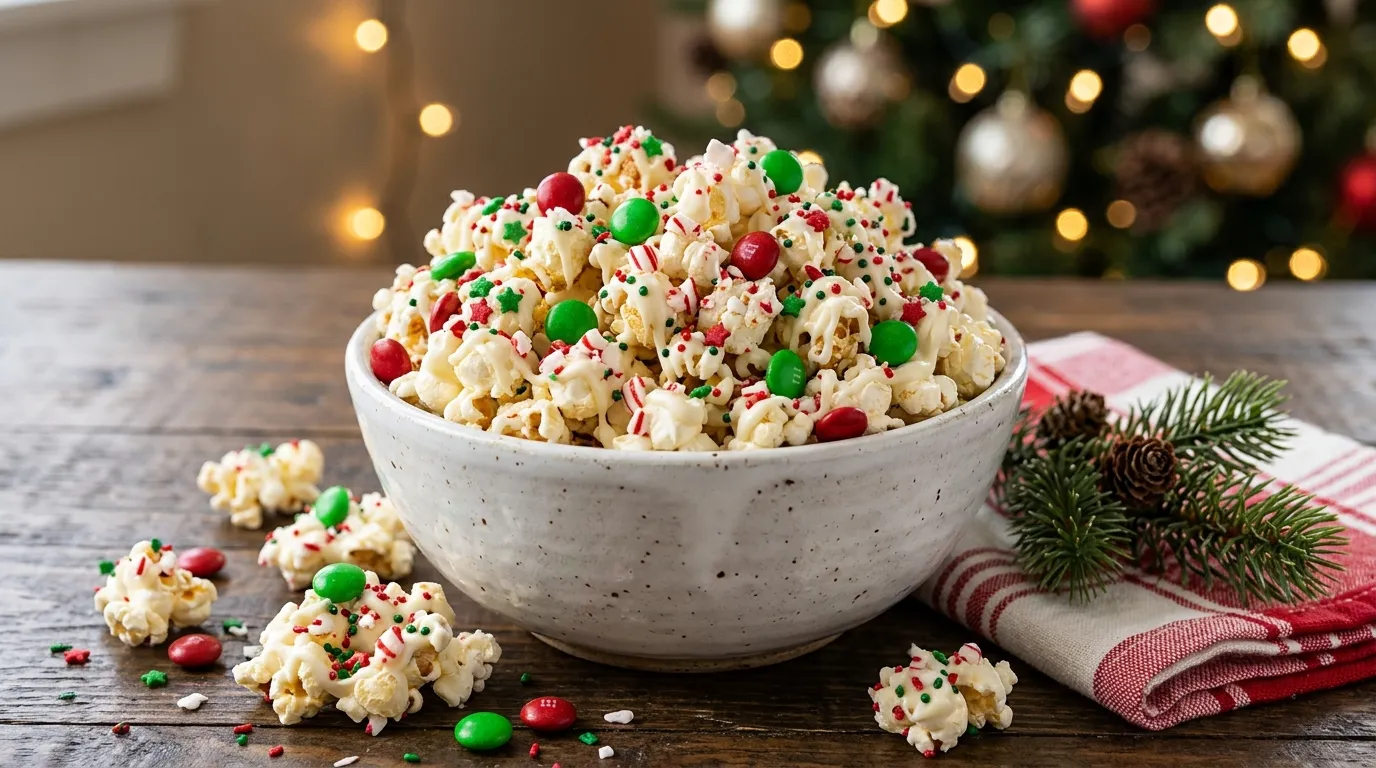
There is something about Christmas snacks that makes the holiday season feel extra special. Maybe it’s the twinkling lights, the smell of freshly baked cookies, or the excitement of preparing little treats to share with family and friends. For me, one of the simplest ways to bring that festive feeling into the kitchen is with a big bowl of colorful Christmas popcorn.
I love making this Christmas Popcorn Recipe because it looks like something you’d find in a cute holiday gift shop, but it takes surprisingly little effort. A few simple ingredients, some melted chocolate, festive sprinkles, and freshly popped popcorn turn into a sweet-and-salty treat that everyone wants to grab by the handful.
The first time I made it, I underestimated how quickly the chocolate would set. I spread the popcorn out on a baking sheet, turned around to grab the sprinkles, and realized I needed to work a little faster! Since then, I’ve learned to keep all my decorations ready before melting the chocolate.
That’s one of the best things about this recipe: you don’t need fancy baking equipment or hours in the kitchen. You can prepare a generous batch in around 30 minutes, let it set, and package it in pretty Christmas bags or serve it in a big bowl at your holiday gathering.
The combination of crunchy popcorn, creamy white chocolate, festive red and green candies, and colorful sprinkles makes every handful feel like a little celebration.
Whether you’re planning a Christmas movie night, looking for an easy homemade gift, or simply craving something sweet, this holiday popcorn deserves a place on your Christmas snack table.
Why You’ll Love This Christmas Popcorn Recipe

There are plenty of reasons to add this easy Christmas popcorn to your holiday baking list.
- Quick and easy: You can prepare everything in about 30 minutes, including the decorating and setting time.
- Budget-friendly: You only need a handful of everyday ingredients, and you can easily adjust the decorations to fit your budget.
- Sweet and salty: The combination of lightly salted popcorn and sweet white chocolate creates a delicious balance.
- Perfect for sharing: Make a large batch for Christmas parties, family gatherings, school celebrations, or holiday movie nights.
- Beautiful homemade gifts: Package the finished popcorn in clear treat bags, tie them with red ribbons, and you have an adorable edible Christmas gift.
Another thing I appreciate is how flexible this recipe is. You can use whatever Christmas candies and sprinkles you already have in your pantry. There is no need to make a special shopping trip for every little decoration.
Ingredients
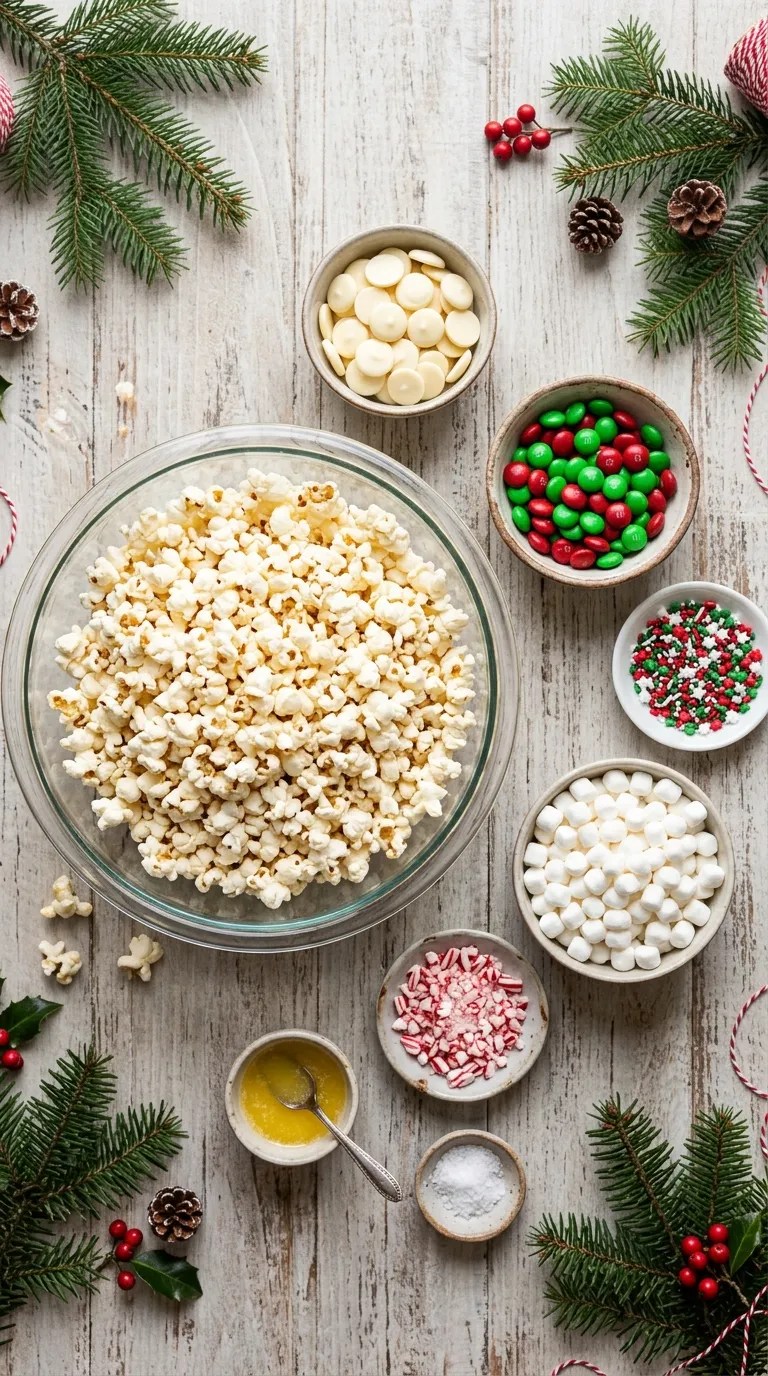
You only need a few basic ingredients to make this festive treat. I recommend choosing good-quality white chocolate because it gives the popcorn a smooth, creamy coating.
Here is everything you’ll need.
For the Popcorn
- 10 cups popped popcorn: This is approximately ½ cup unpopped kernels, depending on the popping method. Use plain or lightly salted popcorn.
- 1 tablespoon melted butter: Optional, but it adds a lovely buttery flavor.
- ¼ teaspoon fine salt: Adjust according to your taste and the saltiness of your popcorn.
For the Chocolate Coating
- 12 ounces white chocolate melting wafers: Use good-quality melting wafers for a smooth coating. You can also use white chocolate chips, although they may need a little extra attention when melting.
- 1 teaspoon coconut oil: Optional. This helps loosen the chocolate and makes it easier to drizzle.
For the Christmas Decorations
- ½ cup red and green candy-coated chocolates: Mini Christmas-colored candies work especially well.
- ¼ cup red and green holiday sprinkles: Choose stars, tiny balls, or festive shapes.
- ¼ cup mini marshmallows: Optional, for extra sweetness and a soft texture.
- 2 tablespoons crushed peppermint candies: Optional, for a refreshing Christmas flavor.
Helpful Ingredient Substitutions
You don’t have to follow the ingredient list exactly.
If you cannot find red and green candy-coated chocolates, use regular colorful candies or chopped chocolate pieces. You can also replace white chocolate with milk or dark chocolate if you prefer a richer flavor.
For a more pronounced peppermint taste, add a little extra crushed candy cane. Just avoid adding too much because peppermint can quickly overpower the delicate white chocolate flavor.
If you prefer a simpler snack, leave out the marshmallows and use only popcorn, white chocolate, and sprinkles.
Step-by-Step Instructions
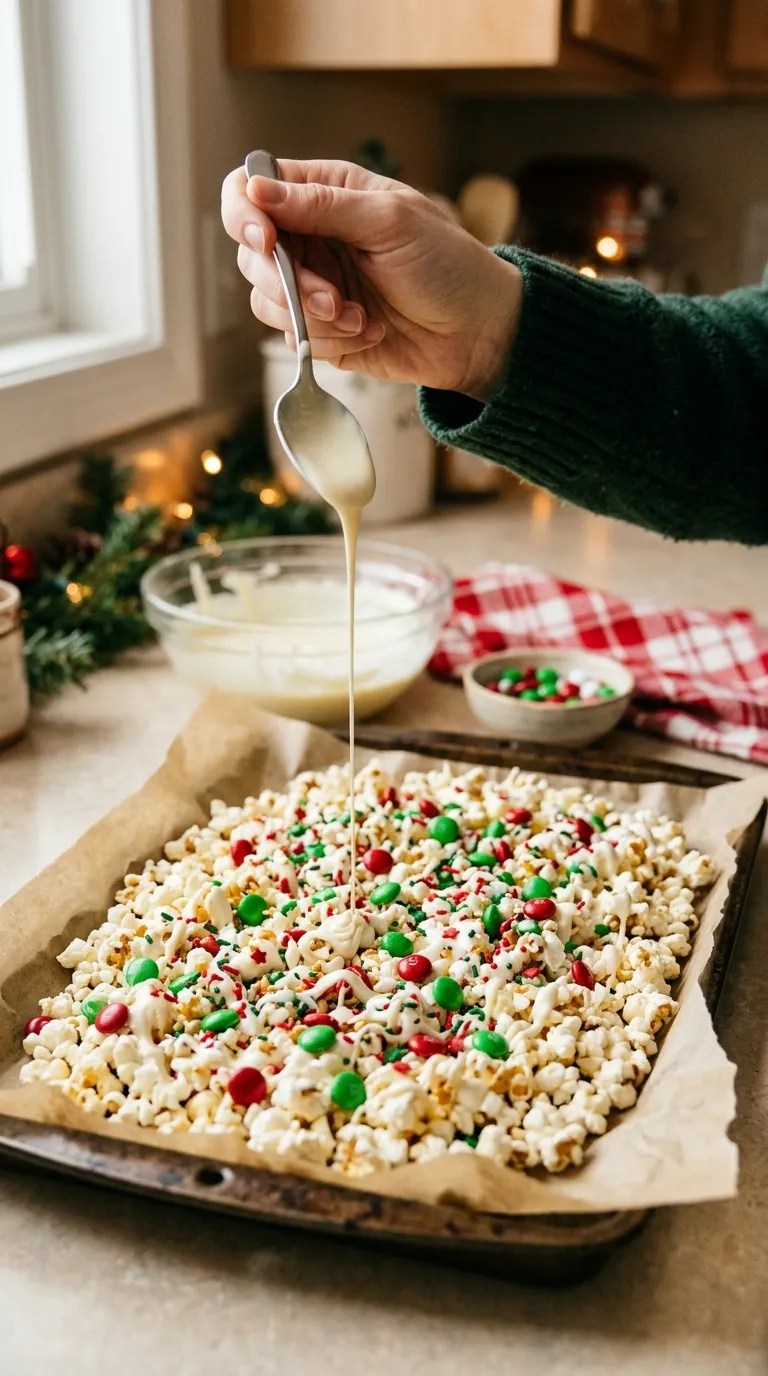
The process is wonderfully simple, even if you’ve never made chocolate-covered popcorn before. Follow these steps, and you’ll have a festive batch ready for sharing.
Step 1: Prepare Your Workspace (3 Minutes)
Before you start popping the popcorn, line two large baking sheets with parchment paper or wax paper.
Gather your chocolate, candies, sprinkles, and other decorations. Open any sprinkle containers so you can reach everything easily.
This small preparation step makes a big difference. White chocolate can begin setting quickly, especially in a cool kitchen, so you don’t want to waste time searching for decorations later.
Step 2: Pop the Popcorn (5–7 Minutes)
Pop your popcorn using your preferred method.
You can use an air popper, a stovetop pot, or plain microwave popcorn. If you use microwave popcorn, choose a lightly salted variety without too much butter or added flavoring.
Once the popcorn finishes popping, transfer it to a large bowl.
Remove any unpopped kernels you find at the bottom. This is an important little detail because nobody wants to bite into a hard kernel while enjoying a sweet snack.
If you like a buttery flavor, drizzle the melted butter over the popcorn and toss gently. Add the salt and mix again.
Let the popcorn cool slightly before adding the chocolate.
Step 3: Melt the White Chocolate (2–3 Minutes)
Place your white chocolate melting wafers in a microwave-safe bowl.
Microwave them in 20-second intervals, stirring thoroughly between each interval. White chocolate can burn or become grainy if you heat it for too long, so patience really helps here.
Continue until the chocolate looks smooth and completely melted.
If the chocolate seems too thick for drizzling, stir in the coconut oil, about half a teaspoon at a time.
You want a smooth, pourable consistency rather than a watery mixture.
My kitchen tip: Don’t wait until every last tiny chocolate piece disappears before stirring. Sometimes the remaining pieces melt from the heat of the chocolate around them. A few extra seconds of gentle stirring can save you from overheating the mixture.
Step 4: Coat the Popcorn (3–5 Minutes)
Pour approximately two-thirds of the melted white chocolate over the popcorn.
Use a large silicone spatula or wooden spoon to gently toss everything together.
Try to distribute the chocolate without crushing the popcorn. You don’t need every single piece to receive a thick coating. A light, even drizzle creates a lovely texture and helps prevent large sticky clumps.
Transfer the coated popcorn onto your prepared baking sheets.
Spread it into a relatively even layer, separating any large clusters with your hands or spatula.
Step 5: Add the Christmas Decorations (3 Minutes)
Now comes the fun part!
Drizzle the remaining melted white chocolate over the popcorn. You can use a spoon or transfer the chocolate into a small zip-top bag and snip off one corner.
Immediately scatter the red and green candy-coated chocolates and holiday sprinkles over the top.
If you’re using mini marshmallows or crushed peppermint candies, add those now, too.
Press larger decorations gently into the popcorn so they stick to the melted chocolate.
Don’t worry about making everything look perfectly arranged. A little messiness gives homemade Christmas popcorn its charming appearance.
Step 6: Let the Chocolate Set (15–20 Minutes)
Leave the baking sheets at room temperature for approximately 15–20 minutes, or until the chocolate feels firm.
If your kitchen is particularly warm, place the trays in the refrigerator for about 10–15 minutes.
Once the chocolate sets, gently break the popcorn into bite-sized clusters.
Some pieces will stick together in larger clusters, while others will separate into individual bites. Both are perfectly fine.
Step 7: Serve or Package Your Christmas Popcorn
Transfer your finished popcorn into a large serving bowl, festive snack containers, or clear cellophane bags.
If you’re making edible Christmas gifts, add a small ribbon and a handwritten holiday tag.
Your homemade Christmas popcorn is ready!
Pro Tips & Tricks
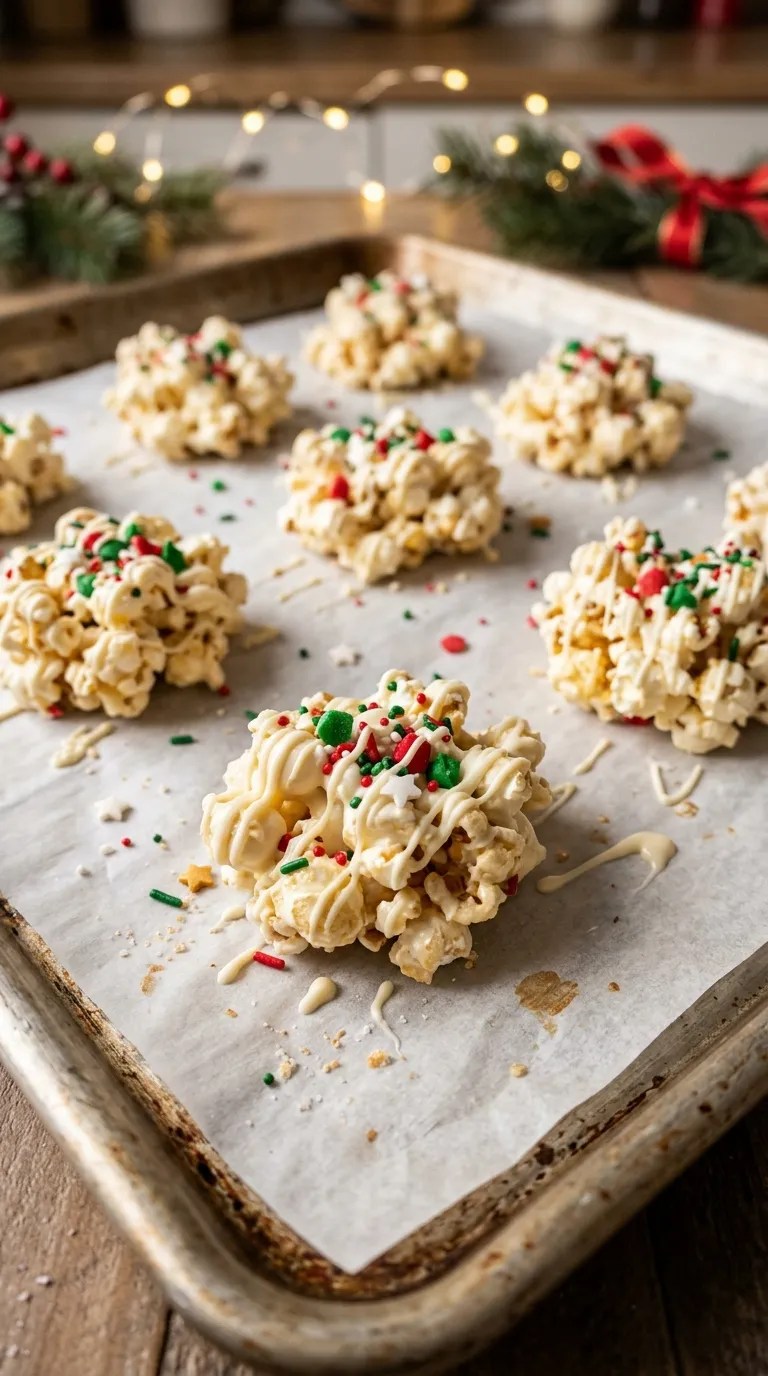
A simple recipe can still have a few little tricks that make the finished result much better. Here are some things I’ve learned while making chocolate-covered popcorn.
1. Always Remove Unpopped Kernels
This might sound obvious, but don’t skip it.
After popping the popcorn, transfer it to another bowl rather than pouring everything directly from the pot or bag. This makes it easier to leave the hard kernels behind.
It’s a small step that makes the finished snack much more enjoyable.
2. Don’t Overheat the White Chocolate
White chocolate needs gentle heat.
I recommend using short microwave intervals and stirring between each one. If you heat it continuously, it can become thick, grainy, or difficult to work with.
If you have a double boiler, you can use that instead. Just make sure the bowl doesn’t touch the simmering water, and keep steam and water away from the chocolate.
3. Decorate While the Chocolate Is Wet
This is probably the most important tip for getting those beautiful Christmas colors to stay in place.
Add your candies and sprinkles immediately after drizzling the chocolate. If you wait too long, the decorations may fall off when you move the popcorn.
I learned this the hard way after trying to add sprinkles to chocolate that had already started setting!
4. Use Two Baking Sheets Instead of One
Ten cups of popcorn can take up quite a bit of space.
If you pile everything onto one small tray, the popcorn may stick together in large, uneven clumps. Two baking sheets give you more room to spread everything out.
A thinner layer also helps the chocolate set evenly.
5. Store It Properly
Once the chocolate has completely hardened, store your Christmas popcorn in an airtight container.
Keep it in a cool, dry place away from direct sunlight and heat. Moisture can make popcorn lose its crunch, so avoid leaving it uncovered for long periods.
For the best texture, enjoy it within 3–5 days.
Variations & Substitutions
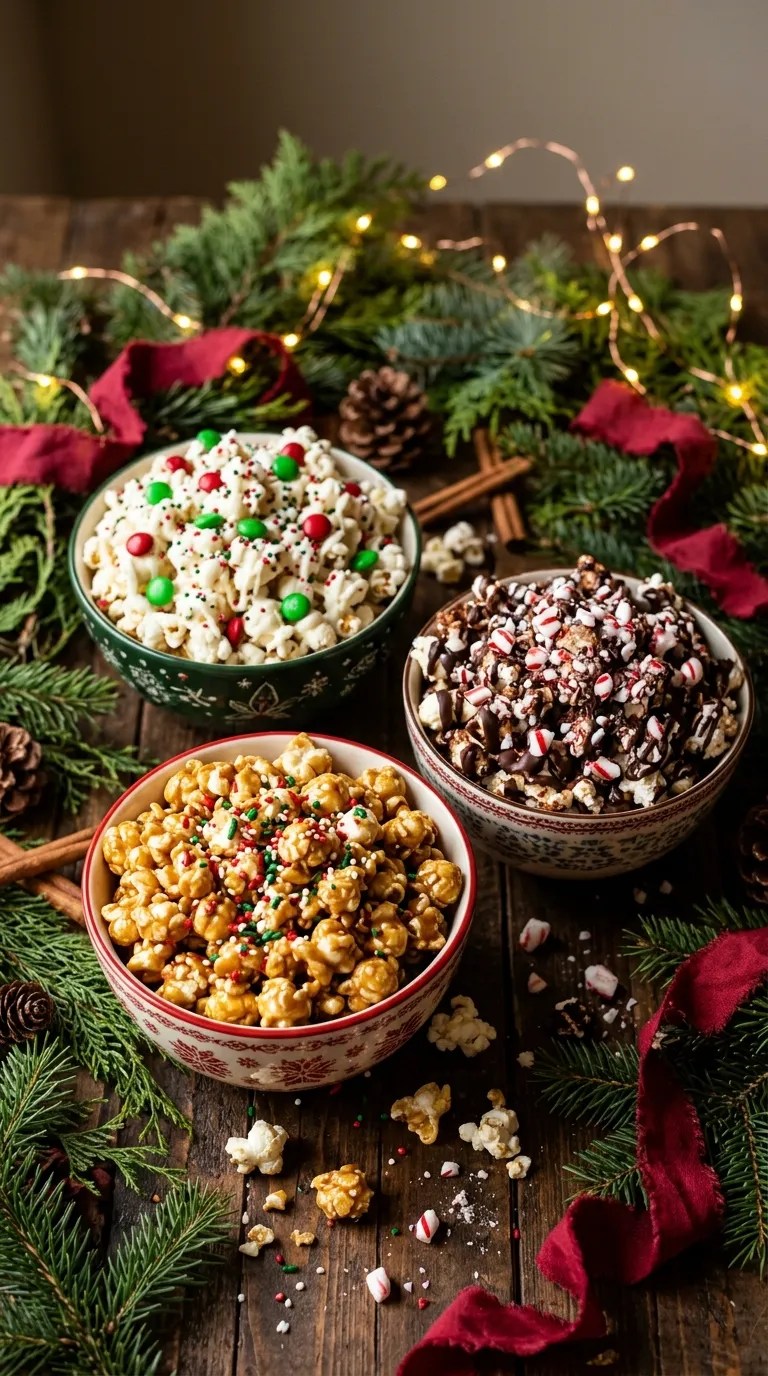
One of my favorite things about this recipe is that you can change the flavors and decorations without changing the basic method.
Here are a few variations worth trying.
1. Peppermint White Chocolate Christmas Popcorn
If you love peppermint during the holidays, this version is a lovely choice.
Prepare the popcorn as directed, but add ¼ cup crushed candy canes along with the Christmas sprinkles.
You can also sprinkle a little peppermint over the melted chocolate before it sets.
The combination of creamy white chocolate, crunchy popcorn, and refreshing peppermint tastes wonderfully festive.
My suggestion is to start with a smaller amount of crushed candy cane and add more if you want a stronger flavor.
2. Chocolate Lover’s Christmas Popcorn
For anyone who prefers milk or dark chocolate, this variation is an easy winner.
Replace the white chocolate with 12 ounces of milk chocolate or dark chocolate melting wafers.
Once you’ve coated the popcorn, decorate it with red and green candies, mini chocolate chips, or festive sprinkles.
You can even drizzle a little melted white chocolate over the top for a pretty two-tone effect.
This version looks especially beautiful when you serve it in a large glass bowl.
3. Vegan Christmas Popcorn
You can make a plant-based version with a few ingredient changes.
Choose plain popcorn, dairy-free chocolate melting wafers, and vegan candy decorations.
Use plant-based butter or leave the butter out completely. Check the ingredient labels on your sprinkles and candies, too, because some contain dairy or other animal-derived ingredients.
The result still gives you that festive chocolate-covered popcorn experience without using traditional dairy chocolate.
4. Gluten-Free Christmas Popcorn
For a gluten-free variation, start with plain popcorn and use chocolate and decorations that carry appropriate gluten-free labeling.
Popcorn itself naturally contains no gluten, but flavorings, coatings, and candy decorations may introduce gluten-containing ingredients.
Check every package before serving it to someone who needs to avoid gluten.
5. Christmas Caramel Popcorn
Want something sweeter and crunchier?
Replace the white chocolate coating with your favorite homemade or prepared caramel sauce.
Toss the popcorn with the caramel, spread it on a parchment-lined baking sheet, and allow it to cool according to the caramel recipe’s instructions.
Finish with red and green candies or festive sprinkles.
Keep in mind that caramel popcorn has a different texture and preparation process from the original recipe.
Serving Suggestions

This popcorn is more than just a quick snack. You can serve it in several fun ways throughout the holiday season.
Christmas Movie Night
Set out a large bowl of Christmas popcorn alongside hot chocolate, cookies, and other favorite movie snacks.
It’s a lovely treat for a cozy evening watching holiday movies with family.
You can even prepare individual popcorn cups so everyone gets their own serving.
Holiday Parties and Family Gatherings
Add Christmas popcorn to your holiday snack table.
Serve it in a large festive bowl or divide it into small paper cups. Its bright red, green, and white colors make it an attractive addition to a Christmas buffet.
It also pairs nicely with pretzels, chocolate-covered nuts, cookies, and fresh fruit.
Homemade Christmas Gifts
If you enjoy making homemade gifts, this recipe is a wonderful option.
Fill clear cellophane bags with small portions of popcorn, twist the tops closed, and tie them with colorful ribbons.
You can also use small Christmas-themed jars or food-safe gift boxes.
Add a handwritten label with the preparation date and a reminder to store the popcorn in an airtight container.
Christmas Dessert Boards
Arrange the popcorn on a large dessert board with:
- Chocolate chip cookies
- Mini brownies
- Candy canes
- Chocolate truffles
- Marshmallows
- Christmas sugar cookies
- Pretzels
The popcorn adds a crunchy, colorful element that makes the board feel more festive.
School and Holiday Celebrations
You can divide the popcorn into individual treat bags for holiday gatherings and celebrations.
Before preparing treats for a group, check for allergy restrictions and any school or event food guidelines.
Related Recipes:
- Christmas Pie Recipe – Easy & Festive Holiday Dessert
- Christmas Chex Mix Recipe Holiday
- Vintage Christmas Cookie Recipe
- Easy Christmas Recipe – Simple Holiday Favorite
FAQ’s
Here are some common questions that can help you get the best results from this easy holiday treat.
1. How Long Does Christmas Popcorn Last?
Christmas popcorn tastes best within 3–5 days when you store it in an airtight container in a cool, dry place.
Humidity can affect the texture, so keep the container tightly sealed between servings.
If you notice that the popcorn has become soft or stale, its quality has started to decline.
2. Can I Make Christmas Popcorn Ahead of Time?
Absolutely!
You can prepare Christmas popcorn 1–2 days before your party or gathering.
Allow the chocolate to set completely before transferring the popcorn into airtight containers.
I actually prefer making it the day before a gathering because it gives me one less thing to prepare on the day itself.
For the best crunch, keep it away from moisture and heat.
3. Can I Use Microwave Popcorn for This Recipe?
Yes! Microwave popcorn works perfectly well.
Choose a plain or lightly salted variety because heavily buttered popcorn can make the chocolate coating greasy.
Let the popcorn cool slightly before mixing it with the melted chocolate.
Remember to remove any unpopped kernels before decorating.
4. Why Is My White Chocolate Thick and Difficult to Drizzle?
White chocolate can become thick if you overheat it or if moisture gets into the bowl.
Always use a completely dry microwave-safe bowl and heat the chocolate in short intervals.
If it simply needs a little thinning, stir in a small amount of coconut oil.
However, if the chocolate has seized because water entered the mixture, adding more oil may not restore its original smooth texture.
5. Can I Freeze Christmas Popcorn?
Freezing isn’t my first recommendation because popcorn can absorb moisture during thawing and lose its crunchy texture.
For the best results, prepare smaller batches and enjoy them fresh.
If you decide to freeze a batch, use a freezer-safe airtight container. Let it return to room temperature while still sealed to reduce condensation.
The texture may change, so fresh preparation usually gives better results.
6. Can I Use Different Types of Chocolate?
Of course!
White chocolate creates a classic snowy Christmas appearance, but milk chocolate and dark chocolate also work beautifully.
You can even combine two types of chocolate for a decorative effect.
For easier melting and coating, choose chocolate melting wafers. If you use regular chocolate chips, remember that their texture may be thicker and less suitable for drizzling.
7. How Do I Keep the Popcorn From Becoming Soggy?
Start with completely cooled, freshly popped popcorn.
Avoid adding warm chocolate to popcorn that still releases a lot of steam. Also, don’t use too much butter because excess moisture and fat can affect the texture.
After decorating, let the chocolate set completely before storing the popcorn in an airtight container.
8. Can I Make Christmas Popcorn Without White Chocolate?
Yes!
You can use milk chocolate, dark chocolate, or a prepared caramel coating instead.
You can also make a simpler holiday popcorn mix with plain popcorn, pretzels, red and green candies, and festive sprinkles.
The white chocolate version is particularly pretty, but the decorations are what give the snack its Christmas personality.
Final Thought
Christmas recipes don’t always need to involve complicated baking projects, long ingredient lists, or hours spent in the kitchen.
Sometimes, the simplest treats become the ones everyone remembers.
This Christmas Popcorn Recipe is one of those easy holiday favorites. It combines crunchy popcorn, creamy white chocolate, colorful candies, and festive sprinkles into a snack that looks beautiful and tastes even better.
I especially love how easy it is to customize. You can make it peppermint-flavored, add your favorite chocolate, or change the decorations to match your Christmas theme.
It’s also a lovely recipe to prepare with family. Let everyone choose their favorite sprinkles and candies, spread the popcorn across the baking sheets, and decorate their own little section.
Don’t worry if the clusters look a little uneven. That’s part of the homemade charm!
Whether you serve it at a Christmas party, package it as an edible gift, or enjoy it during a cozy holiday movie night, this sweet-and-salty treat is sure to bring a little extra festive fun to your table.
Give this easy Christmas popcorn a try, and let me know how yours turns out. I’d love to hear which chocolate and decorations you chose!
Leave a Reply
You must be logged in to post a comment.