


There is something special about baking cookies during the Christmas season. The kitchen fills with the smell of butter, vanilla, and warm spices, Christmas music plays in the background, and suddenly even an ordinary afternoon feels a little more magical.
One of my favorite holiday traditions is making a batch of homemade Christmas cookies when the festive season begins. I love how a few simple ingredients can turn into something that looks beautiful, tastes delicious, and makes everyone reach for just one more.
The first time I made these cookies, I learned an important lesson: chilling the dough really does make a difference! I was impatient and skipped that step, and my cookies spread more than I expected. They still tasted wonderful, but they lost some of their pretty shapes. After a little experimenting, I discovered that a short rest in the refrigerator gives the dough a much better texture and makes decorating easier.
This easy Christmas cookie recipe has become a favorite because it uses everyday baking ingredients, requires no complicated techniques, and leaves plenty of room for creativity. You can make stars, Christmas trees, candy-cane shapes, snowflakes, or simple round cookies topped with colorful sprinkles.
Whether you plan to fill a holiday cookie tin, prepare treats for a Christmas party, or spend a cozy afternoon baking with family, these cookies deserve a place in your holiday kitchen.
Let’s get baking!
Why You’ll Love This Easy Christmas Cookie Recipe

There are plenty of Christmas cookie recipes to choose from, but I keep coming back to this one for a few simple reasons.
- Beginner-friendly: You don’t need professional baking skills or special equipment to make delicious cookies.
- Simple ingredients: Butter, sugar, flour, eggs, and vanilla form the base. You can find everything at a regular grocery store.
- Perfect for decorating: The dough works beautifully with Christmas cookie cutters, icing, and festive sprinkles.
- Great for sharing: Make a batch for family gatherings, school celebrations, holiday parties, or homemade Christmas gifts.
- Easy to prepare ahead: You can refrigerate the dough before baking and spread the work across two days.
Another thing I appreciate is how flexible this recipe feels. You can keep the cookies simple with a little sugar on top or turn them into colorful holiday treats with royal icing and decorations.
Ingredients for Easy Christmas Cookies
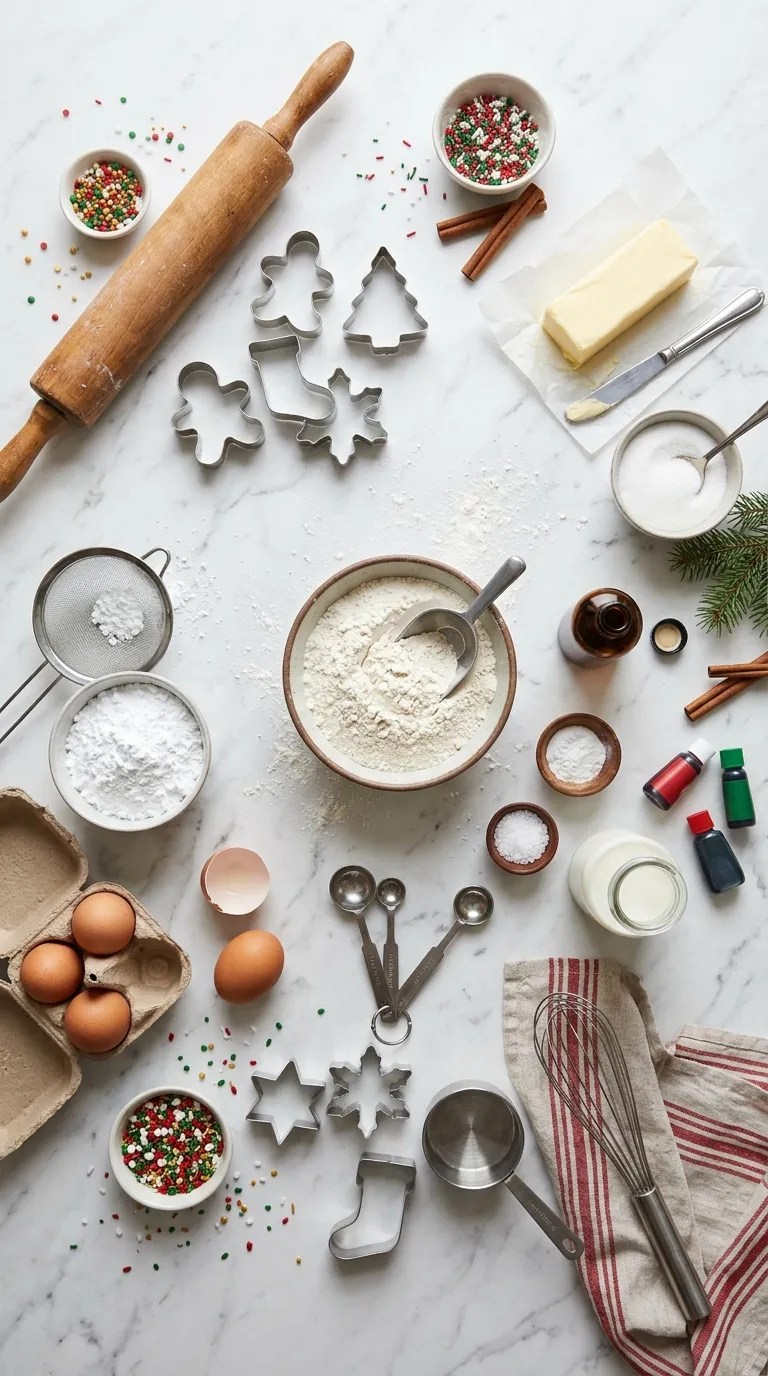
This recipe makes approximately 24–30 medium-sized cookies, depending on the size of your cookie cutters.
For the cookie dough
- 2 ½ cups (315 g) all-purpose flour
- 1 cup (227 g) unsalted butter, softened to room temperature
- ¾ cup (150 g) granulated white sugar
- 1 large egg, at room temperature
- 2 teaspoons pure vanilla extract
- ½ teaspoon baking powder
- ¼ teaspoon salt
- ½ teaspoon ground cinnamon (optional)
For the festive icing
- 1 ½ cups (180 g) powdered sugar
- 2–3 tablespoons milk
- ½ teaspoon vanilla extract
- A few drops of red and green food coloring
For decorating
- Christmas-themed sprinkles
- Red, green, white, and gold sugar decorations
- Mini chocolate chips (optional)
- Edible silver or gold decorating pearls (optional)
Ingredient notes and substitutions
Butter: Unsalted butter gives you better control over the salt level. If you only have salted butter, use it and leave out the additional salt.
Flour: Regular all-purpose flour works best for this recipe. Measure it carefully rather than packing it tightly into your measuring cup. Too much flour can make the cookies dry and crumbly.
Sugar: Granulated sugar gives the cookies a pleasant sweetness and helps create their delicate texture.
Vanilla: Pure vanilla extract adds a lovely flavor. Vanilla essence also works if that’s what you have in your pantry.
Cinnamon: I enjoy adding a little cinnamon because it gives the cookies a cozy holiday flavor. Leave it out if you prefer a classic buttery vanilla cookie.
Milk: Whole milk works nicely for the icing, but you can use another milk you have available. Add it gradually because even a small amount can change the icing consistency.
Step-by-Step Instructions for Christmas Cookies
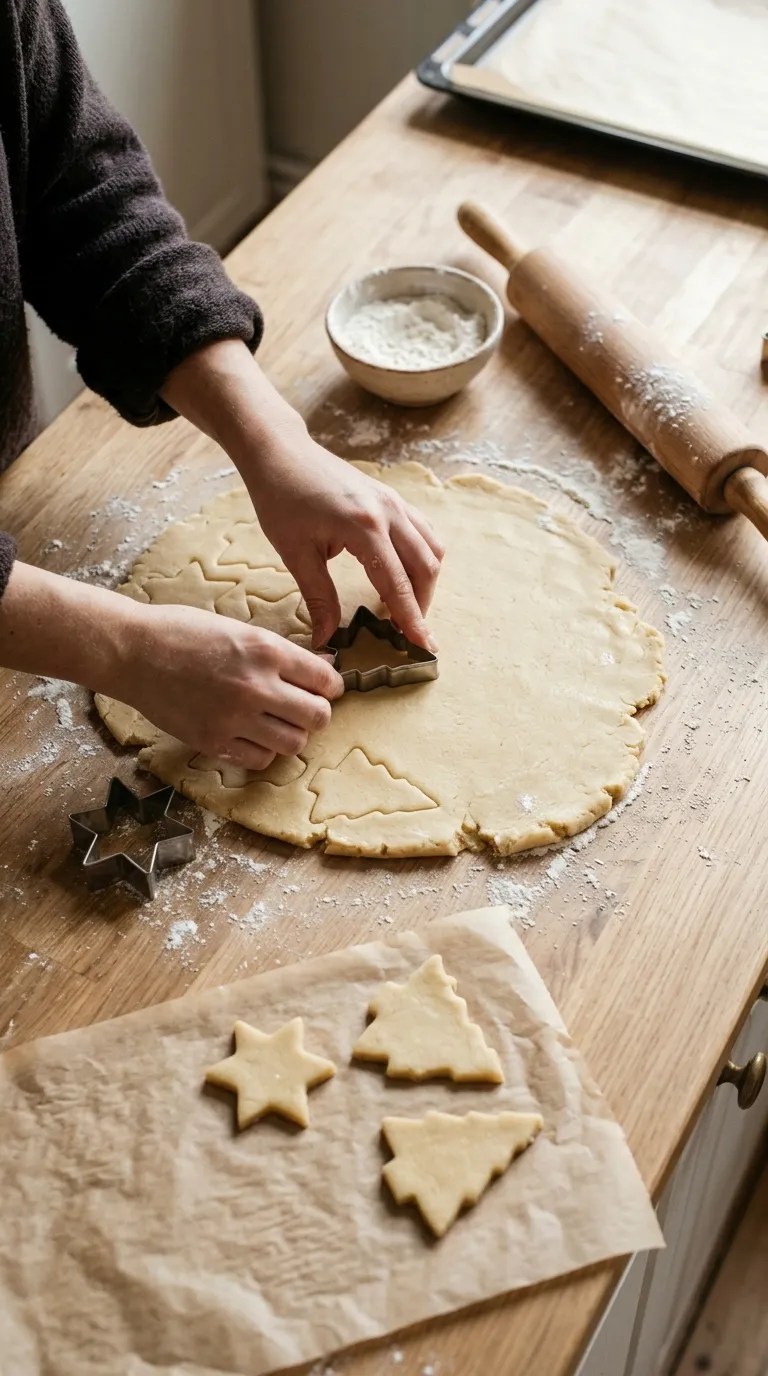
You don’t need to rush through this recipe. Take your time, prepare your ingredients, and enjoy the process.
Step 1: Prepare your baking equipment (5 minutes)
Start by preheating your oven to 350°F (175°C).
Line two large baking sheets with parchment paper. This prevents sticking and makes cleanup much easier.
Gather your mixing bowls, measuring cups, electric hand mixer or stand mixer, rolling pin, cookie cutters, and cooling rack.
I recommend using a stand mixer with a paddle attachment if you have one. However, a regular electric hand mixer works perfectly well.
Step 2: Mix the dry ingredients (2 minutes)
Add the all-purpose flour, baking powder, salt, and optional cinnamon to a medium-sized mixing bowl.
Whisk everything together until the ingredients look evenly combined.
Set the bowl aside while you prepare the butter mixture.
This small step helps distribute the baking powder throughout the flour, so your cookies bake more evenly.
Step 3: Cream the butter and sugar (3–4 minutes)
Place the softened butter and granulated sugar in a large mixing bowl.
Beat them together using an electric mixer on medium speed for approximately 3–4 minutes.
The mixture should look pale, creamy, and slightly fluffy.
Don’t worry if it takes an extra minute. Properly softened butter makes this step much easier.
One mistake I made when learning to bake was using butter straight from the refrigerator. It stayed lumpy, and the sugar never blended as smoothly as I wanted.
Let your butter sit at room temperature before starting.
Step 4: Add the egg and vanilla (1–2 minutes)
Add the egg and vanilla extract to the butter mixture.
Beat until everything combines smoothly.
Stop the mixer occasionally and scrape down the sides of the bowl with a silicone spatula. This helps incorporate any butter or sugar that sticks to the sides.
The mixture should look smooth and creamy before you move on.
Step 5: Combine the wet and dry ingredients (2–3 minutes)
Gradually add the flour mixture to the butter mixture.
Mix on low speed until the dough starts coming together.
Avoid overmixing. Once you no longer see large patches of dry flour, stop the mixer.
The dough should feel soft and smooth without sticking excessively to your fingers.
If it feels unusually sticky, refrigerate it before deciding whether it needs additional flour. Adding too much flour can make the finished cookies tough.
Step 6: Chill the cookie dough (30–45 minutes)
Divide the dough into two portions.
Shape each portion into a flat disc and wrap it in plastic wrap or place it in an airtight container.
Refrigerate for 30–45 minutes.
This step helps the butter firm up, making the dough easier to roll and helping the cookies maintain their shapes during baking.
If you want to prepare ahead, you can leave the dough in the refrigerator overnight.
Step 7: Roll out the dough (5–10 minutes)
Lightly flour your countertop or place a sheet of parchment paper underneath the dough.
Remove one portion from the refrigerator and let it sit for a few minutes if it feels too firm to roll.
Use a rolling pin to roll the dough to approximately ¼-inch thickness.
Try to keep the thickness consistent across the entire sheet. Uneven dough can cause some cookies to brown before others finish baking.
If the dough sticks to your rolling pin, lightly dust the surface with flour.
Step 8: Cut out festive shapes (5–10 minutes)
Now comes the fun part!
Use Christmas cookie cutters to create your favorite holiday shapes.
Some lovely choices include:
- Christmas trees
- Stars
- Gingerbread-style people
- Snowflakes
- Candy canes
- Christmas bells
- Snowmen
Transfer the cut cookies carefully to your prepared baking sheets.
Leave approximately 1–2 inches between cookies to allow room for slight spreading.
Gather the leftover dough, gently bring it together, and roll it again. If it becomes too soft, refrigerate it for a few minutes before cutting more shapes.
Step 9: Bake the cookies (9–12 minutes)
Place the baking sheets in your preheated oven.
Bake for approximately 9–12 minutes, depending on the size and thickness of your cookies.
Watch the edges carefully. They should look set with just a hint of golden color.
The centers may still look slightly soft when you remove the tray. That’s perfectly fine because the cookies will continue to firm up as they cool.
Avoid waiting until the entire cookie turns dark golden brown. That can make the texture too crisp.
Step 10: Cool completely (15–20 minutes)
Allow the cookies to rest on the baking sheet for approximately 5 minutes.
They will be delicate when they first come out of the oven, so give them time to firm up.
Transfer them gently to a wire cooling rack.
Let them cool completely before adding icing. Warm cookies can melt the icing and make your decorations run together.
Step 11: Prepare the festive icing (3–5 minutes)
Add the powdered sugar and vanilla extract to a small mixing bowl.
Add 2 tablespoons of milk and whisk until smooth.
If the icing feels too thick, add more milk a few drops at a time.
If it becomes too thin, add a little extra powdered sugar.
Divide the icing between small bowls and add a few drops of food coloring to create red, green, and white decorations.
For simple decorating, use a spoon or small piping bag. You can outline the cookies, fill the centers, or create little festive patterns.
Step 12: Decorate and enjoy (10–15 minutes)
Spread or pipe the icing onto your cooled cookies.
Add sprinkles, colored sugar, or mini chocolate chips while the icing remains wet.
Try decorating Christmas trees with green icing and colorful sprinkles. Stars look lovely with white icing and a little edible glitter, while round cookies make perfect miniature Christmas ornaments.
Allow the decorations to set before stacking or storing the cookies.
Your homemade Christmas cookies are ready!
Pro Tips and Tricks for Perfect Christmas Cookies
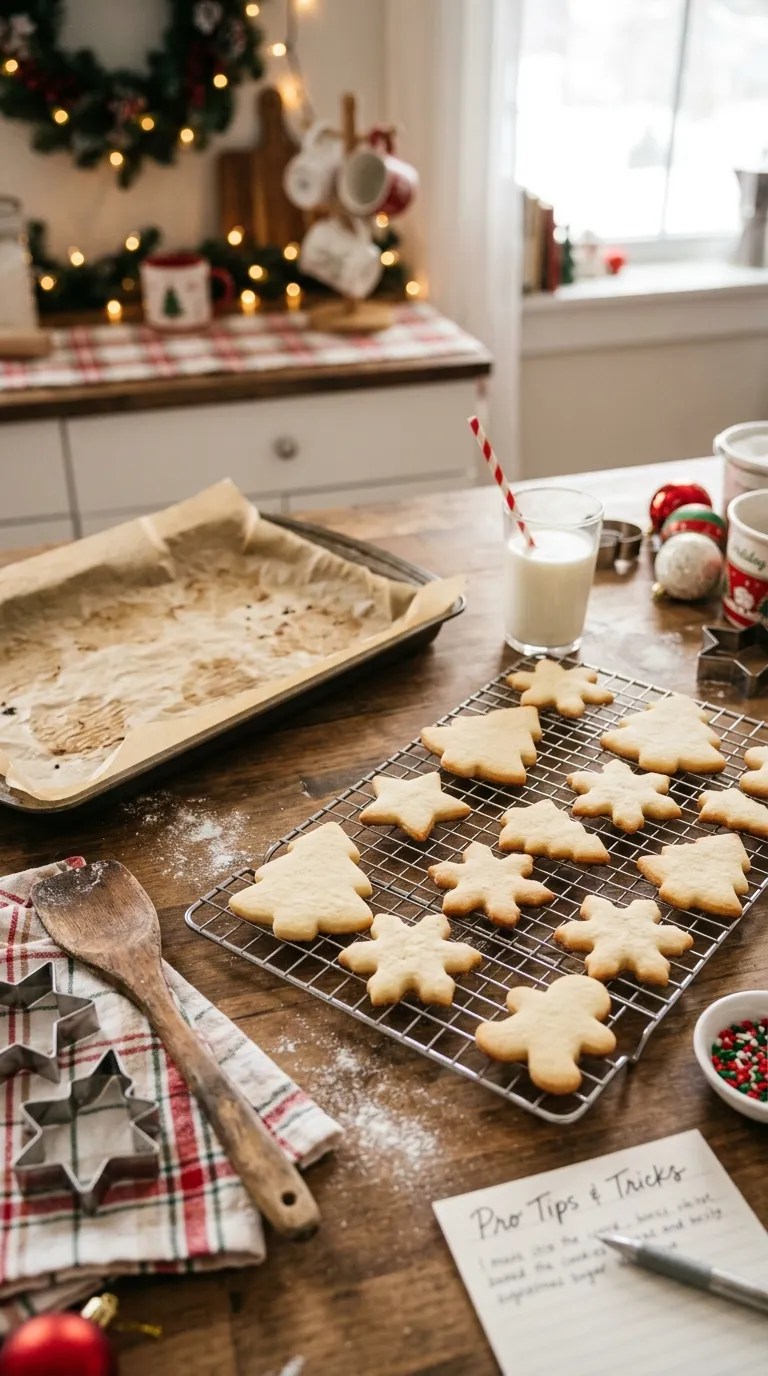
A few small details can make a noticeable difference in your baking results.
1. Don’t skip chilling the dough
I know it’s tempting to move straight from mixing to cutting, especially when you’re excited to bake.
However, chilled dough is easier to handle and helps your cookies hold their shapes.
If your kitchen feels warm, chill the dough for a little longer.
2. Measure flour carefully
Too much flour is one of the most common reasons homemade cookies turn out dry.
A kitchen scale gives you the most consistent results. If you use measuring cups, spoon the flour into the cup and level it with a straight edge instead of scooping directly from the bag.
3. Keep an eye on the oven
Every oven behaves a little differently.
Start checking your cookies around the 9-minute mark. Smaller shapes may finish sooner, while larger cookies may need an extra minute or two.
If you bake multiple trays, rotate them halfway through when your oven has noticeable hot spots.
4. Let the cookies cool before decorating
This is especially important when you use milk-based icing.
Even slightly warm cookies can cause the icing to melt and spread. Wait until they reach room temperature for cleaner decorations.
5. Store decorated cookies carefully
Once the icing dries, place the cookies in an airtight container.
Use parchment paper between layers to protect the decorations.
Keep the container in a cool, dry place away from direct sunlight.
For the best flavor and texture, enjoy them within about 5–7 days.
6. Make the dough ahead of time
You can prepare the dough a day before baking.
Wrap it tightly and refrigerate it. When you’re ready, let it soften slightly until you can roll it comfortably.
This makes holiday baking much easier when you’re preparing several dishes for Christmas gatherings.
Variations and Substitutions

One reason I love this easy Christmas cookie recipe is that you can change the flavor and decorations without learning an entirely new recipe.
Here are a few ideas worth trying.
Chocolate Christmas Cookies
If your family loves chocolate, turn the vanilla dough into a chocolate version.
Replace ¼ cup of the flour with ¼ cup unsweetened cocoa powder.
Mix the ingredients as directed and chill the dough before rolling.
Decorate with white icing, chocolate drizzle, or crushed peppermint candies for a beautiful holiday combination.
Peppermint Christmas Cookies
Peppermint adds a refreshing holiday flavor.
Replace the vanilla extract with ½ teaspoon peppermint extract, or use ¼ teaspoon peppermint extract alongside the vanilla.
Be careful not to add too much because peppermint extract has a strong flavor.
After decorating, sprinkle crushed peppermint candies over the icing.
These cookies look especially pretty with white icing and red decorations.
Gluten-Free Christmas Cookies
For a gluten-free option, try a reputable 1-to-1 gluten-free baking flour blend designed to replace regular all-purpose flour.
Choose a blend that includes a suitable binder, such as xanthan gum, if the manufacturer recommends it.
Follow the package instructions and chill the dough thoroughly before rolling.
The texture can vary between flour blends, so you may need to adjust the handling slightly.
Dairy-Free Christmas Cookies
You can experiment with a plant-based butter alternative designed for baking.
Choose a firm baking-style product rather than a soft spread from a tub, since excess moisture can affect the dough.
For the icing, use an unsweetened plant-based milk.
Check ingredient labels to make sure the products meet your dietary needs.
Serving Suggestions for a Festive Holiday Table

Christmas cookies look beautiful on their own, but a little presentation can make them even more special.
Here are some easy ways to serve them.
With hot chocolate: Arrange the cookies beside mugs of warm hot chocolate. The buttery cookies taste wonderful with a rich chocolate drink.
With tea or coffee: Serve a few cookies with freshly brewed tea or coffee for a relaxed afternoon treat.
On a Christmas dessert platter: Combine your homemade cookies with brownies, chocolate truffles, peppermint treats, and other small desserts.
As homemade Christmas gifts: Place completely cooled cookies in decorative tins or food-safe gift boxes. Add parchment paper between layers and finish with a festive ribbon.
For Christmas parties: Arrange the cookies on a large serving tray and mix different shapes and colors. A combination of stars, trees, and snowflakes creates an attractive holiday display.
For family baking afternoons: Set out bowls of sprinkles, icing, and decorations so everyone can decorate a few cookies.
One of my favorite ways to present these cookies is on a simple white platter with a few decorative Christmas elements around the edges. It looks festive without requiring much effort.
Related Recipes:
- Christmas Cookie Recipe – Easy Holiday Favorite
- Best Fall Cookie Recipes for Holiday Baking
- Cream Cheese Desserts for Holidays and Parties
- Easy Holiday Desserts for Every Celebration
FAQ’s
Can I make Christmas cookie dough ahead of time?
Absolutely! Prepare the dough, divide it into discs, wrap it tightly, and refrigerate it for up to 2 days.
When you’re ready to bake, let it sit at room temperature briefly if it feels too firm to roll.
You can also freeze the dough for longer storage.
How long do homemade Christmas cookies last?
Undecorated or fully set iced cookies generally keep well for approximately 5–7 days in an airtight container at room temperature.
Keep them away from heat and moisture to maintain their texture.
If you use a different topping or filling that requires refrigeration, follow the storage guidance for those ingredients.
Can I freeze Christmas cookies?
Yes! These cookies freeze well.
Let the baked cookies cool completely before placing them in a freezer-safe airtight container.
Separate layers with parchment paper to protect their shapes and decorations.
For the best quality, enjoy frozen baked cookies within approximately 2–3 months.
Thaw them at room temperature inside their container.
You can also freeze unbaked dough discs. Thaw them in the refrigerator before rolling and cutting.
Why did my Christmas cookies spread too much?
Several things can cause cookies to spread.
Your butter may have been too soft, the dough may not have chilled long enough, or your baking sheets may have been warm when you added the cookies.
Measure your flour accurately and chill the dough before baking.
Also, use a cool baking sheet for each new batch.
Why are my Christmas cookies hard instead of soft?
Overbaking is a common reason.
Remove the cookies when the edges look set and the centers still appear slightly soft.
Also, avoid adding too much flour during mixing or rolling. Excess flour can create a dry texture.
Store the cooled cookies in an airtight container to help maintain their texture.
Can I decorate Christmas cookies the day before serving?
Yes! You can bake and decorate your cookies one day ahead.
Allow the icing to dry completely before arranging the cookies in an airtight container.
Place parchment paper between layers to prevent decorations from sticking together.
This is a particularly useful trick when preparing treats for a Christmas party or family gathering.
Do I need a stand mixer to make this recipe?
No. A stand mixer makes the process convenient, but an electric hand mixer works just as well.
You can even cream the butter and sugar by hand with a sturdy whisk or wooden spoon. It simply takes a little more effort.
Can I make these cookies without cookie cutters?
Of course!
Roll the dough into small balls and gently flatten them with your palm or the bottom of a glass.
You can also shape the dough into small rounds and decorate them with festive icing and sprinkles.
The flavor stays just as delicious even without traditional Christmas shapes.
Final Thought
There’s something wonderful about homemade Christmas cookies. They don’t need fancy ingredients or complicated decorations to make people happy.
A little butter, sugar, flour, and vanilla can create something that brings everyone together around the kitchen table.
What I love most about this recipe is how easily you can make it your own. Choose your favorite cookie cutters, experiment with icing colors, add a little peppermint, or keep everything simple with a dusting of sugar.
Don’t worry if your first batch doesn’t look perfect. Some cookies might have slightly uneven edges, and a few decorations might end up in unexpected places. That’s part of the fun of homemade baking!
Make a batch for your family, share a few with neighbors, or wrap them up as thoughtful homemade gifts.
I’d love to hear how your cookies turn out. Which Christmas shapes and decorations did you choose? Leave a comment and share your favorite holiday decorating ideas.
Happy baking, and may your Christmas season be filled with warmth, laughter, and plenty of delicious cookies!
Leave a Reply
You must be logged in to post a comment.