

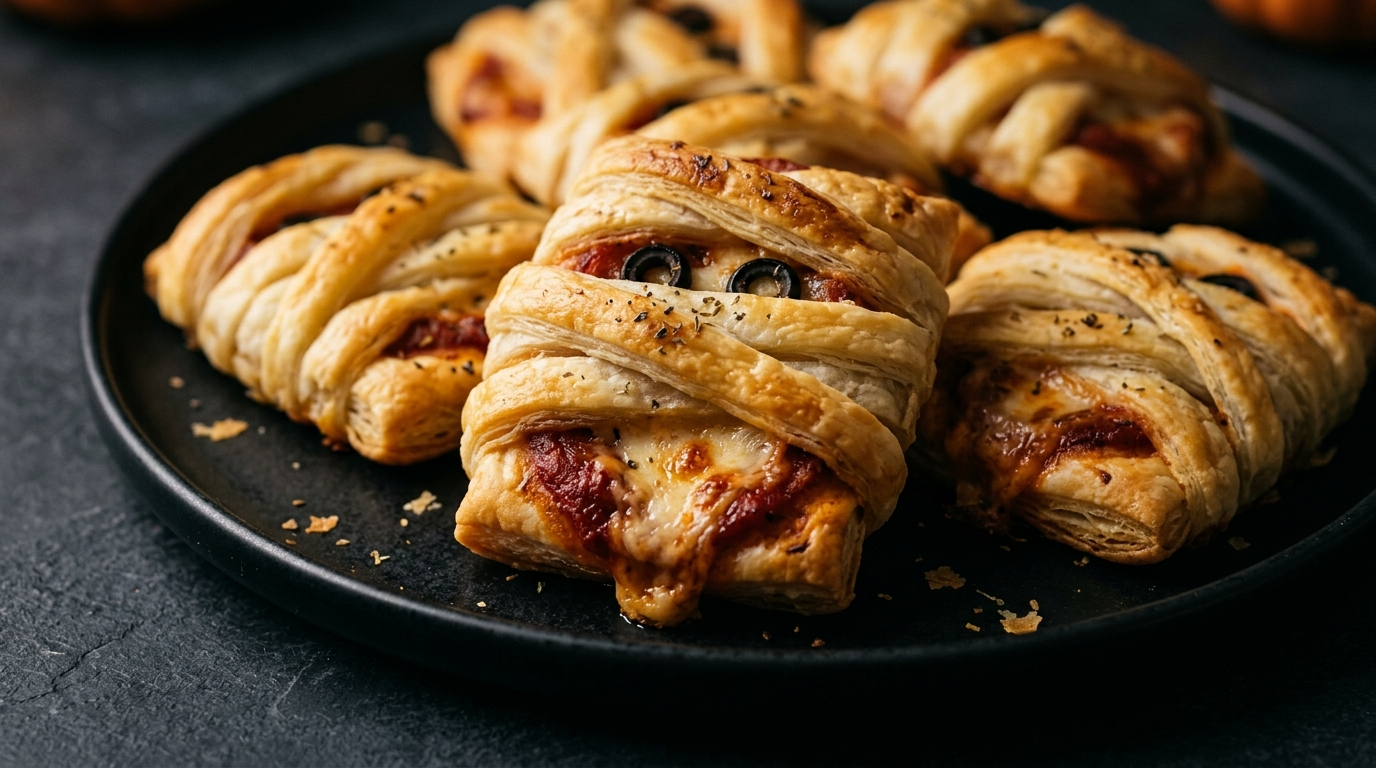
Some party foods disappear so quickly that you barely get a chance to put the serving plate down. Halloween mummy pizza pockets are exactly that kind of snack. They combine warm pizza filling, gooey cheese, and golden pastry with a playful mummy design that makes everyone curious enough to grab one.
I love recipes like this because they turn ordinary ingredients into something festive without creating a mountain of work in the kitchen. You don’t need fancy decorating tools or professional baking skills. A little dough, your favorite pizza toppings, and a few strips of pastry can do the trick.
The first thing I recommend when making mummy pizza pockets is keeping the filling simple. It’s tempting to load every pocket with extra cheese, sauce, and toppings, but too much filling can escape during baking. I learned that a modest amount creates a neater pocket and leaves plenty of room for the cheesy goodness everyone expects.
These Halloween mummy pizza pockets make a fun addition to a family Halloween night, a school party, or a casual gathering with friends. You can prepare them ahead, customize the filling, and serve them with warm pizza sauce for dipping.
If you’re looking for a Halloween dish and food idea for your party that looks creative but uses familiar ingredients, this recipe is a delicious place to start.
Why You’ll Love This Halloween Mummy Pizza Pockets Recipe

-
Easy to make: Refrigerated pizza dough keeps preparation simple, even for beginner cooks.
-
Perfect party size: Individual pockets make serving easy and help guests grab a snack without cutting a whole pizza.
-
Customizable filling: Use mozzarella, cheddar, pepperoni, mushrooms, or your favorite pizza toppings.
-
Fun Halloween appearance: Thin strips of dough create the mummy wrapping, while two little eyes complete the look.
-
Great for preparation ahead: Assemble the pockets in advance and bake them shortly before your guests arrive.
Ingredients
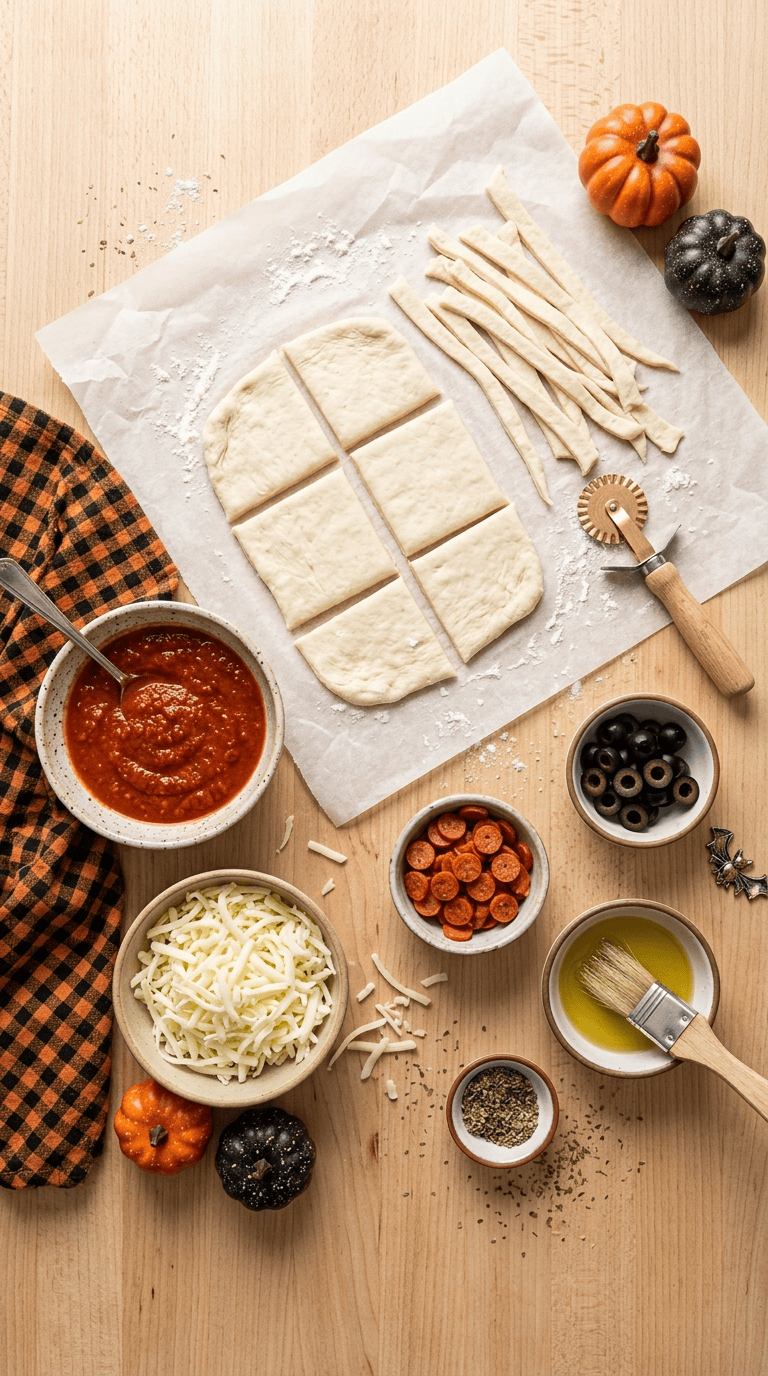
This recipe makes 8 mummy pizza pockets, depending on how you cut the dough. You can double the ingredients if you’re feeding a larger crowd.
For the Pizza Pockets
-
1 pound refrigerated pizza dough
-
½ cup pizza sauce, plus extra for dipping
-
1 cup shredded mozzarella cheese
-
½ cup finely chopped pepperoni
-
¼ cup finely chopped bell pepper
-
¼ teaspoon dried oregano
-
¼ teaspoon garlic powder
-
1 tablespoon all-purpose flour, for dusting the work surface
For the Mummy Wrapping
-
1 egg
-
1 tablespoon water
-
16 small edible candy eyes, or a little mustard to create eyes after baking
Ingredient substitutions: You can replace pepperoni with cooked mushrooms, chopped olives, or finely diced cooked chicken. Cheddar works well alongside mozzarella if you prefer a stronger cheese flavor. If you use gluten-free pizza dough, follow its package directions because some varieties need different handling.
Keep the pizza sauce quantity modest. A thick sauce works better than a watery one because excess moisture can make the dough soggy and cause the pockets to open.
Step-by-Step Instructions
Preparation: 20 minutes · Cooking: 15–20 minutes · Total: approximately 40 minutes · Servings: 8 pockets
Step 1: Preheat the Oven and Prepare Your Baking Tray
Preheat your oven to 400°F (200°C). Line a baking sheet with parchment paper to prevent sticking and make cleanup easier.
Take the pizza dough out of the refrigerator and let it rest according to the package instructions. Slightly relaxed dough stretches more easily and is less likely to shrink while you shape it.
Lightly dust your work surface with flour. Keep a little extra flour nearby, but avoid adding too much because excess flour can make the dough dry.
Step 2: Prepare the Pizza Filling
In a medium bowl, combine the mozzarella, chopped pepperoni, bell pepper, oregano, and garlic powder.
Stir everything together until the ingredients look evenly distributed. You want a little of each ingredient in every pocket, rather than one pocket filled with pepperoni and another containing mostly cheese.
Keep the pizza sauce in a separate small bowl. Adding sauce directly to the filling can make the dough harder to seal, so you’ll spread a thin layer over each dough piece instead.
Step 3: Roll Out and Cut the Dough
Roll the pizza dough into a rectangle approximately 12 by 16 inches, depending on its starting size. Aim for an even thickness of roughly ⅛ inch.
Cut the dough into 16 rectangles. Eight rectangles will form the bottom layers, and the remaining eight will cover the filling.
Don’t worry if your rectangles aren’t perfectly identical. A slightly rustic appearance suits Halloween food, and the mummy wrapping will hide small imperfections.
If the dough becomes too sticky to handle, place it in the refrigerator for five to ten minutes before continuing.
Step 4: Fill the Bottom Dough Pieces
Arrange eight dough rectangles on the prepared baking sheet, leaving space between them.
Spread about 1 teaspoon of pizza sauce over the center of each rectangle. Leave a clear border around the edges so you can seal the pockets properly.
Divide the cheese and pepperoni mixture among the eight pieces. Use roughly 2 tablespoons of filling per pocket, adjusting the amount to fit your dough pieces.
Resist the urge to add extra filling. A small, well-balanced portion cooks more evenly and makes the pockets easier to close.
Step 5: Seal the Pizza Pockets
Place the remaining dough rectangles over the filling. Press the edges together with your fingertips, then gently crimp them with a fork.
Check every pocket for gaps. Even a small opening can allow melted cheese to escape during baking.
If a little filling touches the edges, wipe it away before sealing. Sauce or cheese between the dough layers can prevent a secure seal.
Step 6: Create the Mummy Wrapping
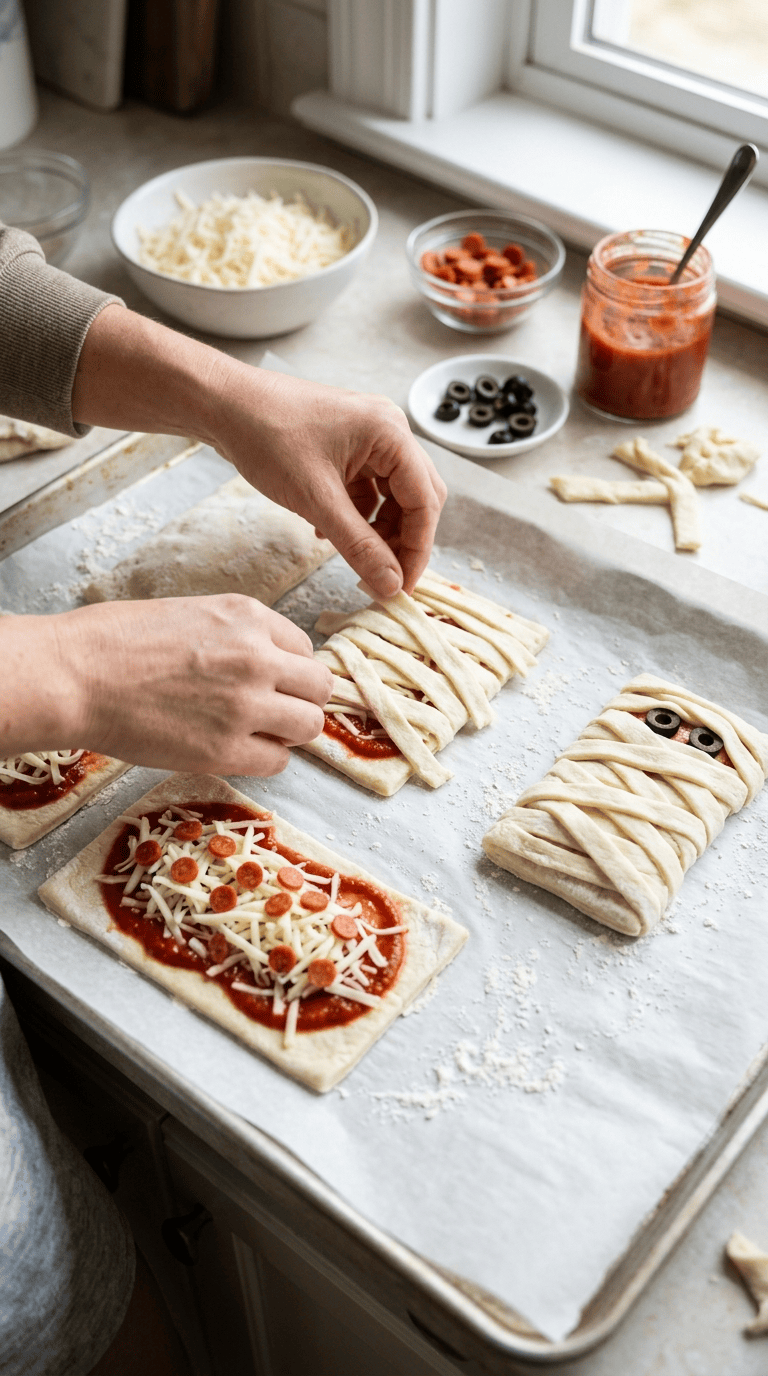
Use a sharp knife or pizza cutter to slice a little extra dough into thin strips. Lay the strips across each pocket in different directions, leaving small gaps between them.
Overlap some strips and angle others slightly to create the appearance of mummy bandages. Keep the strips loose enough that you can still see parts of the pocket underneath.
Press the ends of the strips gently against the base dough so they stay in place during baking.
You don’t need a perfect pattern. In fact, uneven strips give the mummies a playful, handmade look.
Step 7: Brush With Egg Wash
Crack the egg into a small bowl and whisk it with 1 tablespoon of water.
Brush a thin layer over the exposed dough using a pastry brush. This helps the mummy pockets develop a golden-brown finish.
Avoid letting egg wash pool around the bottom edges. Too much liquid can interfere with browning and make the pastry stick.
If you prefer not to use egg, lightly brush the dough with olive oil instead. The final color may look slightly different, but the pockets will still bake nicely.
Step 8: Bake Until Golden
Place the baking sheet in the preheated oven and bake for 15–20 minutes.
Start checking around the 15-minute mark. The dough should look golden brown, the wrapping should feel set, and the bottoms should no longer look pale or raw.
Ovens vary, so use the appearance of the dough as well as the timing. If the tops brown too quickly, loosely cover them with foil while the centers finish cooking.
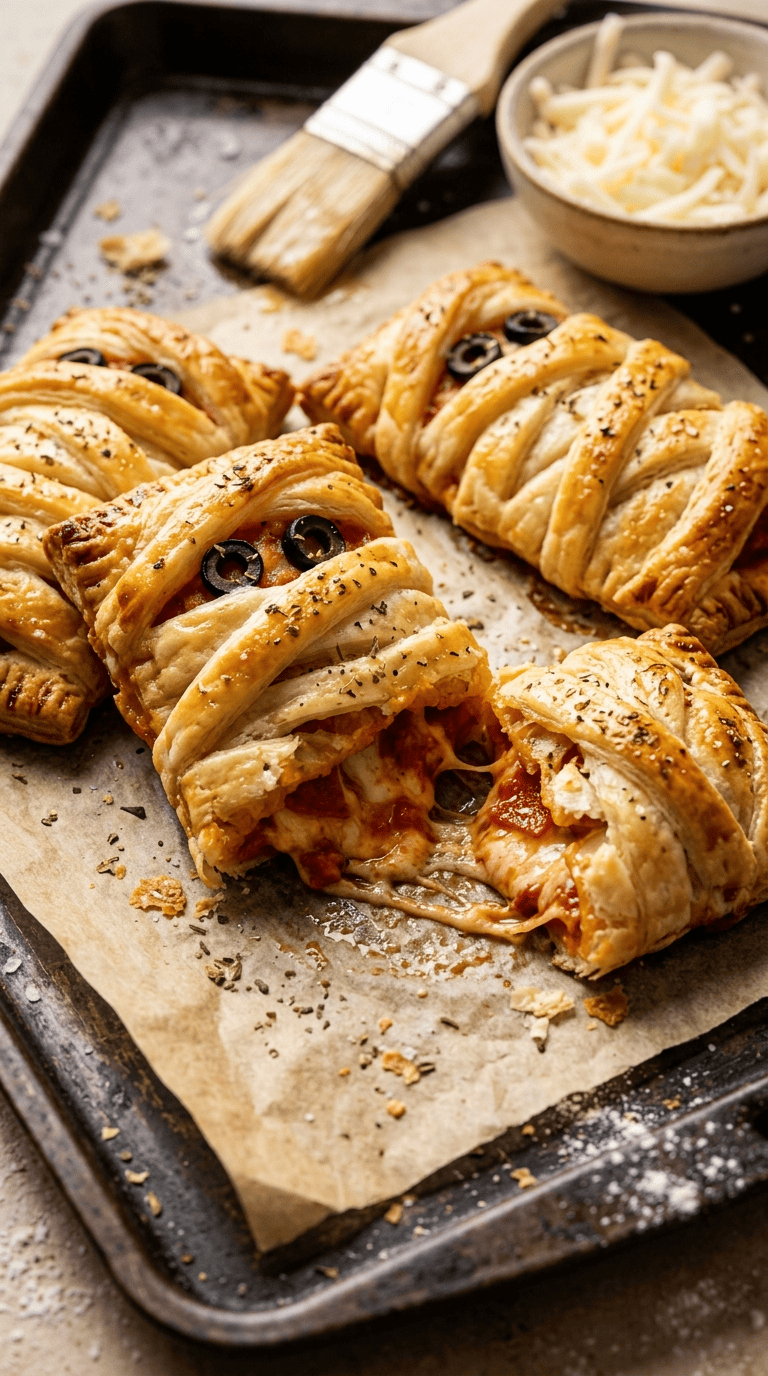
Let the mummy pizza pockets rest on the tray for about five minutes before serving. The filling will be extremely hot immediately after baking.
Step 9: Add the Eyes and Serve
Once the pockets have cooled slightly, add two edible candy eyes to each mummy if you use them. Check that the decorations suit the dish and follow their package instructions.
For a savory alternative, use tiny dots of mustard applied with a toothpick. This option avoids sweet decorations and keeps the flavor closer to traditional pizza.
Transfer the finished mummy pizza pockets to a serving platter with a small bowl of warm pizza sauce in the middle.
Serve them while the pastry is warm and the cheese is still soft.
Pro Tips and Tricks
Don’t Overfill the Dough
The biggest mistake is adding too much sauce or cheese. Extra filling might sound appealing, but it makes sealing difficult and often leaks onto the tray.
Start with a small portion, press the edges firmly, and increase the filling slightly on your next batch if your dough can handle it.
Use Thin, Even Wrapping Strips
Thick dough strips can remain pale or doughy while the bottom cooks. Thin strips brown more evenly and create a more recognizable mummy design.
If the strips become too soft while you’re working, chill the shaped pockets for five minutes before baking.
Keep the Dough Cold Enough to Handle
Warm dough often becomes sticky and difficult to cut. A brief rest in the refrigerator can make it easier to work with without requiring extra flour.
If you’re using refrigerated dough, work with one portion at a time rather than leaving the entire batch on the counter.
Prepare the Pockets Before Your Guests Arrive
You can assemble the pockets several hours ahead and refrigerate them on a covered tray. Brush them with egg wash just before baking for the best finish.
For food safety, keep the prepared pockets refrigerated at 40°F (4°C) or below. Don’t leave fillings containing cheese or meat sitting at room temperature for long periods.
Store and Reheat Leftovers Properly
Place leftover pockets in an airtight container and refrigerate them within two hours of cooking. Enjoy them within three to four days.
For the best texture, reheat them in a 350°F (175°C) oven for about 8–12 minutes, checking that the centers reach 165°F (74°C). An air fryer also works well; start with a few minutes at 325°F (165°C) and check frequently.
A microwave can warm the filling quickly, but it often softens the pastry. Use it when convenience matters more than crispness.
Variations and Substitutions
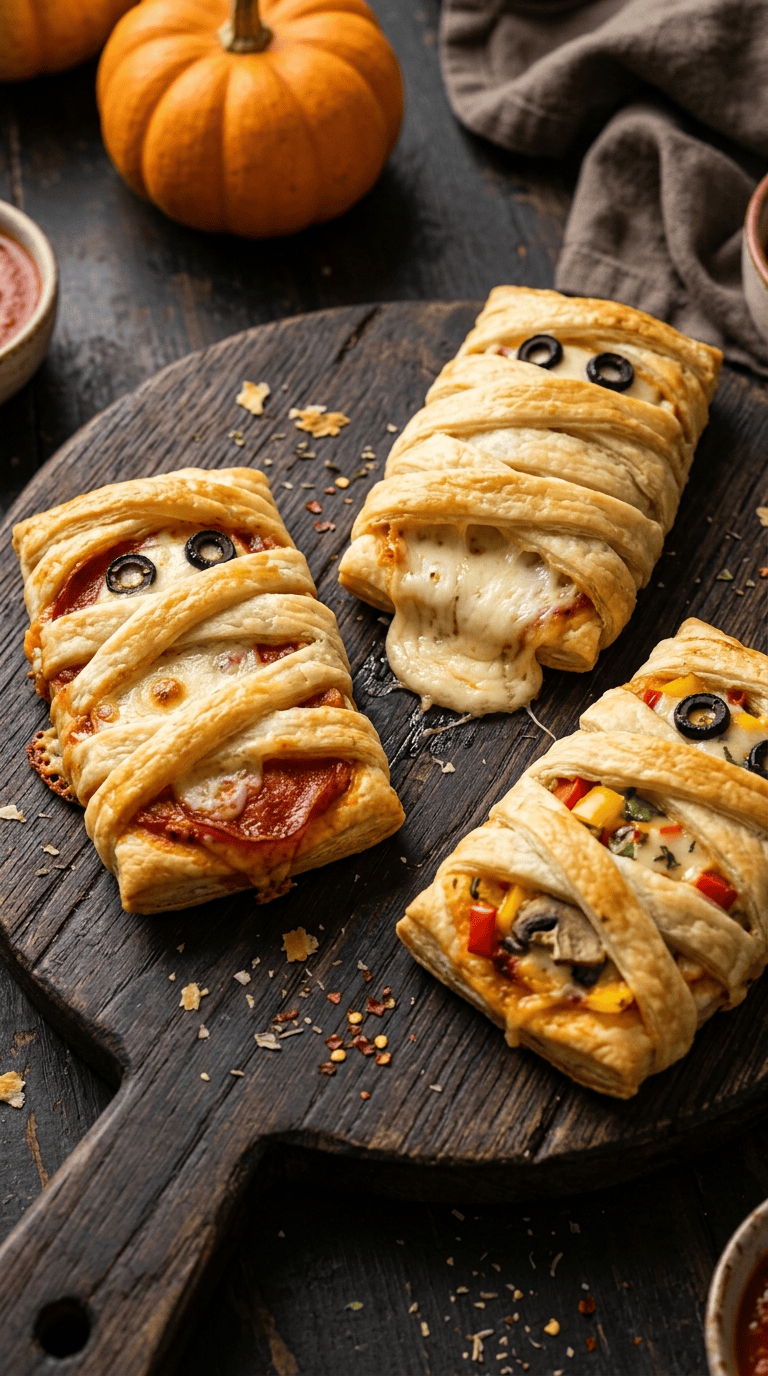
1. Vegetarian Halloween Mummy Pizza Pockets
For a vegetarian version, leave out the pepperoni and use finely chopped mushrooms, bell peppers, black olives, or spinach.
Cook mushrooms and spinach first to remove excess moisture. Let them cool before adding them to the cheese mixture so they don’t soften the dough.
You can also use a combination of mozzarella and cheddar for a richer flavor. Keep the filling quantity similar to the original recipe so the pockets remain easy to seal.
2. Spicy Mummy Pizza Pockets
If your guests enjoy a little heat, add ¼ teaspoon of red pepper flakes to the filling or use sliced jalapeños.
You can replace some of the mozzarella with pepper jack cheese for a stronger spicy flavor. Chop the jalapeños finely so they distribute evenly and don’t create large gaps in the filling.
Serve the pockets with spicy pizza sauce or a little chili sauce on the side. For a children’s party, keep the main batch mild and offer the spicy dip separately.
3. Dairy-Free or Gluten-Free Mummy Pizza Pockets
For a dairy-free version, use dairy-free mozzarella-style cheese and check the labels on your dough, pepperoni, and sauce.
For gluten-free pockets, choose a gluten-free pizza dough designed for baking. Some doughs handle differently from traditional wheat dough, so follow the manufacturer’s rolling and baking guidance.
If you need both modifications, check every ingredient for the relevant allergens. Don’t assume that a product is dairy-free or gluten-free based on its appearance alone.
Serving Suggestions
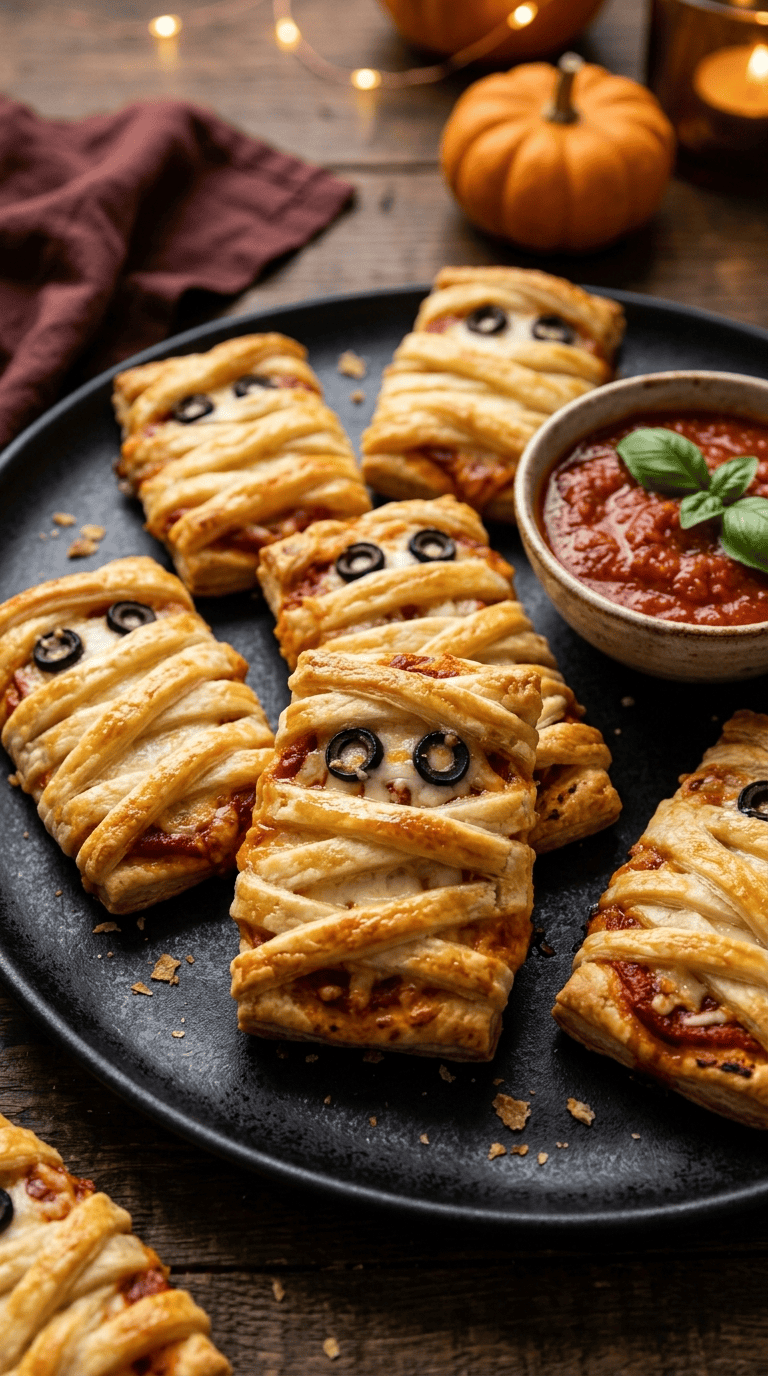
These mummy pizza pockets fit naturally into a Halloween buffet because guests can pick them up and eat them without much fuss.
Arrange them on a dark serving platter with a bowl of warm red pizza sauce in the center. The contrast makes the golden pastry stand out without requiring elaborate decorations.
For a more complete party spread, serve them with a fresh vegetable platter, crunchy cucumber slices, carrot sticks, and a creamy dip. A simple green salad also balances the cheesy filling if you’re serving the pockets as part of dinner.
If you’re hosting a children’s party, serve smaller portions alongside familiar snacks and keep the dips in separate bowls. This makes it easier for guests to choose what they like.
For a Halloween movie night, prepare a tray just before the film begins. The warm cheese and crisp pastry make these pockets a satisfying snack, especially when you pair them with a bowl of popcorn.
You can also serve them as a starter before a larger meal. Just remember that they taste best warm, so bake them close to serving time rather than leaving them on the table for the entire evening.
Related Recipes :
- Easy Halloween Dessert Ideas for Parties Spooky Chocolate Spiderweb Brownies
- Easy Spooky Potluck Food Ideas for Halloween Party Favorites
- Halloween Desserts for Adults That Feel Spooky & Sophisticated
FAQ’s
Can I make Halloween mummy pizza pockets ahead of time?
Yes. Assemble the pockets, seal the edges, and arrange them on a lined tray. Cover and refrigerate them for several hours, then add the egg wash and bake shortly before serving. Keep them refrigerated until they go into the oven.
How do I stop the cheese from leaking out?
Use a moderate amount of filling, leave a clean border around each dough rectangle, and press the edges firmly together. Check for holes before adding the mummy strips. Too much sauce or filling near the edges is a common cause of leakage.
Can I freeze mummy pizza pockets?
You can freeze baked pockets after they cool completely. Arrange them in a single layer until firm, then transfer them to a freezer-safe container. For best quality, use them within two to three months. Thaw them in the refrigerator and reheat thoroughly in the oven.
You can also freeze unbaked pockets, although the final texture may vary depending on the dough. Freeze them on a tray first, then store them in a suitable freezer container. Bake from frozen only if your dough instructions support it, allowing extra cooking time and checking that the center cooks through.
Can I use crescent-roll dough instead of pizza dough?
Yes. Crescent-roll dough makes softer, more buttery pockets and works well for a quick party version. Handle it gently because it can tear more easily than some pizza doughs. Follow the package temperature guidance and check the pockets early, as the baking time may differ.
How do I reheat leftover mummy pizza pockets without making them soggy?
Use an oven or air fryer rather than relying on the microwave. Heat them until the pastry feels crisp again and the filling reaches 165°F (74°C). Avoid reheating them repeatedly because the dough can dry out and the cheese may become rubbery.
Why did my mummy pizza pockets turn out pale or doughy?
The dough may have been too thick, the oven may not have reached the correct temperature, or the pockets may have needed more baking time. Preheat the oven fully, roll the dough evenly, and check the bottoms before removing the tray. If the tops brown before the dough cooks through, cover them loosely with foil and continue baking.
Final Thoughts
Halloween party food doesn’t need to be complicated to make an impression. These mummy pizza pockets bring together familiar pizza flavors, golden pastry, and a playful design that fits right into the spirit of the holiday.
What I especially like about this recipe is how easily you can make it your own. Keep the filling classic with mozzarella and pepperoni, experiment with vegetables, or add a little spice for guests who enjoy bolder flavors.
Don’t worry if your first batch looks a little messy. The uneven wrapping is part of the charm, and the most important thing is that the pockets bake properly and taste delicious.
Make a batch for your next Halloween gathering, serve them warm with your favorite dipping sauce, and enjoy watching everyone reach for one. If you try the recipe, share how your mummy pizza pockets turned out and which filling your family enjoyed most.
Leave a Reply
You must be logged in to post a comment.