

Every Thanksgiving has that one dish that sounds impressive but secretly takes half the afternoon to make. For me, dessert used to be that dish.
I’d picture a beautiful homemade pie cooling on the counter, then remember that pie dough and I have never had a particularly peaceful relationship. One year, after wrestling with a crust that refused to cooperate, I decided I needed a backup dessert.
That’s when this easy pumpkin dump cake became a Thanksgiving favorite.
The first time I made it, I honestly wasn’t sure what to expect. The name isn’t exactly fancy, and the method sounds almost too simple. You basically mix the pumpkin filling, sprinkle cake mix over the top, pour melted butter across everything, and bake.
But then it came out of the oven.
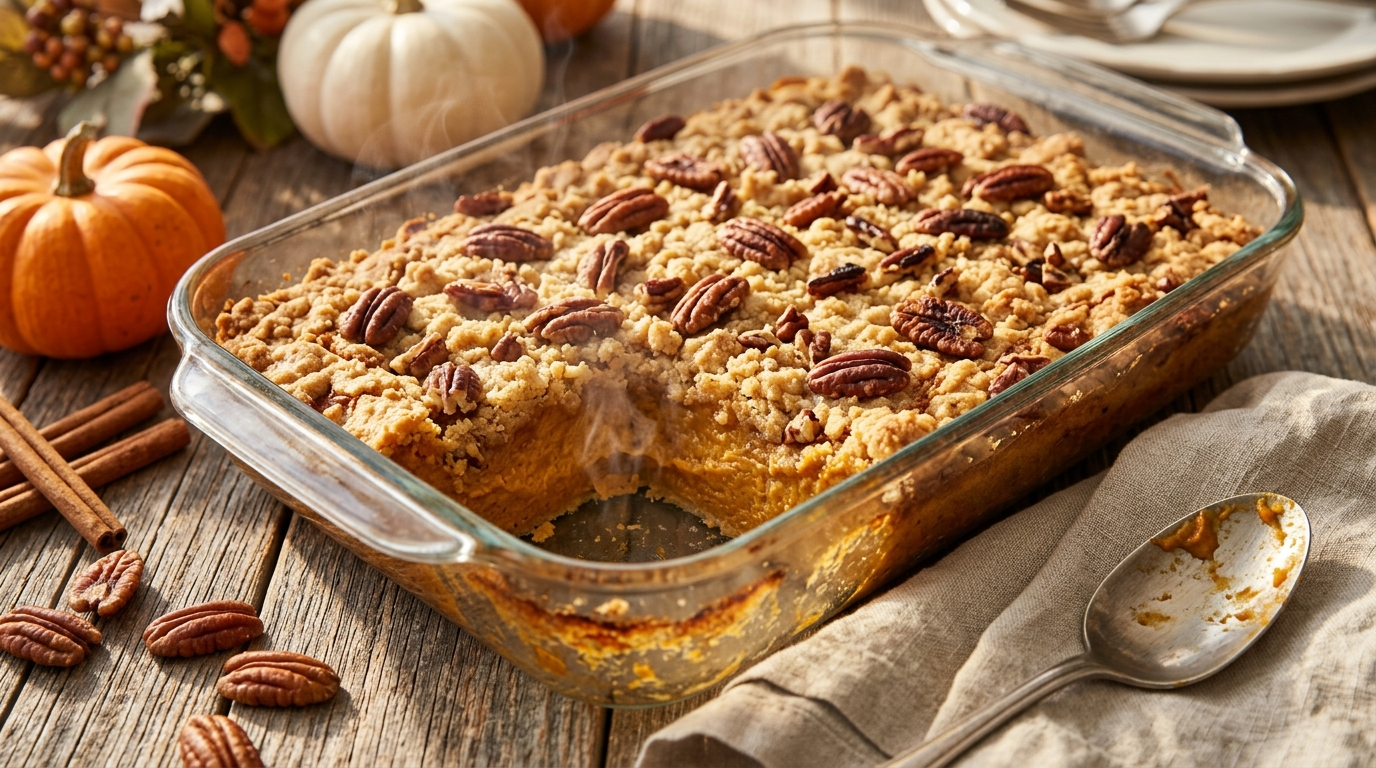
The edges were golden and crisp, the middle was soft and pumpkin-rich, and the whole kitchen smelled like cinnamon and toasted butter. I spooned some onto a plate, added a little whipped cream, and immediately understood why this recipe kept making its way back onto my holiday table.
I’ve made this pumpkin dump cake many times since then. I’ve learned a few little tricks along the way, including one important lesson: don’t rush the butter step. Getting good coverage over the dry cake mix makes a big difference.
If you want a Thanksgiving dessert that tastes homemade without asking you to spend your morning making pastry, this is the one I’d put on the menu.
Why You’ll Love This Pumpkin Dump Cake Recipe

- Almost ridiculously easy: You don’t need to roll dough, frost a cake, or dirty your stand mixer.
- Perfect for Thanksgiving: Pumpkin, cinnamon, and warm spices fit right in with a holiday dinner.
- Great for beginners: The steps are simple enough for a first-time baker.
- Feeds a crowd: One 9×13-inch pan gives you plenty of servings.
- Easy to make ahead: You can prepare it ahead of time and warm it gently before serving.
There’s also something wonderfully forgiving about a dump cake. It doesn’t need to look perfectly uniform when you put it in the oven. In fact, part of its charm comes from those crisp, buttery patches around the edges.
Ingredients You’ll Need
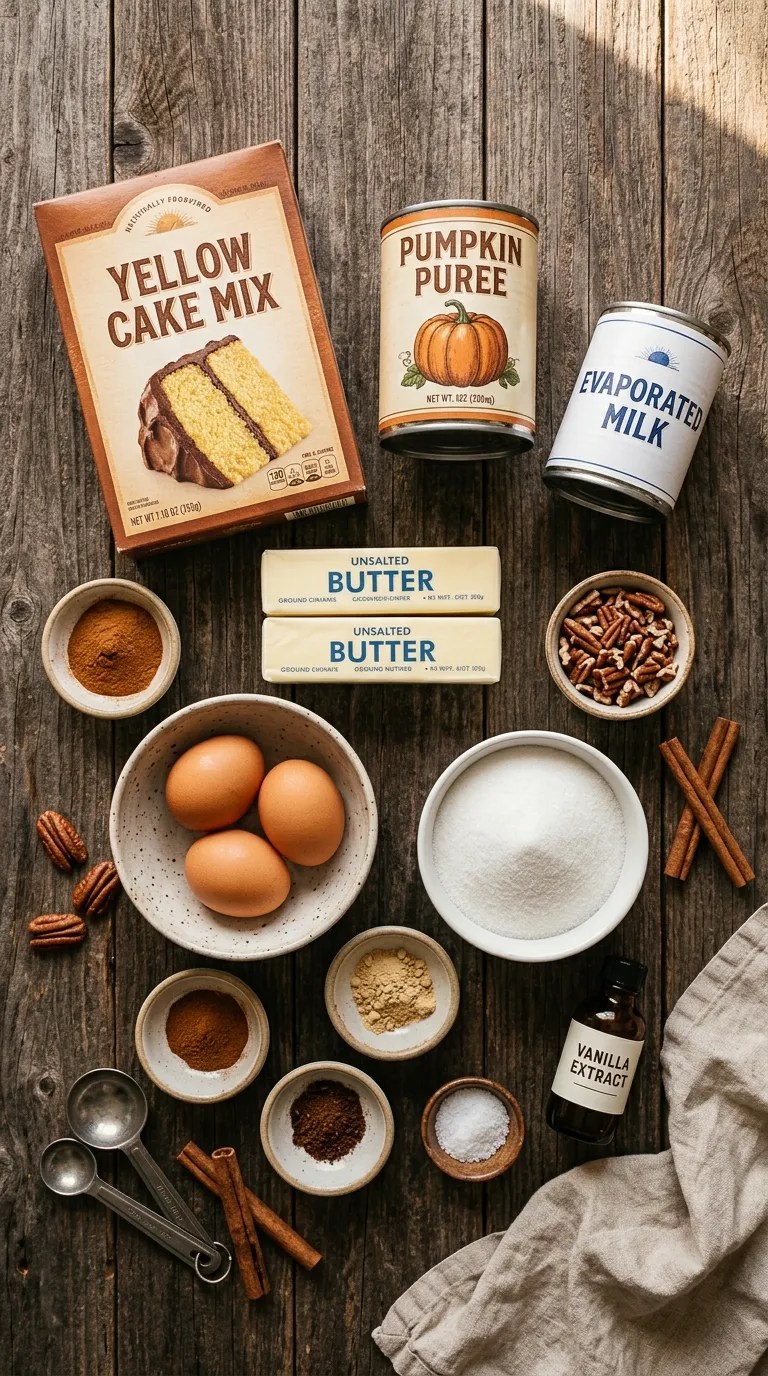
You only need a handful of everyday ingredients for this easy pumpkin dump cake.
For the Pumpkin Filling
- 1 can (15 ounces) pumpkin puree
- 1 can (12 ounces) evaporated milk
- 3 large eggs
- 1 cup granulated sugar
- 1 teaspoon ground cinnamon
- 1/2 teaspoon ground ginger
- 1/4 teaspoon ground nutmeg
- 1/4 teaspoon ground cloves
- 1/2 teaspoon salt
- 1 teaspoon vanilla extract
Make sure you use plain pumpkin puree rather than canned pumpkin pie filling. Pumpkin pie filling already contains sugar and spices, so swapping it into this recipe can throw off the flavor and texture.
For the Cake Topping
- 1 box (15.25 ounces) yellow cake mix
- 1 cup (2 sticks) unsalted butter, melted
- 1/2 cup chopped pecans or walnuts, optional
If you only have salted butter, you can use it. I would simply reduce the added salt in the pumpkin mixture slightly.
For the cake mix, yellow works beautifully, but spice cake mix also makes a delicious variation if you want even more warm spice.
Step-by-Step Instructions
1. Heat the Oven — About 5 Minutes
Start by heating your oven to 350°F.
Grease a 9×13-inch baking dish with butter or nonstick cooking spray. I like using a glass baking dish because it makes it easy to see when the edges have turned golden.
Set the dish aside while you mix the filling.
2. Mix the Pumpkin Filling — About 5 Minutes
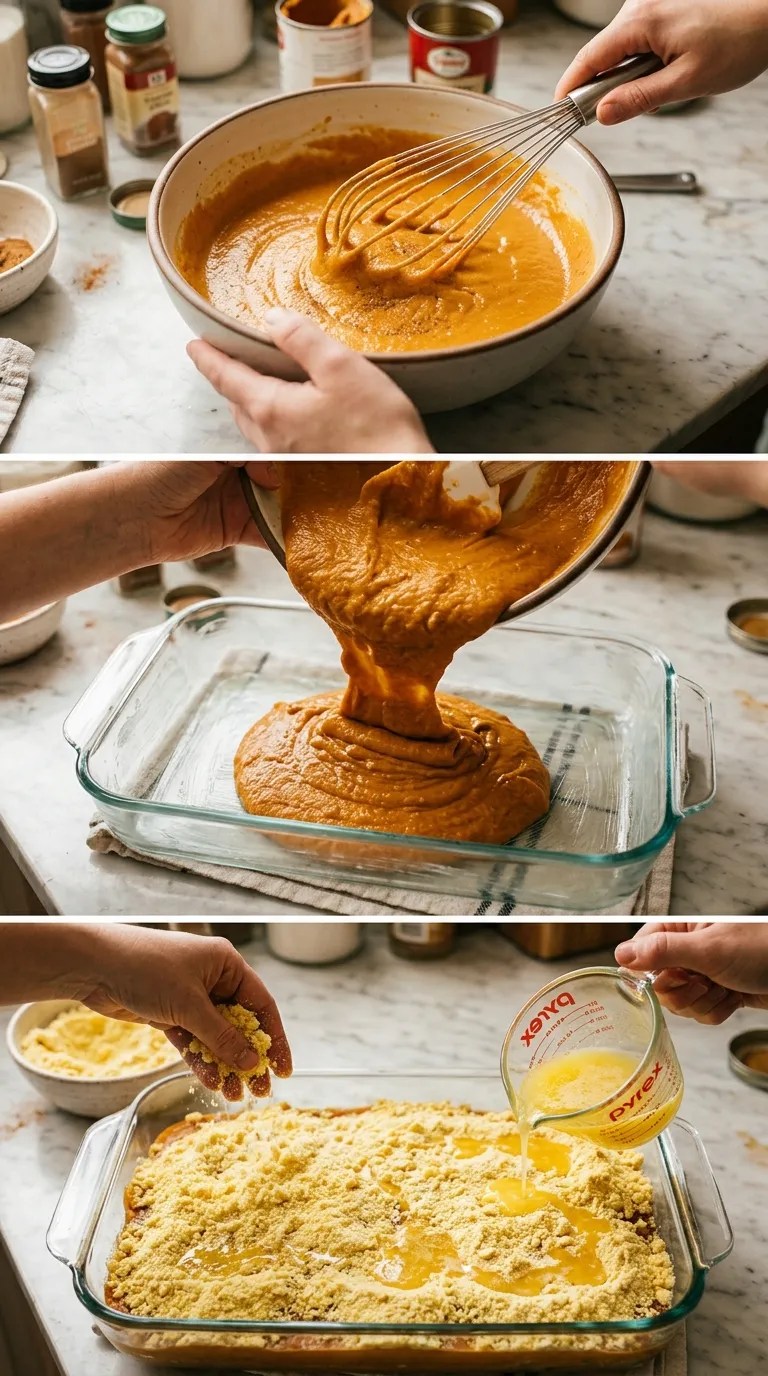
Add the pumpkin puree, evaporated milk, eggs, sugar, cinnamon, ginger, nutmeg, cloves, salt, and vanilla to a large mixing bowl.
Whisk everything together until the mixture looks smooth and evenly combined.
You don’t need an electric mixer here. A sturdy whisk does the job just fine.
At this stage, the mixture should look similar to a loose pumpkin pie filling. If you see streaks of egg or pockets of dry spices, keep whisking for another 20–30 seconds.
3. Pour the Filling Into the Dish — 1 Minute
Pour the pumpkin mixture into your prepared 9×13-inch baking dish.
Give the dish a gentle shake if needed so the filling settles into an even layer.
Don’t worry if it looks fairly thin. The cake mix and butter will transform it as everything bakes together.
4. Add the Dry Cake Mix — 2 Minutes
Open the box of yellow cake mix and sprinkle the dry mix evenly over the entire pumpkin layer.
This is one spot where a little patience helps.
Try not to dump the cake mix into one giant pile and spread it around afterward. Instead, sprinkle it gradually across the surface. You want a fairly even layer from corner to corner.
A few small gaps aren’t a disaster, but large uncovered areas can leave you with patches of pumpkin that don’t develop that lovely cakey topping.
5. Pour Over the Melted Butter — 3 Minutes
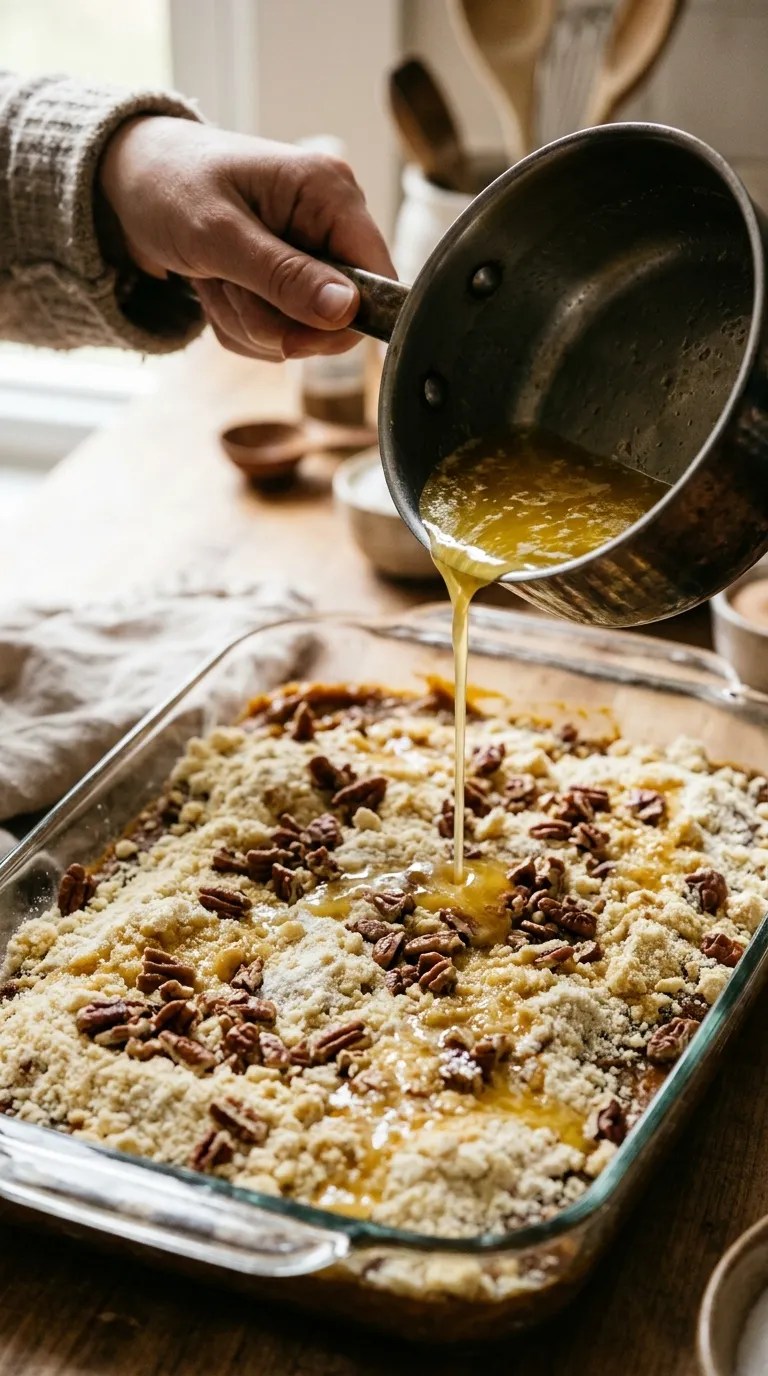
Melt the butter and slowly drizzle it over the cake mix.
Try to cover as much of the dry mix as possible.
This is the part I used to rush. I’d pour the butter mostly down the center, thinking it would somehow spread itself during baking. It did not.
Now I drizzle it slowly from one side of the dish to the other. If you still have a few dry spots, add a little extra butter to those areas.
You can also gently tilt the baking dish to help the butter move across the surface.
6. Add the Nuts — 1 Minute
If you like nuts, scatter the chopped pecans or walnuts over the top.
Pecans are my favorite here because they become lightly toasted while the cake bakes. They also add a nice contrast to the soft pumpkin layer.
If someone at your Thanksgiving table has a nut allergy, simply leave them out.
7. Bake Until Golden — 50 to 60 Minutes
Place the baking dish in the preheated oven and bake for approximately 50–60 minutes.
Start checking around the 50-minute mark.
The top should look golden brown, and the edges should appear set and slightly crisp. The center can still have a gentle wobble when you carefully move the dish.
Don’t judge the cake only by its color. The pumpkin layer underneath needs enough time to cook and set.
If the top starts browning too quickly while the center still looks very loose, loosely cover the dish with aluminum foil and continue baking.
8. Let It Rest — 20 to 30 Minutes
This step requires a little self-control because your kitchen will smell fantastic.
Take the pumpkin dump cake out of the oven and let it rest for 20–30 minutes before serving.
The filling continues to settle as it cools, and the topping becomes easier to scoop.
You can serve it warm, but give it enough time that you won’t end up with a runny spoonful.
Pro Tips & Tricks
Spread the Cake Mix Evenly
The cake mix forms the topping, so try to distribute it evenly.
I like to sprinkle it with my fingers rather than dumping it straight from the box. It takes an extra minute, but you get much better coverage.
Don’t Skimp on Butter Coverage
The melted butter helps turn the dry cake mix into a golden, crisp topping.
If you leave large sections completely dry, you may end up with powdery patches after baking. Pour slowly and aim for good coverage.
Let the Cake Cool Before Cutting Into It
If you scoop into the cake immediately, the pumpkin layer may seem looser than expected.
Give it at least 20 minutes. If you’re serving it for Thanksgiving dinner, you can let it rest while everyone finishes clearing the table.
Watch the Baking Time
Every oven behaves a little differently.
An older oven, a darker metal pan, or a deeper baking dish can change the cooking time. Start checking around 50 minutes rather than blindly relying on the clock.
Use a Real 9×13-Inch Dish
The pan size matters more than you might think.
A smaller dish makes the layers deeper and can increase the baking time. A larger dish creates thinner layers and may cook more quickly.
For the texture I like, a standard 9×13-inch baking dish works best.
Make It Ahead
You can bake the pumpkin dump cake earlier in the day and keep it covered at room temperature for a short period before serving.
For longer storage, refrigerate it once it has cooled.
When Thanksgiving gets hectic, making dessert before the turkey takes center stage can save you a lot of last-minute kitchen juggling.
Variations & Substitutions
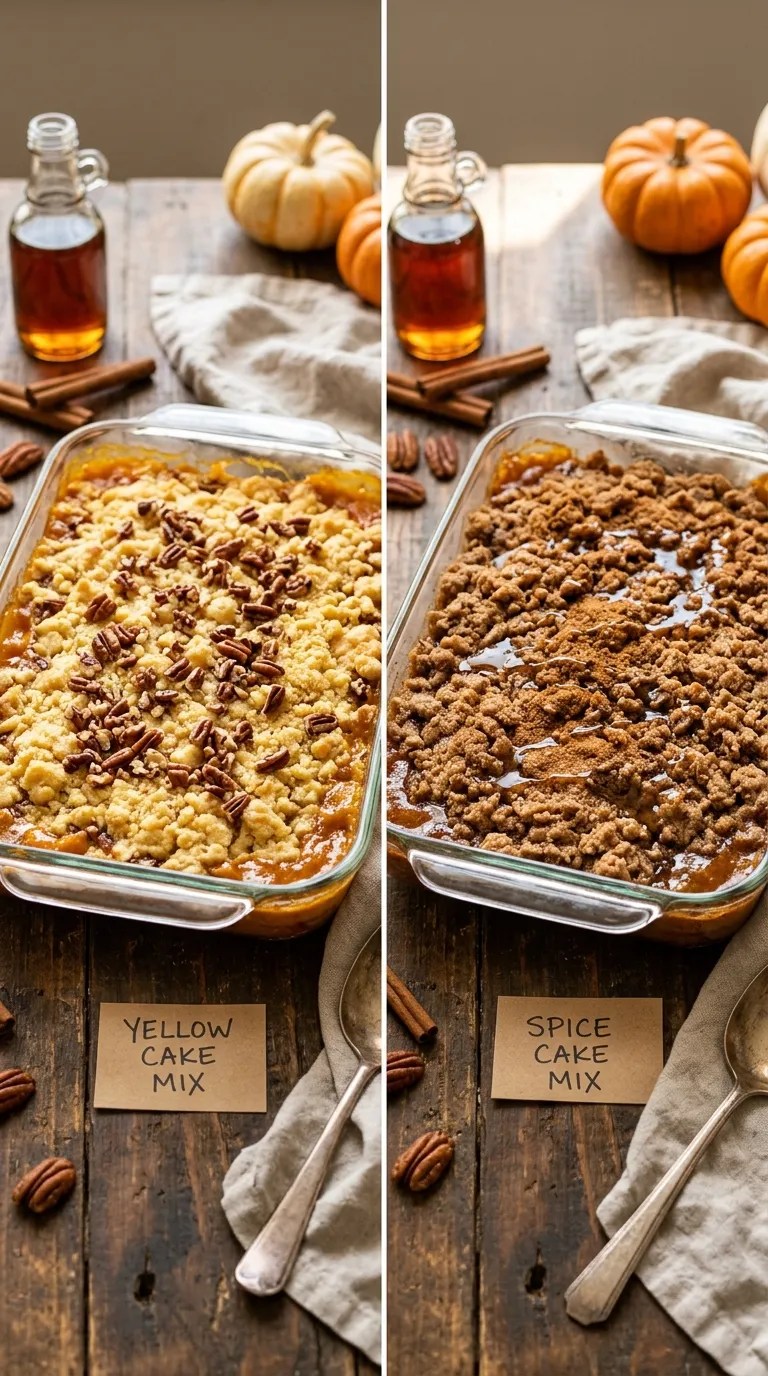
Make It With Spice Cake Mix
Swap the yellow cake mix for a box of spice cake mix.
This version leans harder into cinnamon, nutmeg, and other warm baking spices. If you love pumpkin spice desserts, this may become your favorite version.
Add a Little Maple Flavor
For a subtle maple twist, replace part of the granulated sugar with pure maple syrup.
I recommend using about 3/4 cup sugar plus 1/4 cup pure maple syrup rather than making a complete swap. The extra liquid can affect the texture, so keeping most of the sugar helps maintain the consistency of the pumpkin layer.
Skip the Nuts
You absolutely don’t need nuts to make this dessert work.
Leave them off for a simpler topping, especially if you’re feeding guests with nut allergies.
You can also sprinkle a little extra cinnamon over the top before baking for a simple finish.
Gluten-Free Option
For a gluten-free version, choose a cake mix specifically labeled gluten-free and check the labels on your other packaged ingredients.
Cake mixes vary by brand, so follow the package’s preparation and allergen information when choosing one.
Serving Suggestions

This pumpkin dump cake practically begs for something cool and creamy on top.
My favorite way to serve it is warm with a generous spoonful of vanilla ice cream. The ice cream starts melting into the warm pumpkin layer, and that combination is hard to beat.
Whipped cream works beautifully too.
For Thanksgiving, you can set out a bowl of whipped cream and let everyone add their own. A light dusting of cinnamon makes the dessert look festive without requiring any complicated decoration.
For an extra-special holiday presentation, add a few toasted pecans to individual servings.
You can also serve the cake alongside coffee after dinner. The warm spices pair especially well with a simple cup of freshly brewed coffee.
This dessert fits more than just Thanksgiving, too. I make it for fall potlucks, family dinners, Friendsgiving gatherings, and those weekends when I buy a can of pumpkin and suddenly feel obligated to bake something with it.
Related Recipes:
- Easy Pumpkin Cupcake Recipe for Fall Baking
- Homemade Pumpkin Cupcake With Cinnamon
- How to Make Pumpkin Cupcakes With Cinnamon Cream Cheese Frosting
- Easy Pumpkin Cheesecake Recipe for Thanksgiving
FAQ’s
Can I Make Pumpkin Dump Cake Ahead of Time?
Yes. Pumpkin dump cake works well as a make-ahead dessert.
Bake it earlier in the day, allow it to cool, and cover it. Refrigerate it if you need to store it for longer.
When you’re ready to serve it, warm individual portions gently in the microwave or warm the covered baking dish in the oven.
How Should I Store Leftover Pumpkin Dump Cake?
Once the cake has cooled, cover it and refrigerate the leftovers.
Because the recipe contains eggs and dairy, don’t leave leftovers sitting at room temperature for an extended period.
For the best texture, enjoy refrigerated leftovers within a few days.
Can I Freeze Pumpkin Dump Cake?
Yes, you can freeze it, although the topping may soften slightly after thawing.
Let the cake cool completely, portion it into airtight freezer-safe containers, and freeze.
Thaw it in the refrigerator before reheating. The topping won’t have quite the same freshly baked crispness, but the pumpkin flavor still makes a satisfying leftover dessert.
Why Is My Dump Cake Powdery on Top?
Usually, dry patches mean the cake mix didn’t receive enough butter.
Next time, spread the cake mix more evenly and drizzle the melted butter slowly across the entire surface.
Don’t stir the cake mix into the pumpkin filling. The layered method creates the texture that makes dump cake special.
Can I Use Pumpkin Pie Filling Instead of Pumpkin Puree?
I don’t recommend it.
Canned pumpkin puree and canned pumpkin pie filling aren’t interchangeable in this recipe. Pumpkin pie filling typically already contains sugar and spices, so using it can make the dessert much sweeter and change the balance of the recipe.
Stick with plain pumpkin puree.
Can I Make This Without Nuts?
Absolutely.
The nuts add crunch, but they aren’t necessary for the recipe. Simply leave them out and bake the cake as directed.
If you’re serving guests, skipping nuts also makes the dessert easier to share with people who need to avoid tree nuts.
Final Thought
I still think the best Thanksgiving recipes are the ones that make the cook’s life a little easier.
There’s plenty to manage on Thanksgiving Day — the turkey, side dishes, timing, hungry relatives wandering into the kitchen — so I don’t see the point in making dessert unnecessarily complicated.
This easy pumpkin dump cake gives you all those cozy fall flavors without asking you to fuss over a pie crust or decorate a perfect cake.
And honestly, I like that it looks homemade in the best possible way. The edges get wonderfully golden, the pumpkin layer stays soft and warmly spiced, and every scoop looks just a little different.
If you’re making it for Thanksgiving, put the vanilla ice cream on the table and let people serve themselves.
Then grab a spoonful while it’s still warm. That’s the part I’d never skip.
Leave a Reply
You must be logged in to post a comment.