

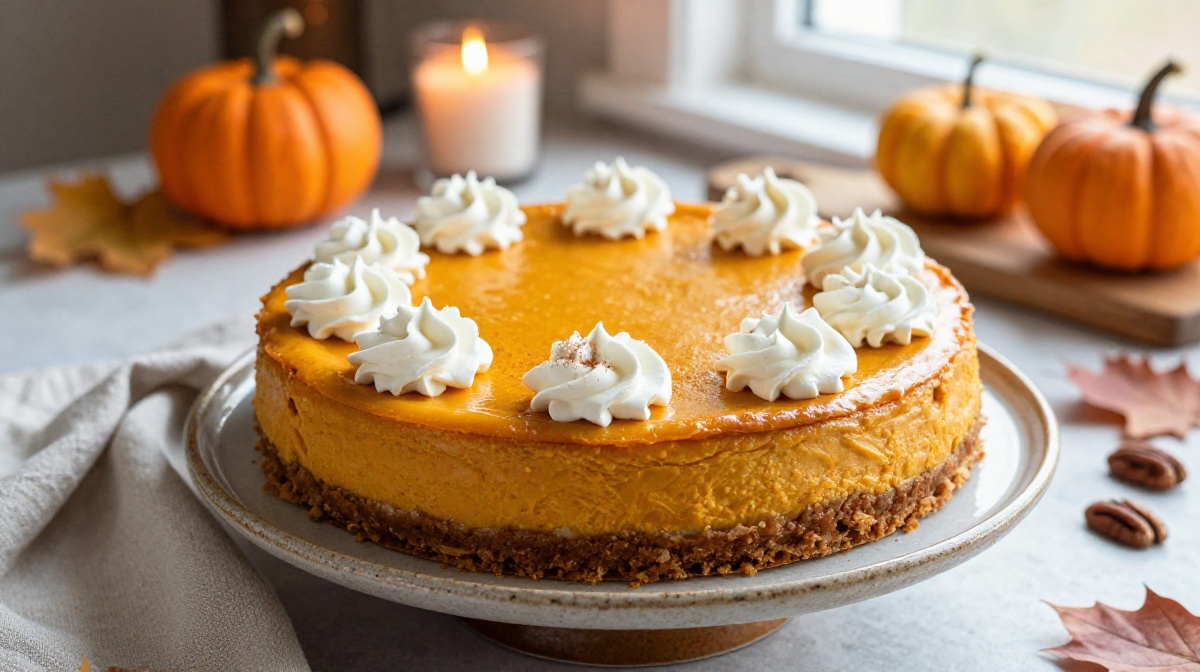
There’s something about pumpkin cheesecake that makes a Thanksgiving table feel extra special.
I still remember the first time I made one for a holiday dinner. I had planned to bake a traditional pumpkin pie, but I wanted something a little creamier and more impressive without spending half the day in the kitchen. So I decided to try a pumpkin cheesecake instead.
I expected a complicated dessert with a long list of things that could go wrong. Instead, I ended up with a creamy, warmly spiced cheesecake sitting on a buttery graham cracker crust. The top looked beautiful, the kitchen smelled like cinnamon and nutmeg, and everyone went back for another slice.
I’ve made plenty of pumpkin cheesecakes since then, and I’ve learned a few little tricks along the way. The biggest one? You don’t need fancy equipment or complicated techniques to make a great Thanksgiving cheesecake.
This easy pumpkin cheesecake recipe uses a simple graham cracker crust and a smooth pumpkin-spiced filling. You can prepare it a day ahead, which makes it especially useful when the oven already has a dozen Thanksgiving jobs waiting for it.
And yes, I recommend making it the day before. Cheesecake tastes even better after it has had plenty of time to chill.
Why You’ll Love This Pumpkin Cheesecake

- It looks impressive without being fussy. The swirled pumpkin filling gives you that classic Thanksgiving look with very little decorating.
- You can make it ahead. In fact, I prefer making it the day before serving.
- The ingredients are easy to find. Nothing here requires a trip to a specialty baking store.
- The texture stays wonderfully creamy. A slow, gentle bake helps keep the filling smooth.
- It gives pumpkin pie some competition. If your family usually reaches for pumpkin pie, this is a fun change without straying too far from familiar holiday flavors.
Ingredients for Easy Pumpkin Cheesecake

This recipe makes one 9-inch cheesecake, which gives you about 10–12 slices depending on how generously you cut them.
For the Graham Cracker Crust
- 1 3/4 cups graham cracker crumbs
- 1/4 cup granulated sugar
- 6 tablespoons unsalted butter, melted
- 1/4 teaspoon ground cinnamon
- Pinch of salt
You can use store-bought graham cracker crumbs, or crush whole graham crackers in a food processor. If you don’t have one, place the crackers in a zip-top bag and crush them with a rolling pin.
For the Cheesecake Filling
- 24 ounces full-fat cream cheese, softened
- 1 cup granulated sugar
- 1 cup pumpkin purée
- 3 large eggs
- 1 teaspoon pure vanilla extract
- 1 1/2 teaspoons ground cinnamon
- 1 teaspoon ground ginger
- 1/4 teaspoon ground nutmeg
- 1/8 teaspoon ground cloves
- 1/4 teaspoon salt
- 1/4 cup sour cream
Use pure pumpkin purée, not canned pumpkin pie filling. Pumpkin pie filling already contains sugar and spices, so swapping it into this recipe can throw off the flavor and texture.
For the cream cheese, I strongly recommend full-fat blocks rather than the spreadable kind sold in tubs. The block cream cheese gives the cheesecake a firmer, creamier texture.
If you don’t have sour cream, plain full-fat Greek yogurt works nicely.
Step-by-Step Instructions
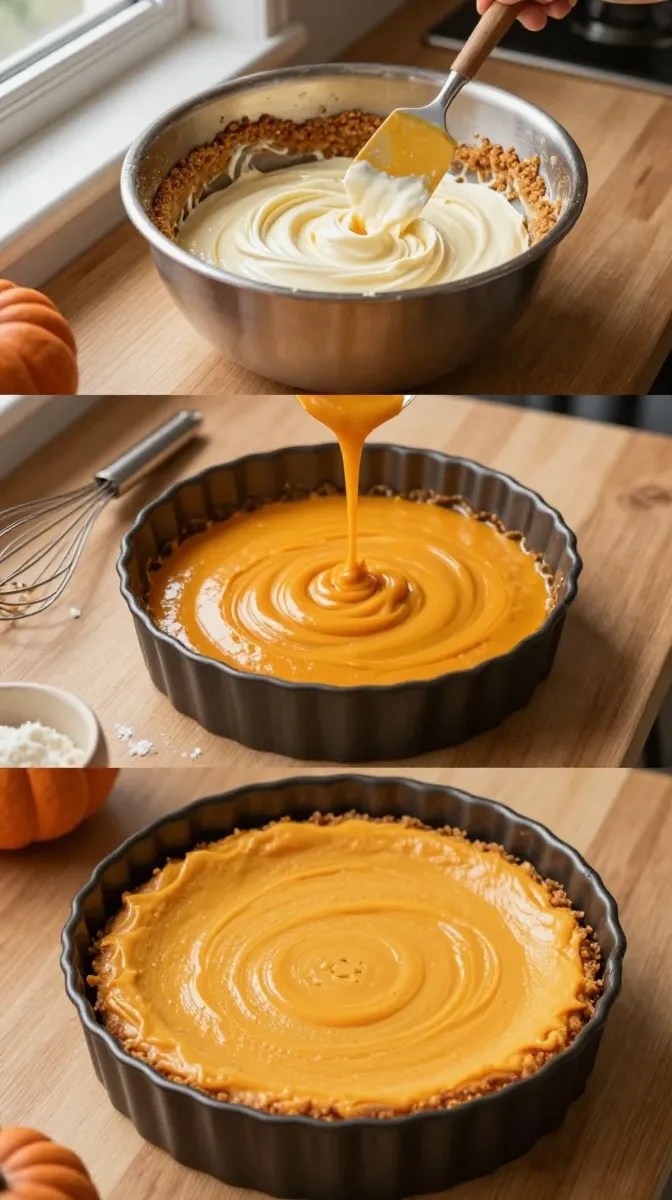
1. Bring the cream cheese and eggs to room temperature — 30 to 45 minutes
Take the cream cheese and eggs out of the refrigerator before you start.
Let the cream cheese soften until you can press your finger into it easily. The eggs don’t need to feel warm, but taking the chill off helps everything blend more smoothly.
This little bit of preparation makes a bigger difference than you might expect.
2. Prepare the oven and pan — 5 minutes
Preheat your oven to 325°F (165°C).
Lightly grease a 9-inch springform pan. I like to wrap the outside bottom of the pan with a sheet of aluminum foil if I plan to use a water bath later.
You don’t need an expensive springform pan. A basic 9-inch model works perfectly well as long as the latch closes securely.
3. Make the graham cracker crust — 10 minutes
Combine the graham cracker crumbs, sugar, cinnamon, salt, and melted butter in a bowl.
Stir until the crumbs look evenly moistened. The mixture should resemble damp sand and hold together when you squeeze a little in your hand.
Pour the mixture into your springform pan.
Press it firmly across the bottom using the bottom of a measuring cup or a flat glass. You want an even layer without loose crumbs around the edges.
Bake the crust for 8–10 minutes, just until it smells buttery and lightly toasted.
Remove it from the oven and let it cool while you prepare the filling.
4. Beat the cream cheese and sugar — 3 to 4 minutes
Place the softened cream cheese in a large mixing bowl.
Using a stand mixer or hand mixer, beat it on medium speed until smooth. Add the sugar gradually and continue mixing until the mixture looks creamy.
Scrape down the sides of the bowl once or twice.
Here’s a mistake I made early on: I rushed this step because the cream cheese looked smooth after only a minute. Small lumps can hide surprisingly well, and once they’re in the filling, they’re difficult to remove.
Give the cream cheese enough time to become completely smooth before moving on.
5. Add the pumpkin and seasonings — 2 minutes
Mix in the pumpkin purée, sour cream, vanilla, cinnamon, ginger, nutmeg, cloves, and salt.
Beat just until everything comes together.
At this point, the filling should look smooth, thick, and evenly orange. Taste a tiny spoonful if you like. This is your chance to decide whether you want a little more cinnamon or ginger before adding the eggs.
6. Add the eggs gently — 2 minutes
Add the eggs one at a time, mixing on low speed after each addition.
Stop mixing as soon as the last egg disappears into the batter.
Try not to whip a lot of air into the mixture. A few bubbles won’t ruin your cheesecake, but excessive mixing can make the filling puff dramatically in the oven and then sink as it cools.
Scrape the bowl one final time with a rubber spatula.
7. Pour the filling over the crust — 2 minutes
Pour the cheesecake mixture over the cooled crust.
Gently smooth the surface with a spatula.
If you see a few large air bubbles, tap the pan gently on the counter once or twice. Don’t slam it down. A light tap is enough.
8. Bake the cheesecake — 55 to 70 minutes
Place the cheesecake in the preheated oven.
Bake for 55–70 minutes, depending on your oven and the exact pan you’re using.
The edges should look set, while the center should still have a slight wobble when you gently move the pan.
Don’t wait for the entire cheesecake to look completely firm. Cheesecake continues cooking from the residual heat after you remove it from the oven.
If the edges become very dark before the center sets, loosely cover the top with aluminum foil.
9. Cool gradually — at least 1 hour
Turn off the oven and crack the oven door open.
Let the cheesecake sit inside for about 30 minutes.
Then remove it and place it on a cooling rack for another 30–60 minutes.
This gradual cooling helps reduce the dramatic temperature change that can cause cracks.
And don’t worry if your cheesecake develops a small crack anyway. It will still taste fantastic.
10. Chill thoroughly — at least 6 hours
Once the cheesecake reaches room temperature, cover it and refrigerate it for at least 6 hours, although overnight works even better.
This is the hardest part of the recipe because you have to look at a beautiful cheesecake and then walk away from it.
Trust me.
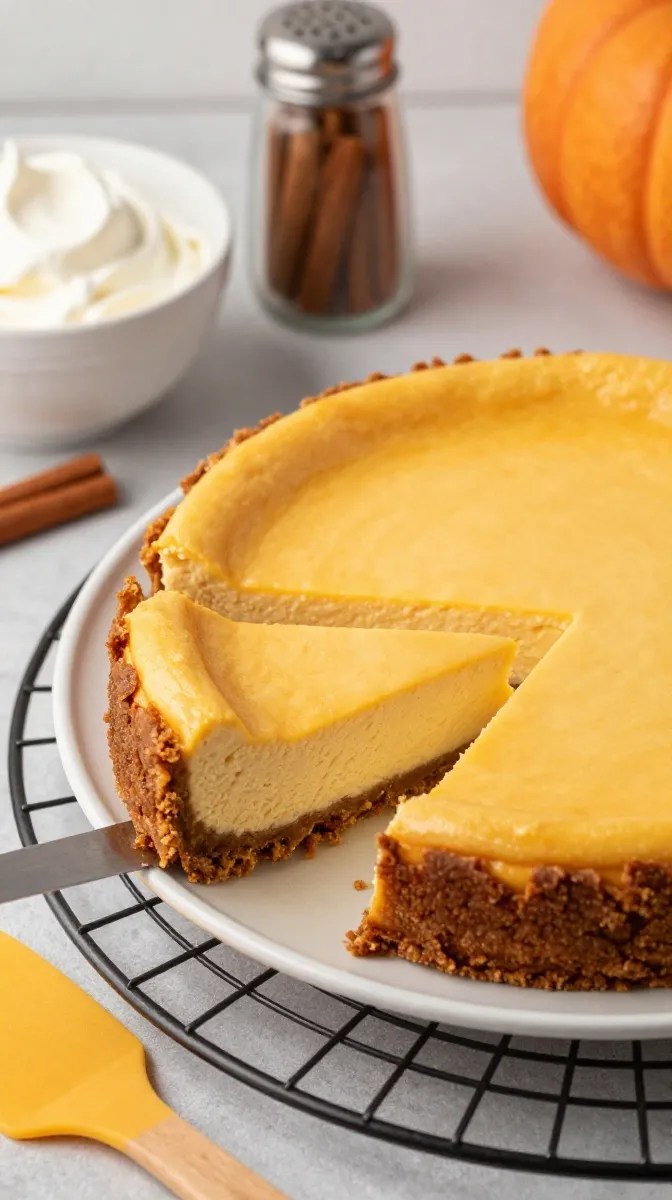
The filling becomes firmer, creamier, and easier to slice after a long chill.
11. Slice and serve — 5 minutes
When you’re ready to serve, carefully release the springform pan.
For neat slices, dip a sharp knife into hot water, wipe it dry, and slice the cheesecake. Wipe the knife clean between cuts and repeat.
Top each slice with a spoonful of whipped cream if you’d like.
A small sprinkle of cinnamon on top gives it a simple Thanksgiving finish.
Pro Tips & Tricks
Don’t use cold cream cheese
Cold cream cheese can leave little lumps throughout the batter. Letting it soften at room temperature gives you a much smoother filling.
If you forgot to take it out early, cut the cream cheese into smaller cubes and let it sit for a while. Avoid trying to heat it aggressively.
Don’t overmix after adding the eggs
Once the eggs go in, mix only until everything looks combined.
Overmixing can incorporate too much air, which may contribute to puffing and cracking.
Watch the center, not the clock
The baking time gives you a useful range, but every oven behaves differently.
Your best visual cue is a cheesecake with set edges and a center that gently jiggles when you move the pan.
Think soft wobble, not liquid movement.
Let it chill overnight when possible
This is my favorite make-ahead trick.
Bake the cheesecake the evening before Thanksgiving, cool it, cover it, and refrigerate it overnight. The next day, all you need to do is slice and decorate it.
That frees up your oven and your attention for the turkey, stuffing, vegetables, rolls, and everything else.
Don’t panic over a crack
I’ve had cheesecakes crack. More than once.
If yours develops a crack, cover it with whipped cream, a dusting of cinnamon, or a thin layer of caramel sauce. Nobody at the Thanksgiving table needs to know that the top wasn’t perfectly smooth.
Variations & Substitutions
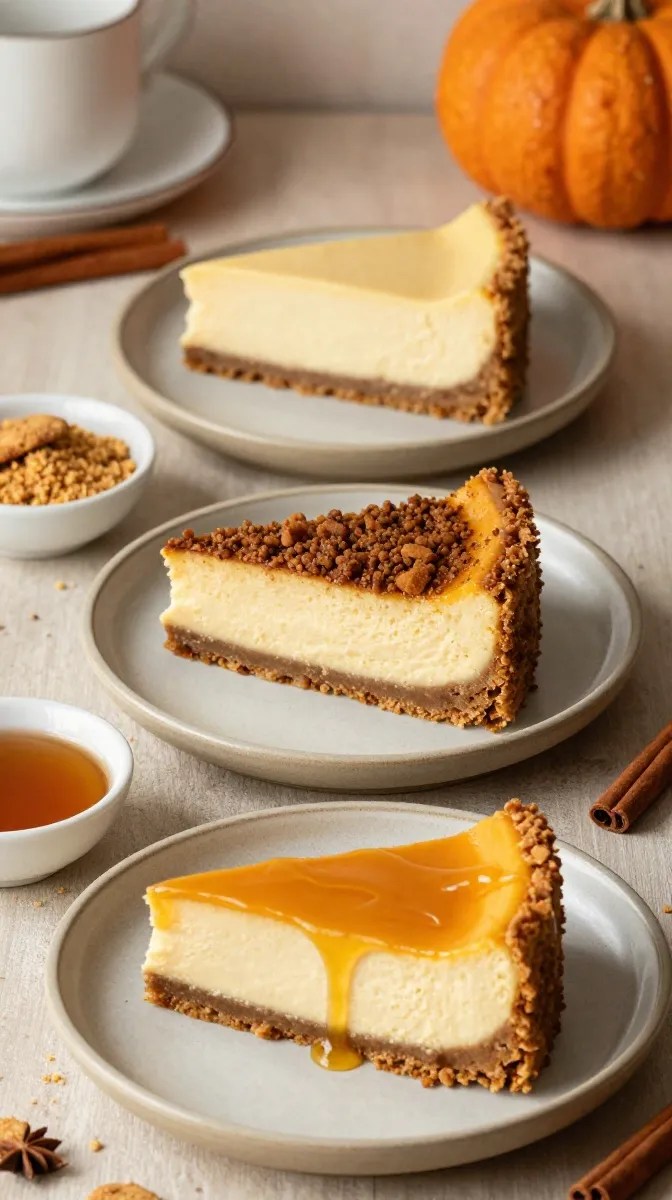
Make a gingersnap crust
For a stronger ginger flavor, replace the graham crackers with crushed gingersnap cookies.
Use about 2 cups of finely crushed gingersnaps and reduce the added sugar because most gingersnaps already contain plenty.
The result tastes especially good with the cinnamon, ginger, and nutmeg in the filling.
Use a gluten-free crust
For a gluten-free version, use certified gluten-free graham crackers and check the labels on your other ingredients.
The filling itself doesn’t require flour, so the crust provides the main substitution.
Add a little maple flavor
For a slightly deeper fall flavor, replace 2 tablespoons of the granulated sugar with pure maple syrup.
Don’t add a large amount of extra liquid, though. Cheesecake filling needs the right balance to set properly.
You can also drizzle a little maple-flavored sauce over individual slices when serving.
Serving Suggestions

This pumpkin cheesecake fits right in on a Thanksgiving dessert table, especially if you’re serving several desserts and want something that feels a little different from traditional pie.
I like serving it cold with a generous spoonful of lightly sweetened whipped cream.
For a more festive presentation, add a light dusting of cinnamon just before serving. A drizzle of caramel sauce also works beautifully with the pumpkin and warm spices.
If you’re hosting Thanksgiving dinner, you can put the cheesecake on a cake stand and decorate the top right before guests arrive. Keep the decoration simple so the creamy pumpkin filling stays the star.
It also works beautifully for Friendsgiving, fall birthday dinners, autumn potlucks, or a cozy Sunday dinner when you happen to have pumpkin purée in the pantry.
For drinks, coffee is an easy match. Black tea, chai, or a glass of cold milk also pairs nicely with the warm spices.
Related Recipes:
- Pumpkin Cookies With Pie Filling
- Old Fashioned Pecan Pie Brownies
- Pecan Pie Bars Using Sugar Cookie Dough – Easy & Delicious Recipe
- Pecan Bars With Graham Cracker Crust
- Gooey Pecan Bar – Easy, Buttery & Delicious Recipe
FAQ’s
How long does pumpkin cheesecake last in the refrigerator?
Store pumpkin cheesecake covered in the refrigerator for up to 4 days.
Keep it chilled until you’re ready to serve. If you’re storing individual slices, place them in an airtight container or cover them well with plastic wrap.
Can I make pumpkin cheesecake ahead of Thanksgiving?
Absolutely.
This is actually one of the best desserts to make ahead. Prepare the cheesecake the day before Thanksgiving, let it cool completely, and refrigerate it overnight.
You can even make it two days ahead if necessary. Keep it tightly covered and chilled.
Can I freeze pumpkin cheesecake?
Yes. Pumpkin cheesecake freezes well when you wrap it properly.
For individual slices, chill the cheesecake completely first. Wrap each slice tightly in plastic wrap, then place the wrapped slices in a freezer-safe container or bag.
Freeze for up to about 2 months for the best quality.
Thaw the slices overnight in the refrigerator rather than leaving them at room temperature for a long period.
Why did my cheesecake crack?
A crack can happen for several reasons, including overmixing the batter, overbaking, or cooling the cheesecake too quickly.
The good news is that a crack doesn’t mean you’ve ruined the dessert.
Next time, mix gently after adding the eggs, remove the cheesecake when the center still has a slight wobble, and cool it gradually.
Can I use pumpkin pie spice instead of individual spices?
Yes.
Instead of the cinnamon, ginger, nutmeg, and cloves, you can use about 2 1/2 teaspoons of pumpkin pie spice.
Because pumpkin pie spice blends vary between brands, you may want to taste the filling before adding the eggs and adjust the spice level if needed.
Can I use low-fat cream cheese?
You can, but I prefer full-fat block cream cheese for cheesecake.
Lower-fat products contain more water and can produce a softer filling with a different texture. For a holiday dessert where I want that rich, creamy cheesecake texture, I stick with full-fat cream cheese.
Final Thought
Every Thanksgiving has those dishes that everyone expects to see on the table.
For my family, pumpkin cheesecake has slowly become one of them.
I love that it feels special without requiring an entire afternoon of complicated baking. Once you’ve made it a couple of times, the process becomes surprisingly relaxed: make the crust, mix the filling, bake it gently, and let the refrigerator do the rest.
The best part comes the next day when you cut that first clean slice and see the creamy pumpkin filling sitting on the buttery crust.
If you’re making this easy pumpkin cheesecake for Thanksgiving, give yourself permission to make it the day before. Pour yourself some coffee, take your time with the filling, and don’t worry if the top isn’t perfectly flawless.
Homemade cheesecake doesn’t need to look like it came from a bakery window.
It just needs to taste good enough that someone quietly asks, “Is there any more left?”
And if you make this recipe, I hope that’s exactly what happens at your table.
Leave a Reply
You must be logged in to post a comment.