
I still remember the first time I pulled a pan of gluten-free brownies out of the oven and felt that little knot of dread. They looked perfect—shiny top, set edges—but the moment I sliced into them, the knife dragged through something dry and crumbly. My kids politely took one bite each and then asked if we still had the regular ones in the freezer. That was the day I decided I was done settling for “good enough” gluten-free desserts.
After more than a dozen batches (and a few that went straight into the compost), I finally landed on a version that stays dense, moist, and deeply chocolatey for days. These gluten-free brownies taste like the ones I used to make before anyone in the house needed to avoid wheat. No sandy texture, no weird aftertaste, just pure fudgy joy.
Why You’ll Love This Recipe

- They stay soft and fudgy even the next day—no sad, dry leftovers.
- One bowl and about 15 minutes of active time. You can have them in the oven before the oven fully preheats.
- Made with everyday gluten-free ingredients you can find at any grocery store.
- They freeze beautifully, so you can always have a square ready for sudden chocolate emergencies.
- Crowd-pleaser status is high. I’ve served these to people who claim they “don’t like gluten-free anything” and watched them go back for seconds.
Ingredients List

Here’s everything you’ll need for an 8×8-inch pan of seriously fudgy brownies:
Dry ingredients
- ¾ cup (105 g) good-quality gluten-free all-purpose flour blend (I use one that already contains xanthan gum)
- ½ cup (45 g) unsweetened cocoa powder (Dutch-process gives a deeper flavor, but natural works too)
- ½ teaspoon baking powder
- ½ teaspoon fine sea salt
Wet ingredients
- ½ cup (113 g) unsalted butter
- 4 oz (113 g) semi-sweet or dark chocolate, chopped (or good chocolate chips)
- 1 cup (200 g) granulated sugar
- 2 large eggs, room temperature
- 1 teaspoon pure vanilla extract
- 1 tablespoon espresso powder or strong brewed coffee (optional but highly recommended—it makes the chocolate taste more chocolatey without adding coffee flavor)
Optional mix-ins
- ½ cup chocolate chips or chunks for extra pockets of melted chocolate
- A handful of chopped walnuts or pecans if you like a little crunch
You can swap the butter for refined coconut oil if you need dairy-free. The texture stays almost identical.
Step-by-Step Instructions

- Preheat your oven to 350°F (175°C). Line an 8×8-inch metal baking pan with parchment paper, leaving some overhang on two sides so you can lift the brownies out later. Lightly grease the parchment. (Metal pans give better edges than glass.)
- In a medium microwave-safe bowl (or a small saucepan over low heat), melt the butter and chopped chocolate together. Microwave in 30-second bursts, stirring between each, until smooth and glossy. This usually takes about 90 seconds total. Let it cool for 3–4 minutes so it doesn’t scramble the eggs.
- Whisk the sugar into the melted chocolate mixture until it looks thick and shiny. Add the eggs one at a time, whisking well after each. Stir in the vanilla and espresso powder if you’re using it. The mixture should look silky.
- In a separate small bowl, whisk together the gluten-free flour, cocoa powder, baking powder, and salt. Dump the dry ingredients into the wet bowl and fold gently with a spatula until just combined. A few streaks of flour are fine—overmixing can make them tough.
- If you’re adding chocolate chips or nuts, fold them in now. Scrape the batter into the prepared pan and smooth the top. The batter will be thick and glossy.
- Bake for 22–26 minutes. Start checking at 22. The edges should look set and slightly pulled away from the pan, but the center should still look a tiny bit underdone and soft when you gently press it. A toothpick inserted in the center should come out with a few moist crumbs, not wet batter and not clean. That’s the secret to fudgy, not dry.
- Cool the pan on a wire rack for at least 1 hour (2 is even better). Resist the urge to cut them early. The residual heat finishes setting the middle while keeping everything moist. Once cool, lift out with the parchment and cut into squares with a sharp knife wiped clean between cuts.
Pro Tips & Tricks
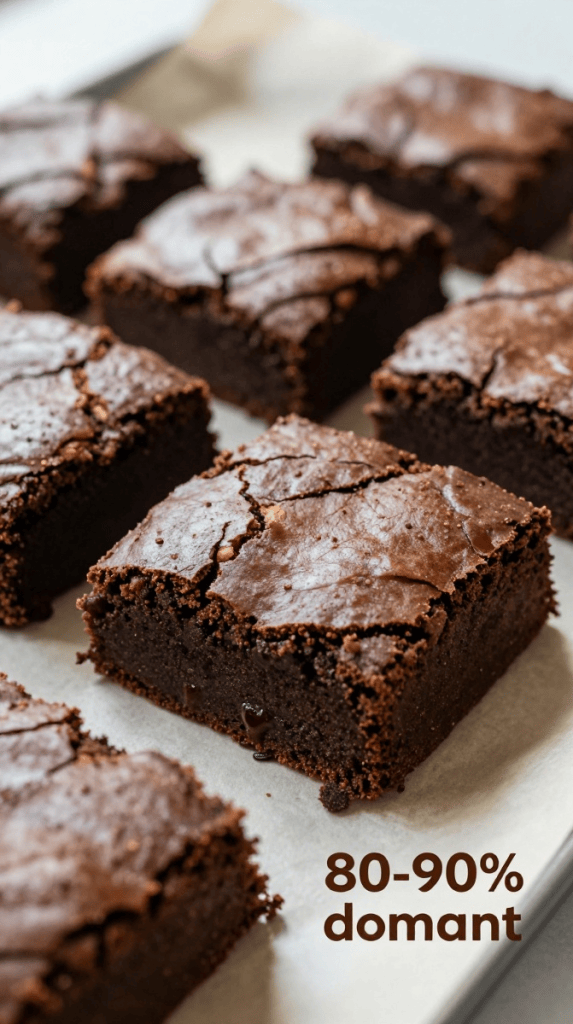
- Weigh your flour if you can. Gluten-free blends vary a lot, and packing the measuring cup can push the brownies toward dry territory.
- Don’t skip the resting time after baking. Cutting too soon releases steam and can leave the center gummy.
- If your gluten-free flour doesn’t already contain xanthan gum, add ¼ teaspoon. It helps hold the structure without making them rubbery.
- For the shiniest crackly top, make sure your eggs are fully at room temperature and you whisk the sugar into the warm chocolate thoroughly.
- Store leftovers in an airtight container at room temperature for up to 4 days, or freeze individual squares wrapped in plastic and then foil for up to 2 months. Thaw at room temp or give them 10 seconds in the microwave for that just-baked warmth.
Variations & Substitutions
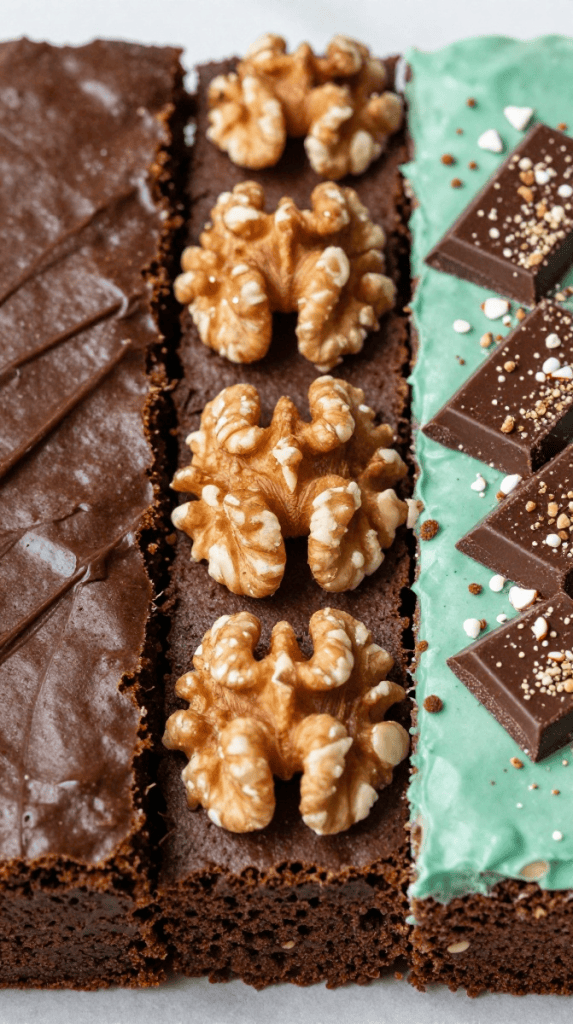
Want to change things up? Here are a few versions I’ve made and loved:
Dairy-free: Swap the butter for an equal amount of refined coconut oil and use dairy-free chocolate. They taste just as rich.
Extra-fudgy “blackout” version: Increase the cocoa to ⅔ cup and add an extra ounce of dark chocolate. The flavor becomes almost truffle-like.
Nutty: Fold in ½ cup toasted chopped walnuts or pecans. The crunch against the soft brownie is addictive.
Mint chocolate: Add ½ teaspoon pure peppermint extract with the vanilla and scatter a few crushed peppermint candies on top before baking.
Serving Suggestions

These brownies are perfect on their own with a glass of cold milk, but they’re also fantastic slightly warmed with a scoop of vanilla ice cream and a drizzle of warm chocolate sauce. I’ve taken them to potlucks, packed them in lunchboxes, and even served them as the “cake” at a casual birthday dinner with whipped cream and fresh berries. They’re equally at home at a summer picnic or next to a cup of coffee on a rainy afternoon.
FAQ’s
Can I make these ahead of time?
Yes. Bake them the day before, cool completely, and store in an airtight container. The flavor actually deepens overnight.
How do I keep them from drying out?
Don’t overbake, and store them tightly covered. If they do start to firm up, a quick 8–10 second zap in the microwave brings the fudginess right back.
Can I freeze them?
Absolutely. Wrap individual squares well and freeze up to 2 months. Thaw on the counter or microwave briefly.
What if I don’t have espresso powder?
Skip it. The brownies will still be excellent. A splash of strong coffee works too, but don’t add extra liquid beyond a tablespoon.
My brownies came out cakey. What happened?
Most likely too much flour or too long in the oven. Next time, weigh the flour and pull them when the center still looks slightly soft.
Can I double the recipe?
Yes—use a 9×13-inch pan and start checking at 28 minutes. The edges may need an extra couple of minutes.
Final Thoughts
These gluten-free brownies have become the one dessert I never hesitate to make when friends are coming over, even the ones who swear by regular flour. There’s something deeply satisfying about watching someone take that first bite and then look up with surprise because they can’t tell the difference.
If you try them, I’d love to hear how they turned out—whether you stuck to the classic version or played with mix-ins. Leave a note or tag me if you share a photo. Happy baking, and may your brownies always be fudgy.

