

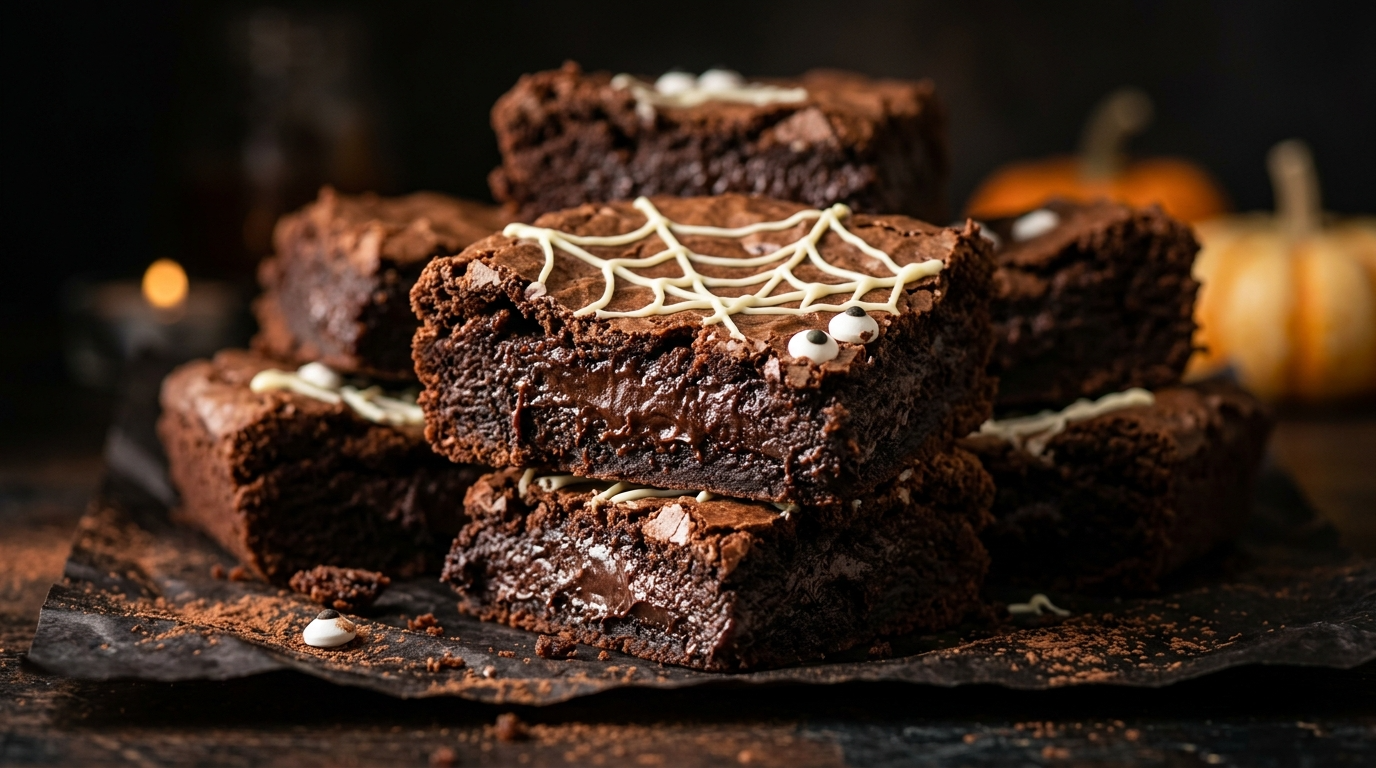
The first time I made Halloween brownies, I had grand plans. I pictured perfectly spooky brownies with neat little decorations, dramatic colors, and zero kitchen disasters.
That lasted about ten minutes.
One batch came out with frosting that was far too soft, another had chocolate fingerprints all over the edges, and one brownie somehow ended up looking more like a confused monster than a scary one. Honestly, the kids loved those the most.
That is why I still make these Halloween brownie ideas every October. They start with a rich, fudgy brownie that tastes amazing on its own. Then I turn them into ghosts, spiderwebs, monsters, graveyards, or creepy little chocolate treats with a few simple decorations.
You do not need fancy cake-decorating skills either. If you can spread frosting and squeeze a piping bag, you can make these.
And if your spiderweb looks slightly wonky? Perfect. It is Halloween. Wonky is part of the charm.
Why You’ll Love These Halloween Brownies

- Easy to decorate: You can create spooky designs without professional decorating tools.
- Rich and fudgy: The brownie base stays soft in the middle with slightly crisp edges.
- Great for parties: Cut them into squares, rectangles, or fun shapes for a Halloween dessert table.
- Budget-friendly: Most of the ingredients probably already live in your pantry.
- Easy to customize: Change the decorations depending on your party theme, colors, or what you have on hand.
My favorite part is that you can prepare the brownies a day ahead and decorate them later. That little trick has saved me more than once when I have been trying to prepare several Halloween treats at the same time.
Ingredients for the Fudgy Brownie Base

For the Brownies
- 1 cup unsalted butter, melted and slightly cooled
- 1 ¾ cups granulated sugar
- ¾ cup unsweetened cocoa powder
- 2 teaspoons vanilla extract
- 4 large eggs
- 1 cup all-purpose flour
- ½ teaspoon salt
- ½ cup semi-sweet chocolate chips
- ½ cup chopped dark chocolate
For the Spooky Decorations
- 1 cup semi-sweet chocolate chips
- ½ cup white chocolate chips
- ½ cup orange candy melts
- ½ cup purple candy melts
- 1 cup chocolate frosting
- ½ cup vanilla frosting
- Candy eyeballs, as needed
- Halloween sprinkles, as needed
- ¼ cup crushed chocolate sandwich cookies
- ¼ cup mini marshmallows
You do not need every decorating ingredient listed above. Pick a few depending on the designs you want to make.
For example, white chocolate works beautifully for ghost brownies, while melted chocolate makes an easy spiderweb. Orange candy melts instantly give the brownies that classic Halloween look.
Helpful Ingredient Swaps
You can use salted butter instead of unsalted butter. If you do, reduce the added salt slightly.
For a deeper chocolate flavor, replace the semi-sweet chocolate chips with dark chocolate chips.
If you do not have candy melts, simply melt white chocolate and tint it with an oil-based food coloring. Avoid adding regular liquid food coloring directly to melted chocolate because it can make the chocolate seize.
Step-by-Step Instructions
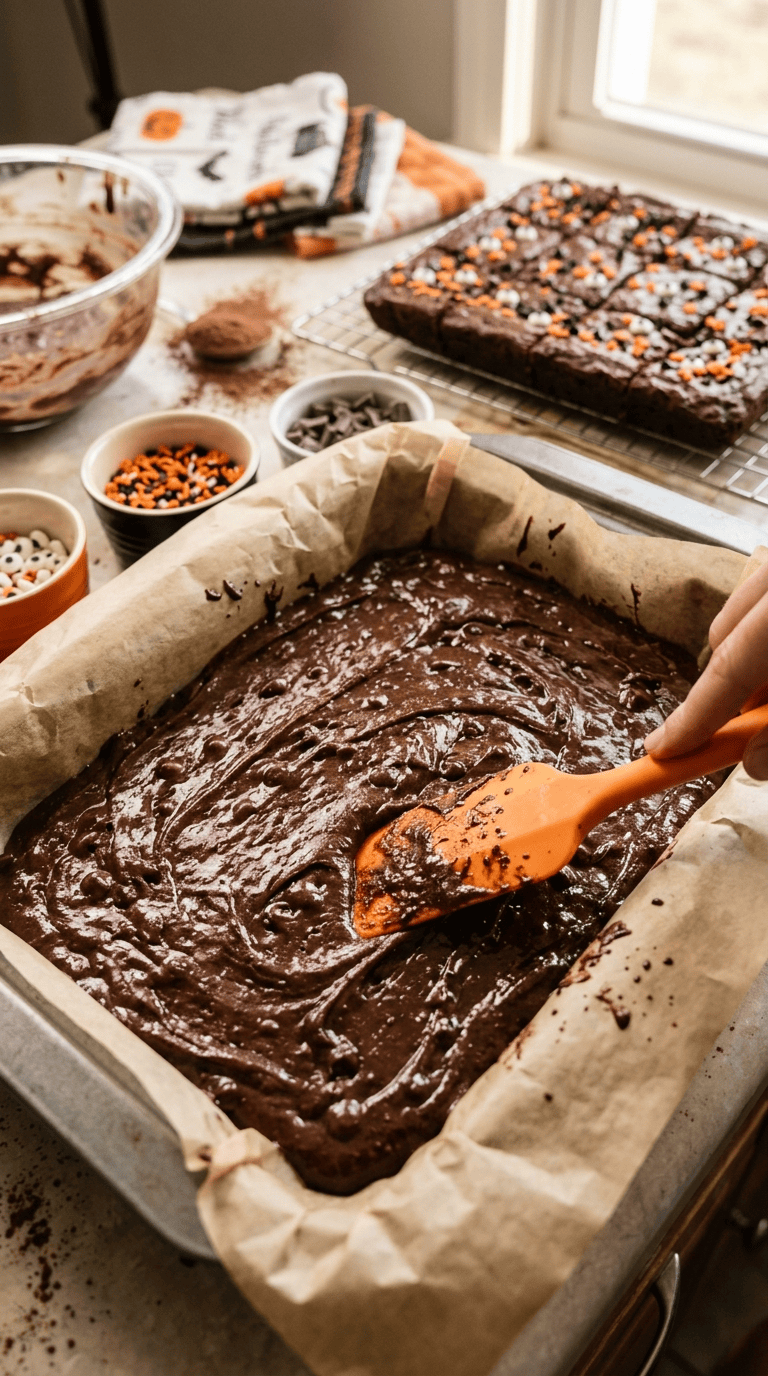
1. Prepare the Baking Pan
Heat your oven to 350°F (175°C).
Line a 9 x 13-inch baking pan with parchment paper, leaving a little overhang on two sides. Lightly grease the parchment with butter or baking spray.
I strongly recommend parchment for these brownies. It makes lifting the cooled brownies from the pan much easier, especially when you want clean cuts for decorating.
2. Mix the Butter and Sugar
Pour the melted butter into a large mixing bowl.
Add the sugar and whisk for about 1–2 minutes.
The mixture will look glossy and slightly thick. You do not need to whip it until fluffy. We want dense, fudgy brownies rather than cakey ones.
3. Add the Cocoa and Vanilla
Add the cocoa powder and vanilla extract.
Whisk until the cocoa blends into the butter mixture and no large dry patches remain.
At this point, your kitchen should already smell like chocolate. This is where I usually have to remind myself that eating brownie batter does not count as quality control.
4. Add the Eggs
Add the eggs one at a time.
Whisk well after each addition before adding the next egg.
The batter should become smooth and glossy. Take your time here because properly mixed eggs help create that rich brownie texture.
5. Fold in the Flour
Add the flour and salt.
Switch to a spatula and gently fold until you no longer see streaks of dry flour.
Do not overmix the batter. Once the flour disappears, stop stirring.
Overmixing can make brownies tougher, and nobody wants a Halloween brownie that requires a chainsaw to cut.
6. Add the Chocolate
Fold in the semi-sweet chocolate chips and chopped dark chocolate.
The extra chocolate gives the brownies little melted pockets throughout the center.
You can also save a tablespoon or two of chocolate chips to sprinkle over the batter before baking.
7. Bake the Brownies
Spread the batter evenly into the prepared pan.
Bake for 25–32 minutes.
Start checking around the 25-minute mark. Insert a toothpick into the center. You want it to come out with a few moist crumbs attached rather than completely clean.
If the toothpick comes out covered in wet batter, give the brownies another few minutes.
Do not overbake them. The brownies will continue cooking slightly as they cool.
8. Cool Completely
Let the brownies cool in the pan for about 30–45 minutes.
Then lift them out using the parchment paper and allow them to cool completely on a wire rack.
This step matters more than you might think.
If you decorate warm brownies, frosting can melt, chocolate can slide around, and your carefully designed spiderweb can turn into a chocolate puddle.
9. Cut the Brownies
For classic Halloween brownie squares, cut the slab into 16 pieces.
For a party, you can cut smaller squares and get around 24 brownies.
You can also use Halloween cookie cutters to make pumpkins, ghosts, or bats. Just remember that cookie cutters work best when the brownies have a firm, chilled texture.
10. Turn Them Into Spooky Brownies
Now comes the fun part.
Spiderweb Brownies
Spread a thin layer of chocolate frosting over the brownie.
Pipe three or four circles of white chocolate or white frosting on top. Start with a small circle in the middle and gradually make the circles larger.
Drag a toothpick from the center toward the edge at several points around the brownie.
Wipe the toothpick after each line.
Just like that, you have a spiderweb.
Add a small candy spider in the center if you want extra drama.
Ghost Brownies
Spread chocolate frosting over each brownie.
Pipe a tall swirl of white frosting in the center. Add two small chocolate dots or candy eyes.
For an extra spooky touch, place the ghost brownies on a dark serving platter with a few crushed chocolate cookies around them.
Graveyard Brownies
Spread chocolate frosting over the brownies.
Crush chocolate sandwich cookies and sprinkle them across the surface to create a dirt effect.
Cut rectangular cookies or chocolate pieces into small tombstone shapes and press them into the brownie.
Add tiny candy pumpkins or candy eyeballs around the tombstones.
This version always disappears quickly at parties.
Monster Brownies
Spread green-tinted frosting over each brownie.
Add candy eyeballs in different sizes.
Do not worry about making the eyes symmetrical. In fact, the stranger they look, the better.
Add small chocolate sprinkles or candy pieces for hair, teeth, or scars.
Bloody Halloween Brownies
For a dramatic Halloween table, spread chocolate frosting over the brownies.
Drizzle a little red decorating gel or red-tinted frosting across the top.
Keep the design simple. A few messy drips look much more convincing than trying to make every line perfect.
Pro Tips & Tricks
Let the Brownies Cool Before Decorating
This is probably the most important tip.
Even slightly warm brownies can soften frosting and melt decorative chocolate.
Give them enough time to cool completely before decorating.
Chill Them for Cleaner Cuts
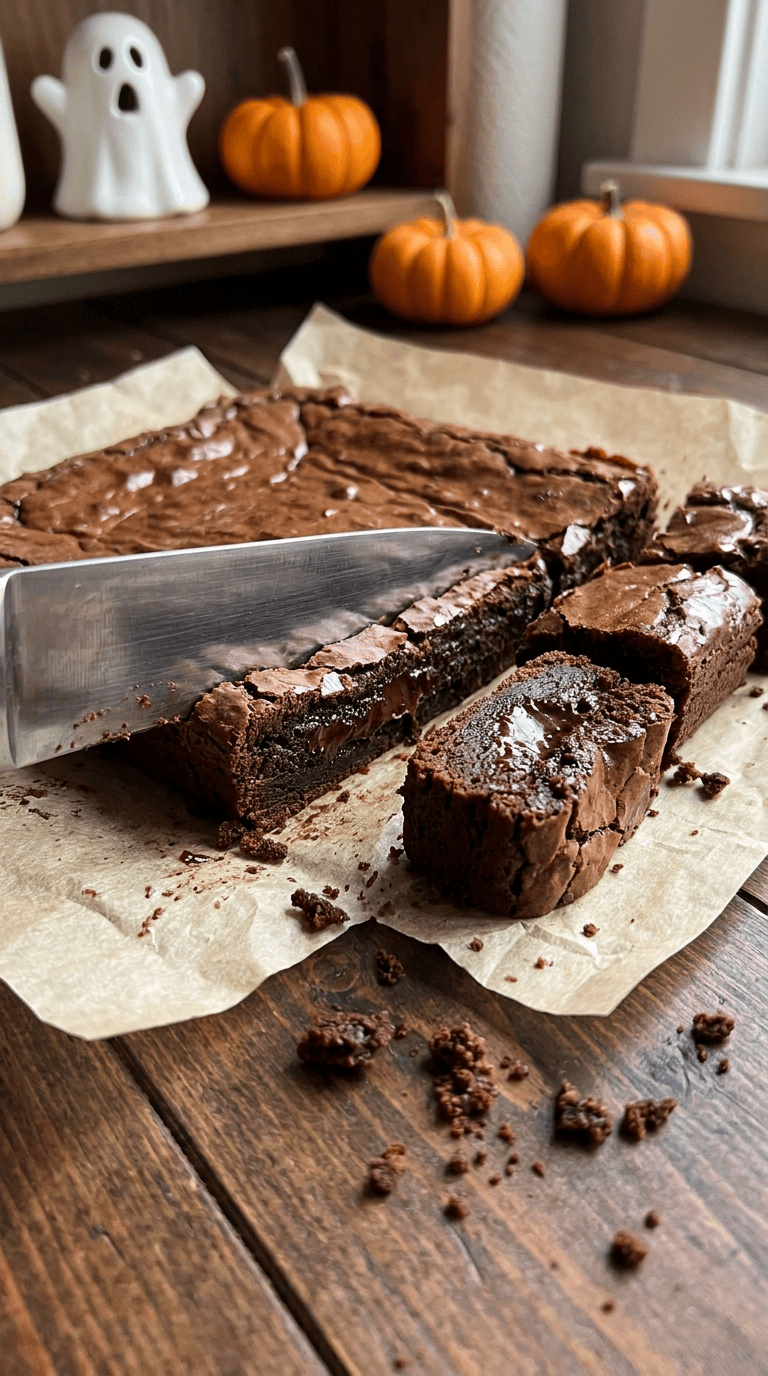
If you want bakery-style brownie squares, refrigerate the cooled brownies for 30–60 minutes before cutting.
Use a sharp knife and wipe the blade between cuts.
That little extra effort gives you much cleaner edges.
Do Not Overbake
Fudgy brownies should still have a few moist crumbs on the toothpick.
If you wait until the toothpick comes out completely clean, you may end up with dry brownies.
Make the Brownies Ahead
You can bake the brownies 1–2 days ahead.
Keep them tightly covered at room temperature if your kitchen stays cool. If you add perishable frosting, refrigerate them instead.
Bring refrigerated brownies closer to room temperature before serving for the best texture.
Use Simple Decorations
You do not need a dozen decorating supplies.
Chocolate frosting plus candy eyeballs can create surprisingly cute monster brownies.
White frosting and melted chocolate can handle ghosts and spiderwebs.
A few sprinkles can make plain brownies look party-ready in seconds.
Variations & Substitutions
Peanut Butter Swirl Brownies
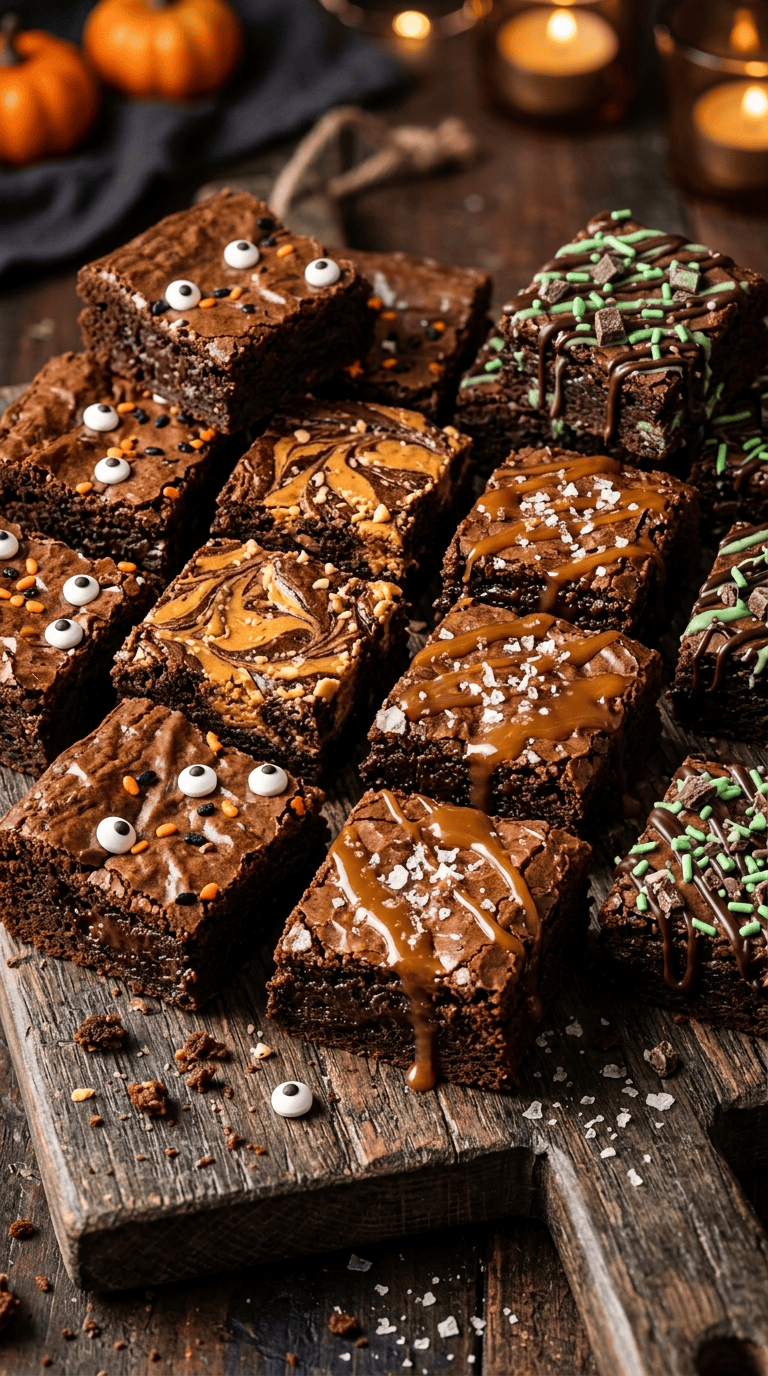
Add small spoonfuls of creamy peanut butter over the brownie batter before baking.
Drag a butter knife through the peanut butter to create swirls.
The peanut butter adds a salty, nutty flavor that works beautifully with dark chocolate.
Mint Chocolate Halloween Brownies
Add ½ teaspoon peppermint extract to the brownie batter.
You can also use mint-flavored chocolate chips.
Decorate the cooled brownies with chocolate frosting and a few green sprinkles for a darker Halloween color scheme.
Gluten-Free Halloween Brownies
Use a good-quality 1-to-1 gluten-free all-purpose flour blend in place of regular flour.
Choose a blend designed for baking so you do not have to calculate complicated ingredient ratios.
Check all decorating candies and packaged ingredients if you need to avoid gluten strictly.
Salted Caramel Brownies
Drizzle cooled brownies with caramel sauce and sprinkle a tiny amount of flaky sea salt over the top.
For Halloween, add chocolate spiders or candy eyeballs after the caramel sets slightly.
The sweet-salty combination is dangerously good.
Serving Suggestions

These Halloween brownies belong right in the middle of a spooky dessert table.
Serve them alongside cookies, cupcakes, popcorn, or bowls of Halloween candy.
For a kids’ party, cut the brownies into smaller pieces. Little hands usually want to try several different treats instead of committing to one giant brownie.
For adults, serve larger squares with coffee, hot chocolate, or a scoop of vanilla ice cream.
If you are hosting a Halloween movie night, arrange the brownies on a large black or dark-colored platter. Add a few fake plastic spiders around the outside of the platter rather than directly on the food.
For a school or office party, individually wrap the brownies in small clear treat bags and tie them with orange or black ribbon.
You can also freeze undecorated brownies and decorate them closer to your event. That makes Halloween baking much less stressful.
Related Recipes :
- No-Bake Halloween Desserts for Busy Hosts
- Halloween Desserts for a Spooky Potluck Everyone Will Love
- Halloween Party Desserts Everyone Will Want to Try
FAQ’s
How should I store Halloween brownies?
Store undecorated brownies in an airtight container at room temperature for about 3–4 days.
If you use a frosting that requires refrigeration, keep the brownies covered in the refrigerator instead.
Let refrigerated brownies sit at room temperature for about 15–30 minutes before serving.
Can I make these Halloween brownies ahead of time?
Yes.
Bake the brownies one or two days before your event and keep them tightly covered.
For the freshest decorations, add frosting, candy eyes, sprinkles, and other toppings on the day you plan to serve them.
Can I freeze Halloween brownies?
Yes, but freeze them before adding delicate decorations.
Wrap individual brownies tightly in plastic wrap, place them in a freezer-safe container or bag, and freeze for up to 2–3 months.
Thaw them in the refrigerator overnight or at room temperature for a few hours.
Decorate after they completely thaw.
Why did my brownies turn out cakey?
You may have added too much flour, overmixed the batter, or baked the brownies too long.
For fudgy brownies, measure the flour carefully and stop mixing as soon as the dry ingredients disappear.
Also start checking the brownies before the full baking time ends.
Can I use a boxed brownie mix?
Absolutely.
There is no Halloween brownie police.
A boxed mix works perfectly when you want to save time. Bake the brownies according to the package directions, let them cool completely, and use the same decorating ideas.
Spiderwebs, ghosts, monsters, and graveyard designs work just as well on boxed brownies.
What is the easiest Halloween brownie decoration?
Candy eyeballs are probably the easiest.
Spread chocolate frosting over a cooled brownie, press on a few candy eyes, and add a couple of colorful sprinkles.
It takes almost no decorating experience, and the brownies instantly look festive.
Final Thoughts
I have made plenty of complicated Halloween desserts over the years, but brownies remain one of my favorites because they give you so much room to play.
You can make them creepy, cute, messy, elegant, or completely ridiculous. The brownie itself does most of the work, so you can spend your energy having fun with the decorations.
My favorite trick is to make one large batch, cut it into small squares, and decorate each one differently. Some become ghosts, some turn into monsters, and a few get the full graveyard treatment.
And honestly, those slightly imperfect ones usually get eaten first.
So grab your cocoa, melt some butter, and let the Halloween decorating begin. Put on some spooky music, invite the kids into the kitchen, and do not worry if your spiderwebs aren’t perfect.
They are brownies, not architectural blueprints.
Just make them chocolatey, spooky, and delicious — and you will have a Halloween treat everyone will want to grab before the last one disappears.
Leave a Reply
You must be logged in to post a comment.