

Every Halloween, I seem to make the same promise to myself: This year, I’m going to keep the dessert table simple.
Then someone mentions a costume party, another guest says they’re bringing appetizers, and suddenly I’m standing in the kitchen surrounded by bowls, sprinkles, chocolate, and enough dirty dishes to haunt the house.
That’s exactly why I love no-bake Halloween desserts.
You can make spooky treats without waiting for an oven to preheat or worrying about whether the center of a cake has baked properly. I’ve made these kinds of desserts for busy Halloween gatherings more times than I can count, and I’ve learned one important lesson: the best party desserts don’t need to be complicated.
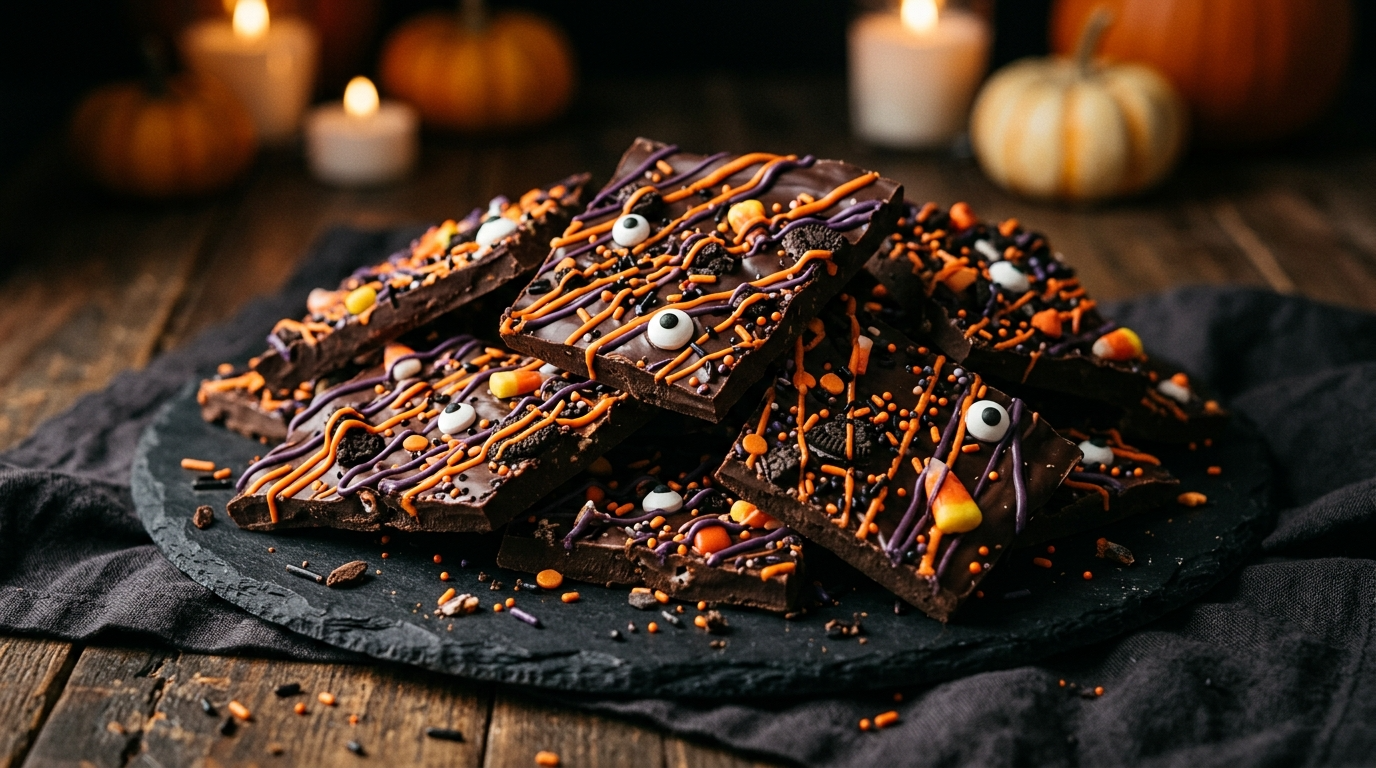
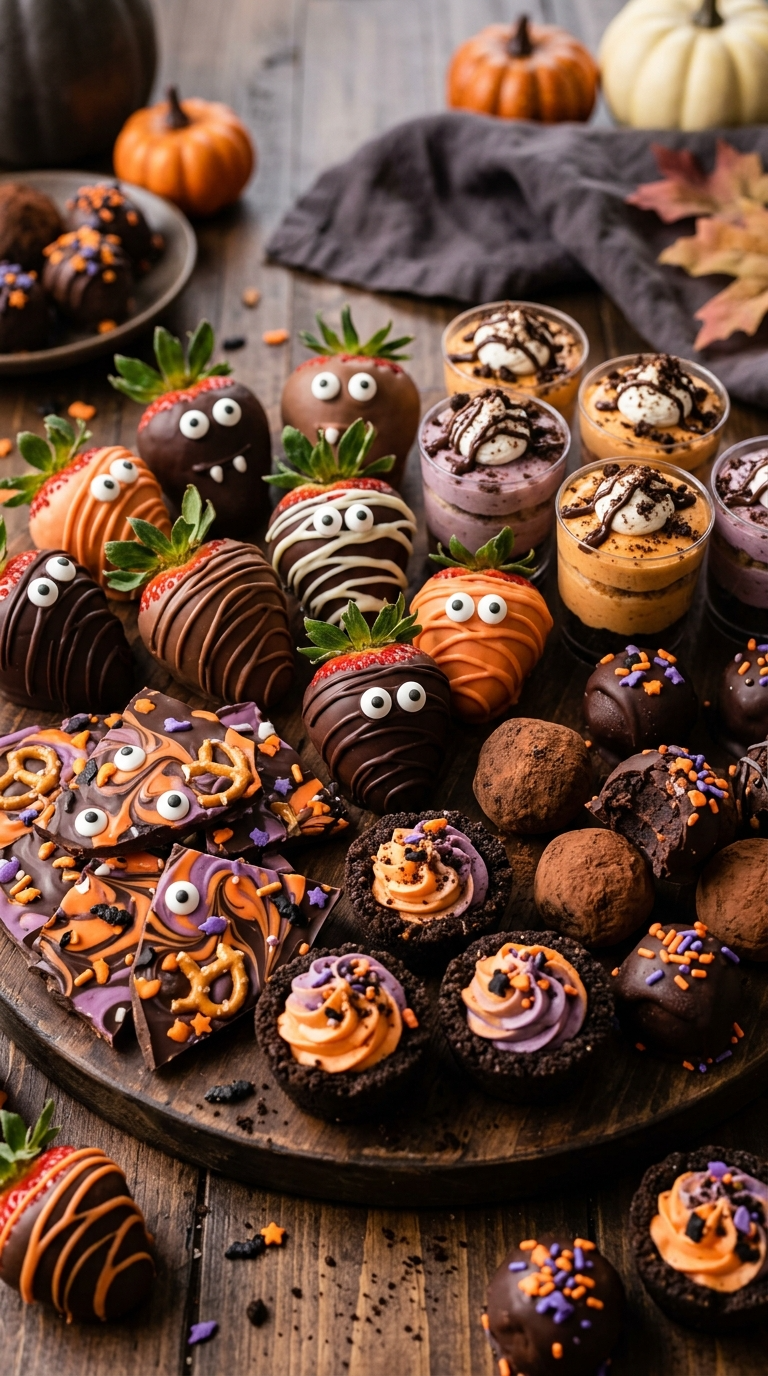
This collection focuses on easy, fun treats that look festive but keep the work manageable. Think chocolate-covered strawberries dressed like little monsters, Oreo spider treats, pumpkin cheesecake cups, Halloween pudding cups, chocolate bark, and creepy-cute dessert bites.
The best part? You can prepare many of them ahead of time, which means you can actually enjoy your own party.
Why You’ll Love These No-Bake Halloween Desserts

- No oven required: Perfect when your oven already has enough work to do.
- Quick to assemble: Most treats come together with simple ingredients and easy decorating.
- Party-friendly: Small portions make these desserts easy for guests to grab and enjoy.
- Make-ahead friendly: Several options taste even better after a little chilling time.
- Easy to customize: Change the colors, candies, cookies, or decorations to match your Halloween theme.
- Great for kids: Kids can help decorate many of these treats without handling hot pans or ovens.
- Less kitchen stress: You spend more time with your guests and less time washing baking dishes.
Ingredients for Easy No-Bake Halloween Desserts

You don’t need a giant specialty-shopping list to create an impressive Halloween dessert table. I usually build my treats around a few dependable ingredients and then let the decorations do the spooky work.
Chocolate Halloween Treats
- 12 oz semi-sweet or milk chocolate melting wafers
- 6 oz white chocolate melting wafers
- 12 Oreo cookies
- 12 large strawberries
- 1 cup mini pretzels
- ½ cup candy eyes
- ¼ cup Halloween sprinkles
- ¼ cup orange and black candy melts
- ½ cup mini chocolate chips
You can use chocolate chips instead of melting wafers, although I prefer wafers because they melt more smoothly.
Creamy Dessert Cups
- 8 oz cream cheese, softened
- 1 cup heavy whipping cream
- ½ cup powdered sugar
- 1 teaspoon vanilla extract
- 8 oz chocolate pudding mix
- 3 cups cold milk
- 12 Oreo cookies, crushed
- 1 cup whipped topping
- Orange food coloring, optional
For a lighter shortcut, use prepared pudding and whipped topping.
Halloween Decorations
- Candy eyeballs
- Gummy worms
- Pumpkin-shaped candies
- Black and orange sprinkles
- Edible Halloween decorations
- Mini marshmallows
- Chocolate cookie crumbs
- Pretzel sticks
- Red decorating gel
- Green and purple candy melts
I keep a small box of Halloween decorations in the pantry every October. It saves me from making a special grocery run when I suddenly decide a dessert needs three extra eyeballs.
Step-by-Step Instructions
1. Plan Your Dessert Table
Before you start melting chocolate or crushing cookies, decide how many desserts you actually need.
For a small gathering, choose two or three different treats. One creamy dessert, one chocolate treat, and one bite-sized snack usually give the table enough variety.
For a larger party, make several smaller batches rather than one enormous dessert.
2. Prepare Your Work Area
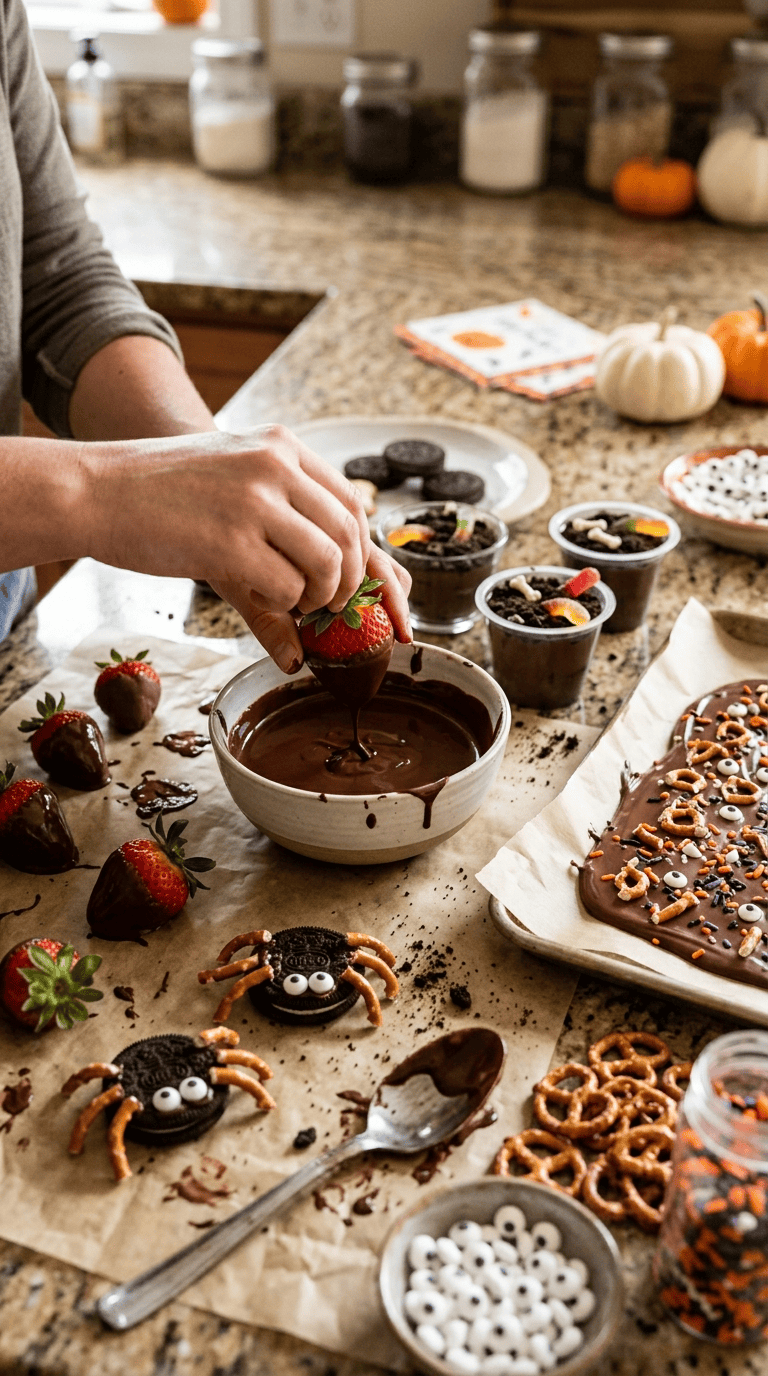
Line a baking sheet with parchment paper.
Set out small bowls for sprinkles, candy eyes, cookie crumbs, and other decorations. Once the chocolate starts melting, you want everything within arm’s reach.
I learned this the messy way after once trying to decorate chocolate treats while searching through a cupboard for candy eyes. By the time I found them, half the chocolate had started setting.
3. Make Chocolate-Covered Halloween Strawberries
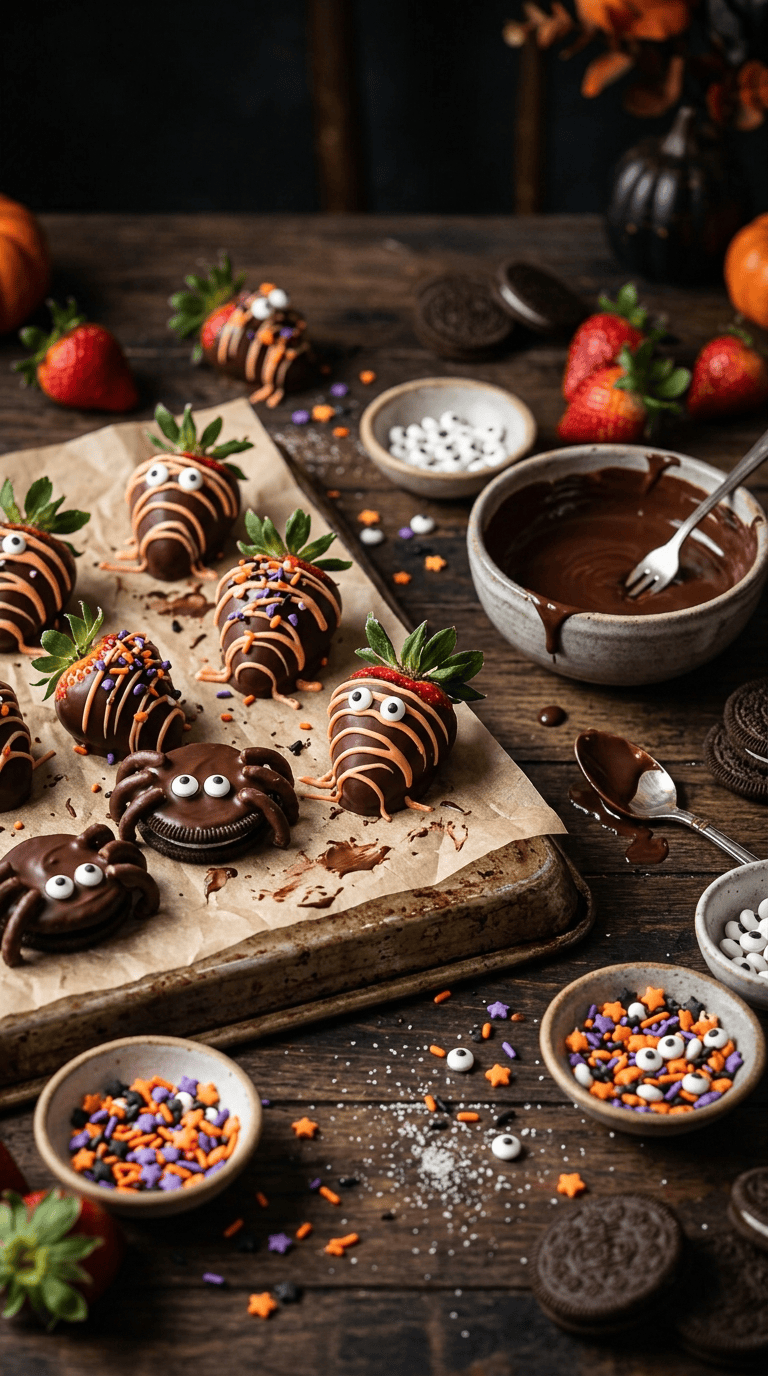
Wash and completely dry 12 strawberries.
Melt 12 ounces of chocolate in a microwave-safe bowl in 20-second intervals. Stir after every interval until smooth.
Dip each strawberry into the melted chocolate and gently shake off the excess.
Place the strawberries on parchment.
While the chocolate remains soft, add candy eyes or drizzle them with contrasting chocolate.
For a mummy look, drizzle white chocolate back and forth across the strawberry. Let the chocolate set for about 15 to 20 minutes.
The chocolate should look firm and glossy when ready.
4. Create Easy Oreo Spider Treats
Separate 12 Oreo cookies only if you want to add a creamy center decoration. Otherwise, keep them whole.
Break mini pretzels into smaller pieces to create spider legs.
Melt a small amount of chocolate and use it as edible glue.
Attach four pretzel pieces to each side of the Oreo.
Add two candy eyes using tiny dots of melted chocolate.
Let them sit for about 15 minutes until the chocolate firms up.
These little spiders disappear incredibly quickly at parties. I usually make a few extras because people tend to grab them before the dessert table officially opens.
5. Make Halloween Chocolate Bark
Line a baking sheet with parchment.
Melt 12 ounces of chocolate and spread it into an even layer about ¼ inch thick.
Melt orange and purple candy melts separately.
Drizzle them over the chocolate.
Add Halloween sprinkles, candy eyes, mini pretzels, or crushed cookies while everything remains soft.
Refrigerate for about 20 to 30 minutes.
Once completely firm, break the bark into irregular pieces.
Don’t worry about making perfectly shaped pieces. The uneven edges actually make the bark look more homemade and festive.
6. Prepare Chocolate Pudding Cups
Whisk the chocolate pudding mix with 3 cups of cold milk according to the package directions.
Let the pudding thicken for about 5 minutes.
Spoon the pudding into small clear cups.
Add crushed Oreo cookies on top to create a dark, crumbly layer.
Add gummy worms, candy eyes, or Halloween sprinkles.
Chill the cups for at least 30 minutes before serving.
For a graveyard-style dessert, add a rectangular cookie decorated with the word “RIP” using chocolate decorating gel.
7. Make Mini Cheesecake Cups
Beat 8 ounces of softened cream cheese with ½ cup powdered sugar and 1 teaspoon vanilla until smooth.
In another bowl, whip 1 cup heavy cream until soft peaks form.
Fold the whipped cream gently into the cream cheese mixture.
Crush Oreo cookies and place a spoonful in the bottom of small dessert cups.
Add the cheesecake mixture.
Top with whipped cream, chocolate crumbs, candy eyes, or Halloween sprinkles.
Chill for at least 1 hour.
The mixture should feel creamy and firm rather than loose when you serve it.
8. Chill Everything Properly
Give chilled desserts enough time to set.
Chocolate bark usually needs around 20 to 30 minutes in the refrigerator, while cheesecake cups benefit from at least an hour.
If you prepare desserts the night before, cover them well so they don’t absorb refrigerator odors.
9. Decorate Right Before Serving
Add delicate decorations close to serving time.
Sprinkles, candy eyes, and chocolate decorations usually hold up well, but fresh fruit and crunchy toppings can change texture if they sit in moisture for too long.
This small step makes the desserts look freshly prepared even when you made them hours earlier.
Pro Tips & Tricks
Keep Chocolate Completely Dry
Water and melted chocolate are not good friends.
Make sure strawberries, bowls, spoons, and utensils are completely dry before you work with chocolate. Even a little water can make melted chocolate seize and become thick.
Use Short Microwave Intervals
Never microwave chocolate for several minutes at once.
Use 15- to 20-second intervals and stir between each one. The chocolate often continues melting from its own heat even after you remove it from the microwave.
Make Decorations Ahead
Candy eyes, chocolate spider legs, and decorated cookies can all sit ready before you assemble the desserts.
This makes the final decorating stage much faster.
Don’t Overfill Dessert Cups
Small dessert cups look prettier when you leave a little room at the top.
They also make portion control easier, especially when your guests want to try several different Halloween desserts.
Make the Messy Desserts First
Chocolate bark and chocolate-dipped treats can create a surprising amount of cleanup.
I usually prepare them before the creamy desserts. Once everything sets, I wipe down the counter and move on to the cleaner parts of the dessert table.
Chill Before Transporting
If you’re taking these desserts to someone else’s Halloween party, chill them thoroughly before putting them into a container.
Use a flat container rather than stacking delicate decorations.
For longer trips, an insulated cooler with ice packs can help keep chocolate and dairy-based desserts cold.
Variations & Substitutions
Make Them Gluten-Free
Choose certified gluten-free sandwich cookies and pretzels if you need to avoid gluten.
Also check the labels on candy melts, sprinkles, and other packaged decorations because ingredients can vary between brands.
Make a Dairy-Free Version
Use dairy-free chocolate and plant-based cream cheese and whipped topping.
Coconut-based products work particularly well for creamy no-bake desserts, although they can add a mild coconut flavor.
Create a Peanut-Free Dessert Table
Skip peanut toppings and choose chocolate chips, pretzels, cookies, fruit, or Halloween sprinkles instead.
If you’re serving guests with allergies, check every packaged ingredient and avoid cross-contact during preparation.
Turn Them Into Mini Desserts
Almost any no-bake Halloween dessert becomes party-friendly when you shrink the serving size.
Use mini cups, small cookie pieces, bite-size chocolate bark, or individual strawberries.
Guests can sample several treats without needing a large plate.
Serving Suggestions

A Halloween dessert table looks much more inviting when you mix heights, textures, and colors.
Place chocolate bark on a large platter and arrange the decorated strawberries nearby. Put pudding cups in rows so guests can easily grab one.
For a fun centerpiece, place mini cheesecake cups around a small Halloween decoration.
You can also use black, orange, purple, and white serving dishes to create a classic Halloween color palette.
If you’re hosting children, keep the decorations playful rather than overly creepy. Candy eyes, little ghosts, pumpkins, and spider designs usually get plenty of attention without making the treats too scary.
For an adult Halloween gathering, try richer flavors such as dark chocolate, espresso, salted caramel, or peppermint.
I also like serving coffee alongside creamy chocolate desserts. Something about a cold Halloween evening and a warm mug of coffee makes the dessert table feel extra cozy.
If you’re serving several desserts, label anything containing nuts or other common allergens.
That small bit of organization helps guests make comfortable choices without having to ask about every dessert.
Related Recipes :
- Halloween Desserts for a Spooky Potluck Everyone Will Love
- Halloween Party Desserts Everyone Will Want to Try
- Creative Halloween Sweets for Kids’ Parties Will Love You
FAQ’s
Can I make no-bake Halloween desserts the day before?
Yes. Many no-bake desserts work beautifully as make-ahead treats.
Cheesecake cups and pudding desserts can usually sit covered in the refrigerator overnight. Chocolate bark and decorated cookies can also stay ready ahead of time.
Add fragile decorations shortly before serving when possible.
How long do no-bake Halloween desserts last?
Storage time depends on the ingredients.
Cream cheese, whipped cream, pudding, and fresh fruit desserts generally need refrigeration and taste best within a few days.
Chocolate bark and decorated cookies usually keep longer when stored in a cool, dry place.
Always follow the storage guidance for the specific ingredients you use.
Can I freeze no-bake Halloween desserts?
Some can, but freezing can change the texture of creamy desserts.
Chocolate bark freezes well when stored in an airtight container, while cheesecake-style desserts may become slightly different in texture after thawing.
I prefer making creamy desserts fresh or one day ahead.
Why did my melted chocolate become thick?
Chocolate can become thick when it overheats or comes into contact with water.
Melt it slowly and stir frequently.
If you use a microwave, short intervals work much better than one long heating cycle.
Can I use store-bought pudding and whipped topping?
Absolutely.
There is nothing wrong with using shortcuts when you’re hosting a party. Prepared pudding and whipped topping can save a lot of time, especially when you’re making several desserts.
Add your own toppings and decorations to make them feel homemade.
Can I make these desserts without special Halloween decorations?
Definitely.
Use regular sprinkles, chocolate chips, crushed cookies, marshmallows, pretzels, or fruit.
Even simple chocolate desserts can look festive with orange and black decorations.
Final Thoughts
Halloween hosting doesn’t need to mean spending the entire day in the kitchen.
Some of my favorite party desserts started with whatever I already had in the pantry and a quick look through my Halloween decorations. A few candy eyes can turn an ordinary chocolate treat into a silly little monster, and crushed cookies can transform simple pudding into a spooky dessert cup.
That’s the charm of no-bake Halloween desserts for busy hosts. You get plenty of room to be creative without taking on a complicated baking project.
So put on some Halloween music, grab the chocolate, and let the decorating begin. And don’t forget to make a few extra treats for yourself—I learned that lesson after watching an entire plate disappear before I even got a chance to taste it.
Leave a Reply
You must be logged in to post a comment.