


I still remember the first time I pulled a tray of these little cheesecake bites out of the fridge on a sticky July afternoon. The kids had invited half the neighborhood over after a water-balloon fight, my oven had already been working overtime making pizza, and the last thing I wanted was to turn it on again for dessert. I mixed a quick cream-cheese filling, pressed some graham crumbs into mini liners, and shoved the whole pan into the fridge while everyone dried off. Forty-five minutes later, those tiny no-bake cheesecake bites disappeared faster than the ice cubes in the cooler. One neighbor asked for the recipe before she even finished her second bite. That’s when I knew I’d found my forever party dessert.
I’ve made these no-bake cheesecake bites more times than I can count—birthday parties, book-club nights, last-minute potlucks, even quiet Sunday evenings when I just want something sweet without the oven heat. They never fail me. Soft, creamy centers, buttery graham crust, and that perfect little size that lets everyone grab “just one more.” If you’ve ever needed a dessert that looks fancy but feels like zero stress, these are it.
Why You’ll Love This Recipe

- Zero oven time—perfect for hot days or busy kitchens
- Ready to chill in under 20 minutes of actual work
- Uses simple pantry and fridge staples you probably already have
- Makes a big batch that stores beautifully for days
- Completely customizable so you never get bored
Ingredients

I always make a double batch because they vanish. This recipe gives you about 24 mini bites.
For the crust
- 1½ cups graham cracker crumbs (about 10 full sheets, crushed fine)
- 5 tablespoons unsalted butter, melted
- 2 tablespoons granulated sugar
- Tiny pinch of salt
For the filling
- 16 ounces full-fat cream cheese, softened to room temperature
- ½ cup powdered sugar, sifted
- 1 teaspoon pure vanilla extract
- 1 cup cold heavy whipping cream (or an 8-ounce tub of frozen whipped topping, thawed)
- Optional: 1 tablespoon fresh lemon juice for a little brightness
For topping (optional but pretty)
- Fresh berries, mini chocolate chips, or a dusting of extra graham crumbs
You can swap the graham crackers for digestive biscuits or even crushed vanilla wafers if that’s what you have. Full-fat cream cheese is non-negotiable for the best texture—low-fat versions can turn watery.
Step-by-Step Instructions
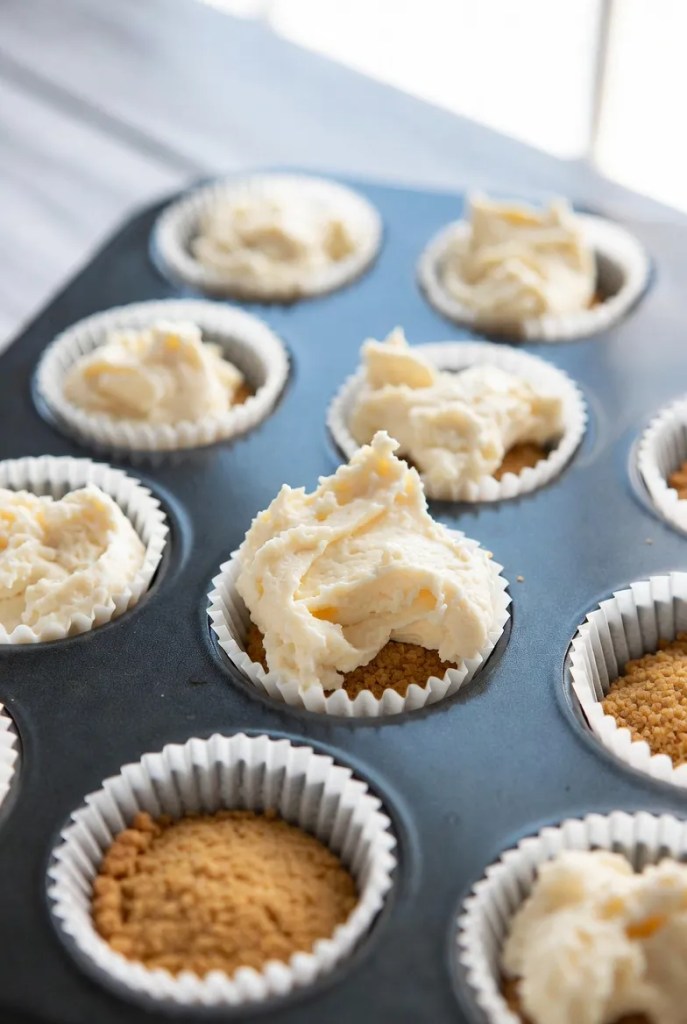
- Line a 24-cup mini muffin tin with paper liners. If you don’t have liners, lightly grease the cups. Set the tin aside.
- Make the crust. In a medium bowl, stir together the graham cracker crumbs, melted butter, sugar, and salt until the mixture looks like wet sand and holds together when you pinch it. Spoon about 1 heaping teaspoon into each mini muffin cup. Use the back of a small spoon or your fingertip to press it firmly into an even layer. Pop the tin in the freezer for 10 minutes while you make the filling. This quick chill keeps the crust from crumbling later.
- Beat the cream cheese. In a large mixing bowl (I use my stand mixer with the paddle, but a hand mixer works fine) beat the softened cream cheese on medium speed for about 1 minute until it’s completely smooth and fluffy. Scrape down the sides. Add the powdered sugar and vanilla (and lemon juice if using). Beat another 30–45 seconds until everything is silky. No lumps allowed—taste a tiny bit and smile.
- Whip the cream. In a separate clean bowl, whip the cold heavy cream with a whisk or mixer until stiff peaks form, about 2–3 minutes. If you’re using thawed whipped topping, just fold it in as-is. Gently fold the whipped cream into the cream-cheese mixture in two additions. Use a spatula and light strokes so you don’t deflate all that air. The filling should look thick, pale, and spoonable—like soft cloud.
- Fill the cups. Spoon or pipe the filling into each mini crust, mounding it slightly above the rim. A small cookie scoop makes this mess-free. Smooth the tops with the back of a spoon if you like them neat, or leave them rustic.
- Chill. Cover the tin loosely with plastic wrap and refrigerate for at least 2 hours, or until the filling is firm enough to hold its shape when you lift a bite out. Overnight is even better if you have the time.
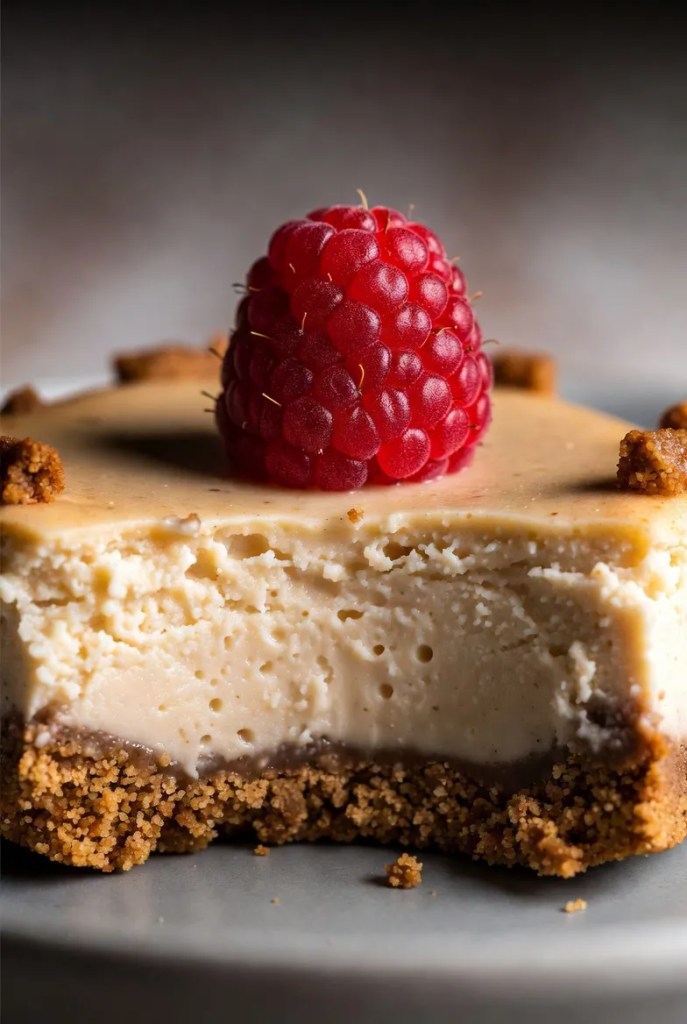
- Finish and serve. Right before serving, add any toppings you love. I usually go with a few fresh raspberries and a light sprinkle of extra graham crumbs. Gently lift the liners out and arrange on a platter.
That’s it. From start to fridge in under 20 minutes of hands-on work.
Pro Tips & Tricks
Room-temperature cream cheese is everything. If it’s even a little cold, you’ll fight lumps for days. I set mine out a full hour before I start, or microwave it in 10-second bursts if I’m impatient.
Don’t over-whip the cream once you fold it in. A few gentle folds keep the filling light instead of dense and heavy.
If your kitchen is warm, chill the mixing bowl and beaters for the cream. It whips faster and holds better.
These freeze like a dream. After the initial 2-hour chill, transfer the bites to an airtight container, freeze solid, then store up to a month. Thaw in the fridge for a couple of hours when you need them. The texture stays almost identical.
Common mistake: pressing the crust too loosely. Take the extra ten seconds to pack it down firmly so it doesn’t fall apart when someone bites in.
Variations & Substitutions

Chocolate lovers in the house? Stir 3 tablespoons of unsweetened cocoa powder into the cream-cheese mixture and roll the finished bites in mini chocolate chips or crushed Oreos instead of graham crumbs. Instant chocolate cheesecake bites.
Berry version: fold ½ cup finely chopped strawberries or a swirl of raspberry jam into the filling right before you portion it. The little pockets of fruit make every bite interesting.
For a gluten-free tray, swap the graham crackers for certified gluten-free cookies or almond flour mixed with a bit of melted butter and sugar. Same buttery crunch, no wheat.
I’ve even made a lighter version using Neufchâtel cheese and Greek yogurt in place of some of the cream cheese. Still rich, just a touch tangier.
Serving Suggestions

These no-bake cheesecake bites shine at almost any gathering. I set them out on a big wooden board with fresh berries scattered around for summer BBQs. For holiday parties, I dust them with powdered sugar and tuck them between cookie trays. They’re also perfect for dessert tables at baby showers or bridal luncheons because they’re neat to eat—no forks required.
Pair them with a strong cup of coffee or a glass of cold milk. If you’re feeling fancy, drizzle a little warm chocolate sauce over the top right before serving. Kids love them as after-school treats; adults love them as the “just one more” that somehow turns into three.
FAQ’s
How long do no-bake cheesecake bites last in the fridge?
They keep beautifully for 4–5 days in an airtight container. The crust softens a little over time but still tastes great.
Can I freeze them?
Absolutely. Freeze in a single layer first, then stack in a freezer-safe container with parchment between layers. They’ll keep for up to a month. Thaw overnight in the fridge.
My filling turned out runny—what happened?
Most likely the cream cheese was too cold, or the whipped cream wasn’t stiff enough. Next time, make sure everything is properly softened and whipped to stiff peaks before folding.
Can I make these without a mini muffin tin?
Yes. Scoop the chilled filling into tablespoon-sized balls, roll them in extra graham crumbs, and place on a parchment-lined tray. Chill again until firm. They look more like truffles this way and are just as delicious.
Are these safe to leave out at a party?
They hold up for about 2 hours at cool room temperature. After that, pop any leftovers back in the fridge so the cream cheese stays happy.
Can I use low-fat cream cheese?
You can, but the texture will be softer and sometimes a bit watery. Full-fat gives the classic dense, creamy bite everyone expects.
Final Thoughts
Every time I make these no-bake cheesecake bites I think about that first sticky summer afternoon and how something so simple can make people light up. They’re the dessert I reach for when I want to feel like a hero in the kitchen without actually working that hard. I hope they become one of those recipes you keep in your back pocket too—the one you can throw together on a whim and still look like you planned.
If you try them, tell me how they turned out. Did you go classic, chocolate, or wild with berries? I always love hearing the little twists people invent. Now go soften that cream cheese and make your own tray of happiness. You’ve got this.
Leave a Reply
You must be logged in to post a comment.