

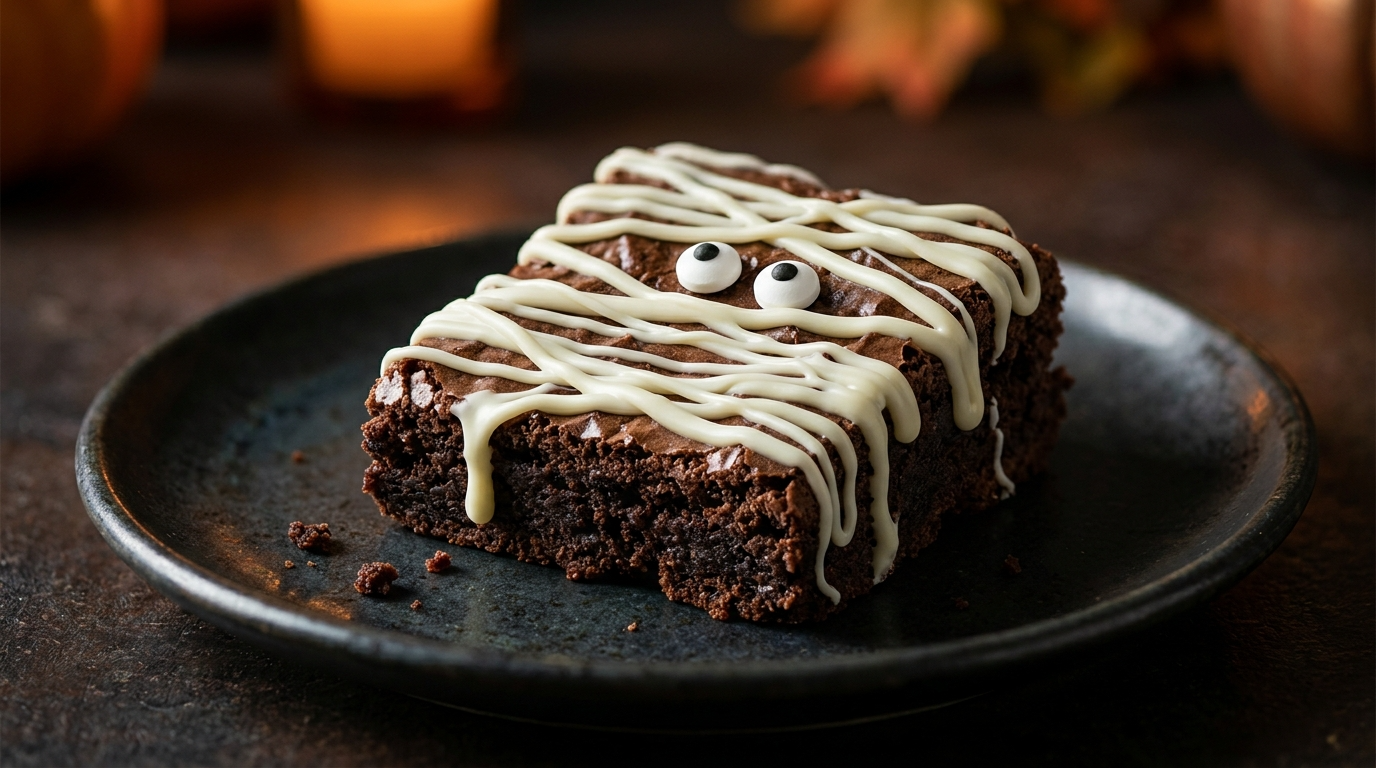
Every Halloween party I’ve hosted has had one thing in common: the kids barely notice the decorations once they spot the dessert table.
I learned that the hard way one October when I spent hours making a fancy Halloween cake, only to watch a plate of chocolate-covered pretzel “spiders” disappear in about ten minutes. Apparently, eight-legged snacks beat fancy frosting every time.
Since then, I’ve leaned into simple Halloween sweets that look fun, taste great, and don’t require a pastry degree. These treats work especially well for kids because they use familiar flavors like chocolate, marshmallows, cookies, pretzels, and colorful candy.
The best part? You can make most of them ahead of the party, which means you won’t spend Halloween afternoon covered in melted chocolate while everyone else enjoys themselves.
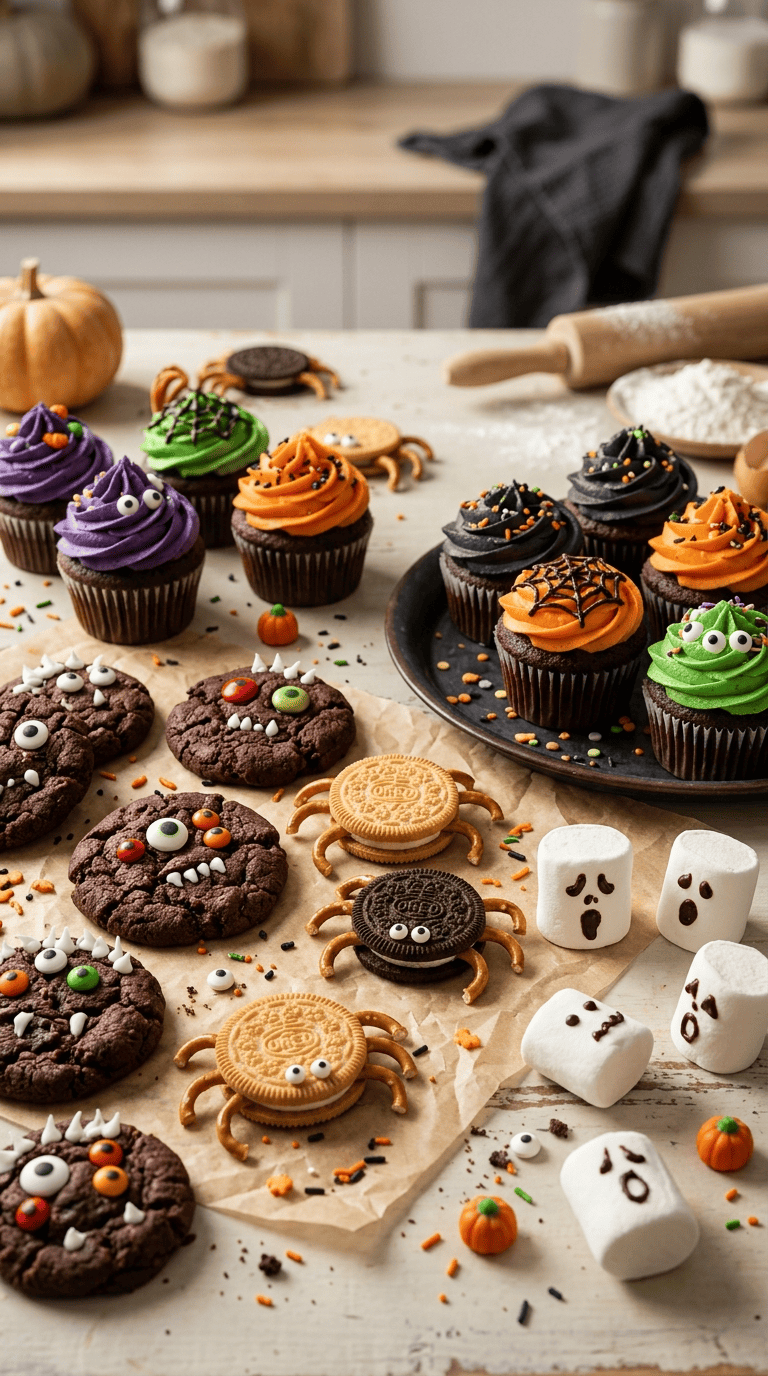
For this Halloween party spread, I usually make chocolate monster cupcakes, mummy brownies, marshmallow ghosts, and pretzel spiders. You can make all four, or pick two depending on the size of your party.
Why You’ll Love These Halloween Sweets

- Kid-friendly flavors: Chocolate, cookies, marshmallows, and pretzels keep things familiar.
- Easy decorating: You don’t need perfect piping skills. A little messy can actually look more spooky.
- Great for parties: Each treat makes several individual servings.
- Make-ahead friendly: Most components can sit ready before guests arrive.
- Easy to customize: Change the candy colors, shapes, and decorations to match your party theme.
- Budget-friendly: Basic baking ingredients do most of the work.
Ingredients for Creative Halloween Sweets
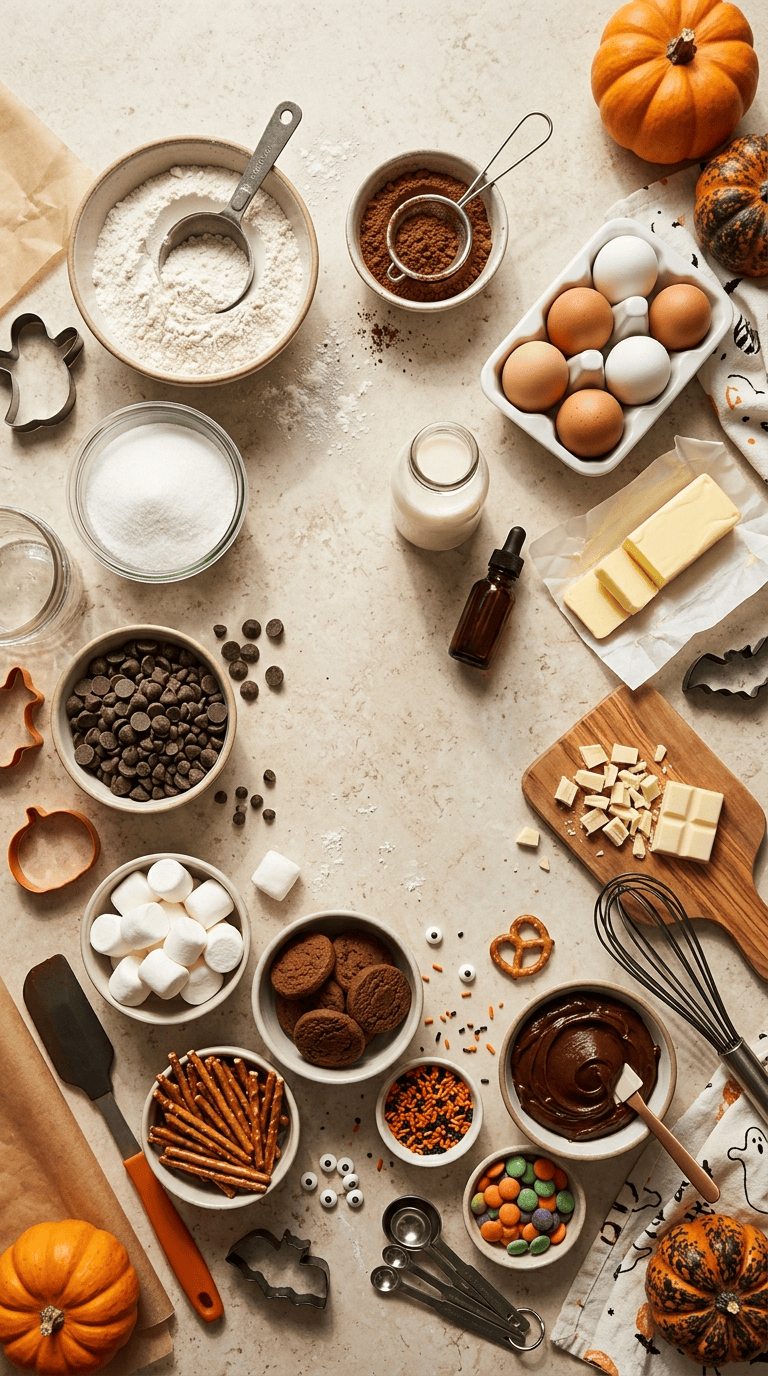
You don’t need one giant shopping list if you’re making only a couple of these treats. Here’s what I use when I make the full Halloween dessert table.
For the Chocolate Monster Cupcakes
- 1 ½ cups all-purpose flour
- ¾ cup granulated sugar
- ½ cup unsweetened cocoa powder
- 1 teaspoon baking powder
- ½ teaspoon baking soda
- ½ teaspoon salt
- 2 large eggs
- ½ cup vegetable oil
- ¾ cup buttermilk
- 1 teaspoon vanilla extract
- ½ cup hot water
- 1 ½ cups chocolate frosting
- 24 candy eyeballs
- ½ cup Halloween-colored sprinkles
You can replace buttermilk with ¾ cup milk mixed with 2 teaspoons lemon juice. Let it sit for about 5 minutes before using.
For the Mummy Brownies
- ½ cup unsalted butter, melted
- 1 cup granulated sugar
- 2 large eggs
- 1 teaspoon vanilla extract
- ½ cup unsweetened cocoa powder
- ¾ cup all-purpose flour
- ¼ teaspoon salt
- ½ cup white chocolate chips
- ¼ cup heavy cream
- 24 small candy eyes
A boxed brownie mix works perfectly if you’re short on time. Nobody at a kids’ party will complain.
For Marshmallow Ghosts
- 24 large marshmallows
- 1 cup white candy melts
- 1 teaspoon vegetable shortening
- ¼ cup mini chocolate chips
For Pretzel Spiders
- 24 small round cookies
- 48 small pretzel sticks
- ½ cup chocolate chips
- ½ cup chocolate candy melts
- 24 candy eyes
You can use peanut butter sandwich cookies, chocolate cookies, or any sturdy round cookie you already have.
Step-by-Step Instructions
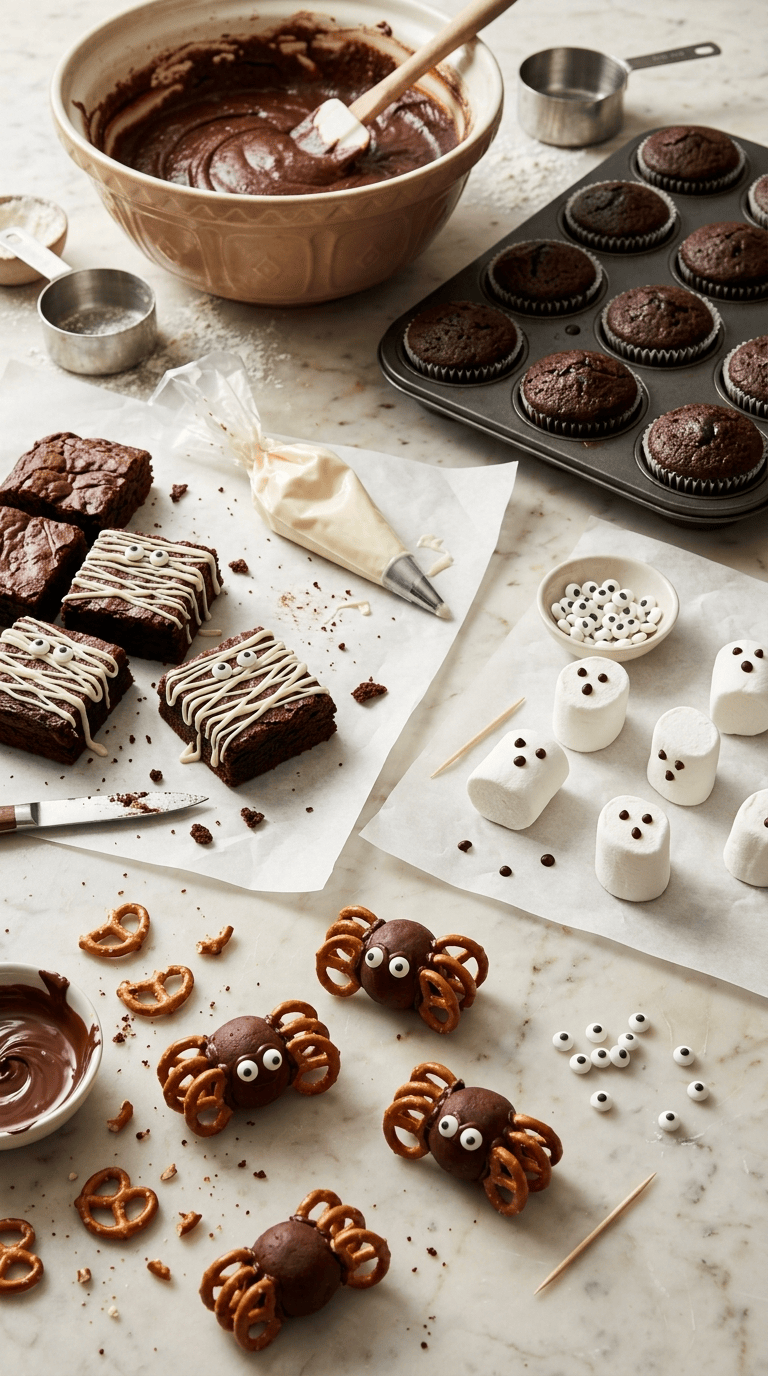
1. Bake the Chocolate Monster Cupcakes
Preheat your oven to 350°F (175°C) and line a 12-cup muffin pan with paper liners.
In a large bowl, whisk together the flour, sugar, cocoa powder, baking powder, baking soda, and salt. I always whisk the dry ingredients first because it helps prevent little pockets of baking soda from hiding in the batter.
In another bowl, whisk the eggs, oil, buttermilk, and vanilla.
Pour the wet mixture into the dry mixture and stir gently until you no longer see dry flour. Don’t keep mixing just because the batter looks a little lumpy.
Slowly stir in the hot water. The batter will look surprisingly thin. That’s completely normal.
Divide the batter between the liners, filling each about two-thirds full.
Bake for 18–21 minutes, or until a toothpick inserted into the center comes out with a few moist crumbs.
Let the cupcakes cool in the pan for about 5 minutes, then move them to a wire rack.
Let them cool completely before decorating. Warm cupcakes turn frosting into a slippery mess.
2. Turn the Cupcakes Into Monsters
Spread chocolate frosting over each cooled cupcake.
You don’t need to make the frosting perfectly smooth. In fact, I like using the back of a spoon to create little peaks because they make the cupcakes look more monster-like.
Press two candy eyeballs into each cupcake.
Add Halloween sprinkles around the eyes.
For extra personality, use different numbers and positions of eyes. One-eyed monsters look just as cute as two-eyed ones, and kids love choosing their favorite.
3. Bake the Mummy Brownies
Reduce the oven temperature to 325°F (165°C).
Line an 8-inch square baking pan with parchment paper, leaving some paper hanging over the sides.
Whisk the melted butter and sugar together.
Add the eggs and vanilla and whisk until the mixture looks glossy.
Stir in the cocoa powder, flour, and salt until just combined.
Spread the batter evenly in the prepared pan.
Bake for 25–30 minutes. The center should look set but still slightly soft.
Let the brownies cool completely before cutting.
This is one place where patience really matters. I once cut brownies while they were still warm and ended up with delicious chocolate rubble instead of neat squares.
4. Add the Mummy Decoration
Melt the white chocolate chips with the heavy cream in short 15-second bursts in the microwave. Stir after each burst until smooth.
Transfer the melted mixture to a piping bag or a small zip-top bag. Snip off one corner.
Cut the brownies into 12 squares.
Drizzle thin white lines across each brownie, moving back and forth to create a mummy-wrap effect.
Add two candy eyes before the chocolate sets.
Let the decorated brownies sit for about 15 minutes so the white chocolate can firm up.
5. Make the Marshmallow Ghosts
Melt the white candy melts according to the package instructions.
If the coating feels too thick, stir in about 1 teaspoon vegetable shortening.
Insert a toothpick into the bottom of each marshmallow and dip it into the melted coating.
Place the coated marshmallows on parchment paper.
While the coating remains soft, add mini chocolate chips for tiny eyes.
Let the ghosts sit for 15–20 minutes until firm.
Remove the toothpicks before serving, especially if younger children will eat them.
6. Build the Pretzel Spiders
Melt the chocolate chips or chocolate candy melts until smooth.
Place a small spoonful of melted chocolate onto the back of a round cookie.
Arrange four pretzel sticks on each side to create eight spider legs.
Place another small amount of chocolate over the center to help secure everything.
Add two candy eyes.
Let the spiders sit on parchment paper for about 20 minutes.
If the chocolate refuses to set because your kitchen is warm, pop the tray into the refrigerator for about 10 minutes.
Pro Tips & Tricks
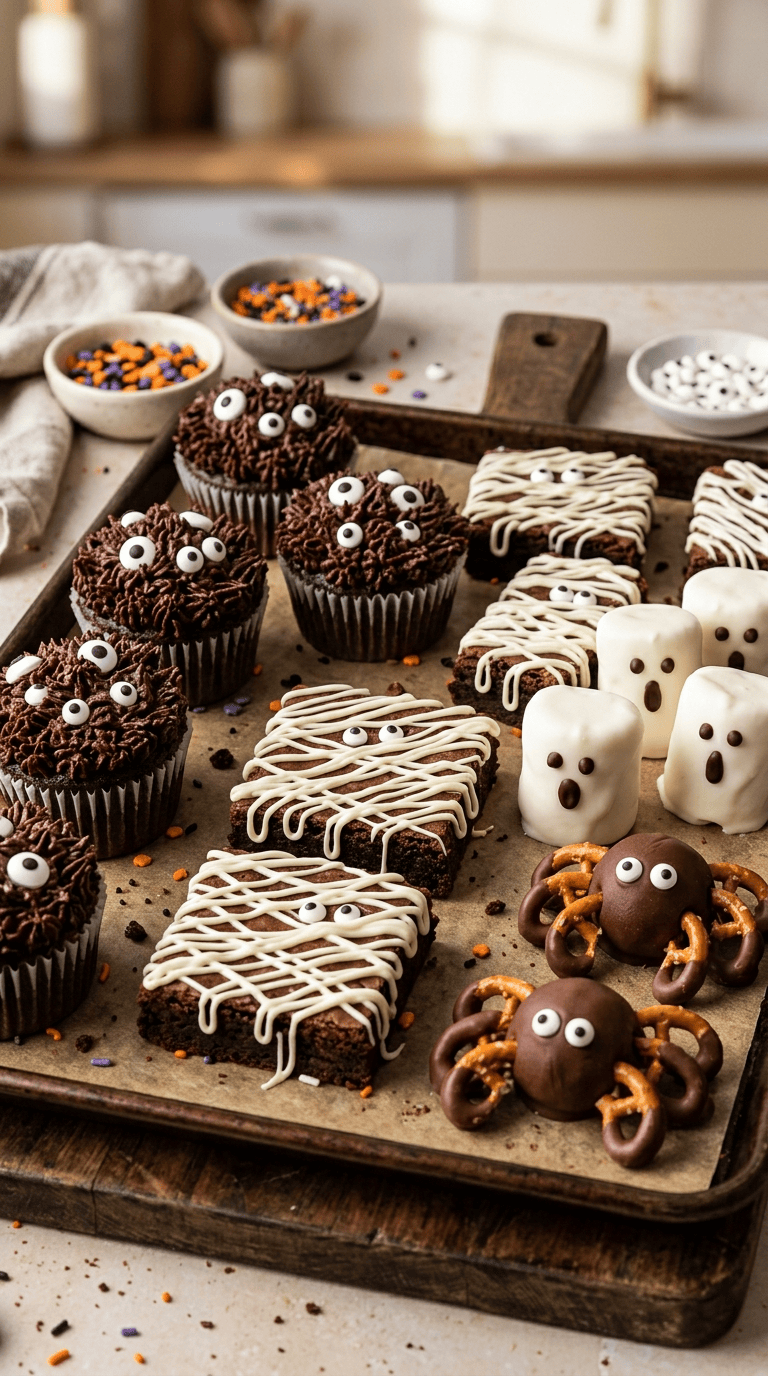
Let Everything Cool Before Decorating
This sounds obvious, but it’s the mistake I see most often. Warm cupcakes melt frosting, warm brownies smear decorations, and warm chocolate makes pretzel spiders slide apart.
Give baked goods enough time to cool.
Use Candy Eyes for Instant Halloween Magic
Candy eyes do most of the decorating work for you. Keep a bag in your pantry during October and suddenly almost any cookie, cupcake, brownie, or marshmallow can become a Halloween character.
Make the Mess Part of the Look
Don’t stress about perfect frosting lines or identical monster faces.
Halloween treats actually look better when they have personality. A crooked mummy stripe or a slightly wonky eyeball can make a cupcake more fun.
Prepare the Brownies and Cupcakes Ahead
Bake the cupcakes and brownies the day before the party.
Store the cooled cupcakes in an airtight container at room temperature. Keep the brownies covered tightly so they stay soft.
Decorate them on the morning of the party or a few hours before guests arrive.
Keep Decorations Away From Heat
Chocolate and candy melts soften quickly in a warm room.
If your Halloween party gets crowded and warm, keep decorated treats in a cool area until you’re ready to put them out.
Variations & Substitutions
Make Them Peanut-Free
If you’re serving a mixed group of children, choose cookies and candy that don’t contain peanuts or peanut ingredients. Always check the package labels because ingredients and allergen statements can vary by brand.
For the pretzel spiders, use plain chocolate cookies instead of peanut butter sandwich cookies.
Make Simple Halloween Cookie Monsters
Don’t want to bake cupcakes?
Use store-bought chocolate chip cookies or sugar cookies instead.
Spread a little frosting on top, add candy eyes, and finish with sprinkles. Kids can even decorate their own cookies as a party activity.
Create Colorful Monster Cupcakes
Chocolate frosting works beautifully, but you can also use vanilla frosting tinted with food coloring.
Try orange, purple, green, or black for a classic Halloween palette.
For a really fun party table, let children choose their own frosting color and decorations.
Serving Suggestions

I like arranging Halloween sweets on different-sized cake stands and plates rather than placing everything on one large tray.
Put the cupcakes on one stand, brownies on a rectangular platter, and smaller treats in bowls around them. This gives the dessert table some height without requiring fancy decorations.
For a kids’ party, serve smaller portions whenever possible. Brownie squares can be cut into bite-sized pieces, and cupcakes can stay on the smaller side.
You can also turn decorating into part of the party.
Set out undecorated sugar cookies, small bowls of sprinkles, candy eyes, and frosting. Give each child a cookie and let them create their own Halloween monster.
For drinks, simple options like cold milk, apple cider, lemonade, or sparkling water work nicely alongside chocolate-heavy sweets.
And don’t forget napkins. Lots of them. Chocolate frosting and excited children have a complicated relationship with clean clothes.
Related Recipes :
- Creepy Halloween Dessert Ideas That Are Surprisingly Easy
- Halloween Baking Ideas for a Spooky Night In
- Halloween Chocolate Dessert Spooky Chocolate Graveyard Brownies Recipe
FAQ’s
Can I make these Halloween sweets the day before?
Yes. Cupcakes, brownies, and cookies can all handle being prepared ahead.
Bake the cupcakes and brownies the day before and store them in airtight containers. Add delicate decorations closer to serving time if possible.
How should I store leftover Halloween cupcakes?
Store decorated cupcakes in an airtight container at room temperature for about 1–2 days if your frosting and kitchen conditions allow it.
If your frosting contains ingredients that require refrigeration, follow the storage directions for that specific frosting.
Can I freeze the brownies?
Yes. Freeze undecorated brownies for the best texture.
Wrap individual pieces tightly in plastic wrap and place them in a freezer-safe container or bag. Thaw them at room temperature, then add the mummy decoration.
Why did my chocolate decorations become too thick?
Chocolate and candy melts can thicken when they cool.
Warm them gently in short bursts and stir between each one. A tiny amount of shortening can also help loosen candy melts.
Avoid adding water because even a small amount can cause melted chocolate to seize.
Can I use boxed brownie or cake mix?
Absolutely.
When I’m making sweets for a large Halloween party, I often use shortcuts. A boxed mix saves time, and the decorations provide most of the Halloween personality anyway.
How far ahead can I decorate the treats?
You can decorate most of them several hours before serving.
For the freshest appearance, keep the finished treats covered and away from direct sunlight or heat. Add anything that can melt or soften quickly as close to serving time as practical.
Final Thoughts
Halloween baking doesn’t have to turn your kitchen into a disaster zone.
Some of my favorite party treats started with ordinary ingredients and a slightly ridiculous idea. Put candy eyes on a cupcake, add pretzel legs to a cookie, drizzle white chocolate over a brownie, and suddenly you have a whole table of spooky little characters.
That’s what I love about these creative Halloween sweets for kids’ parties. They don’t demand perfection. They just need a little chocolate, a few decorations, and enough imagination to make everyone smile.
If you’re making these for a Halloween party, let the kids get involved with the decorating. Expect sprinkles everywhere, a few strange-looking monsters, and probably some missing candy before the party even starts.
And honestly, that’s half the fun.
Leave a Reply
You must be logged in to post a comment.