

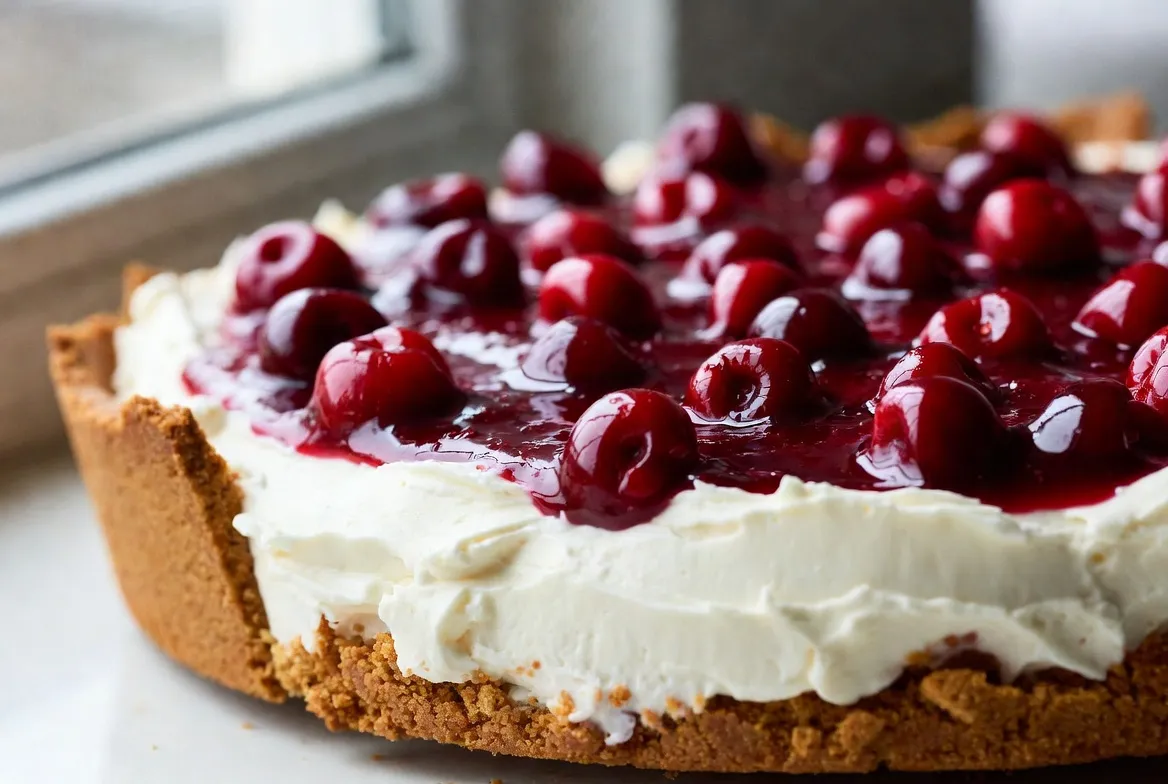
I still remember the first time I made Cherry Yum Yum for a last-minute family get-together. It was a sticky July afternoon, the kind where nobody wants to turn on the oven. My cousin texted that she was bringing the kids over in two hours, and all I had in the pantry was a couple of packages of graham crackers, a block of cream cheese that was about to expire, and a can of cherry pie filling I’d bought on sale. I threw it together in a panic, stuck it in the fridge, and crossed my fingers.
When I pulled it out later, the whole kitchen smelled like sweet cherries and vanilla. One bite and the kids went quiet. My aunt asked for the recipe before she’d even finished her square. That was ten years ago, and I’ve lost count of how many times I’ve made this no-bake Cherry Yum Yum since. It’s the dessert that shows up at every summer potluck, every holiday when the oven is already full, and every random Tuesday when I just need something cold and creamy.
This Cherry Yum Yum dessert recipe has become my secret weapon. It’s the one I teach new cooks first because it never fails, and it always disappears.
Why You’ll Love This Recipe

- Zero oven time — perfect for hot days or when your oven is already working overtime
- Ready in under 20 minutes of active work, then the fridge does the rest
- Uses pantry staples you probably already have
- Crowd-pleaser for both kids and adults (I’ve watched grown men fight over the last piece)
- Looks fancy enough for company but is almost impossible to mess up
Ingredients

Here’s everything you need for a 9×13-inch pan that serves 12–15 generous squares. I’ve listed them in the order you’ll use them so you can pull things out as you go.
For the crust:
- 2 cups graham cracker crumbs (about 14–15 full sheets, crushed)
- ½ cup (1 stick) unsalted butter, melted
- ¼ cup granulated sugar
For the cream cheese layer:
- 8 oz cream cheese, softened to room temperature
- 1 cup powdered sugar
- 1 teaspoon pure vanilla extract
- 8 oz Cool Whip (or homemade whipped cream — see tips)
For the cherry layer:
- 1 can (21 oz) cherry pie filling (I like the ones with whole cherries)
Optional but highly recommended topping:
- Extra Cool Whip or freshly whipped cream for spreading on top
- A few fresh cherries or a light dusting of graham cracker crumbs for looks
Substitutions that actually work: If you’re out of graham crackers, digestive biscuits or even crushed vanilla wafers make a fine crust. Dairy-free cream cheese and coconut whipped topping turn this into a solid dairy-free version. I’ve done it for friends with great results.
display render_generated_image with prompt is Close-up 9:16 portrait shot of the ingredients for Cherry Yum Yum dessert arranged on a marble counter: graham cracker crumbs in a glass bowl, stick of butter, block of cream cheese, can of bright red cherry pie filling, powdered sugar, Cool Whip tub, vanilla extract bottle, soft natural lighting, food and ingredients fill 85-90% of the frame, vibrant colors, appetizing Pinterest food photography style orientation is portrait layout is block
Step-by-Step Instructions

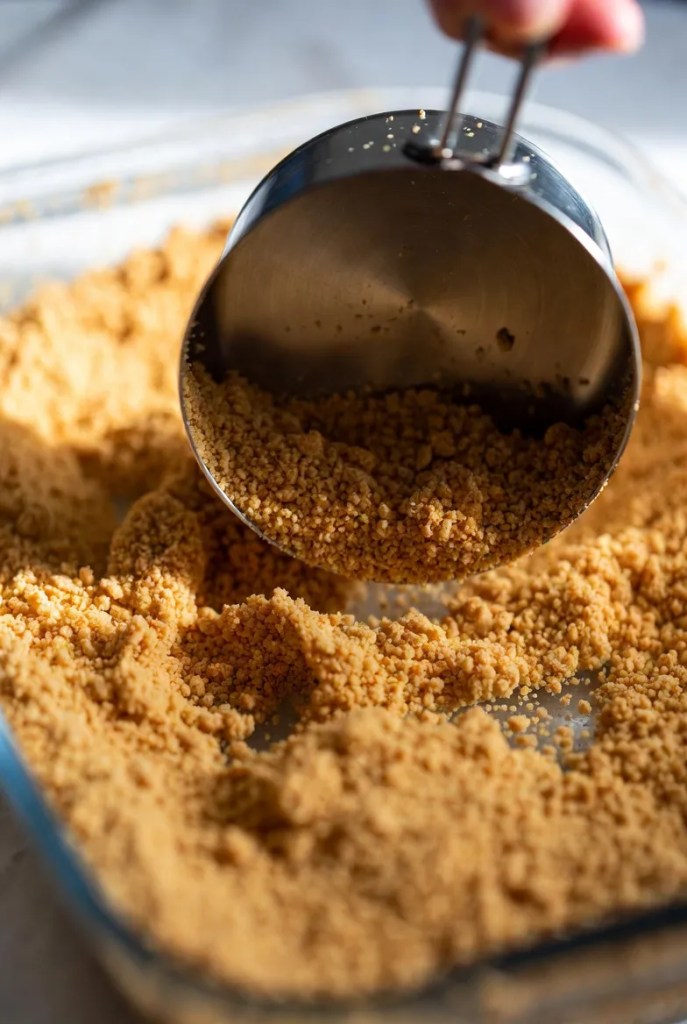
- Make the crust. Crush the graham crackers until they look like fine sand. I usually toss them in a zip-top bag and roll with a rolling pin — it’s oddly satisfying. Pour the crumbs into a medium bowl, add the melted butter and sugar, and stir until every bit is moistened and the mixture holds together when you squeeze it. Press firmly into the bottom of a 9×13-inch glass or ceramic dish. I use the bottom of a measuring cup to get it nice and even. Pop the dish in the fridge while you make the filling (about 10 minutes).
- Whip up the cream cheese layer. In a large mixing bowl, beat the softened cream cheese with a hand mixer (or stand mixer) until it’s completely smooth — no lumps allowed. This takes about 1 minute. Add the powdered sugar and vanilla and beat again until fluffy, another minute. Gently fold in the Cool Whip with a rubber spatula until no white streaks remain. Don’t overmix or you’ll deflate the airiness.
- Assemble the first creamy layer. Spread the cream cheese mixture evenly over the chilled crust. Take your time and get it all the way to the edges. A slight offset spatula or the back of a spoon works perfectly. Smooth the top so the cherries will sit nicely.
- Add the cherry pie filling. Spoon the cherry pie filling over the cream cheese layer. I like to dollop it in spoonfuls first, then gently spread so I don’t drag the cream cheese up. Aim for an even layer that covers everything. If you want extra cherry flavor, you can use a second can, but one is plenty for classic balance.
- Optional final topping. If you want that bakery look, spread a thin layer of extra Cool Whip over the cherries. It seals everything in and looks pretty when you cut squares. Sprinkle a few graham crumbs or place fresh cherries on top if you’re feeling fancy.
- Chill. Cover the dish tightly with plastic wrap and refrigerate for at least 4 hours, preferably overnight. The flavors meld and the layers firm up so you get clean slices. Resist the urge to dig in early — the wait is worth it.
display render_generated_image with prompt is Extreme close-up 9:16 portrait of a hand spreading the creamy white cream cheese layer over a golden graham cracker crust in a glass baking dish, soft natural light, creamy texture details visible, food fills 85% of the frame, warm kitchen atmosphere, Pinterest-worthy food photography orientation is portrait layout is block
display render_generated_image with prompt is Close-up 9:16 portrait of glossy bright red cherry pie filling being spooned onto the white cream layer of Cherry Yum Yum dessert, juicy cherries and thick sauce visible, food dominates 90% of the frame, vibrant red and white contrast, appetizing shallow depth of field, Pinterest style orientation is portrait layout is block
Pro Tips & Tricks
Room-temperature cream cheese is non-negotiable. Cold cream cheese leaves little lumps that no amount of beating will fix. I set mine on the counter for 45–60 minutes before I start.
Press that crust hard. A loosely packed crust falls apart when you cut squares. Really lean into it with the measuring cup.
If you want cleaner slices, run a sharp knife under hot water, wipe it dry, and cut. Wipe and reheat between cuts. The difference is night and day.
This dessert loves being made ahead. I often assemble it the night before a party. It holds beautifully for up to 3 days in the fridge, covered.
For a slightly less sweet version, reduce the powdered sugar to ¾ cup. The cherry filling is already pretty sweet, so the balance stays nice.
Variations & Substitutions

Blueberry or strawberry versions are just as addictive. Swap the cherry pie filling for the same size can of your favorite fruit. Blueberry is my second favorite for winter months.
Want it a little richer? Fold ½ cup of sour cream into the cream cheese layer. It adds a subtle tang that cuts the sweetness beautifully.
For a gluten-free crowd, use gluten-free graham crackers or crushed gluten-free shortbread cookies for the crust. Everything else is naturally gluten-free.
I’ve even made a lighter version with Neufchâtel cheese and sugar-free Cool Whip for friends watching sugar. Still disappears just as fast.
Serving Suggestions

This Cherry Yum Yum shines at potlucks, summer barbecues, church socials, and holiday tables when you need something that doesn’t require oven space. Cut it into neat squares and serve straight from the fridge. A little extra whipped cream on the side never hurts.
It’s also perfect for weeknight dessert when you want something special without the effort. Pair it with strong coffee or a glass of cold milk. Leftovers (if they exist) make an excellent mid-afternoon treat straight from the fridge.
display render_generated_image with prompt is Beautiful 9:16 portrait close-up of a full pan of Cherry Yum Yum dessert cut into neat squares, one square being lifted with a spatula showing perfect layers of crust, cream, and cherries, soft natural lighting, food fills 85% of the frame, glossy cherry topping catching the light, inviting Pinterest food photo orientation is portrait layout is block
FAQ’s
Can I freeze Cherry Yum Yum?
Yes, but the texture of the Cool Whip can change slightly. Freeze the whole pan tightly wrapped for up to 1 month. Thaw overnight in the fridge before serving. Individual squares freeze and thaw better than the whole dish.
How long does it last in the fridge?
Covered tightly, it stays fresh for 3–4 days. After that, the crust starts to soften more than I like, though it’s still safe to eat.
Can I use homemade whipped cream instead of Cool Whip?
Absolutely. Whip 1½ cups heavy cream with 3 tablespoons powdered sugar and 1 teaspoon vanilla until stiff peaks form. Fold it in the same way. It tastes even better, just a little less stable if the dessert sits out for long periods.
Why is my cream cheese layer lumpy?
The cream cheese wasn’t soft enough. Next time, let it sit out longer, or microwave it in 10-second bursts until soft but not melted.
Can I make this in a smaller pan?
Yes. An 8×8-inch pan works for half the recipe and is perfect for smaller households. Just reduce all ingredients by half and chill for the same amount of time.
Does it need to be refrigerated the whole time?
Yes. Because of the dairy, keep it cold until serving and return leftovers to the fridge promptly.
Final Thoughts
There’s something magical about a dessert that asks so little and gives so much. Every time I pull a pan of Cherry Yum Yum out of the fridge and see those bright red cherries sitting on that cloud of cream, I think about that first frantic afternoon and how something so simple became a family favorite.
Make it this weekend. Let it chill while you do whatever else needs doing. Then dig in and tell me how it went — I love hearing your twists and the reactions it gets at your table. Happy no-bake cooking, friends.
Leave a Reply
You must be logged in to post a comment.