

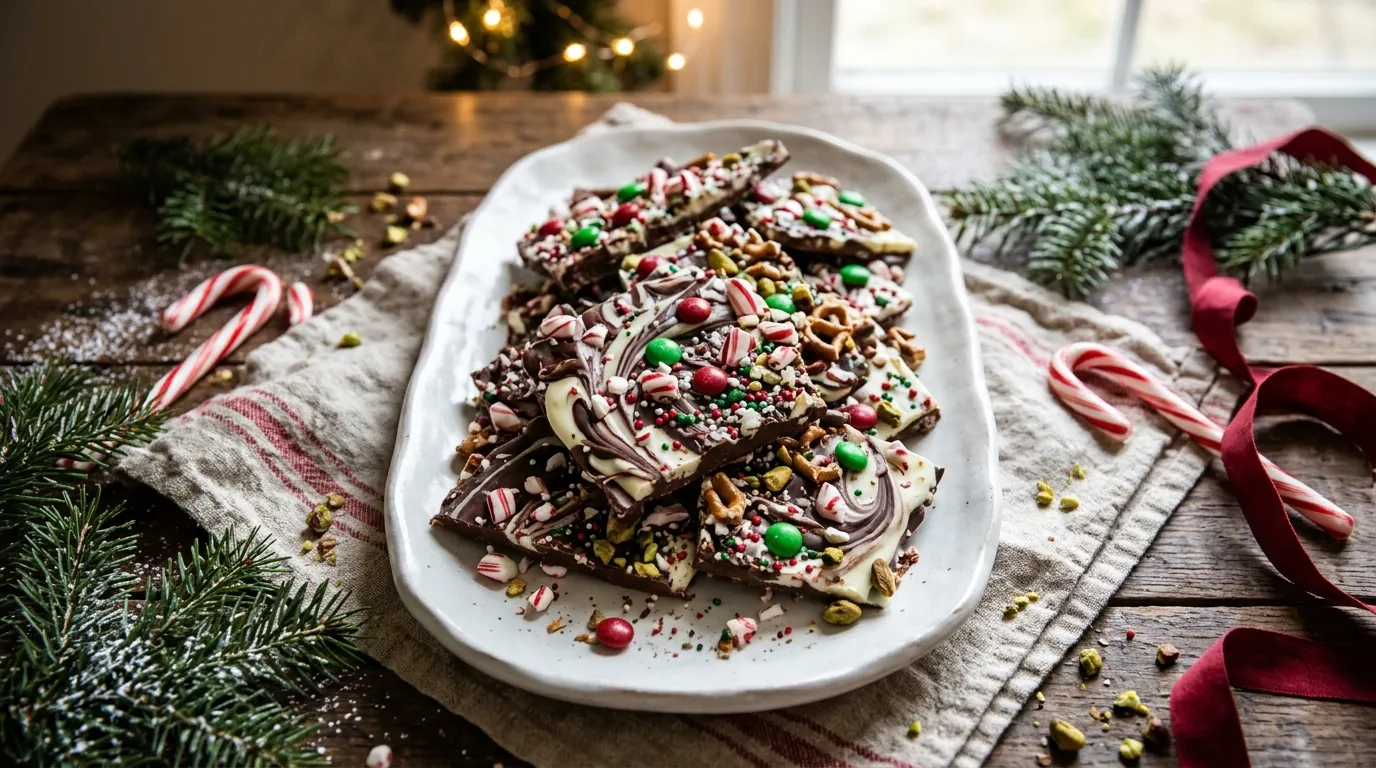
There is something about Christmas treats that makes the holiday season feel extra special. For me, some of the happiest holiday kitchen moments happen when the house smells like melted chocolate, festive music plays in the background, and the kitchen counter slowly fills with homemade goodies.
One treat I always love making is Christmas Bark. It looks beautiful, tastes delicious, and requires surprisingly little effort. The best part? You don’t need to turn on the oven, spend hours decorating, or have any special baking skills.
The first time I made Christmas Bark, I wanted something pretty enough to add to holiday gift boxes but easy enough to prepare alongside all my other Christmas cooking. I melted some chocolate, sprinkled on crushed candy canes and colorful holiday candies, and popped the tray into the refrigerator.
A little later, I broke the chocolate into rustic pieces, and they looked like something straight out of a holiday candy shop!
Since then, Christmas Bark has become one of my favorite holiday recipes. I love how easily I can change the toppings depending on what I have in the pantry. Sometimes I add peppermint candies, sometimes roasted nuts, and occasionally a handful of colorful sprinkles for extra Christmas cheer.
This Christmas Bark Recipe combines smooth chocolate, crunchy toppings, and a beautiful holiday appearance. It makes a wonderful homemade gift, a festive dessert for Christmas parties, or a simple sweet treat to enjoy with a cup of hot cocoa.
If you need a last-minute Christmas dessert that looks impressive without requiring much work, this recipe deserves a place on your holiday baking list.
Why You’ll Love This Christmas Bark Recipe

There are plenty of reasons to make Christmas Bark during the holidays, but these are the things I love most:
- Super easy to prepare: You only need a handful of ingredients and a microwave or double boiler. No complicated baking techniques required.
- No oven needed: This is a wonderful recipe when your oven already has Christmas cookies, cakes, and casseroles competing for space.
- Beautifully festive: Red, green, white, and colorful toppings make every piece look like a little Christmas celebration.
- Perfect for gifting: Break the bark into pieces, package it in clear treat bags or holiday tins, and share it with friends, neighbors, teachers, and family.
- Easy to customize: Use your favorite chocolates, nuts, peppermint candies, pretzels, or sprinkles to create your own combination.
Another reason I keep coming back to this recipe is that it doesn’t need to look perfect. Every piece has a slightly different shape, and that homemade appearance is part of its charm.
Christmas Bark Recipe Ingredients
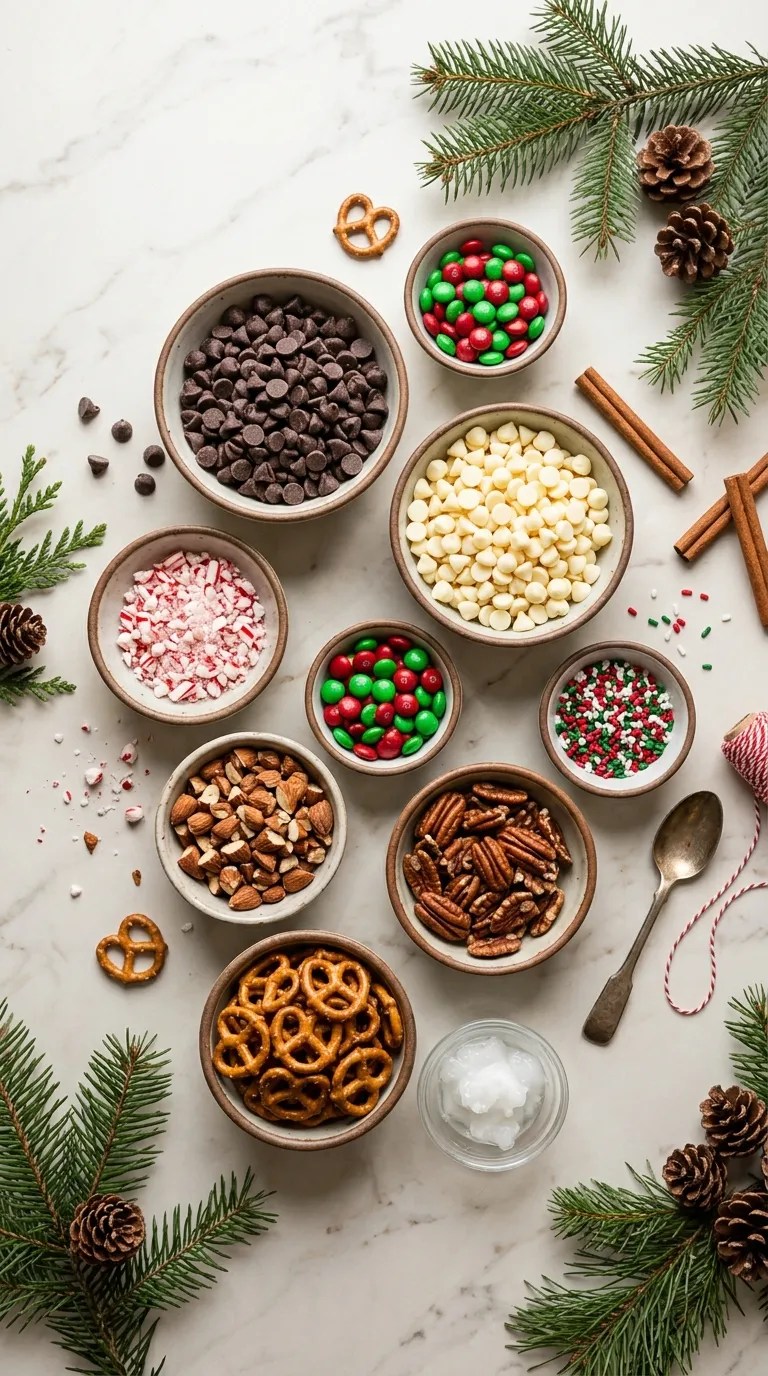
You only need a few simple ingredients to make this festive holiday treat. I recommend using good-quality chocolate because chocolate makes up most of the recipe, so its flavor really matters.
This recipe makes approximately 20–24 pieces, depending on how large you break the bark.
Marshmallow recipes – BBC Food
For the Chocolate Base
- 12 ounces (340 g) semi-sweet chocolate: Use good-quality chocolate chips or chopped chocolate bars. Semi-sweet chocolate provides a lovely balance of sweetness and richness.
- 8 ounces (225 g) white chocolate: This creates beautiful contrasting layers and gives the bark a festive appearance.
- 1 teaspoon coconut oil (optional): Add a little to the white chocolate if you want a smoother consistency. Use refined coconut oil for a neutral flavor.
For the Festive Toppings
- ¼ cup crushed candy canes: These add peppermint flavor and a lovely red-and-white Christmas pattern.
- ¼ cup red and green M&M’s or similar candy-coated chocolates: Choose seasonal colors if available.
- 2 tablespoons holiday sprinkles: Use stars, snowflakes, or classic red and green sprinkles.
- ¼ cup chopped roasted almonds or pecans: These add a delicious crunchy texture.
- ¼ cup mini pretzels, roughly crushed: Optional, but they bring a pleasant salty contrast to the sweet chocolate.
Ingredient Substitutions
Don’t worry if you cannot find every ingredient.
You can replace semi-sweet chocolate with milk or dark chocolate. If you prefer a sweeter bark, milk chocolate works beautifully.
No candy canes? Use crushed peppermint candies instead. You can also leave out the peppermint entirely and add dried cranberries or chopped pistachios.
If you have nut allergies in your household, simply skip the almonds and pecans. Add extra pretzels, crispy rice cereal, or sunflower seeds instead, provided they suit your dietary needs.
For the best results, keep your toppings ready before melting the chocolate. Once you spread the chocolate onto the tray, it can begin setting fairly quickly.
Step-by-Step Instructions for Christmas Bark
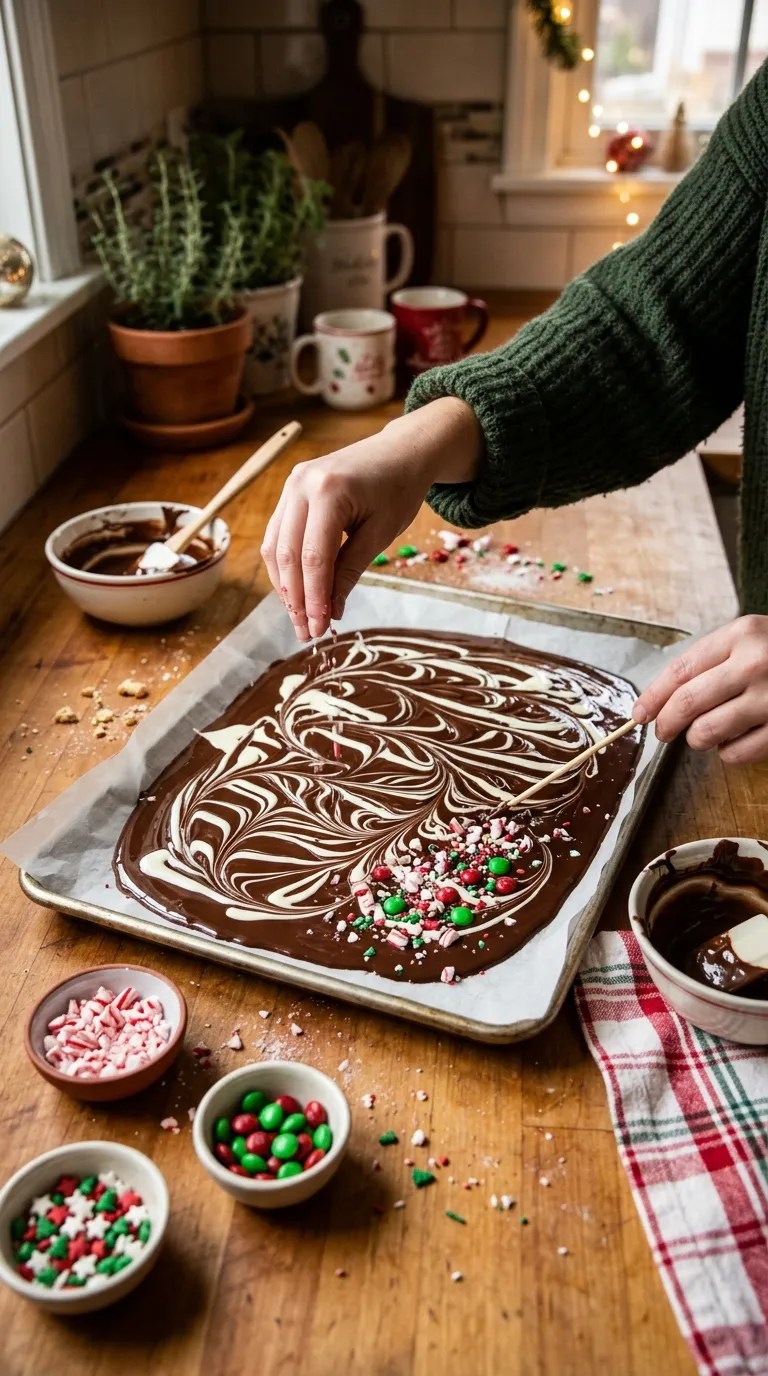
The preparation is simple, but a few small details make a big difference. In particular, keep moisture away from your chocolate and prepare your toppings before you start melting anything.
Schokolade richtig hacken | Rezept | Kitchen Stories
Step 1: Prepare Your Baking Tray (5 Minutes)
Start by lining a large baking sheet with parchment paper.
I usually use a standard rimmed baking sheet because it gives me plenty of room to spread the chocolate. You can also use a silicone baking mat if you have one.
Make sure the parchment lies flat. If the corners curl upward, add a small dab of melted chocolate underneath to hold the paper in place.
Set the tray aside while you prepare the toppings.
Step 2: Prepare the Toppings (5–7 Minutes)
Unwrap the candy canes and place them inside a sturdy zip-top bag.
Use a rolling pin or the flat side of a meat mallet to crush them into small pieces. You want a mixture of fine peppermint crumbs and slightly larger chunks.
Avoid crushing everything into powder. Those little candy pieces look especially pretty against the chocolate.
Next, chop your almonds or pecans, break the pretzels into smaller pieces, and measure out the candies and sprinkles.
Keep everything within reach.
I learned this little trick after once spending too much time searching for sprinkles while my chocolate started setting on the tray. Having everything ready makes the whole process much easier.
Step 3: Melt the Semi-Sweet Chocolate (2–3 Minutes)
Place the semi-sweet chocolate in a microwave-safe bowl.
Microwave it in 20–30-second intervals, stirring after each interval. Continue until the chocolate looks mostly melted.
Remove the bowl and stir until the remaining pieces disappear into the warm chocolate.
The mixture should look glossy and smooth.
Be careful not to overheat it. Chocolate can burn surprisingly quickly, especially around the edges of the bowl.
Alternative method: If you prefer using a double boiler, place the chocolate in a heatproof bowl over a saucepan containing gently simmering water. Make sure the bottom of the bowl doesn’t touch the water, and keep steam away from the chocolate.
Step 4: Spread the Dark Chocolate (3–4 Minutes)
Pour the melted semi-sweet chocolate onto your prepared baking sheet.
Use a silicone spatula or the back of a spoon to spread it into an even rectangle.
Aim for approximately ¼-inch thickness. You don’t need perfectly straight edges because the broken pieces will have a rustic look.
Try to keep the thickness fairly consistent so the bark sets evenly.
Allow this layer to sit for a few minutes while you melt the white chocolate. Don’t let it become completely firm if you want the layers to stick together.
Step 5: Melt the White Chocolate (2–3 Minutes)
Place the white chocolate in a clean, completely dry microwave-safe bowl.
Add the optional teaspoon of coconut oil if desired.
Microwave in 15–20-second intervals, stirring each time. White chocolate needs extra attention because it can scorch more easily than semi-sweet chocolate.
Stop heating when a few small pieces remain, then stir until smooth.
If the chocolate feels thick, give it a gentle stir rather than immediately adding more oil.
Step 6: Create the Festive Chocolate Swirls (3 Minutes)
Pour the melted white chocolate over the semi-sweet chocolate layer.
You can spread it gently with a spatula or leave some areas uncovered for a beautiful two-tone appearance.
For a marbled effect, use a toothpick or the tip of a butter knife to gently swirl the two chocolates together.
Don’t overmix them. A few simple swirls create a much prettier pattern than stirring everything into one color.
Peppermint Candy Cane Bark | Canadian Living
Step 7: Add the Christmas Toppings (3–5 Minutes)
Now comes my favorite part!
While the chocolate is still soft, sprinkle the crushed candy canes, red and green candies, chopped nuts, pretzels, and holiday sprinkles over the surface.
Distribute the toppings evenly so every piece gets a little something.
Gently press larger toppings into the chocolate with clean fingertips or the back of a spoon. This helps prevent them from falling off when you break the bark later.
For an especially pretty finish, save a few candy cane pieces and colorful sprinkles to scatter over the top at the end.
Step 8: Chill Until Firm (45–60 Minutes)
Carefully transfer the baking sheet to the refrigerator.
Let the bark chill for approximately 45–60 minutes, or until the chocolate feels completely firm.
You should be able to touch the surface gently without leaving a mark.
Avoid moving the tray around too much while the chocolate sets.
If your kitchen feels warm, give the bark a little extra chilling time.
Step 9: Break Into Pieces and Serve (5 Minutes)
Once the chocolate has completely hardened, remove the tray from the refrigerator.
Lift the parchment paper and transfer the bark to a clean cutting board.
Use your hands to break it into irregular pieces. You can also use a sharp knife to create more uniform squares.
I personally prefer the rustic pieces because they look homemade and festive.
Arrange your Christmas Bark on a serving platter, or place the pieces in small holiday gift boxes.
Christmas Chocolate Bark with Pretzels and Candy Canes – Piper Cooks
Your Christmas Bark is ready to enjoy!
Pro Tips & Tricks for Perfect Christmas Bark
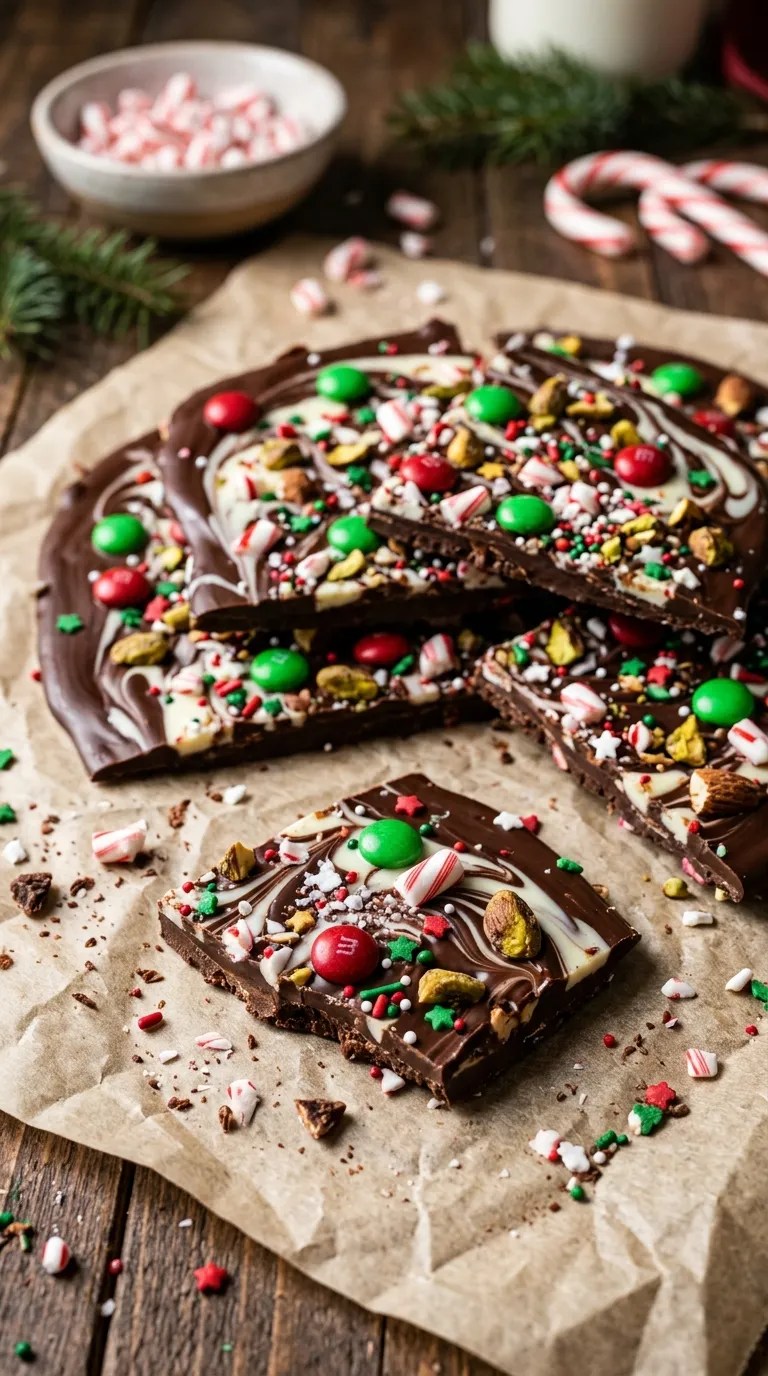
Even though this recipe is beginner-friendly, a few little tricks can help you get beautiful results every time.
1. Never Let Water Touch the Chocolate
This is probably the most important tip.
Even a tiny amount of water can cause melted chocolate to seize, turning it thick and grainy instead of smooth.
Make sure your bowls, spoons, spatulas, and other equipment are completely dry before you begin.
When using a double boiler, keep the simmering water and steam away from the chocolate.
2. Use Good-Quality Chocolate
Since chocolate provides most of the flavor, choose something you genuinely enjoy eating.
Chocolate chips work well for convenience, but chopped chocolate bars often melt more smoothly. If you use chocolate chips, check that they melt easily and stir them frequently.
For an especially smooth finish, choose chocolate labeled for melting or baking.
3. Don’t Wait Too Long Before Adding Toppings
This is an easy mistake to make.
If the chocolate starts setting before you add your candy canes and sprinkles, the toppings might not stick properly.
Prepare everything ahead of time, then decorate immediately after spreading the chocolate.
4. Avoid Refrigerating for Too Long
The refrigerator helps the chocolate set quickly, but you don’t need to leave the bark inside for hours.
Once it becomes firm, remove it and store it properly.
If you plan to serve it at room temperature, allow it to adjust gradually in a cool room. This can help reduce condensation on the chocolate.
5. Make It Ahead for Holiday Gifts
Christmas Bark is wonderful for preparing ahead of busy holiday gatherings.
You can make it several days before Christmas, break it into pieces, and store it in an airtight container.
For gifting, use small paper candy cups, clear treat bags, or festive metal tins. Add a ribbon and a simple homemade label for a thoughtful presentation.
Christmas Bark Variations & Substitutions
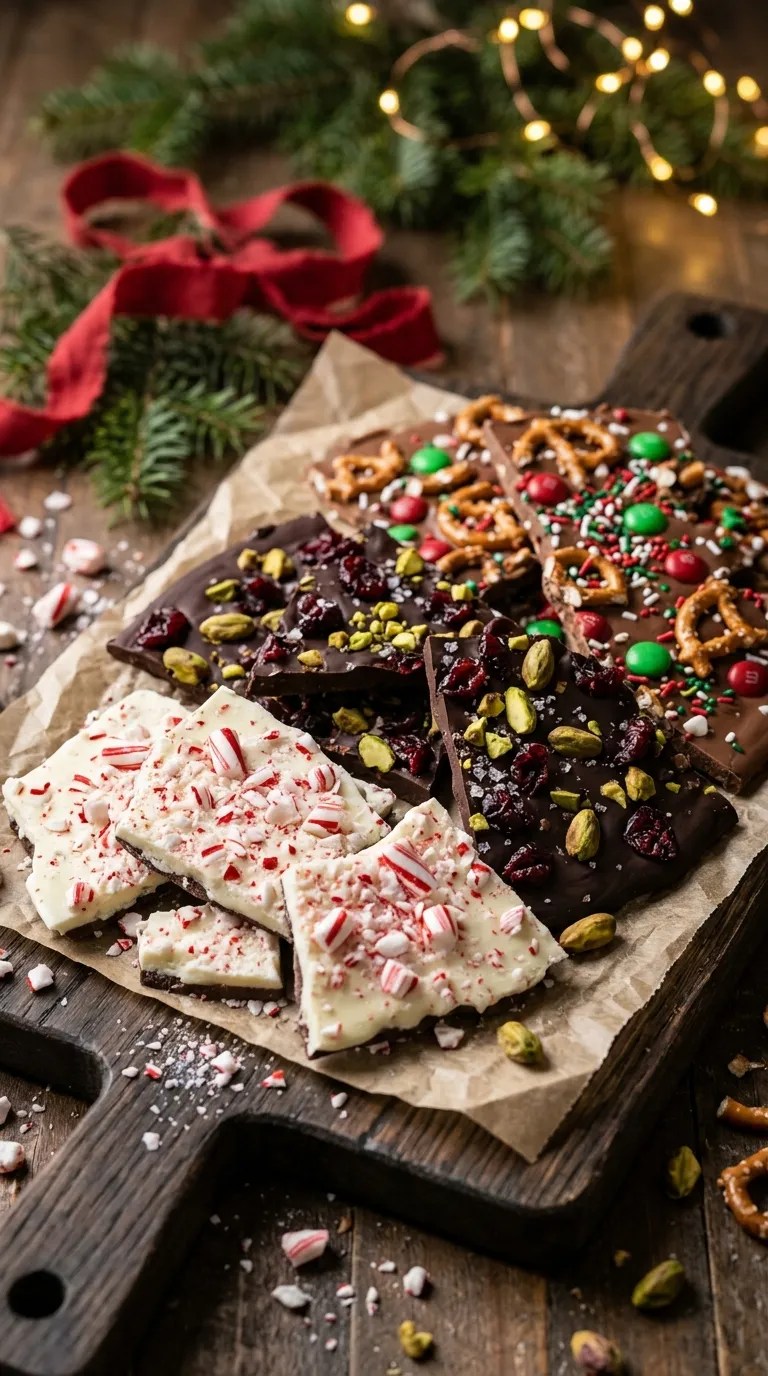
One of the best things about this recipe is how easily you can change it.
Once you understand the basic method, you can experiment with different chocolate combinations and toppings.
Here are a few of my favorite ideas.
“Festive Flavors of Christmas: Celebratory Dishes for the Perfect Holiday”
Dark Chocolate Peppermint Bark Recipe – Sunset Magazine
11
1. White Chocolate Peppermint Bark
If you love peppermint, this variation is a wonderful choice.
Replace the semi-sweet chocolate base with an additional 12 ounces of white chocolate, making a single-layer white chocolate bark.
Add ½ teaspoon of peppermint extract and ¼ cup crushed candy canes.
Stir the extract into the melted chocolate before spreading it onto the tray. Make sure you use a small amount of a suitable water-free extract or peppermint oil formulated for chocolate.
Sprinkle extra candy cane pieces over the top.
This version has a classic holiday candy-shop flavor and looks especially pretty with its red-and-white topping.
2. Dark Chocolate Cranberry Pistachio Bark
For something a little different, try combining dark chocolate with dried cranberries and pistachios.
Use 12 ounces of melted dark chocolate and top it with:
- ¼ cup dried cranberries
- ¼ cup chopped pistachios
- 2 tablespoons toasted coconut
- A small pinch of flaky sea salt
The dark chocolate balances the sweetness of the cranberries, while pistachios add a lovely green color.
This variation also makes a beautiful addition to holiday dessert platters.
3. Christmas Candy and Pretzel Bark
If you enjoy sweet-and-salty desserts, this one is worth trying.
Use milk chocolate or semi-sweet chocolate as your base. Add crushed pretzels, colorful candy-coated chocolates, mini marshmallows, and festive sprinkles.
The pretzels provide a satisfying crunch, while the candies make every piece look cheerful.
For this version, I like to keep the toppings slightly chunky rather than crushing everything into tiny pieces.
Making Christmas Bark Without Nuts
If you need a nut-free version, leave out the almonds and pecans.
Replace them with extra pretzels, toasted pumpkin seeds, crispy rice cereal, or additional candy pieces.
Always check the ingredient labels on your chocolate, candies, and sprinkles if you need to avoid cross-contact with nuts.
Serving Suggestions: How to Enjoy Christmas Bark

Christmas Bark tastes wonderful straight from the refrigerator, but you can serve it in several fun ways.
Serve It With Hot Chocolate
Arrange a few pieces of Christmas Bark beside mugs of warm hot chocolate.
The combination of rich chocolate and peppermint makes a lovely winter treat.
You can even place a small piece on the saucer alongside each mug when guests visit.
Add It to a Christmas Dessert Board
Create a festive dessert platter with Christmas Bark, gingerbread cookies, shortbread, chocolate truffles, marshmallows, and fresh strawberries.
Use small bowls for loose toppings and candies to make the board look fuller.
The different textures and colors make it an attractive centerpiece for holiday gatherings.
Package It as Homemade Christmas Gifts
Christmas Bark is one of my favorite homemade edible gift ideas because it looks lovely without requiring fancy decorating skills.
Place a few pieces inside a clear cellophane bag, tie the top with a red or green ribbon, and add a handwritten gift tag.
You can also arrange several varieties in a decorative holiday tin.
Just make sure the bark stays cool during storage and transport.
Serve It After Christmas Dinner
A small piece of Christmas Bark makes a lovely sweet bite after a festive meal.
Serve it with coffee, tea, or hot chocolate. You can also add a few pieces to a cookie platter when family and friends gather.
Because the bark contains rich chocolate and sweet toppings, small portions work perfectly.
Related Recipes:
- How to Make Butter Pecan Pie From Scratch
- Homemade Pecan Pie Brownie With a Gooey Topping
- Old Fashioned Pecan Pie Brownie
- Easy Pecan Pie Bars With Sugar Cookie Crust
FAQ’s
Here are answers to some common questions that can help you prepare, store, and serve your Christmas Bark successfully.
1. How Long Does Homemade Christmas Bark Last?
When stored in an airtight container in a cool, dry place, Christmas Bark generally keeps well for about 1–2 weeks.
If your kitchen feels warm, store it in the refrigerator instead.
Keep the pieces away from direct sunlight, heat, and moisture to maintain their texture and appearance.
2. Can I Make Christmas Bark Ahead of Time?
Absolutely!
Christmas Bark works wonderfully as a make-ahead holiday treat.
You can prepare it several days before a Christmas party or gift exchange. Once it sets completely, break it into pieces and store it in an airtight container.
I recommend adding a piece of parchment paper between layers to prevent the pieces from rubbing against each other.
3. Can I Freeze Christmas Bark?
Yes, you can freeze Christmas Bark.
Place the completely hardened pieces in a freezer-safe airtight container, separating the layers with parchment paper.
Freeze for up to 2 months for the best quality.
When you’re ready to enjoy it, transfer the container to the refrigerator and allow it to thaw gradually while still covered. This helps reduce condensation from forming directly on the chocolate.
4. Why Did My Melted Chocolate Become Thick and Grainy?
Chocolate can become thick and grainy if you overheat it or allow even a little moisture to enter the bowl.
To prevent this, use completely dry utensils and heat the chocolate in short intervals.
If the chocolate has seized because of moisture, it may not return to a suitable consistency for making bark. Starting with a fresh batch often gives you a better result.
5. Can I Use Chocolate Chips Instead of Chocolate Bars?
Yes!
Chocolate chips are convenient and work well for this recipe.
However, some chocolate chips contain ingredients that help them maintain their shape during baking, so they may not melt as smoothly as certain chocolate bars.
Stir frequently and heat gently for the best texture.
6. Do I Need to Refrigerate Christmas Bark?
Not necessarily.
If your home stays reasonably cool, you can store Christmas Bark in an airtight container in a cool, dry cupboard.
However, if your kitchen gets warm, refrigeration is a better option because chocolate can soften or melt at higher temperatures.
Keep refrigerated bark in a sealed container to protect it from moisture and unwanted refrigerator odors.
7. How Do I Break Christmas Bark Without Making a Mess?
First, make sure the chocolate has completely hardened.
Lift the parchment paper from the baking sheet and transfer the bark to a clean cutting board.
Break it into pieces with your hands or use a sharp knife to cut more controlled portions.
If the bark feels too hard to break comfortably, let it sit at room temperature for a few minutes before handling it.
8. Can I Make Christmas Bark Without White Chocolate?
Of course!
You can make the entire recipe with semi-sweet, milk, or dark chocolate.
You can also use different chocolate varieties in separate sections of the tray to create a beautiful assortment of colors and flavors.
The white chocolate adds visual contrast, but it isn’t essential to making delicious Christmas Bark.
Final Thought
Some holiday recipes require a long ingredient list, hours of preparation, and plenty of patience. Christmas Bark is a refreshing change.
With just a few ingredients, a baking sheet, and a little creativity, you can make something that looks beautiful and tastes wonderful.
What I love most about this Christmas Bark Recipe is that it leaves plenty of room for personal touches. You can use your favorite chocolate, experiment with different toppings, and create a version that your family looks forward to every December.
It’s also a lovely way to spend a little time in the kitchen with family. Let everyone choose their favorite toppings and decorate a section of the chocolate. The finished bark might not look perfectly uniform, but that’s part of the fun.
Whether you’re preparing a Christmas dessert platter, putting together homemade holiday gifts, or simply craving something sweet, this easy chocolate bark is always a welcome addition.
So grab your favorite chocolate, crush a few candy canes, and give this recipe a try!
I’d love to hear how your Christmas Bark turns out. Leave a comment and share which toppings you used. Did you stick with classic peppermint, or create your own festive combination?
Happy holidays, and enjoy every delicious bite!
Leave a Reply
You must be logged in to post a comment.