

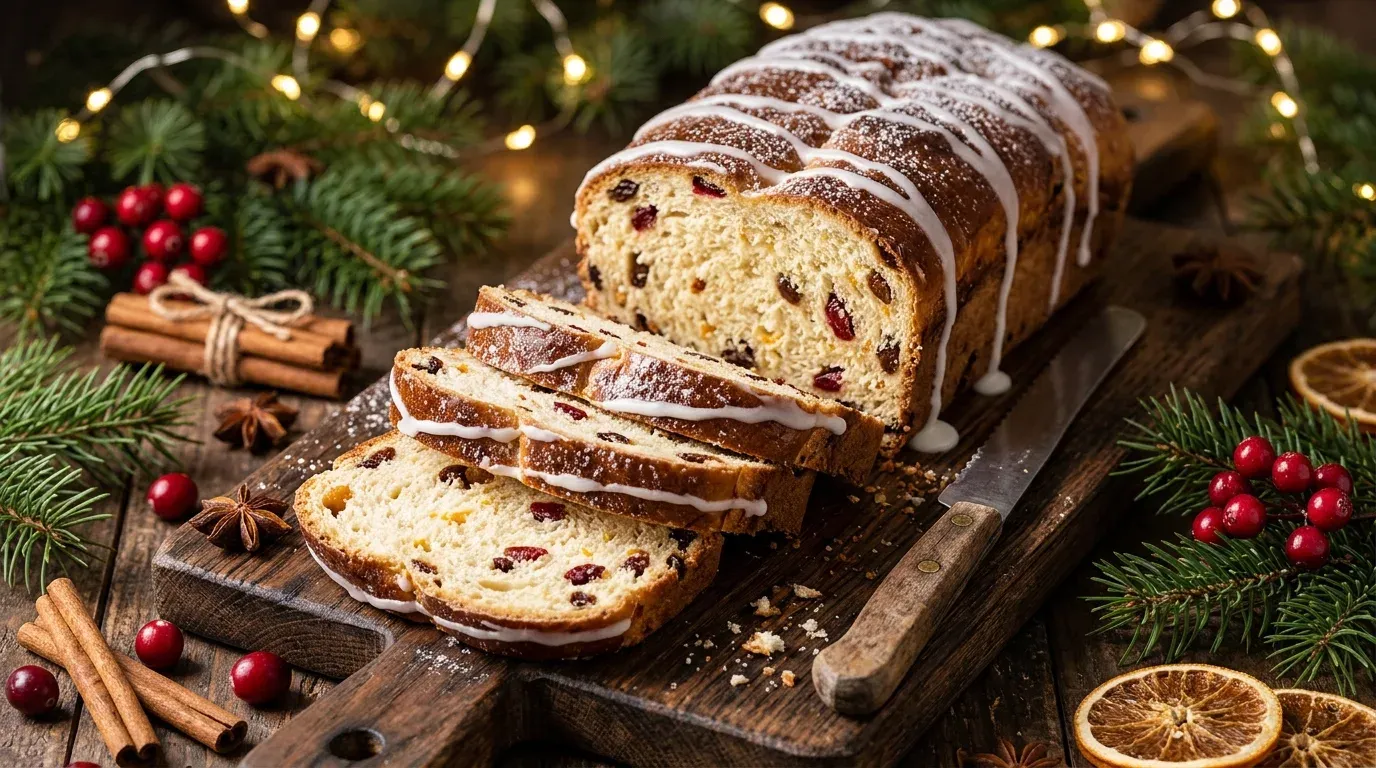
There is something special about the smell of freshly baked bread during the Christmas season. The moment cinnamon, butter, vanilla, and warm dough fill the kitchen, the whole house feels a little more festive.
I love making Christmas bread when the weather turns chilly and the holiday decorations start coming out. It is one of those recipes that makes an ordinary afternoon feel like a celebration. You can enjoy it with a cup of coffee, serve it at Christmas breakfast, or wrap a few slices for someone you love.
The best part? You don’t need fancy baking equipment or years of baking experience to make it.
This easy Christmas bread recipe creates a soft, fluffy, slightly sweet loaf filled with warm holiday spices, dried cranberries, and raisins. A simple vanilla glaze adds a pretty finishing touch and makes every slice feel like a little holiday treat.
I also love how forgiving this recipe feels. The first time I made a holiday loaf, I worried that I had added too many dried fruits. A few pieces even poked out of the dough! But after baking, those little fruity pockets became some of my favorite bites.
Since then, I’ve learned that the secret to a lovely Christmas bread is simple: give the dough enough time to rise, measure the flour carefully, and don’t rush the baking process.
Whether you’re preparing a festive family breakfast, planning a holiday brunch, or looking for a homemade Christmas gift, this bread deserves a place on your holiday table.
Why You’ll Love This Christmas Bread Recipe

There are plenty of reasons to add this Christmas bread to your holiday baking list.
- Simple ingredients: You probably already have many of the basic ingredients in your kitchen.
- Beautiful holiday flavors: Cinnamon, vanilla, cranberries, and raisins create a delicious seasonal combination.
- Soft and fluffy texture: The buttery dough produces a tender loaf with a lightly sweet flavor.
- Perfect for sharing: One loaf gives you plenty of slices for family, friends, and holiday guests.
- Easy to customize: Add nuts, orange zest, chocolate chips, or your favorite dried fruits.
Another thing I appreciate is how versatile this bread can be. Serve it fresh from the oven, toast a slice the next morning, or turn leftovers into delicious French toast.
You can even prepare the dough ahead of time and bake it fresh when you need it.
Ingredients
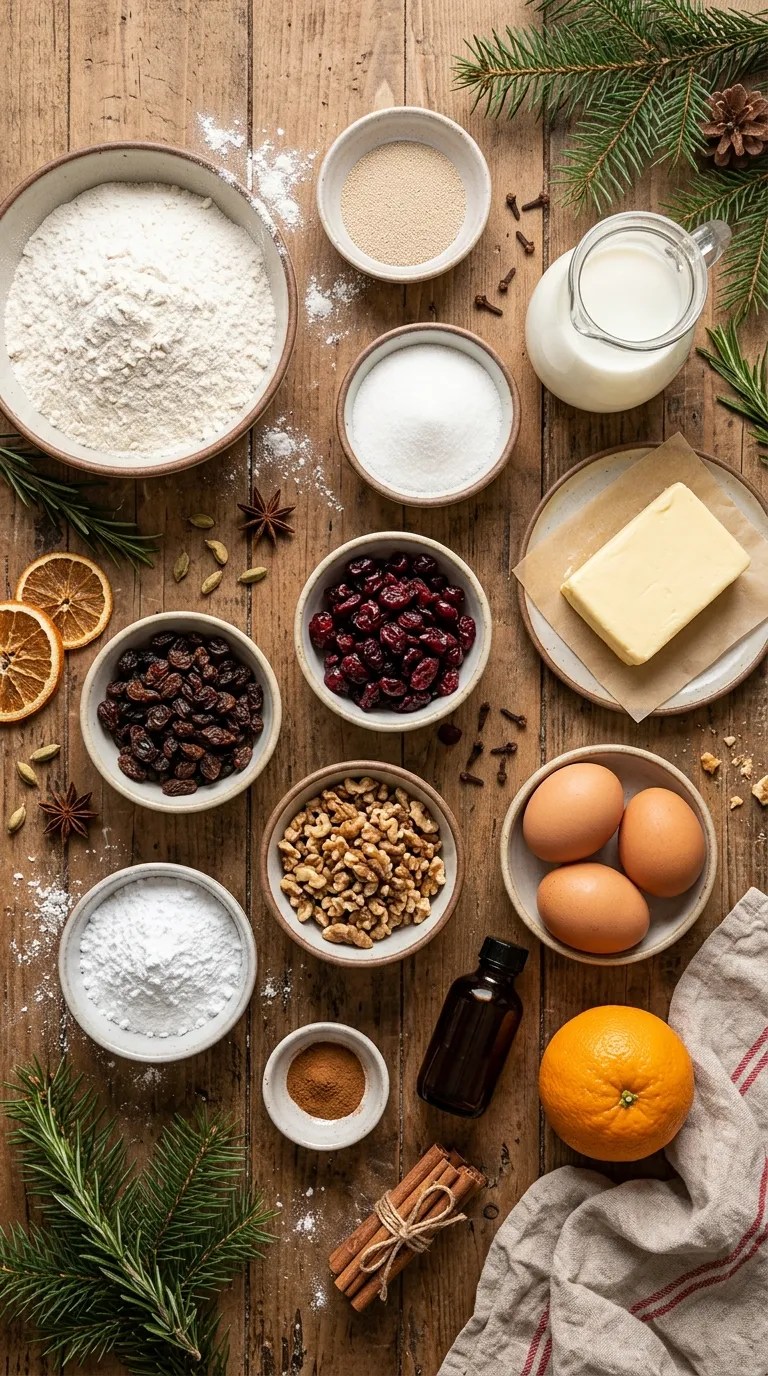
This recipe makes one large loaf, approximately 10–12 slices.
You’ll need everyday baking ingredients, plus a handful of festive additions that give the bread its Christmas flavor.
For the bread dough
- 3 cups (375 g) all-purpose flour, plus a little extra for kneading
- 2¼ teaspoons (7 g) active dry yeast
- ¾ cup (180 ml) warm milk
- ¼ cup (50 g) granulated sugar
- ¼ cup (56 g) unsalted butter, softened
- 1 large egg, at room temperature
- ½ teaspoon salt
- 1 teaspoon vanilla extract
- 1 teaspoon ground cinnamon
- ¼ teaspoon ground nutmeg
For the holiday fruit filling
- ½ cup (75 g) dried cranberries
- ⅓ cup (50 g) raisins
- ¼ cup (30 g) chopped walnuts or pecans
- 1 teaspoon finely grated orange zest
You can replace the cranberries with chopped dried cherries or additional raisins. If you don’t enjoy nuts, simply leave them out.
For the egg wash
- 1 large egg
- 1 tablespoon milk
For the vanilla glaze
- ¾ cup (90 g) powdered sugar
- 1–2 tablespoons milk
- ½ teaspoon vanilla extract
The glaze is optional, but I highly recommend it if you want your Christmas bread to look extra festive.
A few useful ingredient notes
Flour: Regular all-purpose flour works beautifully. You don’t need expensive bread flour for this recipe.
Milk: Whole milk gives the dough a lovely richness. You can also use 2% milk.
Yeast: Active dry yeast works well. Make sure you check the expiration date before starting.
Dried fruit: If your cranberries and raisins feel very dry, soak them in warm water for about 10 minutes. Drain them thoroughly and pat them dry before adding them to the dough.
Butter: Use unsalted butter so you can control the salt level in the recipe.
Step-by-Step Instructions for Homemade Christmas Bread
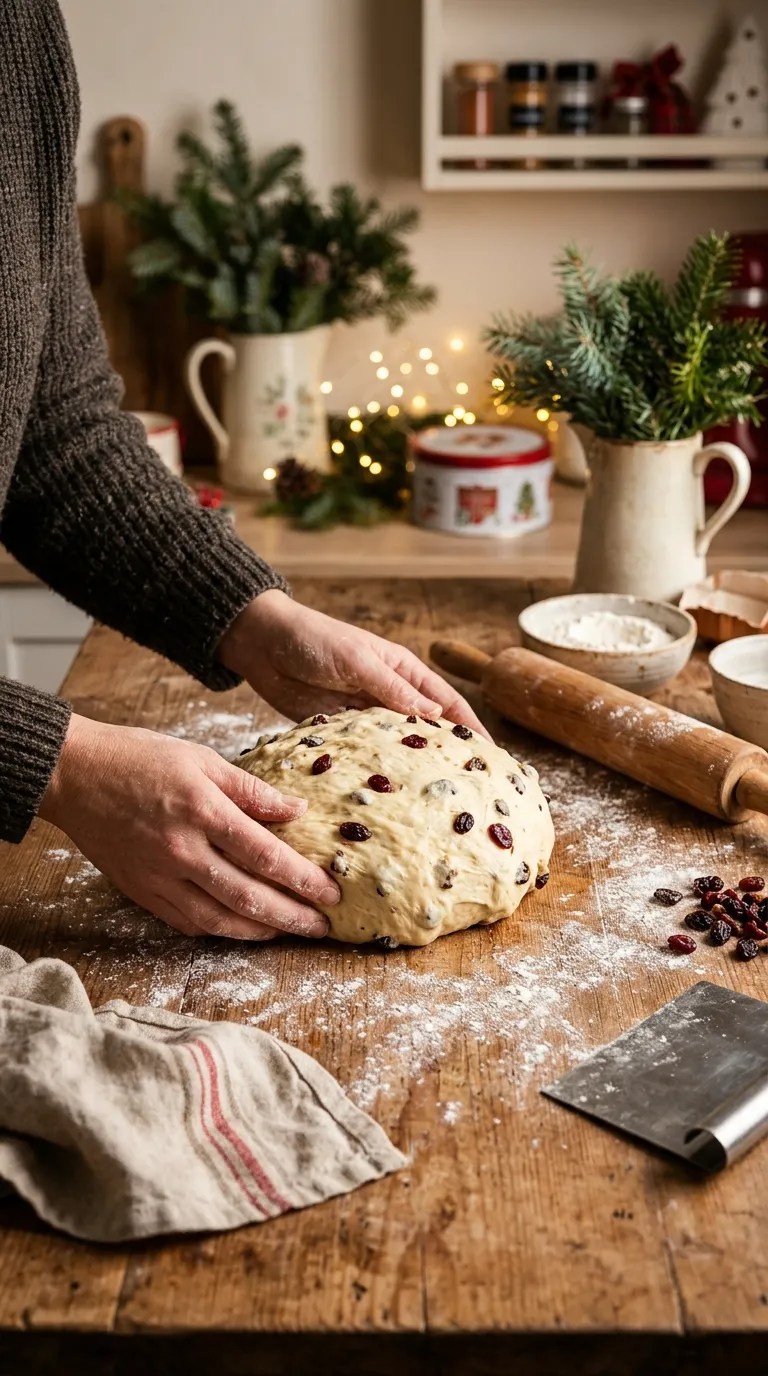
Don’t worry if you’ve never made homemade yeast bread before. I’ll walk you through each stage, including what the dough should look and feel like.
Step 1: Prepare the yeast (5–10 minutes)
Start by warming your milk.
The milk should feel comfortably warm when you touch it, not hot. Aim for approximately 105–110°F (40–43°C).
Pour the warm milk into a small bowl. Add the active dry yeast and one teaspoon of the measured sugar.
Give everything a gentle stir and let the mixture stand for 5–10 minutes.
You’ll know the yeast has activated when the surface looks foamy and bubbly.
If nothing happens, your milk may have been too hot or your yeast may have lost its freshness. Check the yeast before continuing.
Step 2: Mix the dough (5 minutes)
In a large mixing bowl, combine the flour, remaining sugar, salt, cinnamon, and nutmeg.
Add the softened butter, egg, vanilla extract, and activated yeast mixture.
Mix everything with a wooden spoon or the dough hook attachment of a stand mixer.
At first, the dough may look rough and slightly sticky. That’s completely normal.
Keep mixing until the ingredients come together into a soft dough.
If you’re using a stand mixer, a KitchenAid mixer with a dough hook makes this step especially convenient.
Step 3: Knead until smooth (8–10 minutes)
Transfer the dough to a lightly floured countertop.
Knead it for approximately 8–10 minutes.
To knead by hand, push the dough away from you with the heel of your hand, fold it back toward yourself, turn it slightly, and repeat.
The dough should gradually become smoother, softer, and more elastic.
If you prefer using a stand mixer, knead with the dough hook on low to medium-low speed for approximately 6–8 minutes.
Avoid adding too much extra flour. A slightly tacky dough usually produces softer bread than a dry, stiff dough.
Step 4: Add the dried fruit and nuts (3–4 minutes)
Once the dough feels smooth and elastic, flatten it gently into a thick rectangle.
Scatter the dried cranberries, raisins, chopped walnuts, and orange zest over the surface.
Fold the dough over the filling and knead gently until the fruit spreads throughout.
You don’t need to knead aggressively here. Just work enough to distribute the ingredients.
Some fruit may try to escape while you knead. Simply tuck it back inside.
Step 5: Let the dough rise (60–90 minutes)
Place the dough in a lightly greased bowl.
Turn it once so the surface gets a little oil or butter.
Cover the bowl with a clean kitchen towel or plastic wrap.
Leave it in a warm, draft-free place for approximately 60–90 minutes.
The dough should roughly double in size.
I usually place my bowl somewhere warm in the kitchen rather than near a direct heat source.
Don’t rush this step. If your kitchen feels cool, the dough may need additional time.
Step 6: Shape the bread (5–10 minutes)
Once the dough has doubled, gently press it to release some of the larger air pockets.
Transfer it to a lightly floured surface.
Shape the dough into a loaf by flattening it into a rectangle, folding the sides inward, and rolling it into a neat log.
Pinch the seam underneath to help keep the loaf together.
Place the shaped dough into a greased 9 × 5-inch loaf pan.
If you prefer a more decorative holiday bread, you can divide the dough into three equal portions, roll them into long ropes, and braid them together instead.
Step 7: Allow the second rise (30–45 minutes)
Cover the shaped dough loosely with a clean towel.
Let it rise again for approximately 30–45 minutes.
The dough should look puffy and rise noticeably above its original size.
Meanwhile, preheat your oven to 350°F (175°C).
This second rise helps create a lighter, softer loaf.
Step 8: Brush with egg wash (2 minutes)
Whisk one egg with one tablespoon of milk in a small bowl.
Gently brush the mixture over the top of the loaf.
The egg wash helps create a beautiful golden-brown crust.
If you want extra decoration, sprinkle a few additional dried cranberries or chopped nuts over the top.
Step 9: Bake the Christmas bread (30–40 minutes)
Place the loaf in your preheated oven.
Bake for approximately 30–40 minutes, depending on your oven and the shape of your loaf.
The top should turn a lovely golden brown, and the bread should smell wonderfully buttery and fragrant.
If the top browns too quickly, loosely cover it with aluminum foil during the final part of baking.
For the most reliable result, check the center with an instant-read thermometer. Sweet yeast bread should reach approximately 190°F (88°C) in the middle.
Remove the loaf from the oven and let it rest in the pan for about 10 minutes.
Then transfer it to a wire cooling rack.
Step 10: Prepare the vanilla glaze (3 minutes)
While the bread cools, prepare the glaze.
Add the powdered sugar and vanilla extract to a small bowl.
Gradually stir in the milk until you get a smooth, pourable consistency.
If the glaze looks too thick, add a little more milk.
If it becomes too runny, mix in a little extra powdered sugar.
Wait until the bread cools before drizzling the glaze over the top. Otherwise, the warmth will make it melt and run off the loaf.
Step 11: Slice and enjoy!
Once the glaze sets, slice your Christmas bread with a sharp serrated bread knife.
The inside should look soft and fluffy, with little pockets of cranberries and raisins throughout.
Serve the slices at room temperature or warm them slightly before serving.
And don’t forget to save a slice for the next morning. It tastes wonderful with coffee or tea!
Pro Tips & Tricks
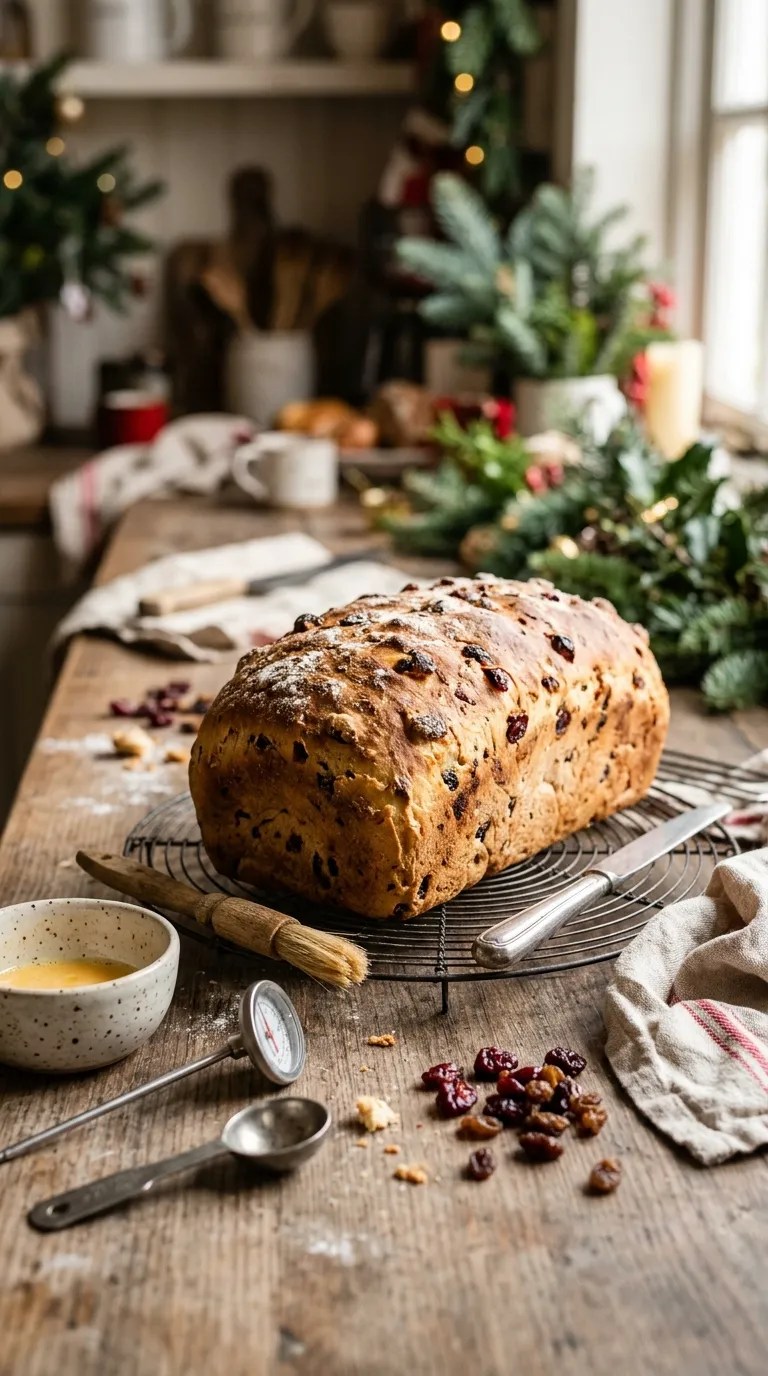
A few small details can make a big difference when baking homemade bread.
Here are the tips I’ve found most helpful.
1. Don’t use milk that’s too hot
This is one of the easiest mistakes to make.
Hot milk can damage the yeast and prevent the dough from rising properly.
Use a kitchen thermometer if you’re unsure. Aim for approximately 105–110°F when activating active dry yeast.
2. Avoid adding too much flour
When dough feels sticky, it’s tempting to keep adding flour until it stops sticking to your hands.
Try not to do that.
A slightly tacky dough often produces a softer loaf. Add flour gradually, only when the dough becomes difficult to handle.
3. Give the dough enough time to rise
Rising time depends on your kitchen temperature, the yeast, and the dough itself.
Instead of following the clock blindly, look for visual changes.
The dough should approximately double during the first rise and become noticeably puffy during the second rise.
4. Soak very dry fruit before baking
Dried cranberries and raisins can absorb moisture from the dough.
If yours feel particularly dry, soak them in warm water for 10 minutes.
Drain them well and pat them dry before mixing them into the dough.
This little step helps keep the fruit pleasantly soft.
5. Let the bread cool before glazing
I know it’s tempting to drizzle the icing over a warm loaf.
However, waiting gives you a much prettier finish.
Let the bread cool completely before adding the glaze. This helps the icing stay on top instead of disappearing into the crust.
6. Use a kitchen thermometer when possible
Ovens don’t always bake at the temperature shown on their displays.
An oven thermometer can help you identify temperature differences, while an instant-read thermometer lets you check the center of the bread.
These two tools can save you from underbaked or overly dry loaves.
Variations and Substitutions
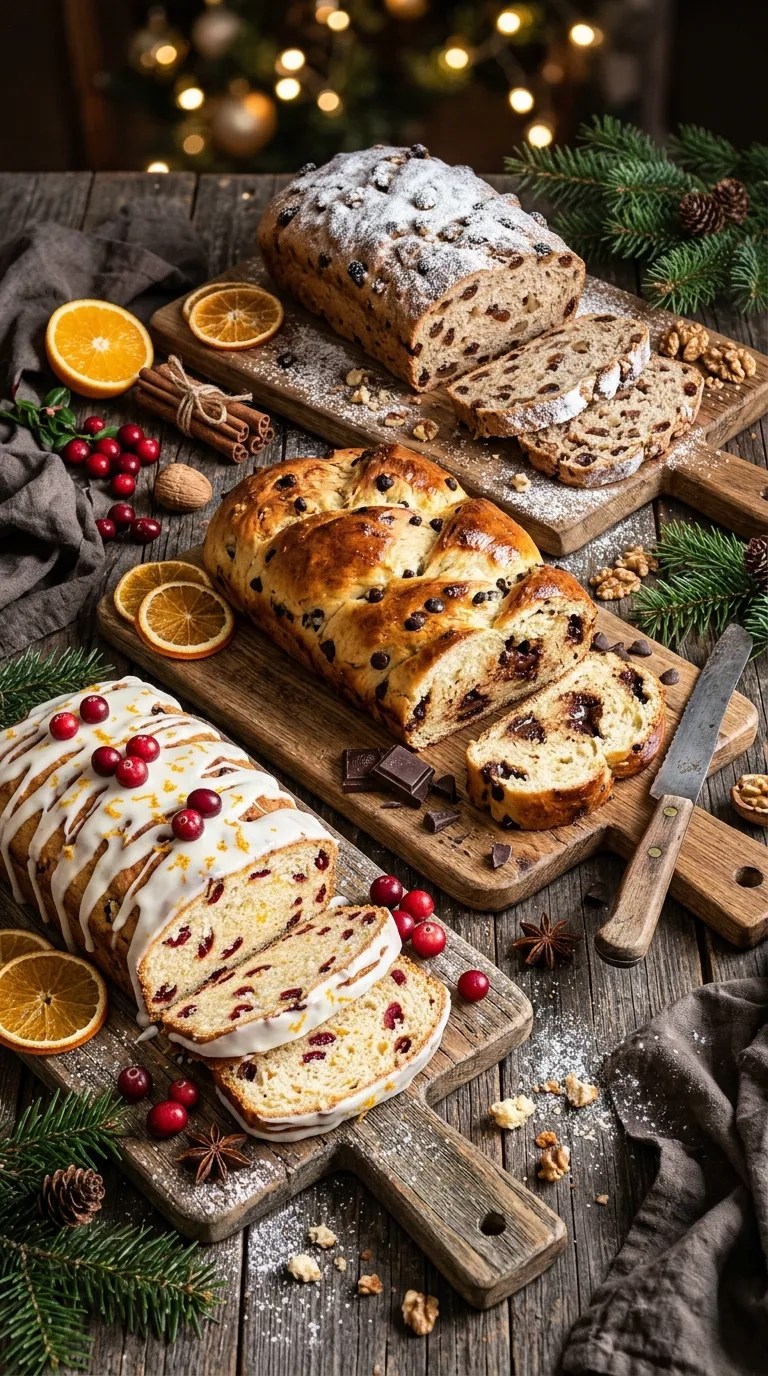
One of my favorite things about homemade Christmas bread is how easily you can change the flavors.
Once you understand the basic dough, you can create several delicious versions.
Orange Cranberry Christmas Bread
If you enjoy bright citrus flavors, try making an orange cranberry version.
Increase the orange zest to two teaspoons and replace the raisins with additional dried cranberries.
You can also add one tablespoon of fresh orange juice to the glaze.
The citrus adds a refreshing flavor that works beautifully with the buttery dough.
Chocolate Chip Christmas Bread
For a sweeter loaf, replace the dried fruit with ½ cup of chocolate chips.
Semi-sweet chocolate chips work especially well because they balance the sweetness of the dough.
You can keep the cinnamon and vanilla or reduce the spices slightly for a more chocolate-forward flavor.
This version is especially popular with children and anyone who enjoys a sweeter breakfast treat.
Nut-Free Christmas Bread
If someone at your table avoids nuts, simply leave out the walnuts or pecans.
The bread will still taste delicious with cranberries, raisins, cinnamon, and orange zest.
You can replace the nuts with an additional ¼ cup of dried fruit if you like.
Dairy-Free Option
You can make a dairy-free variation by replacing the regular milk with an unsweetened plant-based alternative and using a suitable dairy-free butter substitute.
Choose a neutral-flavored milk alternative, such as oat or soy milk.
For the glaze, use plant-based milk instead of regular milk.
Check the labels on your yeast, chocolate, and other packaged ingredients to ensure they meet your dietary requirements.
Gluten-Free Option
For a gluten-free version, use a gluten-free bread flour blend specifically formulated for yeast baking.
Keep in mind that gluten-free dough behaves differently from regular wheat dough. You may need to adjust the liquid according to the flour manufacturer’s instructions.
Choose a blend that includes a suitable binder, such as xanthan gum, if the product requires one.
Don’t expect the dough to feel or knead exactly like traditional bread dough.
Serving Suggestions

Freshly baked Christmas bread tastes wonderful on its own, but a few simple additions can make it feel even more special.
Here are some of my favorite ways to serve it.
For Christmas breakfast: Serve thick slices with scrambled eggs, fresh fruit, yogurt, and coffee. The slightly sweet bread creates a lovely balance with savory breakfast foods.
With butter: Spread a little softened butter over a warm slice. It melts into the bread and makes every bite extra comforting.
With cream cheese: A thin layer of cream cheese pairs beautifully with the cranberries and cinnamon.
For afternoon tea: Arrange sliced Christmas bread on a serving plate with tea, coffee, or hot chocolate.
As a holiday dessert: Serve a slice with whipped cream or a scoop of vanilla ice cream. A little orange zest on top makes it look especially pretty.
For a Christmas brunch: Place the whole glazed loaf on a wooden serving board and surround it with fresh cranberries, orange slices, and a few cinnamon sticks.
You can also cut leftover bread into cubes and use it to prepare a festive bread pudding.
A lovely homemade Christmas gift
This bread makes a thoughtful homemade gift.
Allow the loaf to cool completely, then wrap it in parchment paper or food-safe packaging.
Add a festive ribbon and a small handwritten label with the baking date and storage instructions.
If you’re gifting it, I recommend keeping the glaze in mind. Let it set fully before wrapping so it doesn’t stick to the packaging.
Homemade food gifts have a special charm, especially during the holiday season.
Related Recipes:
- Christmas Cake Recipe – Festive & Easy Dessert
- Easy Christmas Cookie Recipe
- Christmas Treat Recipe – Easy Holiday Sweet
- Christmas Simmer Pot Recipe
FAQ’s
Can I make Christmas bread the day before Christmas?
Absolutely!
You can bake the loaf one day ahead and store it in an airtight container at room temperature once it cools completely.
For the freshest appearance, prepare the glaze separately and drizzle it over the loaf shortly before serving.
You can also prepare the dough the night before. After shaping it, cover the loaf pan and refrigerate it overnight.
The next morning, allow the dough to sit at room temperature until it looks properly puffy before baking. The exact time depends on how cold the dough becomes in the refrigerator.
How should I store homemade Christmas bread?
Store completely cooled Christmas bread in an airtight container or tightly wrapped at room temperature for approximately 2–3 days.
Keep it away from direct sunlight and heat.
If you want to keep it longer, freeze the bread rather than leaving it at room temperature for several additional days.
Avoid refrigerating the loaf unless necessary, as refrigeration can make homemade bread lose its soft texture more quickly.
Can I freeze Christmas bread?
Yes! Christmas bread freezes beautifully.
Allow the loaf to cool completely before freezing.
You can freeze it whole or cut it into individual slices.
Wrap the bread tightly in plastic wrap, then place it in a freezer-safe bag or container.
For the best quality, enjoy it within approximately 2–3 months.
Thaw the bread at room temperature while keeping it wrapped to help retain moisture.
For a prettier finish, freeze the bread without glaze and add fresh icing after thawing.
How do I reheat Christmas bread?
For a quick serving, place a slice in the microwave for approximately 10–15 seconds.
Check the temperature and add a few more seconds if needed.
You can also warm slices in a toaster oven at a low temperature until they’re just heated through.
If you enjoy slightly crisp edges, lightly toast a slice and spread a little butter over it.
Avoid overheating the bread because it can become dry.
Why didn’t my Christmas bread rise?
Several things can prevent yeast dough from rising properly.
The most common reasons include:
- Expired or inactive yeast.
- Milk that was too hot.
- A kitchen that’s too cold.
- Not giving the dough enough time.
- Adding too much flour and creating a stiff dough.
Always check your yeast before mixing the dough.
Also remember that rising time is an estimate. In a cool kitchen, your dough may need longer than the recipe suggests.
Can I make Christmas bread without a stand mixer?
Definitely!
A stand mixer makes kneading easier, but you can make this recipe entirely by hand.
Use a large mixing bowl, a wooden spoon, and a clean countertop.
Mix the ingredients until they form a dough, then knead by hand for approximately 8–10 minutes.
It takes a little effort, but the results are just as delicious.
Can I use instant yeast instead of active dry yeast?
Yes.
You can replace the active dry yeast with the same amount of instant yeast.
Mix instant yeast directly into the flour rather than activating it separately in warm milk.
Then add the remaining ingredients and prepare the dough as directed.
Your rising times may vary, so watch the dough rather than relying only on the clock.
How do I know when Christmas bread is fully baked?
The top should look golden brown, and the loaf should feel firm rather than doughy.
For a more reliable check, insert an instant-read thermometer into the center of the loaf.
Look for an internal temperature of approximately 190°F (88°C).
If the outside browns before the center finishes baking, loosely cover the loaf with foil and continue baking.
Can I make Christmas bread without dried fruit?
Of course!
You can leave out the cranberries and raisins or replace them with chocolate chips, chopped dates, or other dried fruit.
If you prefer plain sweet bread, keep the cinnamon, nutmeg, and vanilla for a lovely holiday flavor.
You can also add a little extra orange zest for fragrance.
Final thought
Some recipes become holiday favorites because they taste wonderful. Others become favorites because of the memories we create while making them.
For me, this Christmas bread brings both together.
There’s something comforting about mixing the dough, watching it rise, and waiting for that first warm, buttery smell to fill the kitchen. Even if the loaf doesn’t come out looking perfectly shaped, it still feels special when you slice into it and see all those colorful cranberries and raisins.
Don’t worry about making it look like something from a professional bakery. Homemade bread has its own charm, and a little imperfection makes it even more inviting.
If you’re trying this recipe for the first time, take your time with the rising process, avoid adding too much flour, and let the loaf cool before glazing.
Most importantly, enjoy the experience.
Make it for Christmas morning, share it with family, or bake an extra loaf for a neighbor. However you serve it, I hope this easy Christmas bread recipe brings a little extra warmth and happiness to your holiday season.
Happy baking, and Merry Christmas! 🎄
Leave a Reply
You must be logged in to post a comment.