

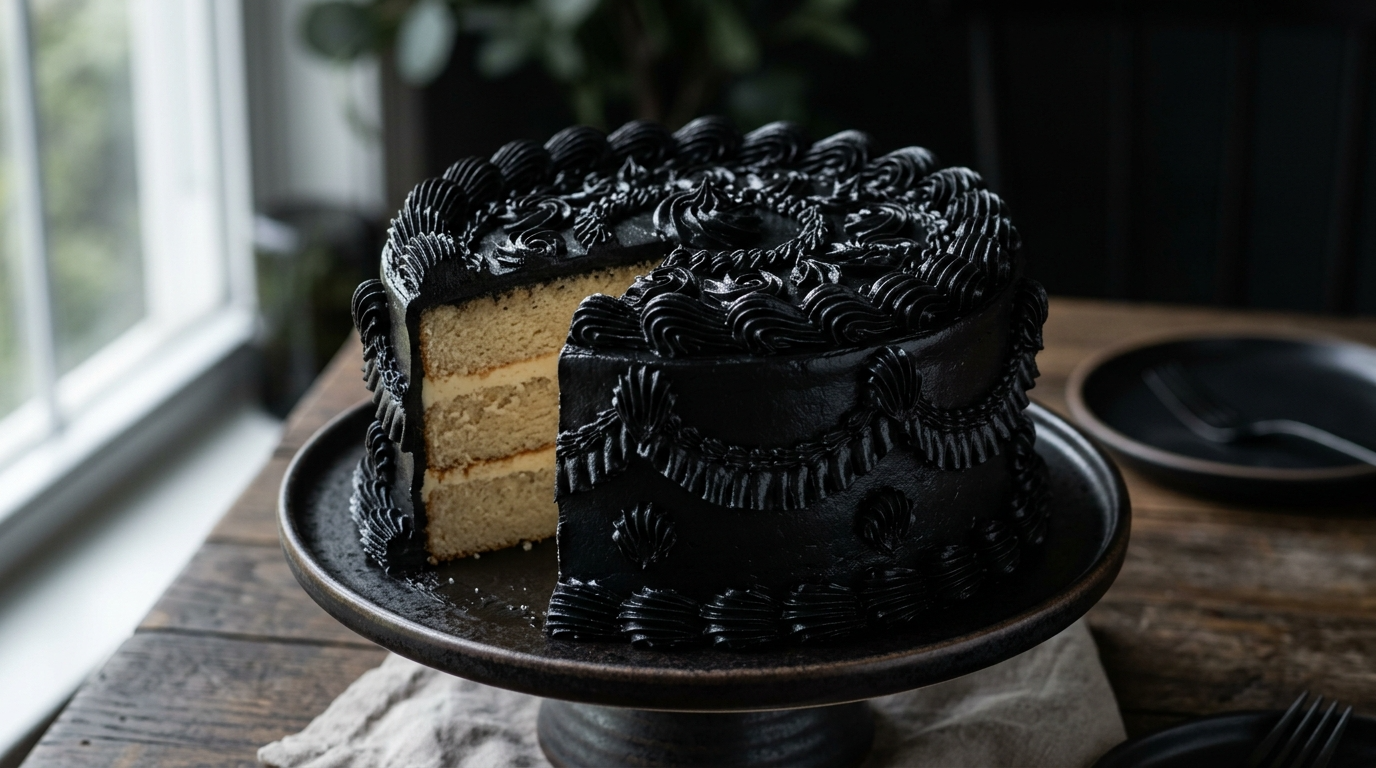
I have made more batches of cream cheese frosting than I can count, and getting a deep black frosting always seemed harder than it should be. I could get gray, charcoal, or a suspiciously dark purple, but true black? That was another story.
Then I learned a little trick that changed everything: black gel food coloring works much better when you give the frosting time to develop its color. I used to keep adding more coloring because the frosting looked gray right after mixing. That usually left me with an overly colored, slightly bitter frosting. Now I mix it, let it rest, and watch the color deepen.
This black cream cheese frosting has that lovely tangy cream cheese flavor, a smooth texture, and a rich black color that looks amazing on cupcakes, cakes, cookies, and Halloween desserts. It also takes just a few minutes to whip together.
And yes, your spoon will probably look like it belongs in a tiny witch’s kitchen. That’s part of the fun.
Why You’ll Love This Recipe

- Deep black color: Black gel food coloring creates a much richer color than ordinary liquid coloring.
- Creamy and tangy: Cream cheese keeps the frosting from tasting like straight powdered sugar.
- Easy to make: You only need a handful of ingredients and basic kitchen equipment.
- Perfect for decorating: The frosting holds its shape well enough for piping swirls, borders, rosettes, and simple decorations.
- Great for Halloween: It makes cakes and cupcakes look instantly dramatic without complicated decorating skills.
- Make-ahead friendly: You can prepare it ahead and keep it refrigerated until you’re ready to decorate.
Ingredients

You don’t need anything fancy here. The quality of your cream cheese and butter makes a noticeable difference, though.
For the Frosting
- 8 ounces full-fat cream cheese, softened to room temperature
- 1/2 cup unsalted butter, softened to room temperature
- 4 cups powdered sugar, sifted
- 1 teaspoon pure vanilla extract
- 1/4 teaspoon fine salt
- 1 1/2 to 2 tablespoons black gel food coloring
- 1–2 tablespoons heavy cream or milk, only if needed for consistency
A Few Ingredient Notes
Use block-style cream cheese, not the spreadable kind that comes in a tub. Tub cream cheese contains more moisture, which can make your frosting softer than you want.
I prefer unsalted butter because it lets me control the salt. If you only have salted butter, reduce or skip the added salt.
For the black color, use a concentrated black gel food coloring. Wilton, AmeriColor, and similar gel colors work well. You don’t need to use a whole bottle.
Powdered sugar can contain little lumps, so I recommend sifting it. It takes an extra minute and gives you noticeably smoother frosting.
Step-by-Step Instructions

1. Bring the Butter and Cream Cheese to Room Temperature
Take the cream cheese and butter out of the refrigerator about 30–60 minutes before mixing.
You want both ingredients soft enough to blend easily but not melted or greasy.
Here’s my little test: press your finger gently into the butter. It should leave an impression without collapsing completely.
Cold cream cheese creates little lumps, while overly warm cream cheese can make the frosting loose. Room temperature is the sweet spot.
2. Beat the Butter
Add the softened butter to a large mixing bowl.
Using a hand mixer or stand mixer fitted with the paddle attachment, beat the butter on medium speed for about 1–2 minutes.
It should look smooth and creamy.
I like doing this before adding the cream cheese because it creates a fluffy base and helps prevent stubborn butter lumps.
3. Add the Cream Cheese
Add the softened cream cheese to the butter.
Beat on medium speed for about 30–60 seconds, just until the mixture looks smooth.
Don’t keep beating it for several minutes. That’s one mistake I made when I first started making cream cheese frosting.
Too much mixing can make cream cheese frosting softer and harder to pipe.
4. Add the Powdered Sugar
Turn the mixer to low speed and gradually add the sifted powdered sugar.
I usually add it about 1 cup at a time.
Keep the mixer on low while adding the sugar unless you want your kitchen covered in a very convincing white snowstorm.
Once the sugar disappears into the mixture, increase the speed to medium and beat for about 1–2 minutes.
5. Add Vanilla and Salt
Add the vanilla extract and salt.
Mix for about 20–30 seconds.
The vanilla rounds out the sweetness, while the small amount of salt helps keep the frosting from tasting flat.
6. Add the Black Gel Food Coloring
Now comes the fun part.
Add about 1 tablespoon of black gel food coloring and mix on low speed until incorporated.
Scrape down the sides of the bowl, then mix again.
Add more coloring gradually until you reach the shade you want.
Don’t panic if the frosting looks dark gray instead of black.
Let it rest for 20–30 minutes.
The color usually deepens as the gel coloring develops. If you need an extremely dark black, let it sit for an hour or even refrigerate it for a while.
This little resting period saves you from adding way too much coloring.
7. Check the Texture
Your frosting should be thick, creamy, and spreadable.
If you’re spreading it over a cake, you can keep it slightly softer.
If you’re piping cupcakes, you want it firm enough to hold ridges.
If the frosting feels too thick, add 1 teaspoon of heavy cream or milk at a time and mix briefly.
If it feels too soft, add a little more powdered sugar.
8. Pipe or Spread
Transfer the frosting into a piping bag fitted with your favorite decorating tip.
For cupcakes, a large star tip creates beautiful swirls.
For cakes, spread the frosting with an offset spatula and smooth the surface.
Try not to overwork the frosting once you’ve achieved the right texture.
Pro Tips & Tricks
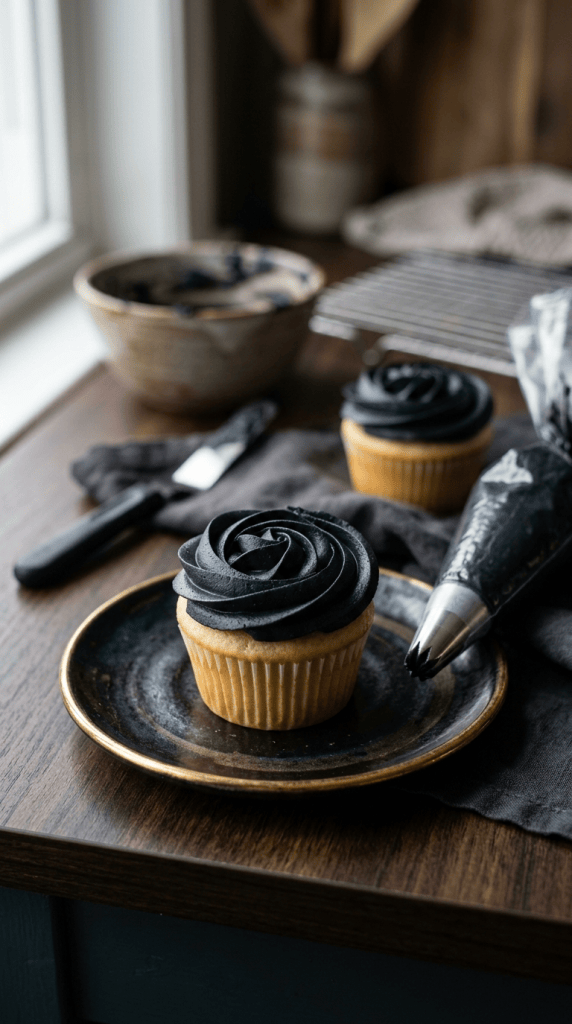
Give the Black Color Time to Develop
This is probably the most important trick.
Freshly mixed black frosting often looks grayish. The color becomes much deeper after sitting.
I used to keep adding gel coloring every time the frosting looked too light. That was my mistake.
Mix first, wait, then decide whether you actually need more color.
Use Gel Instead of Liquid Food Coloring
Liquid coloring can thin your frosting, especially when you need enough to create a very dark shade.
Gel coloring provides much more pigment without adding as much liquid.
Don’t Overbeat Cream Cheese
Cream cheese behaves differently from buttercream.
Long mixing can make it softer and sometimes a little runny.
Once everything looks smooth, stop mixing.
Chill Soft Frosting
If your kitchen is warm and your frosting feels too soft, place the bowl in the refrigerator for 15–20 minutes.
Give it a quick stir afterward.
This often works better than dumping in lots of extra powdered sugar.
Expect Some Color Transfer
Very dark frosting can stain your lips, teeth, and fingers slightly, especially when you use a generous amount of black coloring.
For parties, I usually tell guests with a grin, “The frosting is black. The evidence is temporary.”
Variations & Substitutions

Chocolate Black Cream Cheese Frosting
For an even richer flavor, replace about 1/3 cup of the powdered sugar with unsweetened cocoa powder.
Dutch-process cocoa works especially well because it gives the frosting a darker chocolate base.
You may need a little extra powdered sugar to reach your preferred consistency.
Oreo-Style Black Frosting
Add 1/2 cup finely crushed chocolate sandwich cookies to the finished frosting.
This gives you a cookies-and-cream flavor with little crunchy chocolate pieces throughout.
For smoother piping, crush the cookies very finely.
Dairy-Free Version
Use dairy-free block-style cream cheese and a plant-based butter that works well for frosting.
Check the labels of your powdered sugar and food coloring if you need the entire recipe to remain dairy-free.
The texture can vary between brands, so add the powdered sugar gradually and adjust as needed.
Serving Suggestions

This black cream cheese frosting looks especially good against lighter cakes and cupcakes.
Try it with:
- Vanilla cupcakes
- Chocolate cupcakes
- Red velvet cake
- Carrot cake
- Chocolate layer cake
- Sugar cookies
- Brownies
- Halloween cupcakes
- Black-and-white birthday cakes
- Chocolate sandwich cookies
For Halloween, pipe black swirls onto orange or white cupcakes and add a few Halloween sprinkles.
For a birthday cake, use the frosting between chocolate cake layers and decorate the top with chocolate curls.
For cookies, spread a thin layer of frosting over cooled sugar cookies and finish with sprinkles.
I also love pairing this frosting with a simple vanilla cake. The contrast between the pale cake and dramatic black frosting looks much more complicated than it actually is.
FAQ’s
How do I make cream cheese frosting black?
Use concentrated black gel food coloring and add it gradually. After mixing, let the frosting sit for 20–30 minutes because the color usually becomes darker as it develops.
If you want a very deep black, you can also start with a chocolate-based frosting before adding black coloring.
Why is my black frosting gray?
Freshly colored frosting often looks gray or charcoal rather than completely black.
Give it some time before adding more coloring. After 20–30 minutes, check the color again.
If it still looks too light, add a small amount of black gel coloring and mix again.
Can I make black cream cheese frosting ahead of time?
Yes.
Store the finished frosting in an airtight container in the refrigerator for up to about 3–4 days.
Before decorating, let it soften slightly at room temperature and mix it briefly to restore a smooth consistency.
Can I freeze black cream cheese frosting?
Yes. Place the frosting in a freezer-safe airtight container and freeze it for up to about 1 month for the best quality.
Thaw it in the refrigerator overnight, then let it sit at room temperature briefly before mixing.
Give it a short whip with your mixer if the texture needs refreshing.
Can I use liquid food coloring instead of gel?
You can, but I don’t recommend it when you want a deep black color.
You would usually need much more liquid coloring to reach the same intensity, and that extra liquid can make the frosting softer.
Gel coloring gives you much stronger color with less liquid.
Why is my cream cheese frosting too runny?
The most common reasons include overly warm ingredients, overmixing, or adding too much liquid.
Start by refrigerating the frosting for 15–20 minutes.
If it still feels too soft, gradually add powdered sugar until you reach a pipeable consistency.
Final Thoughts
After making this frosting many times, I’ve learned that the biggest secret isn’t dumping half a bottle of black food coloring into the bowl. It’s patience.
Make the frosting, add the gel gradually, let the color develop, and adjust the texture at the end. Those few extra minutes make a surprisingly big difference.
Whether you’re decorating spooky Halloween cupcakes, a dramatic birthday cake, or simply want a frosting that makes everyone ask, “How did you get it THAT black?” this recipe is a fun one to keep in your back pocket.
So grab your mixer, put on an apron you don’t mind getting a little colorful, and give it a try. And if your first batch comes out charcoal instead of jet black, don’t panic. Let it rest before reaching for more coloring. That little trick has saved me more than once.
If you make it, I’d love to hear how you used it — especially if you turn it into something wonderfully spooky.
Leave a Reply
You must be logged in to post a comment.