

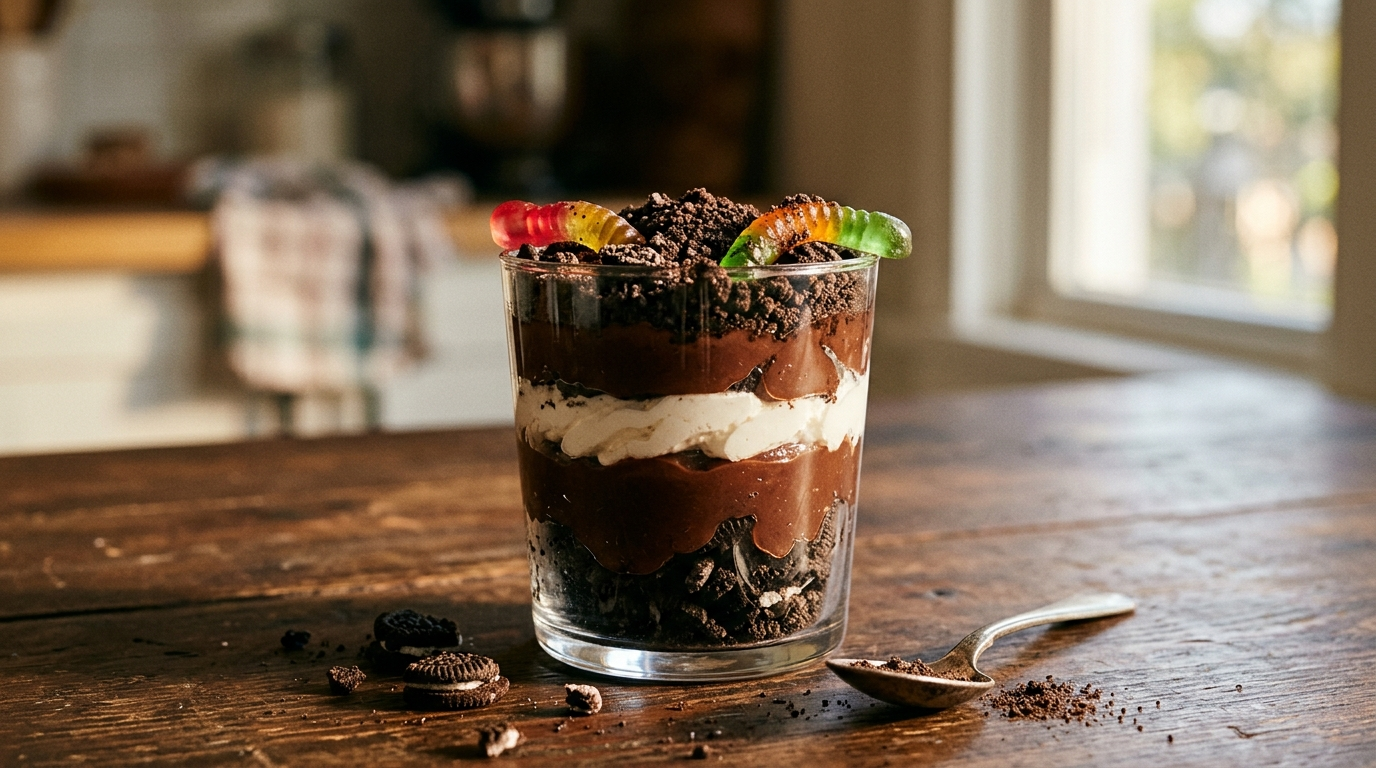
I made these chocolate pudding dirt cups on a rainy afternoon when I wanted a dessert that felt fun without turning the kitchen upside down. I had a box of chocolate cookies, some instant pudding, and a little leftover whipped topping in the fridge. That was enough.
The kids immediately wanted to help, which meant crushed cookies ended up on the counter, the pudding spoon somehow disappeared, and I probably made more of a mess than necessary. But once I layered everything into little cups, the kitchen chaos suddenly felt worth it.
The best part? Everyone loved digging their spoons through the chocolate “dirt” to find the creamy pudding underneath.
I’ve made this easy dirt cup dessert with chocolate pudding many times since then. I keep coming back to it because it takes very little effort, looks adorable on a dessert table, and works just as well for a family treat as it does for a birthday party.
You don’t need baking skills or fancy equipment. A few simple ingredients and about 20 minutes of hands-on work will give you a dessert that looks like you spent much longer making it.
Why You’ll Love This Recipe

- No oven required. You only need a bowl, a whisk, and something to crush the cookies.
- Quick to assemble. The pudding comes together in minutes, and the layers do the rest of the work.
- Kid-friendly and party-ready. Little cups make individual servings easy to grab and decorate.
- Budget-friendly. Simple pantry and refrigerator ingredients keep the cost reasonable.
- Easy to customize. Change the toppings, switch the cookies, or add gummy worms for a classic garden look.
Ingredients
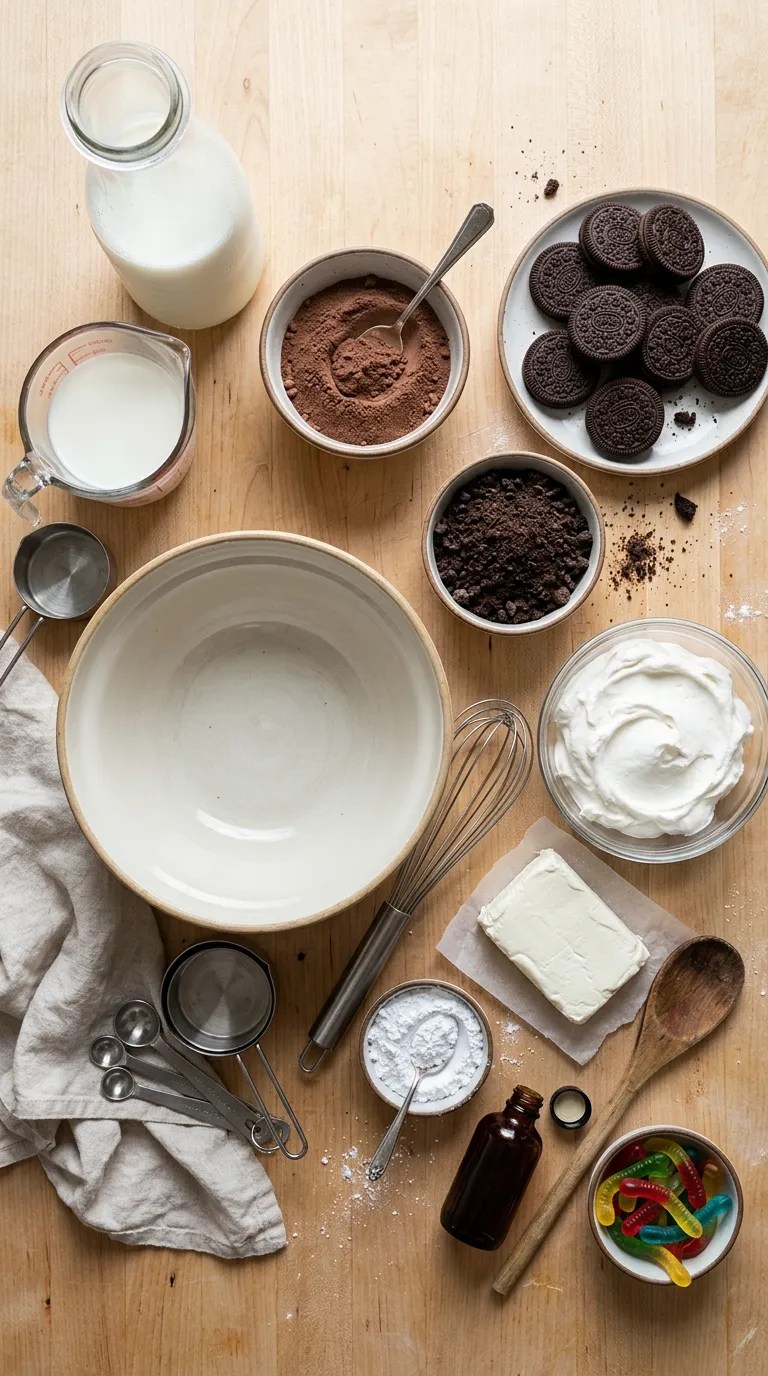
This recipe makes about 8 individual dirt cups, depending on the size of your serving cups.
For the Chocolate Pudding
- 1 package (3.9 ounces) instant chocolate pudding mix
- 2 cups cold whole milk
- 1 teaspoon vanilla extract, optional
For the Cookie “Dirt”
- 20 chocolate sandwich cookies, such as Oreo cookies, about 7 ounces
- 2 tablespoons unsalted butter, melted, optional
For the Creamy Layer
- 8 ounces cream cheese, softened
- 1/3 cup powdered sugar
- 1 teaspoon vanilla extract
- 1 cup whipped topping, thawed
For Decorating
- 1 cup additional whipped topping
- 8 gummy worms, optional
- Chocolate sprinkles, optional
- Chocolate chips or chocolate curls, optional
- Small mint leaves, optional, if you want a little “garden” look
A Few Easy Ingredient Swaps
You can use chocolate wafer cookies instead of chocolate sandwich cookies. If you prefer a sweeter, softer dirt layer, sandwich cookies work especially well because the cream filling adds a little extra sweetness.
You can also use homemade whipped cream instead of prepared whipped topping. Just make sure it holds its shape well enough for layering.
For the milk, whole milk gives the pudding a richer texture, but 2% milk works too. I wouldn’t choose skim milk if you want the creamiest result.
Step-by-Step Instructions
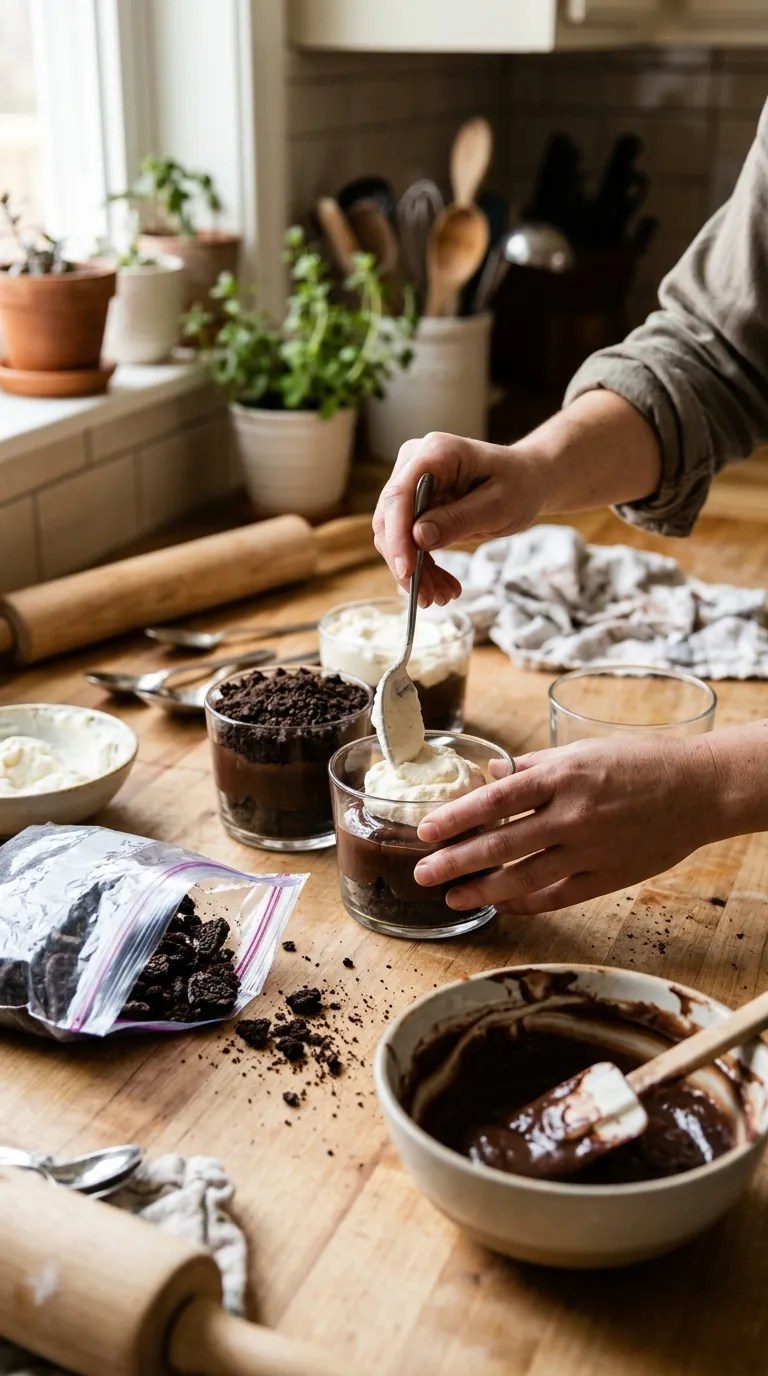
1. Make the Chocolate Pudding — 5 Minutes
Pour the cold milk into a medium mixing bowl. Add the instant chocolate pudding mix.
Whisk for about 2 minutes, or according to the pudding package directions, until the mixture thickens.
Add the vanilla extract if you’re using it and whisk briefly to combine.
Let the pudding sit for another 2 to 3 minutes. It should look thick and creamy rather than runny.
Kitchen cue: When you drag your whisk through the pudding, the line should remain visible for a moment before slowly disappearing.
Set the pudding aside while you prepare the other layers.
2. Crush the Cookies — 3 to 5 Minutes
Place the chocolate sandwich cookies in a sturdy zip-top bag and seal it well.
Use a rolling pin, the bottom of a measuring cup, or another heavy kitchen tool to crush the cookies.
You want a mixture of fine crumbs and a few slightly larger pieces. Don’t turn every cookie into powder.
That little bit of texture makes the finished dessert more convincing and gives every spoonful a pleasant crunch.
If you have a food processor, you can pulse the cookies several times instead. I usually use the zip-top bag because I don’t feel like washing another appliance afterward.
3. Make the Cream Cheese Mixture — 5 Minutes
Place the softened cream cheese in a mixing bowl.
Beat it with a hand mixer for about 1 to 2 minutes, until smooth.
Add the powdered sugar and vanilla. Beat again until the mixture looks creamy and has no obvious lumps.
Fold in 1 cup of whipped topping using a rubber spatula.
Fold gently rather than stirring aggressively. You want the mixture to stay light and fluffy.
Beginner tip: If your cream cheese still feels cold and firm, let it sit at room temperature for a little longer before mixing. Cold cream cheese can leave stubborn lumps.
4. Start Building the Dirt Cups — 5 Minutes
Set out eight small clear cups, dessert glasses, or small plastic serving cups.
Add a spoonful of crushed cookies to the bottom of each cup.
You don’t need a perfectly even layer. Just cover the bottom.
Next, spoon or pipe in a layer of the chocolate pudding.
Add another layer of the cream cheese mixture.
Then repeat the cookie crumbs and pudding until you reach near the top of the cup.
I like to finish with a generous layer of cookie crumbs because it creates the “dirt” effect that makes these desserts so much fun.
5. Add the Decorations — 2 Minutes
Top each cup with a small spoonful of whipped topping if you like.
Then add your decorations.
For the classic version, tuck a gummy worm partly into the cookie crumbs so it looks like it’s crawling through the dirt.
For a birthday party, add colorful sprinkles.
For a more grown-up dessert table, skip the gummy worms and use chocolate curls, chocolate shavings, or a small mint leaf instead.
6. Chill Before Serving — At Least 30 Minutes
Cover the cups loosely with plastic wrap and refrigerate them for at least 30 minutes.
You can serve them immediately if you’re in a hurry, but I prefer to chill them. The cookie crumbs soften slightly against the pudding, while the layers become easier to eat together.
For the best texture, serve the dirt cups within a few hours of assembling them.
Pro Tips & Tricks
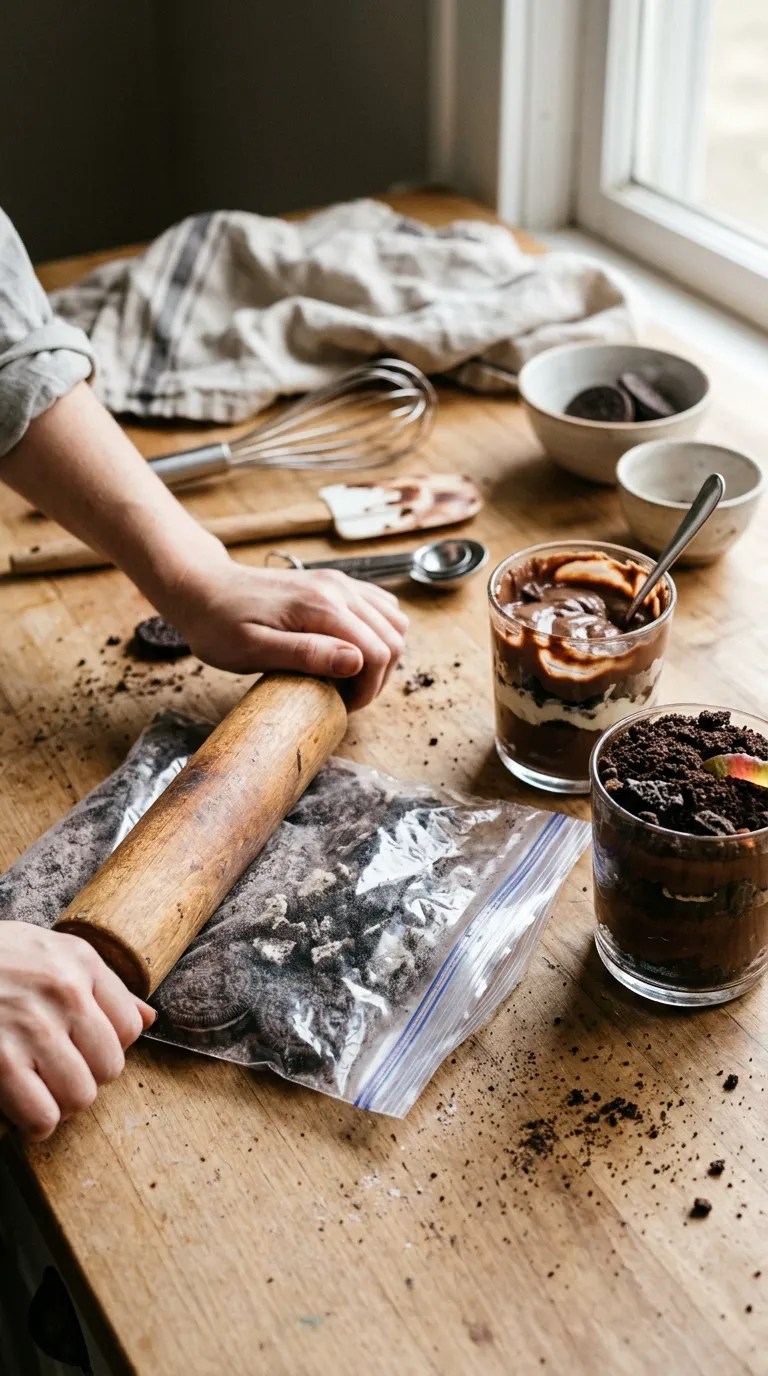
Crush the Cookies to Different Sizes
This small detail makes a noticeable difference.
If you pulverize the cookies completely, the topping can become dense and slightly pasty after it sits against the pudding.
Keep some crumbs fine and leave a few tiny chunks. The texture feels much more like loose cookie “dirt.”
Don’t Add the Cookie Layers Too Early
If you assemble the cups several hours before serving, the cookies will soften.
That isn’t necessarily bad. In fact, some people prefer softer dirt cups.
But if you want the strongest cookie crunch, prepare the pudding and cream mixture ahead of time, then assemble the cups closer to serving.
Soften the Cream Cheese Properly
Soft cream cheese blends much more smoothly than refrigerated cream cheese.
Leave it on the counter for roughly 30 minutes before mixing. Don’t try to rush the process by overheating it, because melted cream cheese can change the texture of the filling.
Use Clear Cups
Clear cups aren’t required, but they show off the layers beautifully.
Small 5- to 8-ounce cups work particularly well. You can use disposable cups for a children’s party or small glass dessert dishes for a dinner gathering.
Don’t Overfill the Cups
Leave a little space at the top for crumbs and decorations.
Overfilled cups look messy and become difficult to carry, especially when you’re serving them at a party.
Make Them the Night Before? Yes, With One Adjustment
You can prepare the pudding and cream cheese mixture the day before and keep both covered in the refrigerator.
For the freshest cookie texture, crush the cookies and assemble the cups the day you plan to serve them.
If you don’t mind softer cookie crumbs, you can assemble the entire dessert the night before. The flavors will meld nicely, and the cups will still look great.
Variations & Substitutions

Peanut Butter Chocolate Dirt Cups
For a peanut butter twist, add 1/3 cup creamy peanut butter to the softened cream cheese before mixing in the powdered sugar.
The chocolate pudding and peanut butter create a classic combination without requiring any complicated changes to the recipe.
If you’re serving this at a party, check your ingredients and clearly label the dessert for anyone with food allergies.
Mint Chocolate Dirt Cups
Add 1/4 teaspoon peppermint extract to the cream cheese mixture.
Start small because peppermint extract can quickly overpower the chocolate.
Finish the cups with chocolate cookie crumbs and a small mint leaf for a simple chocolate-mint presentation.
Gluten-Free Dirt Cups
Use certified gluten-free chocolate sandwich cookies and make sure the pudding mix and other packaged ingredients meet your dietary needs.
Ingredient formulas can vary between brands, so check each package rather than assuming every chocolate cookie or pudding mix has the same ingredients.
Serving Suggestions

Dirt cups make an especially good dessert for birthday parties, Halloween gatherings, school celebrations, picnics, movie nights, and casual family dinners.
For a garden-party theme, decorate them with gummy worms and small candy flowers.
For Halloween, use gummy worms, candy pumpkins, or cookie crumbs shaped into little “graveyard” scenes.
For a birthday party, place each cup on a tray and let guests choose their own toppings.
If you’re serving them after dinner, pair the cups with coffee, cold milk, or a simple glass of iced tea.
You can also make a larger family-style version in a glass trifle dish. Layer the cookies, pudding, and cream mixture in the same order, then scoop portions into bowls when you’re ready to serve.
Related Recipes:
- Easy Thanksgiving Dessert Ideas for a Crowd
- Classic Thanksgiving Dessert Recipes for Fall
- Easy Holiday Desserts for Every Celebration
- Easy Crockpot Desserts for Family Gatherings
FAQ’s
Can I make dirt cups ahead of time?
Yes. You can prepare the pudding and cream cheese mixture up to a day ahead and refrigerate them separately.
For the best cookie texture, assemble the cups a few hours before serving. If you don’t mind softer crumbs, you can assemble the entire dessert the night before.
How long do chocolate pudding dirt cups last in the refrigerator?
Keep them covered and refrigerated, and aim to eat them within 2 to 3 days.
The pudding and cream layers can remain pleasant for a couple of days, but the cookie crumbs will gradually soften.
Can I use homemade chocolate pudding?
Absolutely.
Homemade pudding can give the dessert a richer chocolate flavor. Just cool it completely and let it thicken before assembling the cups.
Don’t layer hot pudding into the dessert because it can melt or loosen the creamy layer.
Can I use whipped cream instead of whipped topping?
Yes.
Use freshly whipped cream if you prefer it. Make sure you whip it to firm peaks so it can support the layers.
Keep in mind that homemade whipped cream can lose volume sooner than prepared whipped topping, so I recommend assembling the dessert closer to serving time.
Can I freeze dirt cups?
I don’t recommend freezing fully assembled dirt cups.
The pudding and cream layers can change texture after freezing and thawing, while the cookies can become unpleasantly soft.
If you need to prepare components in advance, make the pudding and cream mixture ahead, refrigerate them, and assemble the dessert later.
Why did my pudding turn out too runny?
The most common culprit is not giving instant pudding enough time to thicken or using a different amount of milk than the package recommends.
Measure the milk carefully and whisk the pudding according to the package directions.
If the pudding still seems loose, refrigerate it for a little longer before assembling the cups.
Final Thought
There’s something wonderfully silly about serving a dessert called a dirt cup. It looks like a little garden project, but underneath those chocolate cookie crumbs sits a creamy combination of pudding and sweet cream cheese.
That’s exactly why I keep this recipe around.
It doesn’t require perfect decorating skills, expensive ingredients, or a free afternoon. You can make it when you need a quick party dessert, when the kids want to help in the kitchen, or when you simply want something chocolatey without turning on the oven.
And don’t worry if your first cups don’t have perfectly straight layers. Mine certainly don’t. A few uneven cookie crumbs and a slightly lopsided gummy worm somehow make them look even more homemade.
Grab a spoon, dig through that chocolate “dirt,” and enjoy.
If you make these easy dirt cups with chocolate pudding, try your own favorite toppings and see which version becomes your family’s favorite.
Leave a Reply
You must be logged in to post a comment.