

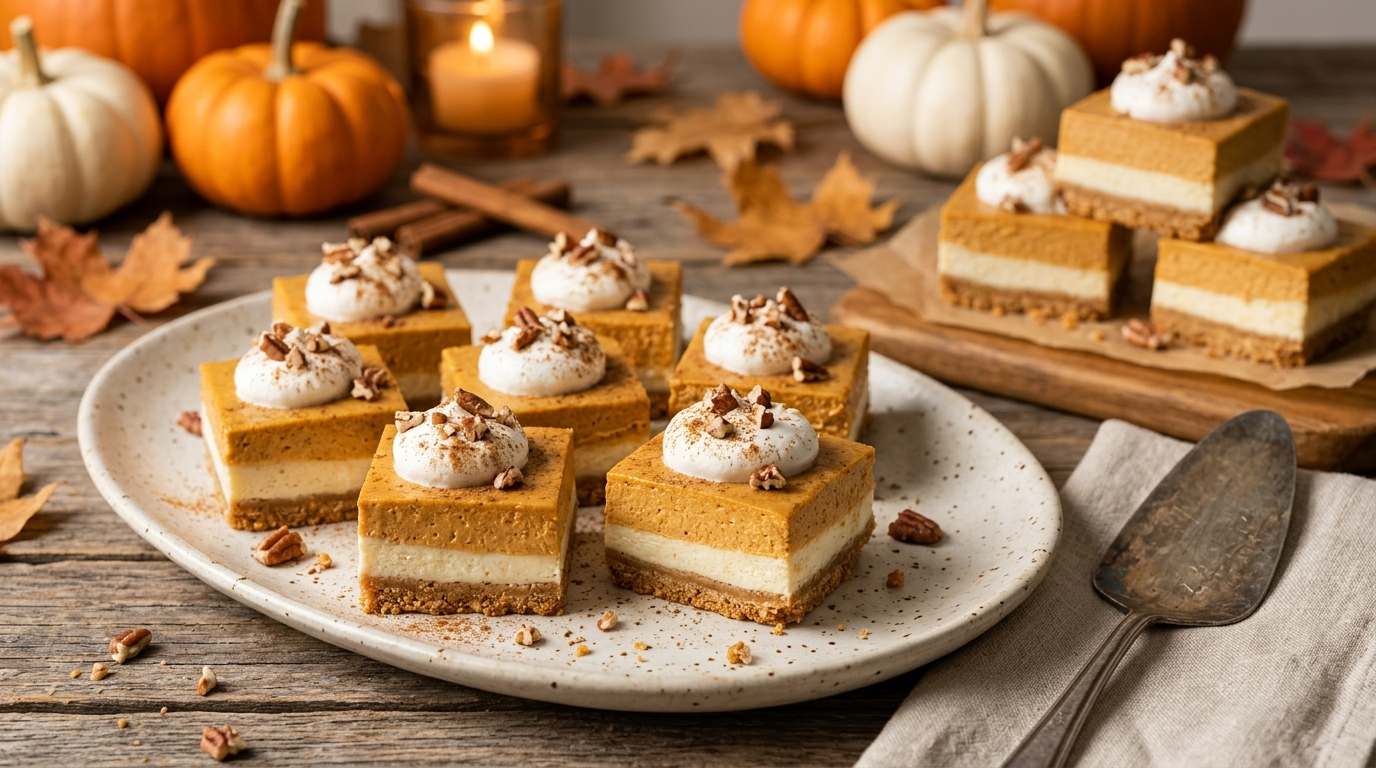
Every Thanksgiving, I seem to underestimate how much food I need. I’ll have the turkey planned, the mashed potatoes ready, and enough rolls to feed a small army—and then someone casually asks, “What are we having for dessert?”
That’s how these easy Thanksgiving dessert bars became a regular in my kitchen.
I wanted something that felt festive without requiring another pie crust, another complicated filling, or hours of oven space. These no-bake pumpkin cheesecake bars checked every box. They taste like Thanksgiving, look pretty on a platter, and I can make them the day before when the kitchen is still relatively calm.
The first time I made them, I rushed the chilling step and tried to cut them too soon. Big mistake. The bars tasted delicious, but my slices looked more like pumpkin cheesecake rubble than neat squares.
Once I gave them enough time to set, everything changed. The crust stayed together, the cheesecake layer sliced cleanly, and the pumpkin topping had just enough firmness to hold its shape.
Now I make them ahead, chill them overnight, and cut them shortly before guests arrive. It’s one less thing competing for oven space on Thanksgiving Day.
Why You’ll Love This Recipe

- No oven required: That matters when the turkey and side dishes already have the oven booked.
- Great for a crowd: One 9×13-inch pan gives you plenty of small dessert squares.
- Make-ahead friendly: The bars actually benefit from several hours in the refrigerator.
- Classic Thanksgiving flavors: Pumpkin, cinnamon, nutmeg, brown sugar, and cheesecake belong together.
- Easy to serve: Cut them into small squares and let everyone grab one without needing a fork and plate for a full slice of pie.
Ingredients
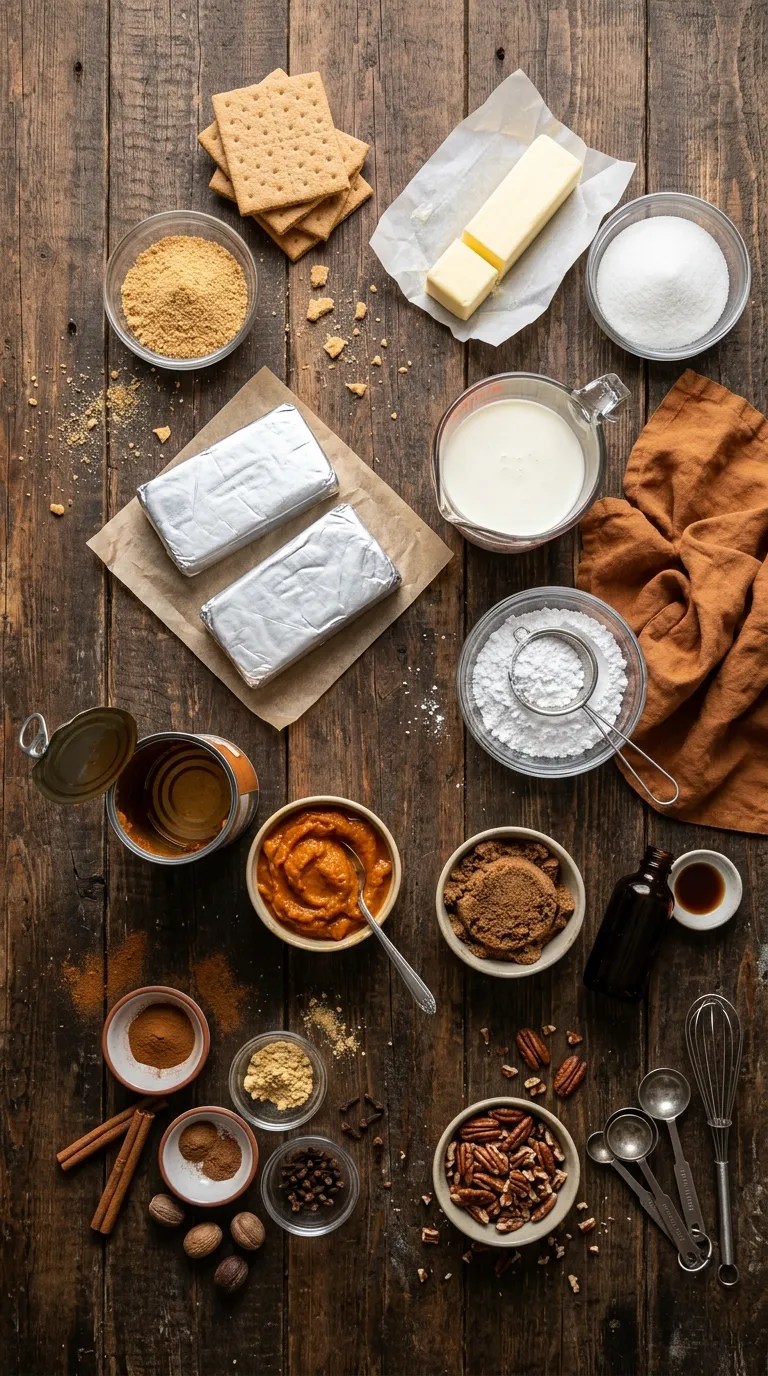
I like to gather everything before I start because the recipe moves quickly once the crust comes together.
For the Graham Cracker Crust
- 2 ½ cups graham cracker crumbs
- ½ cup unsalted butter, melted
- 3 tablespoons granulated sugar
- ¼ teaspoon salt
You can use store-bought graham cracker crumbs, or crush whole graham crackers in a food processor. I usually use the food processor because it gets the crumbs fine and even.
For the Cheesecake Layer
- 16 ounces cream cheese, softened
- 1 cup powdered sugar
- 1 teaspoon vanilla extract
- 1 cup heavy whipping cream, cold
Use full-fat cream cheese if you want the richest texture. Reduced-fat cream cheese can work, but the filling may feel softer.
For the Pumpkin Layer
- 1 cup pumpkin purée
- ½ cup packed light brown sugar
- 1 teaspoon ground cinnamon
- ½ teaspoon ground ginger
- ¼ teaspoon ground nutmeg
- ⅛ teaspoon ground cloves
- 1 teaspoon vanilla extract
- 8 ounces cream cheese, softened
- 1 cup powdered sugar
- 1 cup heavy whipping cream, cold
Make sure you use plain pumpkin purée, not canned pumpkin pie filling. Pumpkin pie filling already contains sugar and spices, which would throw off the recipe.
For Topping
- ½ cup heavy whipping cream
- 2 tablespoons powdered sugar
- ½ teaspoon vanilla extract
- A little ground cinnamon for dusting, optional
- Chopped pecans, optional
If you need a shortcut, you can use prepared whipped topping instead of making whipped cream.
Step-by-Step Instructions
1. Prepare the Pan — 5 Minutes
Line a 9×13-inch baking pan with parchment paper, leaving some paper hanging over the long sides.
That overhang becomes your handle later. Trust me, it makes removing the chilled bars much easier.
Give the parchment a quick press into the corners so it stays in place.
2. Make the Graham Cracker Crust — 5 Minutes
Add the graham cracker crumbs, sugar, salt, and melted butter to a medium bowl.
Stir until every crumb looks slightly damp. When you squeeze a little mixture in your hand, it should hold together instead of falling apart immediately.
Pour the mixture into your prepared pan.
Press it firmly into an even layer. I use the bottom of a measuring cup because it gives me a flat, compact crust without making a mess.
Refrigerate the crust for about 20 minutes while you prepare the first filling.
3. Whip the Cream for the Cheesecake Layer — 3 to 5 Minutes
Pour the cold heavy cream into a large mixing bowl.
Using a hand mixer or stand mixer, beat it on medium-high speed until stiff peaks form.
You’ll know you’re there when you lift the beaters and the cream holds a peak without immediately collapsing.
Set the whipped cream aside.
4. Make the Cheesecake Filling — 5 Minutes
In another bowl, beat the softened cream cheese until smooth.
Add the powdered sugar and vanilla and beat again until creamy. Scrape down the sides of the bowl if necessary.
Fold the whipped cream into the cream cheese mixture in two or three additions.
Use a spatula and fold gently rather than beating aggressively. You want to keep the filling light and fluffy.
Spread this cheesecake layer over the chilled crust.
Smooth the top with an offset spatula or the back of a spoon.
Return the pan to the refrigerator while you make the pumpkin layer.
5. Mix the Pumpkin Filling — 7 Minutes
In a large bowl, beat the softened cream cheese until smooth.
Add the pumpkin purée, brown sugar, cinnamon, ginger, nutmeg, cloves, and vanilla.
Beat until the mixture looks completely smooth and evenly colored.
Take a minute to scrape the bowl. Little pockets of plain cream cheese can hide along the sides, and nobody wants to discover one in an otherwise perfect pumpkin layer.
6. Whip the Second Batch of Cream — 3 to 5 Minutes
In a clean bowl, whip the cold heavy cream until stiff peaks form.
Fold the whipped cream into the pumpkin mixture gently.
The finished mixture should feel airy but thick enough to spread. If it looks runny, don’t panic. Chilling will help it firm up.
7. Add the Pumpkin Layer — 5 Minutes
Take the pan out of the refrigerator.
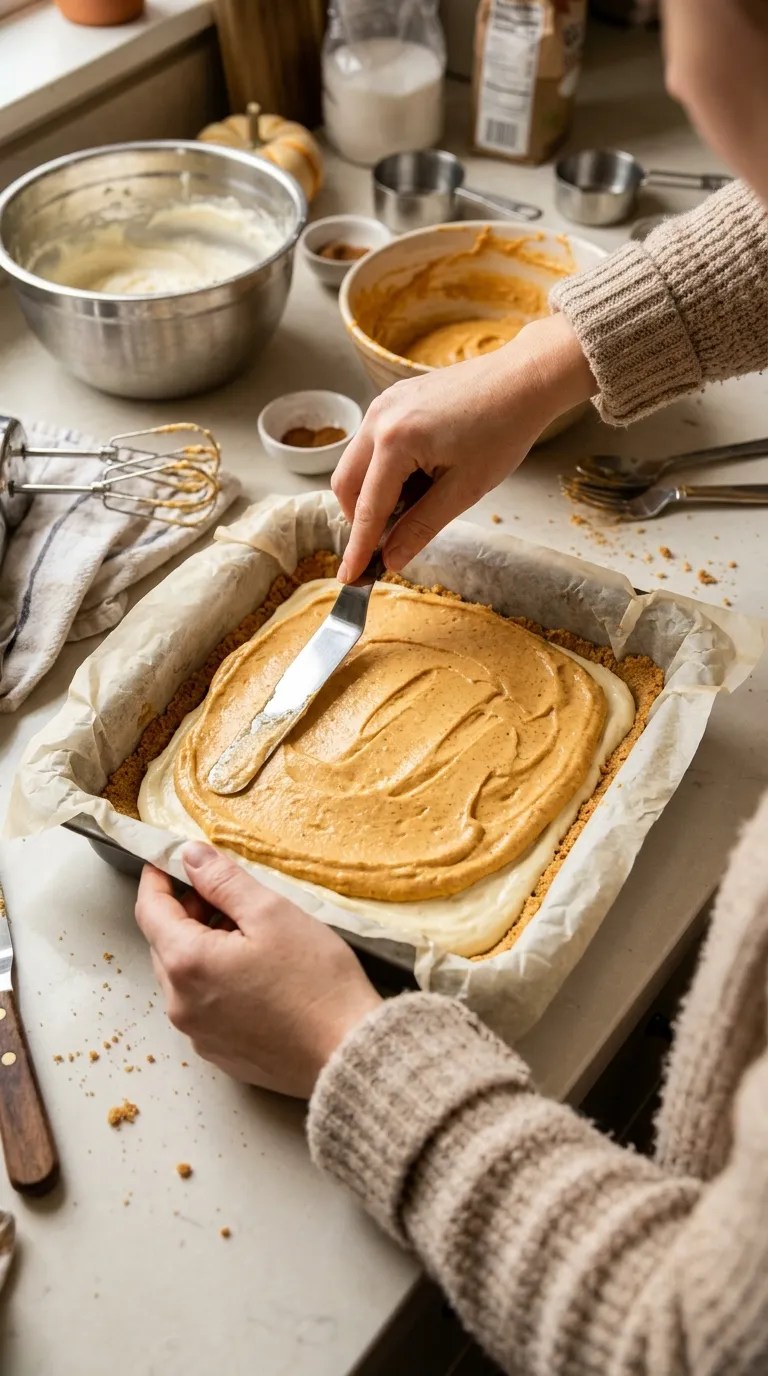
Carefully spread the pumpkin mixture over the cheesecake layer.
Work slowly, especially around the edges. A small offset spatula works beautifully here.
Smooth the top until it looks even.
Cover the pan tightly with plastic wrap or foil.
8. Chill Until Firm — At Least 6 Hours
This is the part I used to rush.
Don’t.
Refrigerate the bars for at least 6 hours, although overnight gives you the best texture.
The longer chill lets the layers firm up so you can cut clean squares instead of spooning dessert onto plates.
9. Make the Whipped Cream Topping — 5 Minutes
Just before serving, beat the heavy cream, powdered sugar, and vanilla until medium-stiff peaks form.
Spread or pipe the whipped cream over the chilled bars.
I like to add small dollops rather than cover the entire surface. That way, each square gets a little cloud of whipped cream without making the dessert feel too heavy.
Finish with a light dusting of cinnamon or a few chopped pecans if you like.
10. Cut and Serve — 10 Minutes
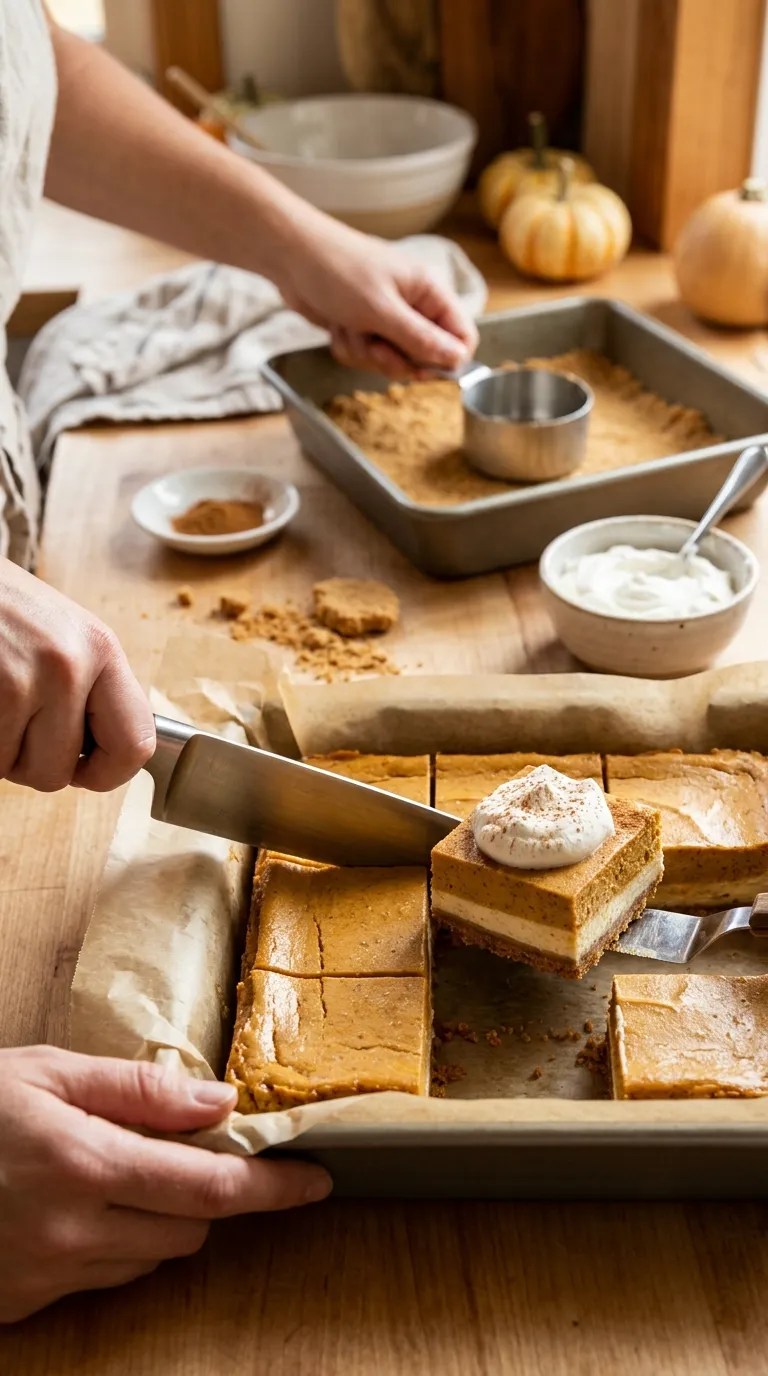
Use the parchment handles to lift the entire dessert from the pan.
For neat slices, use a sharp knife and wipe it clean between cuts.
I usually make 20–24 smaller squares for Thanksgiving. If you’re serving fewer people, cut larger pieces.
The smaller squares work especially well after a big Thanksgiving dinner because guests can enjoy dessert without committing to a huge slice.
Pro Tips & Tricks
Soften the Cream Cheese Properly
Cold cream cheese can leave little lumps throughout your filling.
Let it sit at room temperature for about 30–45 minutes before mixing. If you forget, don’t try to solve the problem by aggressively beating it for ages. Give it a little time to soften instead.
Don’t Skip the Chill
This is the biggest lesson I learned from making these bars.
The refrigerator does more than cool the dessert. It gives the layers time to firm up and hold together.
If you’re making this for Thanksgiving, prepare it the night before. That takes the pressure off the busiest cooking day.
Press the Crust Firmly
A loose crust makes the finished bars difficult to pick up.
Press the graham cracker mixture firmly into the pan, especially around the corners. A flat measuring cup works better than your fingers because you can create consistent pressure across the whole surface.
Use Cold Heavy Cream
Cold cream whips faster and holds its structure better.
I sometimes put the mixing bowl and beaters in the refrigerator for about 10 minutes before whipping. You don’t have to do this, but it helps if your kitchen feels warm.
Don’t Overmix After Adding Whipped Cream
Once you fold whipped cream into the cheesecake and pumpkin mixtures, use a gentle hand.
Overmixing can knock out some of the air that gives these layers their soft, creamy texture.
Make Them a Day Ahead
Thanksgiving morning can get chaotic quickly.
Make the bars the evening before, cover them well, and keep them refrigerated. Add the whipped cream topping shortly before serving for the freshest appearance.
Variations & Substitutions
Turn Them Into Pumpkin Spice Cheesecake Cups
If you don’t want to slice anything, layer the graham cracker crumbs, cheesecake mixture, and pumpkin mixture into small clear dessert cups.
This works especially well for a buffet because guests can grab individual portions.
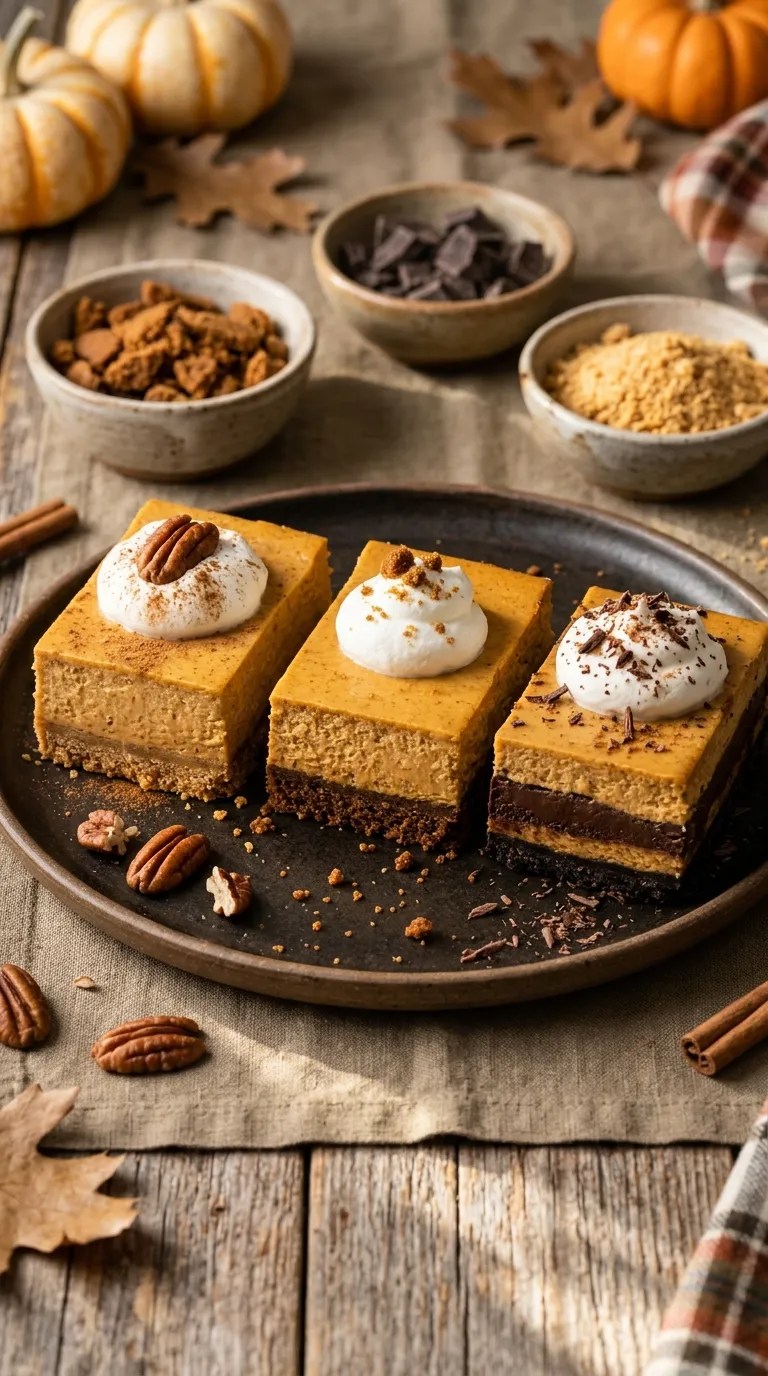
Make a Chocolate-Pumpkin Version
Add a thin layer of melted chocolate between the graham cracker crust and cheesecake layer.
Let the chocolate cool and firm up before adding the cheesecake mixture.
The chocolate adds a richer flavor without changing the basic recipe.
Use Gingersnap Cookies Instead
For a stronger fall flavor, replace the graham cracker crumbs with finely crushed gingersnap cookies.
Because gingersnaps already contain more spice, you may want to reduce the cinnamon in the crust or simply leave it out.
Make a Gluten-Free Version
Use certified gluten-free graham-style crackers for the crust and check the labels on your other packaged ingredients.
The filling itself doesn’t require a flour-based thickener.
Serving Suggestions

I love serving these pumpkin cheesecake bars on a large white platter because the layers stand out nicely.
For Thanksgiving dinner, I usually arrange the bars in rows and add a small amount of whipped cream to each one. A light sprinkle of cinnamon makes them look finished without requiring fancy decorating skills.
They pair naturally with coffee after dinner.
They’re also great with tea, hot chocolate, or a simple glass of cold milk.
If you’re serving several desserts, cut these into smaller pieces and place them alongside apple pie, pecan pie, or cookies. Their creamy texture gives the dessert table a nice change of pace.
For a casual Thanksgiving gathering, you can skip individual plates altogether and put the chilled squares on a dessert tray with a small serving spatula.
One thing I wouldn’t do: leave the whole pan sitting at room temperature for hours. These bars contain dairy and whipped cream, so keep them refrigerated and bring out a reasonable amount at a time.
Related Recipes:
- Easy Thanksgiving Desserts for the Whole Family
- Easy Pumpkin Dessert for Thanksgiving – Simple & Delicious Recipe
- Easy Maple Pecan Pie for Thanksgiving
- Easy Fall Truffles for Thanksgiving Dessert
FAQ’s
Can I make these Thanksgiving dessert bars the day before?
Absolutely. In fact, I prefer it.
Prepare the bars the night before and refrigerate them covered. Wait until shortly before serving to add the whipped cream topping and any garnishes.
How long do pumpkin cheesecake bars last in the refrigerator?
Keep the bars covered in the refrigerator and enjoy them within about 3–4 days for the best quality.
The crust may soften slightly over time, so I think they’re at their best during the first couple of days.
Can I freeze these bars?
Yes, but I recommend freezing them without the whipped cream topping.
Cut the chilled bars into portions, wrap them well, and place them in a freezer-safe container. Thaw them in the refrigerator before serving.
Add fresh whipped cream after they thaw.
Why is my cheesecake layer too soft?
The most common reasons are insufficient chilling, cream that didn’t whip firmly enough, or cream cheese that became too warm.
Give the finished dessert plenty of refrigerator time before deciding that the filling hasn’t set.
Can I use whipped topping instead of heavy cream?
Yes.
Prepared whipped topping works as a shortcut in both filling layers and on top. Keep in mind that the texture and sweetness will differ slightly from freshly whipped cream.
Can I make this without a stand mixer?
Definitely.
A hand mixer works perfectly well. You can even whip the cream by hand with a whisk if you’re feeling ambitious, although you’ll get a much easier workout than you planned.
I use a hand mixer when I want fewer dishes and a stand mixer when I’m already making several Thanksgiving desserts.
Final Thought
Thanksgiving desserts don’t have to create another marathon in the kitchen.
These easy Thanksgiving dessert bars give you the cozy pumpkin-and-spice flavors everyone expects, but you can make them ahead and keep them tucked away in the refrigerator until dessert time.
And if your first batch doesn’t come out looking bakery-perfect, don’t worry. Mine didn’t either.
The important thing is to give the layers enough time to chill, cut them with a clean sharp knife, and let yourself enjoy the fact that dessert is already handled.
I especially love making these when I’m feeding a crowd because one pan stretches a long way. Someone will inevitably ask where the pumpkin pie is, and that’s fine—but I’ve noticed that these bars tend to disappear surprisingly fast.
So make them the night before, clear a little refrigerator space, and let Thanksgiving Day belong to the turkey and all those side dishes.
Then, when everyone finally settles around the table and reaches for dessert, you’ll already have one thing completely under control.
Leave a Reply
You must be logged in to post a comment.