


Every Halloween party needs a dessert table that makes people stop walking for a second.
I learned that after one particularly chaotic Halloween when I spent half the afternoon trying to make an elaborate cake. It looked impressive, but by the time the guests arrived, I was tired, the kitchen looked like a powdered-sugar storm had hit it, and the kids went straight for the simplest treats on the table.
That little lesson stuck with me.
Now, when I put together Halloween desserts, I look for recipes that feel festive without requiring pastry-school skills. A batch of fudgy brownies can become spooky with a few candy eyes. Chocolate-covered strawberries can turn into little monsters. Even ordinary cupcakes look party-ready with orange frosting and a handful of sprinkles.
These easy Halloween desserts are the kind of treats I like making when I want the table to look special but still have enough energy left to enjoy the party.
The best part? You don’t need a cupboard full of specialty decorating equipment. A piping bag, a spoon, some melted chocolate, and a little imagination can take you surprisingly far.
Why You’ll Love These Halloween Desserts

- They’re genuinely easy. Most of the decorating takes minutes rather than hours.
- They look festive without being fussy. A few simple details do most of the work.
- They’re great for a crowd. You can make several batches and mix them across one dessert table.
- They’re easy to customize. Change the colors, toppings, or shapes to match your party.
- You can make many of them ahead. That means less last-minute kitchen scrambling.
Ingredients for an Easy Halloween Dessert Spread
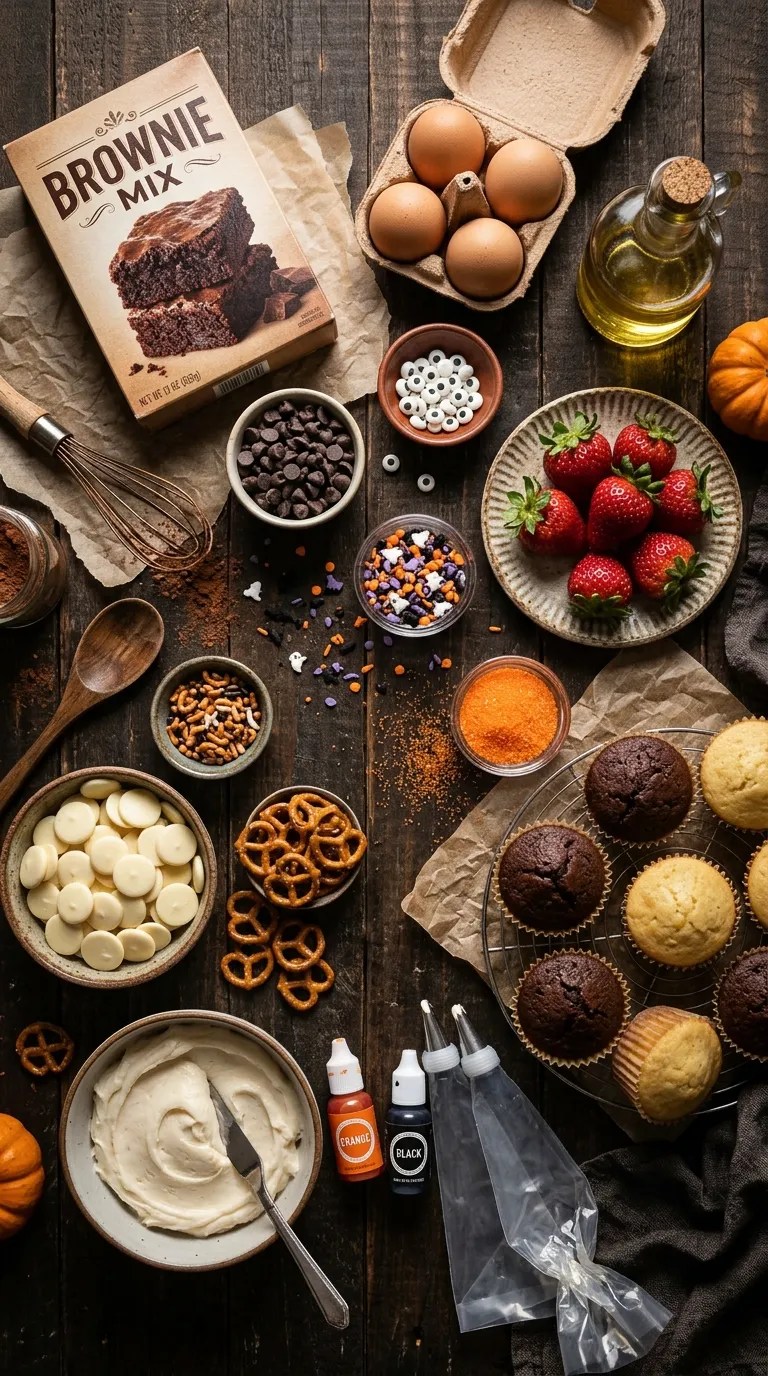
Rather than making one complicated centerpiece, I like combining a few simple treats. Here’s a flexible shopping list for a party-sized dessert table.
For the Halloween Brownies
- 1 box brownie mix, prepared according to the package directions
- 2 large eggs, if required by your brownie mix
- 1/2 cup vegetable oil, if required
- Water, according to the package directions
- 1/2 cup chocolate chips
- 24–30 candy eyes
- 1/3 cup orange or Halloween-colored sprinkles
You can absolutely use your favorite homemade brownie recipe instead of boxed mix. I often use a mix when I’m preparing several desserts because it saves time and still gives you a rich, chocolatey base.
For the Monster Strawberries
- 1 pound fresh strawberries
- 8 ounces white chocolate or white candy melts
- 4 ounces milk or dark chocolate
- 24–30 candy eyes
- 1 teaspoon neutral-flavored oil, optional
If you can’t find candy melts, regular chocolate works beautifully. The tiny amount of oil can help loosen melted chocolate if it feels too thick for dipping.
For the Halloween Cupcakes
- 12 vanilla or chocolate cupcakes
- 1 1/2 cups prepared buttercream frosting
- Orange food coloring
- Black or purple food coloring
- Halloween sprinkles
- Candy eyes or small Halloween candies
Store-bought cupcakes and frosting work perfectly well here. Halloween is supposed to be fun, not an audition for a baking competition.
For Simple Chocolate Pretzel Bats
- 24 small pretzel twists
- 6 ounces semisweet chocolate
- 1/4 cup Halloween sprinkles
- Candy eyes, optional
You can substitute milk chocolate or dark chocolate depending on what you have in the pantry.
Step-by-Step Instructions
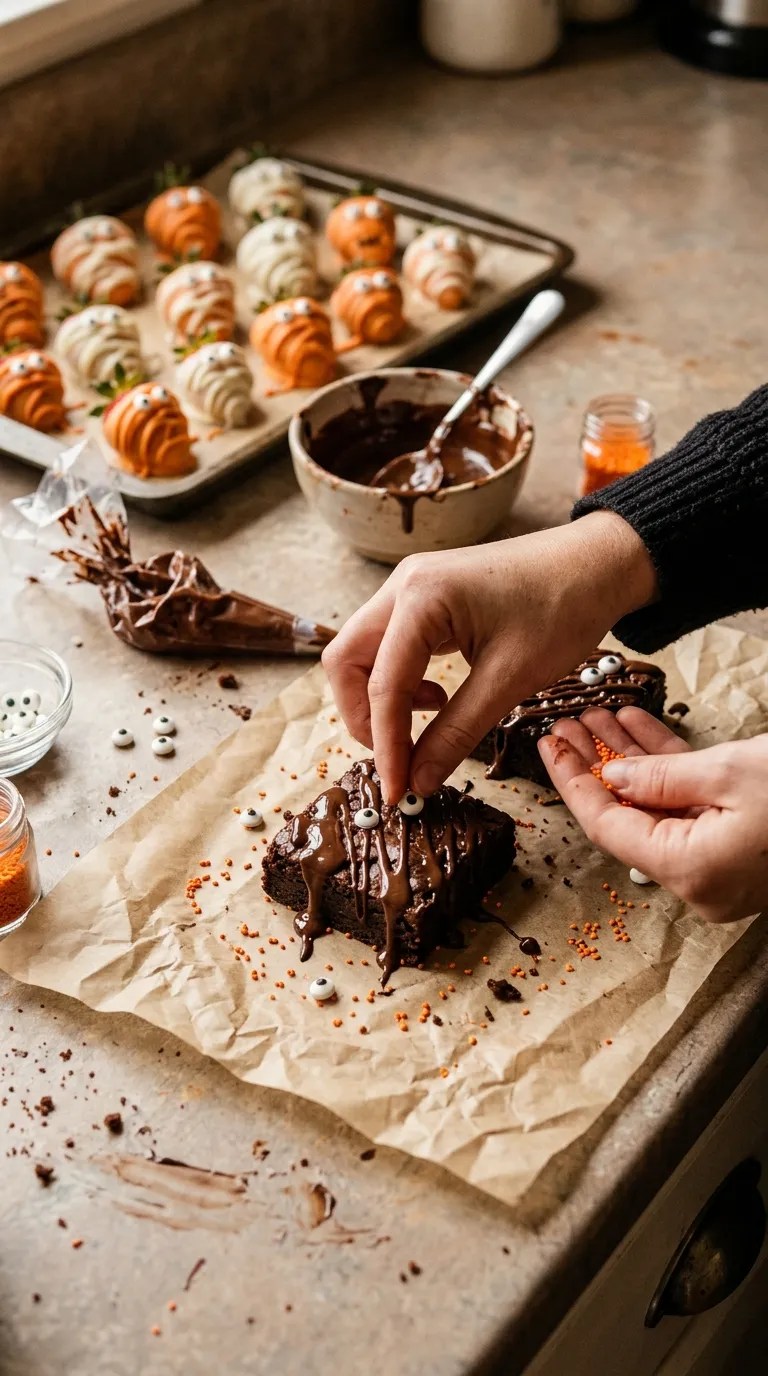
1. Start With the Brownies — About 30 Minutes
Preheat your oven according to your brownie recipe or box instructions.
Line an 8-by-8-inch or 9-by-9-inch baking pan with parchment paper, leaving some paper hanging over the sides. That little trick makes removing the brownies much easier later.
Prepare the brownie batter and fold in the chocolate chips.
Pour the batter into the pan and smooth the top with a spatula. Bake according to the recipe directions.
Don’t overbake them. For Halloween brownies, I prefer a soft center because the texture feels richer and holds up well under decorations.
Let the brownies cool completely before cutting them.
Once they’re cool, cut them into small squares. Press two candy eyes onto each brownie while the surface is still slightly soft. Add a few orange sprinkles around the eyes.
For an extra spooky look, drizzle a little melted chocolate over the top and let it set.
2. Make the Monster Strawberries — About 20 Minutes
Wash the strawberries and dry them extremely well.
This step matters more than it sounds. Water and melted chocolate don’t get along, and damp strawberries can make dipping messy.
Melt the white chocolate in a microwave-safe bowl in 15-second bursts, stirring after each burst. Continue until it’s smooth.
Hold each strawberry by the leaves and dip it into the melted chocolate.
Let the excess chocolate drip back into the bowl before placing the strawberry on parchment paper.
While the coating remains soft, add two candy eyes.
Now melt the milk or dark chocolate.
Transfer it to a small piping bag or a zip-top bag with the tiniest corner snipped off. Pipe little lines, eyebrows, mouths, or messy monster hair across the strawberries.
Don’t worry about perfect lines. In fact, slightly uneven chocolate makes the monsters look more playful.
Let the strawberries sit until the chocolate firms up.
3. Decorate the Cupcakes — About 15 Minutes
If you’re using homemade cupcakes, make sure they’ve cooled completely.
Divide your buttercream into two bowls. Tint one portion orange and another black or purple.
Spoon the frosting into piping bags fitted with a star tip, or simply spread it onto the cupcakes with a butter knife.
For a quick Halloween look, pipe a tall swirl of orange frosting onto each cupcake.
Add candy eyes and Halloween sprinkles.
If you don’t have piping bags, use a zip-top bag with one corner snipped off. It won’t give you quite the same bakery-style finish, but it works surprisingly well.
For a super-simple decoration, spread the frosting into a rough swirl and drag a toothpick lightly through it. The irregular texture makes the cupcakes look intentionally spooky.
4. Turn Pretzels Into Chocolate Bats — About 15 Minutes
Melt the semisweet chocolate gently in the microwave, stirring every 15 seconds.
Dip each pretzel halfway into the chocolate, or spoon chocolate over the center.
Place the pretzels on parchment paper.
While the chocolate is still wet, add a few Halloween sprinkles.
For little bat faces, place two candy eyes near the center of the pretzel.
Let the chocolate harden at room temperature or place the tray in the refrigerator for about 10 minutes.
These are especially handy when you want a dessert that guests can grab without needing a plate and fork.
5. Arrange the Dessert Table — About 10 Minutes
This is where the whole thing comes together.
Place the brownies on one large platter. Put the decorated strawberries on another. Arrange the cupcakes at different heights if you have cake stands or sturdy serving plates.
Scatter the chocolate pretzels around the empty spaces.
Then add a few extra Halloween sprinkles around the serving dishes.
I like keeping the colors consistent. Orange, black, white, purple, and chocolate brown make the table feel coordinated even when the desserts themselves look completely different.
Pro Tips & Tricks
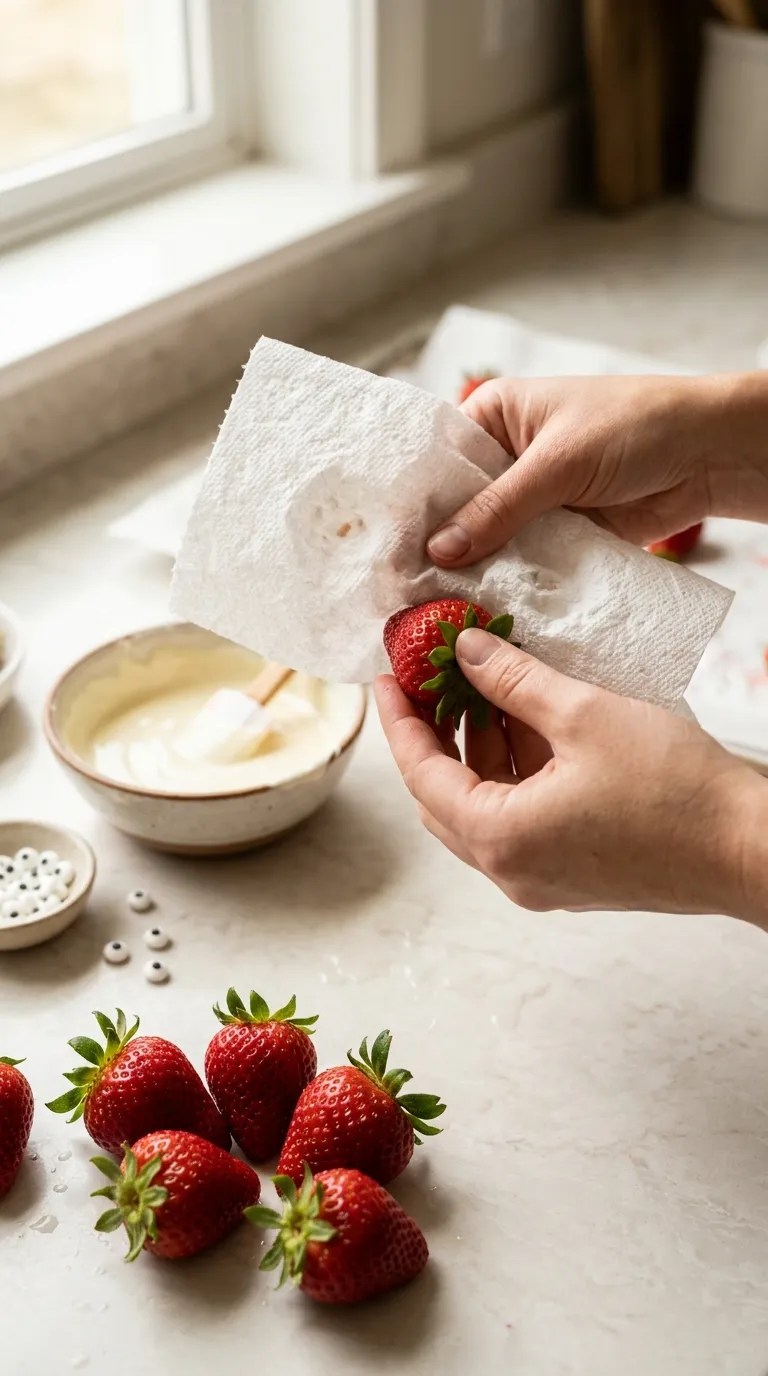
Dry Your Strawberries Thoroughly
Before dipping strawberries in chocolate, pat them dry with paper towels and let them air-dry for a few minutes.
Any moisture left on the berries can cause the chocolate to slide or become difficult to work with.
Let Brownies Cool Before Decorating
I know it’s tempting to decorate warm brownies, especially when you’re racing the clock.
Don’t.
Warm brownies can melt candy eyes, smear chocolate, and make your decorations slide around. Give them time to cool completely.
Don’t Overheat Chocolate
Chocolate can go from beautifully melted to thick and unusable surprisingly quickly.
Use short microwave intervals and stir between each one. The residual heat will continue melting the chocolate even after you remove the bowl.
Make the Easy Desserts First
Brownies and chocolate pretzels can handle being made ahead.
I usually prepare those first, then decorate cupcakes and strawberries closer to serving time. Fresh strawberries simply look their best when you make them on the day of the party.
Store Different Desserts Separately
Don’t pile everything into one container.
Store brownies in an airtight container at room temperature if your recipe allows it. Keep chocolate-covered strawberries refrigerated, preferably in a single layer.
Cupcakes should also stay in an airtight container so they don’t dry out.
Variations & Substitutions
Make Them Nut-Free
If you’re serving a crowd, check the labels on your chocolate, candy, sprinkles, and decorations for allergen information.
Skip any toppings that contain nuts or that may have cross-contact concerns, depending on the needs of your guests.
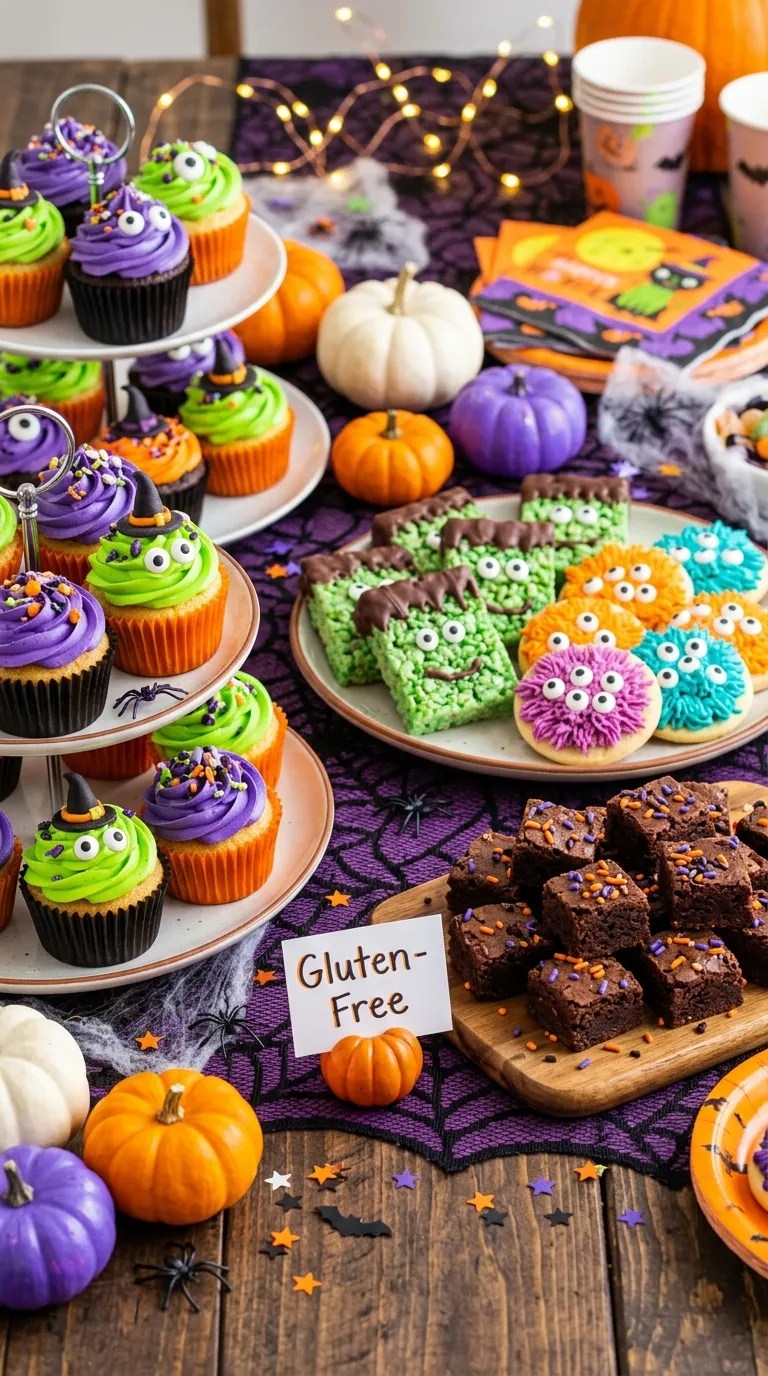
Make a Gluten-Free Dessert Table
Use certified gluten-free brownie mix or your favorite gluten-free brownie recipe.
For the pretzel treats, choose gluten-free pretzels. Keep your work surfaces, utensils, and decorations separate if you’re preparing food for someone with a medically necessary gluten-free diet.
Make Mini Desserts
For a larger party, make everything smaller.
Cut brownies into bite-sized squares, use mini cupcakes, and choose small strawberries when possible.
Mini desserts give guests the chance to try several different treats without committing to one large serving.
Change the Halloween Theme
You don’t have to stick with the traditional orange-and-black combination.
Try purple and green for a playful monster theme, or black, white, and silver for a slightly more grown-up Halloween table.
You can also turn the same cupcakes into ghosts, pumpkins, monsters, or spiders just by changing the decorations.
Serving Suggestions

These easy Halloween desserts work especially well for a casual Halloween party, school-friendly gathering, family movie night, or neighborhood get-together.
For a kids’ party, arrange the treats on low serving stands so everyone can see the decorations. Put napkins nearby because chocolate has a way of finding fingers, faces, and clothing.
For a Halloween movie night, serve the brownies and pretzels alongside popcorn. The salty pretzels balance the sweeter treats nicely.
If you’re hosting a larger party, consider creating one dessert table rather than placing sweets throughout the room. It gives the desserts a visual home and makes it easier to keep track of what needs replenishing.
A few simple decorations can also make a big difference. Add a dark tablecloth, small paper bats, miniature pumpkins, or battery-powered lights around the serving area.
Just keep decorations that aren’t food well away from anything guests might eat.
If you want a centerpiece, pile cupcakes onto a cake stand and place the brownie squares around the base. The height makes the table look much fuller without requiring more food.
Related Recipes:
- Halloween Desserts for Adults That Feel Spooky & Sophisticated
- Scary Halloween Desserts That Are Perfect for Parties
- No-Bake Halloween Desserts for Busy Hosts
- Halloween Desserts for a Spooky Potluck Everyone Will Love
- Halloween Party Desserts Everyone Will Want to Try
FAQ’s
Can I make these Halloween desserts the day before?
Yes, with a little planning.
Brownies and chocolate-covered pretzels work very well when prepared a day ahead. Cupcakes can also be baked the day before and decorated later.
I prefer making chocolate-covered strawberries on the day of the party because they look and taste freshest then.
How should I store leftover Halloween brownies?
Keep the brownies in an airtight container at room temperature for a day or two if your specific recipe doesn’t contain ingredients that require refrigeration.
Place parchment paper between layers if you’ve decorated them heavily.
Can I freeze Halloween brownies?
Yes. Freeze undecorated brownies in an airtight freezer-safe container or tightly wrapped package.
Thaw them at room temperature, then add the candy eyes, drizzle, and sprinkles afterward. The decorations will look much better than if you freeze the finished brownies.
Why won’t my chocolate stick to the strawberries?
The strawberries probably still have some moisture on them.
Wash them, then dry them very thoroughly. Letting them air-dry for a few minutes before dipping can help too.
Also make sure the strawberries aren’t extremely cold when you dip them, since condensation can form on the surface.
Can I use store-bought cupcakes?
Absolutely.
Honestly, this is one of my favorite shortcuts when I’m making several Halloween desserts. Buy plain cupcakes, add homemade or store-bought frosting, and spend your time on the decorations.
Most guests care far more about how fun the cupcakes look than whether you baked the cake from scratch.
What can I use instead of candy eyes?
You can make simple eyes from small dots of melted white and dark chocolate.
You can also use tiny pieces of marshmallow with a chocolate dot in the center. Just keep the pieces small enough to sit securely on the dessert.
Final Thought
Halloween desserts don’t need complicated piping techniques, specialty molds, or an entire afternoon in the kitchen.
Sometimes the treats people remember most are the ones that look a little silly and homemade.
I still think about that Halloween when my fancy cake barely got touched while the simple brownies disappeared almost immediately. These days, I take the hint.
Make a batch of brownies. Dip some strawberries. Decorate a few cupcakes. Add chocolate-covered pretzels, put everything on a big platter, and let the decorations do the heavy lifting.
And if one monster ends up with three eyes or a cupcake looks more like a purple alien than a ghost, leave it alone. That’s part of the charm.
The goal isn’t perfection. The goal is a dessert table that makes people smile when they walk into the room.
So put on your favorite Halloween playlist, grab the sprinkles, and have fun with it. Your spooky party table is going to look fantastic.
Leave a Reply
You must be logged in to post a comment.