

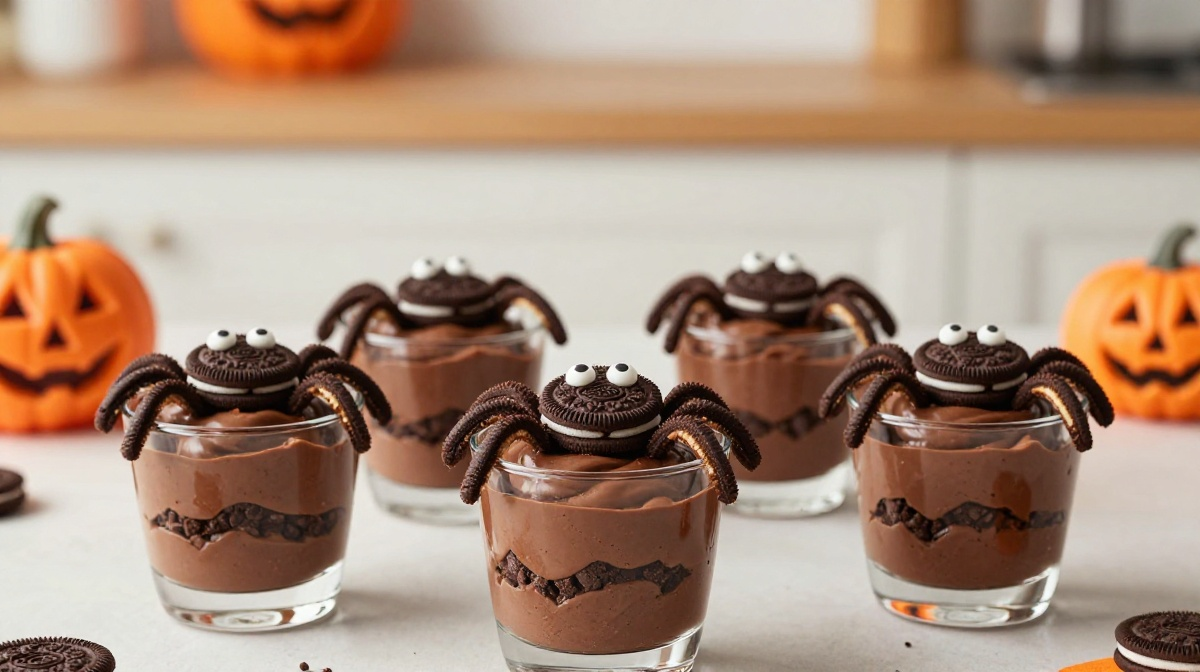
The first time I made these Halloween dessert cups, I had grand plans for something complicated. I pictured neat little chocolate decorations, perfectly piped frosting, and a dessert table that looked like it belonged in a magazine.
Then I remembered I was making dessert for a house full of excited people who cared much more about eating it than admiring my decorating skills.
So I grabbed some chocolate sandwich cookies, pudding, whipped topping, and a handful of candy. That little shortcut turned into one of my favorite Halloween treats.
These Oreo spider cups look festive without requiring fancy baking skills. You don’t need to make cake layers, temper chocolate, or pipe intricate designs. You simply layer a creamy chocolate dessert with crushed cookies and add a few easy decorations.
The first batch wasn’t perfect. One spider had crooked eyes, another looked more like a tiny alien, and I accidentally crushed some of the cookies into crumbs finer than I wanted. Nobody complained. In fact, those slightly wonky spiders made the dessert feel more homemade.
If you’re looking for an easy Halloween dessert for beginners, this is exactly the sort of recipe I’d make again when I want something cute, inexpensive, and low-stress.
Why You’ll Love This Recipe

- No oven required. That’s especially nice when the kitchen already feels busy.
- Beginner-friendly. The hardest part is crushing cookies and assembling the cups.
- Fun to decorate. Kids and adults can each create their own spooky little spider.
- Easy to make ahead. The pudding mixture and cookie crumbs can sit in the refrigerator until you’re ready to assemble.
- Great for parties. Individual cups make serving simple and keep everyone from fighting over the biggest slice.
And honestly, the imperfect decorations are part of the charm. Halloween desserts don’t need to look perfect to disappear quickly.
Ingredients
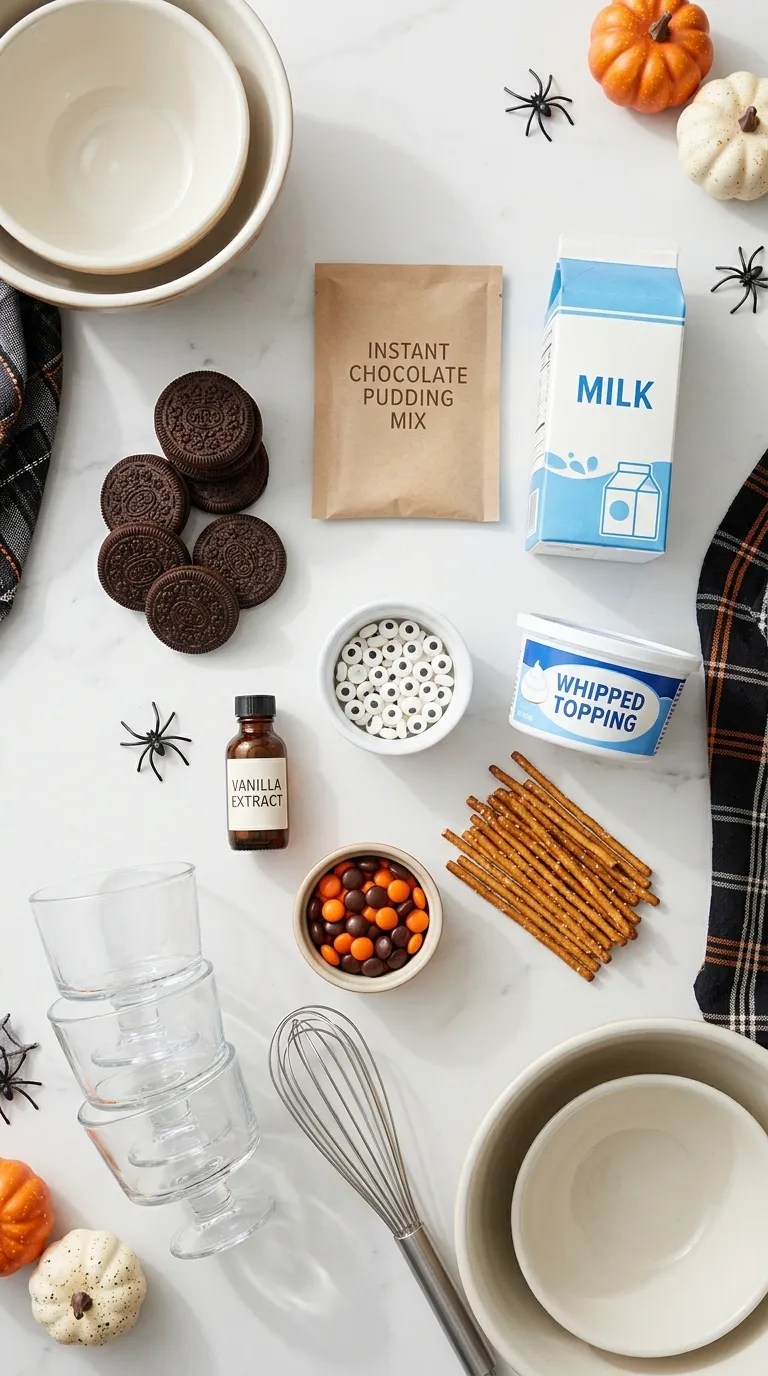
This recipe makes about 8 small dessert cups, depending on the size of your serving glasses.
For the chocolate pudding layer
- 1 package (3.9 ounces) instant chocolate pudding mix
- 2 cups cold whole milk
- 1 cup whipped topping, thawed
- 1 teaspoon vanilla extract
You can use 2% milk if that’s what you have, although whole milk gives the pudding a slightly richer texture.
For the cookie crumbs
- 20 chocolate sandwich cookies, such as Oreo cookies
- 2 tablespoons melted butter, optional
I usually skip the butter because the cookies already have enough moisture and flavor for this dessert. If you want the crumbs to hold together a little more firmly, stir in the melted butter.
For the spider decorations
- 16 candy eyes
- 16 small round chocolate candies or chocolate-covered candies
- 32 thin pretzel sticks, broken into short pieces
You can replace the candy eyes with small dots of white icing and use melted chocolate for the pupils.
For a nut-free party, check the labels on your candies and cookies, especially if someone attending has a food allergy.
You’ll also need
- 8 small clear dessert cups or glasses
- 2 medium mixing bowls
- Whisk
- Spoon or spatula
- Food processor or rolling pin
- Small tray for assembling the cups
Clear cups work especially well because you can see the chocolate and cookie layers from the side.
Step-by-Step Instructions
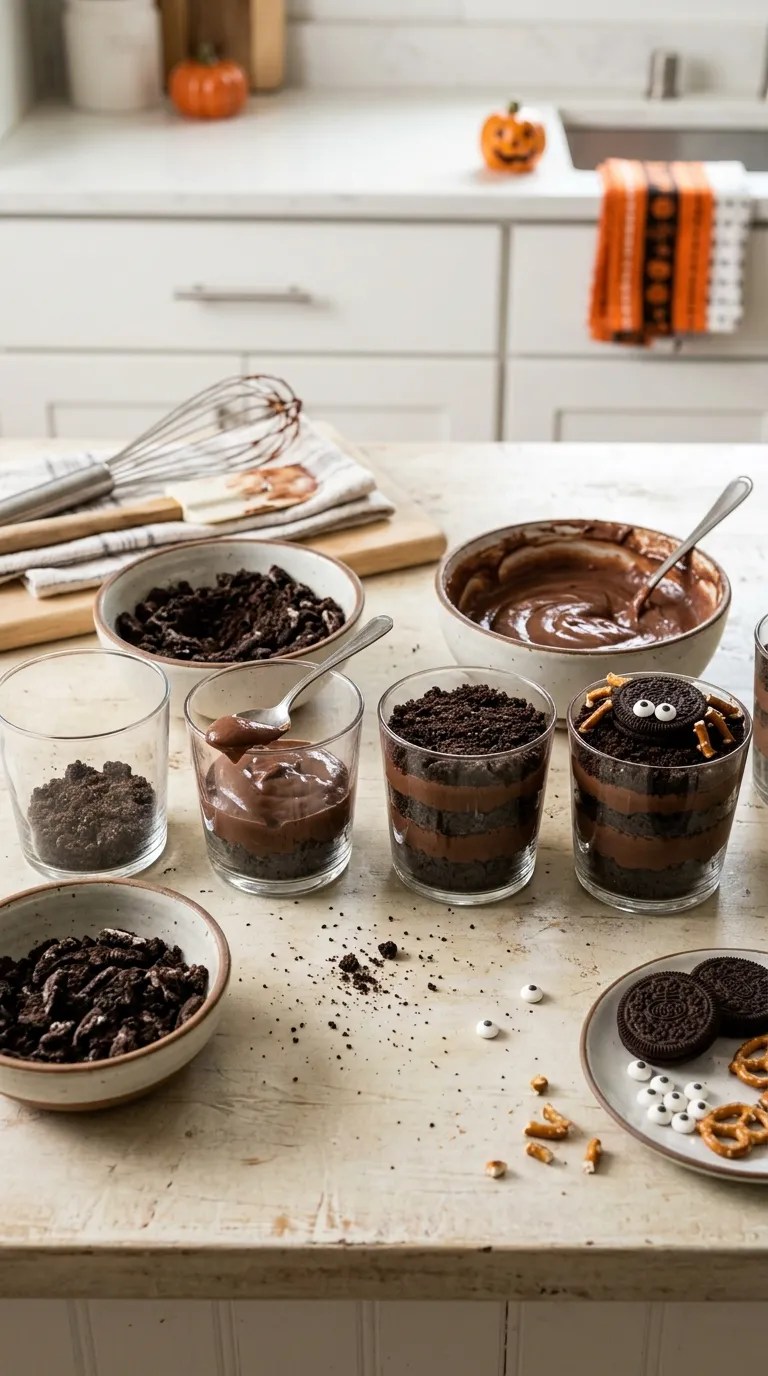
1. Make the chocolate pudding — about 5 minutes
Pour the cold milk into a medium mixing bowl.
Add the instant chocolate pudding mix and whisk for about 2 minutes, or follow the mixing time listed on your pudding package.
The mixture should become noticeably thicker as you whisk.
Don’t worry if it still looks a little soft at this point. The pudding will continue to set as it chills.
2. Add the whipped topping — about 2 minutes
Let the pudding sit for a few minutes, then gently fold in the whipped topping.
Add the vanilla extract and fold again until you no longer see obvious white streaks.
Don’t vigorously stir at this stage. Gentle folding keeps the mixture light and creamy.
I learned this the slightly annoying way after stirring my first batch like I was mixing pancake batter. It still tasted good, but the texture wasn’t nearly as fluffy.
3. Crush the cookies — about 5 minutes
Place the chocolate sandwich cookies in a food processor and pulse until you have fine crumbs.
You can also put the cookies into a sturdy zip-top bag and crush them with a rolling pin.
Aim for crumbs that resemble damp soil rather than completely uniform powder. A few tiny cookie pieces give the dessert a nicer texture.
Set about 2 tablespoons of the crumbs aside if you want to sprinkle a little over the top later.
4. Build the first layer — about 5 minutes
Spoon about 2 tablespoons of cookie crumbs into the bottom of each dessert cup.
Don’t pack them down too firmly. A loose layer looks better and stays easier to scoop.
If your cups are particularly small, use less. You want enough room for several layers without filling the glasses to the very top.
5. Add the chocolate pudding — about 5 minutes
Spoon a layer of chocolate pudding over the cookie crumbs.
Use roughly 2 to 3 tablespoons per cup.
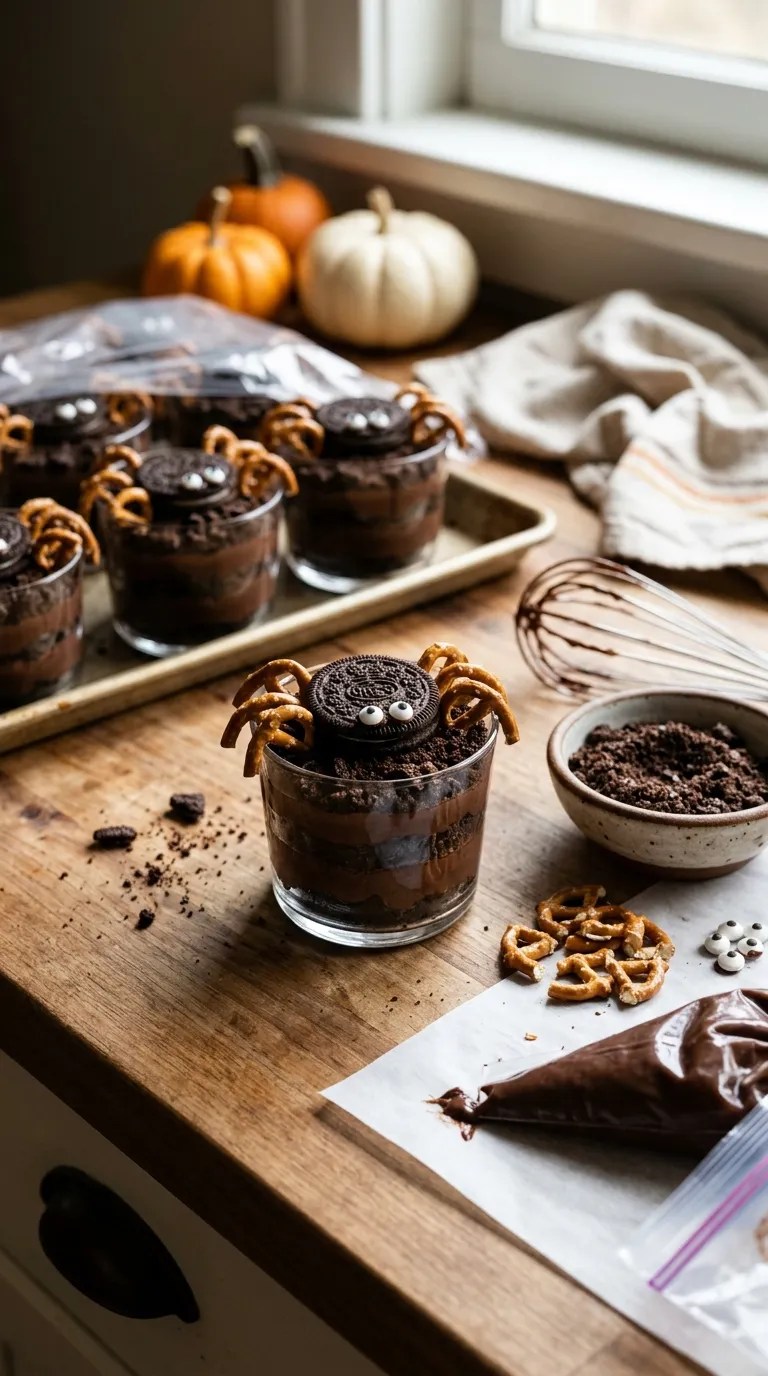
If you want cleaner-looking layers, use a small piping bag or a zip-top bag with one corner snipped off. You can squeeze the pudding into the cups instead of spooning it in.
This little trick helps when you’re making a bunch of cups for a party.
6. Add another cookie layer — about 3 minutes
Add another layer of crushed cookies.
You don’t have to make every layer exactly the same thickness. In fact, I think these desserts look better when they have a slightly homemade appearance.
If some crumbs stick to the sides of the glass, leave them there. Once you add the next layer, they create a fun, messy Halloween look.
7. Finish with pudding — about 3 minutes
Add one final layer of chocolate pudding.
Leave a little space at the top of each cup for the spider decoration.
Cover the cups loosely with plastic wrap and refrigerate them for at least 30 minutes.
For the best texture, I usually chill them for about 1 to 2 hours.
8. Make the chocolate spiders — about 10 minutes
While the dessert chills, make your spiders.
Place one small round chocolate candy on a plate or sheet of parchment paper.
Press two candy eyes onto the front. If they don’t stick, use a tiny dot of icing as edible glue.
Break the pretzel sticks into short pieces and arrange four pieces on each side of the candy to create eight legs.
Don’t stress about symmetry.
A spider with one leg pointing slightly upward somehow looks more convincing than one that looks like it came from a geometry lesson.
9. Add the spiders and serve
Take the chilled dessert cups from the refrigerator.
Sprinkle a few extra cookie crumbs over the top if you like.
Carefully place one chocolate spider on each cup.
Serve immediately with small dessert spoons.
If you’re making these for a Halloween party, keep the finished cups refrigerated until you’re ready to put them out.
Pro Tips & Tricks
Don’t crush every cookie into dust
A food processor can turn cookies into powder surprisingly fast.
Pulse instead of running the machine continuously. Stop when you see mostly fine crumbs with a few small pieces remaining.
That little bit of texture makes every spoonful more interesting.
Chill before decorating
The pudding needs time to firm up.
If you decorate the cups immediately and move them around too much, the layers can look messy. Give them at least 30 minutes in the refrigerator before adding the spiders.
Use a piping bag for cleaner layers
You absolutely don’t need special decorating equipment.
A regular zip-top bag works beautifully. Spoon the pudding inside, push it toward one corner, snip off a tiny piece of the corner, and squeeze.
It gives you much more control than a spoon.
Don’t make the pretzel legs too long
Long pretzel pieces can stick far beyond the sides of the cup and become awkward to eat.
Keep the pieces short enough that the spider stays mostly over the top of the dessert.
Make the spiders separately
If you’re serving these at a party, make the chocolate spiders earlier in the day.
Store them in a covered container at room temperature if your candies and pretzels don’t require refrigeration.
Then assemble the dessert cups when you’re ready.
That saves you from trying to decorate eight individual desserts while guests are already arriving.
Variations & Substitutions

Try vanilla pudding with a colorful Halloween twist
Chocolate isn’t your only option.
Make vanilla instant pudding instead, then add a few drops of orange food coloring. Layer it with chocolate cookie crumbs for a bright orange-and-black Halloween dessert.
You can also leave the pudding white and use orange and black sprinkles on top.
Make a mint chocolate version
If you like the combination of chocolate and mint, use chocolate pudding and add a small amount of mint extract to the pudding mixture.
Start with just 1/8 teaspoon, taste it, and add more only if needed.
Mint extract can become overpowering very quickly, so this is one ingredient where a little really does go a long way.
Make a gluten-free version
Use certified gluten-free chocolate sandwich cookies and gluten-free pretzels.
Also check the labels on the pudding mix, whipped topping, and decorations if you’re preparing the dessert for someone who needs to avoid gluten.
Ingredient labels can change, so check the package you’re actually using rather than relying on an old label you’ve seen before.
Skip the spiders altogether
If you don’t have candy eyes or pretzels, don’t abandon the dessert.
Top each cup with cookie crumbs and a few Halloween sprinkles.
You could also add gummy worms, candy pumpkins, or simple icing decorations.
The dessert still looks festive without the spider theme.
Serving Suggestions

These chocolate dessert cups work especially well for Halloween parties, classroom-style celebrations where permitted, family movie nights, or a simple October dinner at home.
I like serving them in small clear plastic cups when I’m feeding a crowd. You can prepare individual portions ahead of time, cover them, and keep them chilled until dessert.
For a Halloween dessert table, arrange the cups on a tray and scatter a few wrapped candies around them.
You can also serve them alongside simple treats such as popcorn, apple slices, or homemade cookies.
If you’re making dessert for a family Halloween movie night, put the cups in the refrigerator before the movie starts. By the time everyone settles in, they’ll be cold and ready to eat.
One practical tip: give children smaller cups if you’re serving several different desserts. These are rich enough that a little serving goes a surprisingly long way.
Related Recipes:
- Easy Halloween Mummy Pizza Pockets Party Food Recipe
- Easy Halloween Dessert Ideas for Parties Spooky Chocolate Spiderweb Brownies
- Easy Spooky Potluck Food Ideas for Halloween Party Favorites
- Halloween Desserts for Adults That Feel Spooky & Sophisticated
FAQ’s
Can I make this Halloween dessert the day before?
Yes. Prepare the pudding cups up to about 24 hours ahead and keep them covered in the refrigerator.
For the best-looking decorations, add the pretzel spider legs shortly before serving. Pretzels can lose their crunch when they sit against moist ingredients for too long.
How long do the dessert cups last in the refrigerator?
For the best texture and appearance, enjoy them within 2 days.
Keep them covered and refrigerated. The cookie crumbs will gradually soften as they absorb moisture from the pudding, so the dessert becomes less crunchy over time.
Can I freeze these Halloween dessert cups?
I don’t recommend freezing the assembled cups.
The pudding and whipped topping can change texture after freezing and thawing, while the cookie layers can become soft.
If you need to prepare ahead, make the components separately and assemble the cups closer to serving time.
What can I use instead of candy eyes?
Small dots of white icing work well.
You can also use tiny pieces of white chocolate or marshmallow, depending on what you have available.
For a completely different look, make little pumpkin faces with orange and black icing instead of spiders.
Why is my pudding too runny?
First, check that you used instant pudding mix rather than a type that requires cooking.
Also make sure you measured the milk accurately. Too much milk can leave the pudding softer than expected.
If you’ve just mixed it, give it a little time to chill. Cold temperatures help the pudding set.
Can I use homemade whipped cream?
Absolutely.
Use about 1 cup of softly whipped cream in place of the whipped topping. Fold it gently into the prepared pudding.
Keep the finished dessert refrigerated, and avoid whipping the cream until it’s stiff and grainy. A soft, creamy consistency blends more smoothly with the pudding.
Final Thought
I love recipes like this because they don’t ask you to be a professional baker.
You can make the layers a little uneven. Your spiders can have different-sized eyes. One pretzel leg can point in a completely ridiculous direction. Nobody needs to know how many cookies you accidentally ate while assembling the cups.
That’s part of the fun.
This easy Halloween dessert for beginners gives you something that feels special without turning your kitchen into a disaster zone. The chocolate pudding stays creamy, the cookie crumbs add a satisfying crunch at first, and the little chocolate spiders make everyone smile.
If you’re making these for Halloween, let everyone decorate one. You’ll probably end up with a collection of spiders that look nothing alike, and honestly, that’s my favorite part.
Grab a spoon, make a little mess, and enjoy the spooky season.
Leave a Reply
You must be logged in to post a comment.