


Halloween at my house usually starts with one simple question: “What can we make that looks spooky without turning the kitchen into a disaster zone?” I’ve learned the hard way that complicated Halloween treats sound fun until you’re standing over six bowls, three trays, and melted chocolate that refuses to cooperate.
That’s why I love making easy Halloween treats at home. You can turn simple ingredients into creepy, colorful, and seriously fun desserts without spending the whole afternoon decorating. Some of these treats have become little traditions in my kitchen, especially when the kids want to help, and I want something that actually gets finished before Halloween night.
The best part? You don’t need professional decorating skills. A little melted chocolate, candy eyes, sprinkles, and imagination can take ordinary cookies, pretzels, marshmallows, and brownies from everyday snacks to Halloween party stars.
Why You’ll Love These Easy Halloween Treats

- Beginner-friendly: Most treats use simple techniques and everyday ingredients.
- Quick to make: Several options come together in 30 minutes or less.
- Budget-friendly: You can use inexpensive grocery-store staples instead of specialty decorations.
- Perfect for kids: Little hands can help with dipping, sprinkling, and adding candy eyes.
- Party-ready: These treats look festive on Halloween dessert tables, school parties, and family movie nights.
- Easy to customize: Change the colors, sprinkles, candies, or shapes to match your Halloween theme.
Ingredients You’ll Need
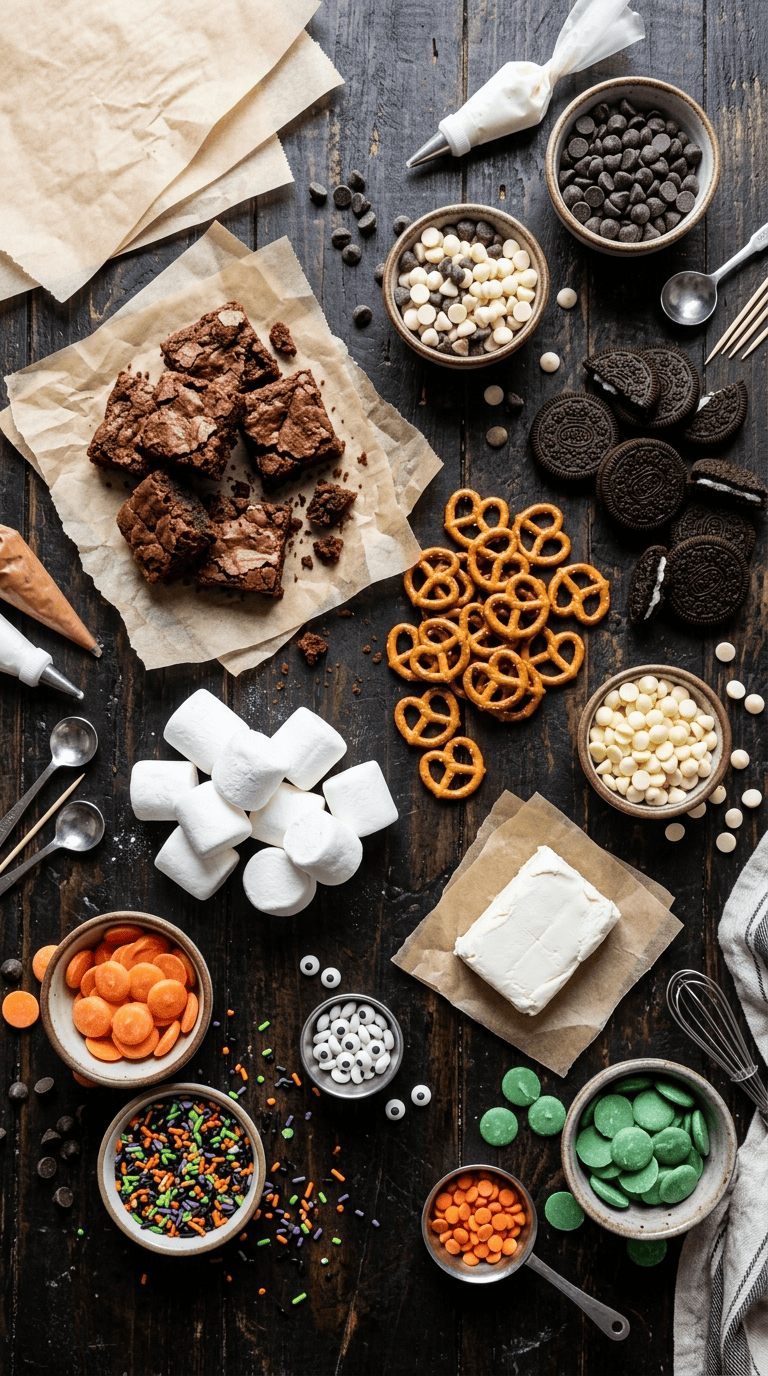
You don’t need one enormous shopping list to make fun Halloween treats. I usually keep a small collection of versatile ingredients around and mix and match them depending on what I’m craving.
For Chocolate-Dipped Pretzel Bats and Mummies
- 2 cups mini pretzel twists
- 1 ½ cups semi-sweet chocolate chips
- ½ cup white chocolate chips
- ¼ cup candy eyes
- 2 tablespoons Halloween sprinkles
- 1 teaspoon vegetable shortening, optional, for thinning chocolate
You can use milk chocolate instead of semi-sweet chocolate if you prefer a sweeter flavor.
For Halloween Marshmallow Pops
- 12 large marshmallows
- 1 cup white chocolate chips
- ½ cup orange candy melts
- 12 paper or reusable treat sticks
- ¼ cup Halloween sprinkles
- 24 candy eyes
If you don’t have candy melts, colored white chocolate works well too.
For Monster Brownie Bites
- 1 box brownie mix
- Ingredients listed on the brownie mix package
- 1 cup green candy melts
- ½ cup chocolate chips
- ¼ cup candy eyes
- 2 tablespoons Halloween sprinkles
A homemade brownie recipe works beautifully if you already have one you love.
For No-Bake Halloween Cookie Balls
- 24 chocolate sandwich cookies
- 4 ounces cream cheese, softened
- 1 ½ cups white or semi-sweet chocolate chips
- ½ cup Halloween sprinkles
- Candy eyes for decorating
I usually use regular chocolate sandwich cookies, but you can experiment with flavored varieties.
Helpful Kitchen Tools
A few basic tools make these treats much easier:
- Microwave-safe bowls
- Baking sheets
- Parchment paper
- Silicone spatula
- Toothpicks
- Small piping bag or zip-top bag
- Cookie scoop
- Cooling rack
I strongly recommend parchment paper. It saves me from scraping hardened chocolate off my baking sheets later.
Step-by-Step Instructions
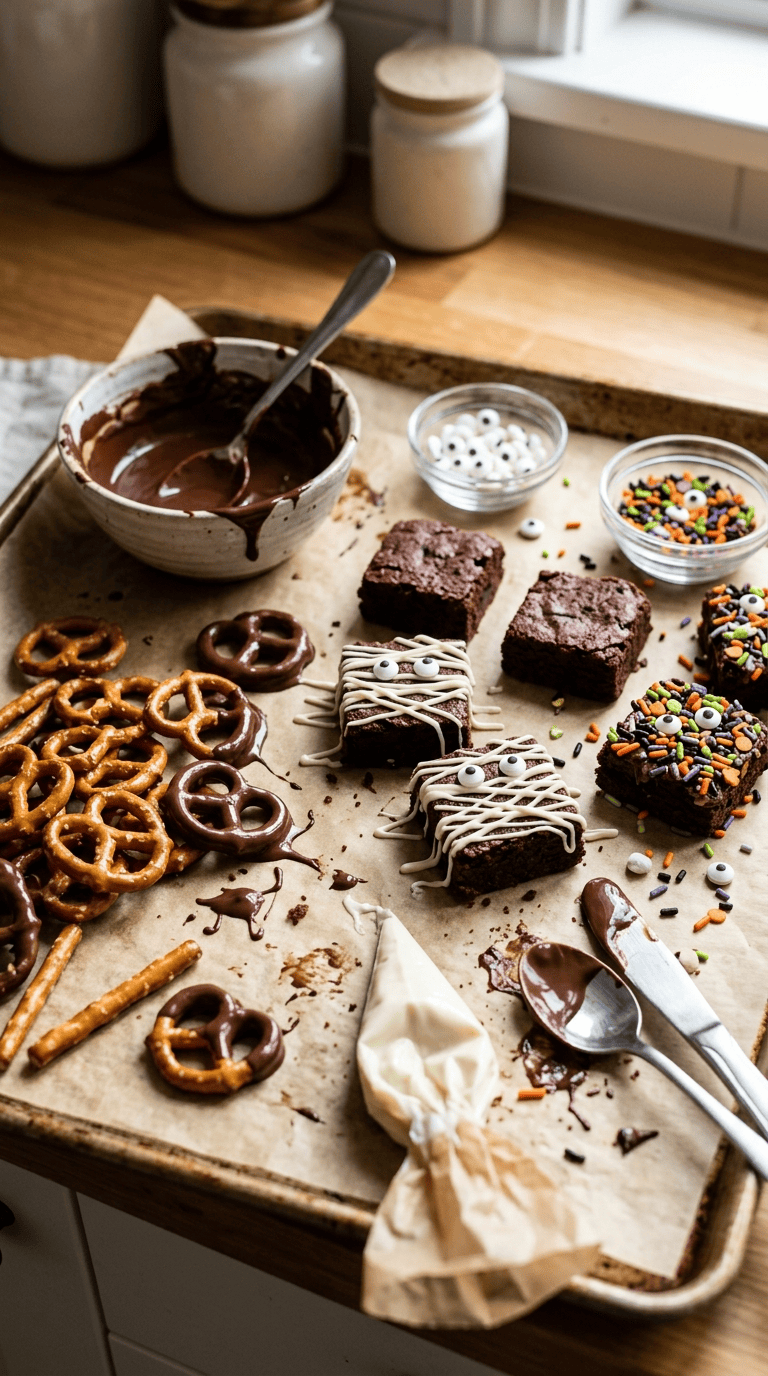
You can make these treats separately, or prepare several at once if you’re hosting a Halloween party.
1. Prepare Your Workspace
Start by lining your baking sheets with parchment paper.
Set your candy eyes, sprinkles, pretzels, marshmallows, and other decorations within easy reach.
This might sound like a tiny detail, but it makes a huge difference. Once melted chocolate starts setting, you don’t want to run around the kitchen searching for sprinkles.
Give yourself about 5 minutes for setup.
2. Melt the Chocolate Carefully
Place the semi-sweet chocolate chips in a microwave-safe bowl.
Microwave for 20 seconds, then stir well.
Continue heating in 10–15 second bursts, stirring after each one until the chocolate becomes smooth.
Don’t rush this part. I once overheated an entire bowl of chocolate because I assumed it needed another minute. It went from silky to thick and grainy surprisingly fast.
If your chocolate looks slightly too thick, stir in about ½ teaspoon vegetable shortening at a time.
3. Make Chocolate-Dipped Pretzels
Dip each pretzel about halfway into the melted chocolate.
Let the excess chocolate drip back into the bowl, then place the pretzel on parchment paper.
Before the chocolate sets, add candy eyes or Halloween sprinkles.
For a spooky mummy look, melt the white chocolate separately.
Transfer it to a small piping bag or zip-top bag with a tiny corner snipped off.
Drizzle thin white lines across the chocolate-covered pretzels.
Add two candy eyes while the chocolate remains soft.
Allow them to set for about 20–30 minutes at room temperature.
If your kitchen feels warm, place the tray in the refrigerator for about 10 minutes.
4. Make the Marshmallow Pops
Push one stick into the bottom of each marshmallow.
Melt the white chocolate in a microwave-safe bowl using short heating intervals.
Dip each marshmallow into the melted chocolate, turning it gently until coated.
Tap the stick lightly against the bowl to remove excess chocolate.
Place the marshmallow upright or on parchment paper.
Add candy eyes and sprinkles while the coating remains soft.
For little ghost pops, keep the coating white and use two candy eyes.
For monster pops, use orange or green candy melts and add lots of colorful sprinkles.
Let the marshmallows set for approximately 20 minutes.
5. Bake the Brownies
Prepare the brownie mix according to the package directions.
Pour the batter into a lined baking pan and bake according to the package instructions.
Start checking the brownies a few minutes before the recommended baking time ends.
You want the center to look set but still slightly soft.
Let the brownies cool completely before decorating.
This usually takes around 30–45 minutes, depending on the pan and your kitchen temperature.
I learned this lesson after decorating warm brownies. The candy melts slid everywhere, and my cute little monster brownies looked more like melted green puddles.
6. Cut the Brownies Into Bites
Once completely cool, cut the brownies into small squares.
You can use a knife, but a small cookie cutter also works if you want Halloween shapes.
Arrange the brownie pieces on parchment paper or a serving tray.
7. Decorate the Brownie Monsters
Melt the green candy melts in a microwave-safe bowl.
Spoon or drizzle the coating over each brownie bite.
Add two or three candy eyes while the coating remains wet.
For a monster-hair effect, use a toothpick to pull the candy coating into little spikes.
Add a few Halloween sprinkles for extra color.
Allow the decorated brownies to sit for about 15–20 minutes until the coating becomes firm.
8. Make the No-Bake Cookie Mixture
Place the chocolate sandwich cookies into a food processor.
Pulse until you get fine crumbs.
Add the softened cream cheese and process until the mixture becomes thick and holds together.
If you don’t have a food processor, crush the cookies inside a sealed bag with a rolling pin and mix everything in a bowl.
Scoop out about 1 tablespoon of the mixture and roll it between your palms.
Repeat until you use all the mixture.
Place the cookie balls on a parchment-lined tray.
Chill them for about 20 minutes.
9. Coat the Cookie Balls
Melt the chocolate chips in short microwave intervals.
Dip each chilled cookie ball into the melted chocolate.
Use a fork to lift it out, allowing extra chocolate to drip away.
Place it on parchment paper.
Add Halloween sprinkles and candy eyes immediately.
Let the cookie balls sit until the chocolate becomes firm.
You can refrigerate them for 15–20 minutes if you want them to set faster.
10. Add the Final Halloween Details
This is the part where I usually let everyone get creative.
Use melted chocolate to draw tiny spider legs.
Add extra candy eyes to create silly monsters.
Try orange, purple, black, and green sprinkles for a classic Halloween look.
Don’t worry about making every treat identical. Honestly, the slightly wonky ones usually look the cutest.
Pro Tips & Tricks
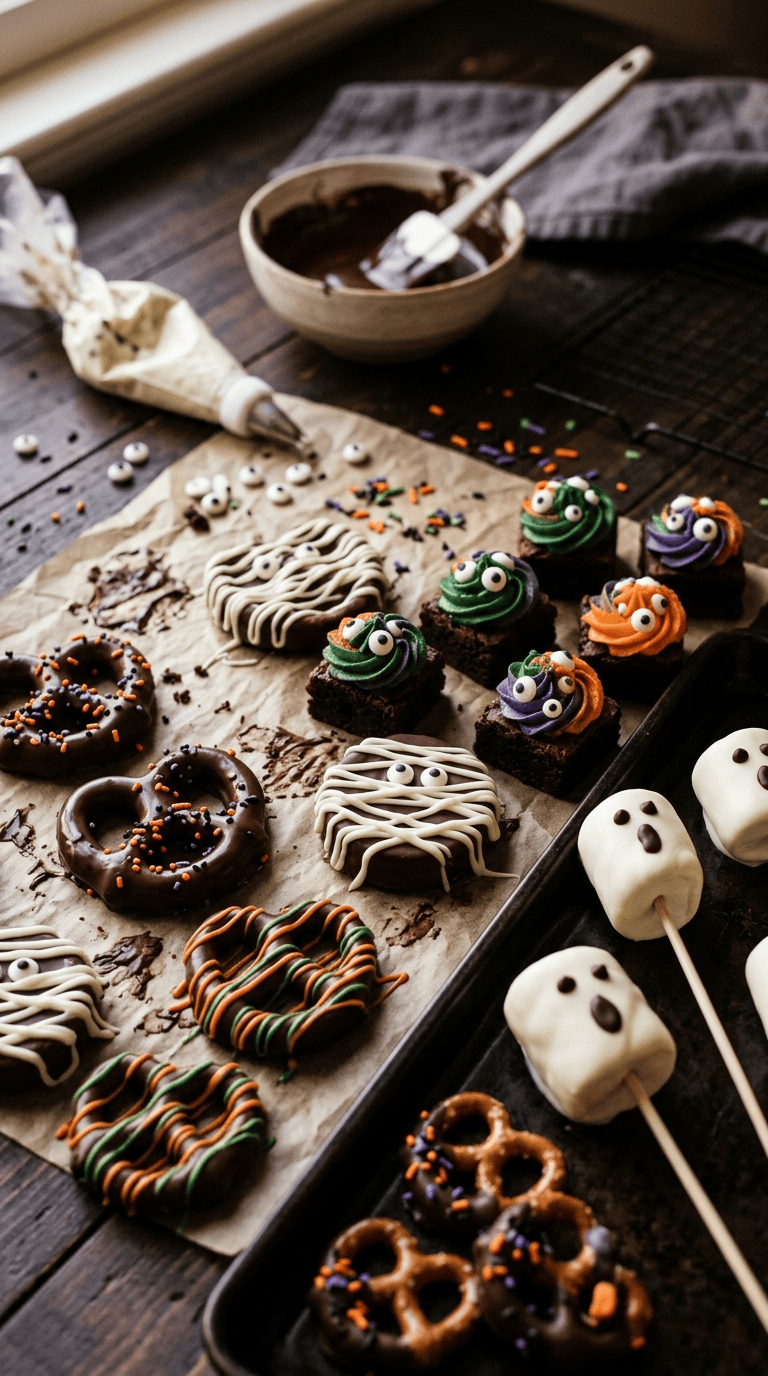
Keep Melted Chocolate Away From Water
Even a little water can make melted chocolate seize and turn thick.
Make sure your bowls and utensils are completely dry before you begin.
Don’t Overheat Candy Melts
Candy melts can become thick if you heat them too long.
Use short bursts and stir frequently.
If they become difficult to dip, let them cool for a minute and stir again before adding a tiny amount of shortening.
Decorate Before the Chocolate Sets
Candy eyes and sprinkles need something soft to stick to.
Work with one or two treats at a time rather than dipping everything first and decorating later.
Let Brownies Cool Completely
This deserves repeating.
Warm brownies and melted candy coating do not make good friends.
Cool brownies give you much cleaner decorations and sharper edges.
Use Parchment Paper
Parchment keeps chocolate from sticking to the tray.
It also makes cleanup much easier, which matters when you have several Halloween treats covering the counter.
Make Them Ahead
Most chocolate-covered treats can sit in an airtight container for a day or two.
For parties, I often prepare the treats the evening before and decorate them once everything has completely cooled.
Variations & Substitutions
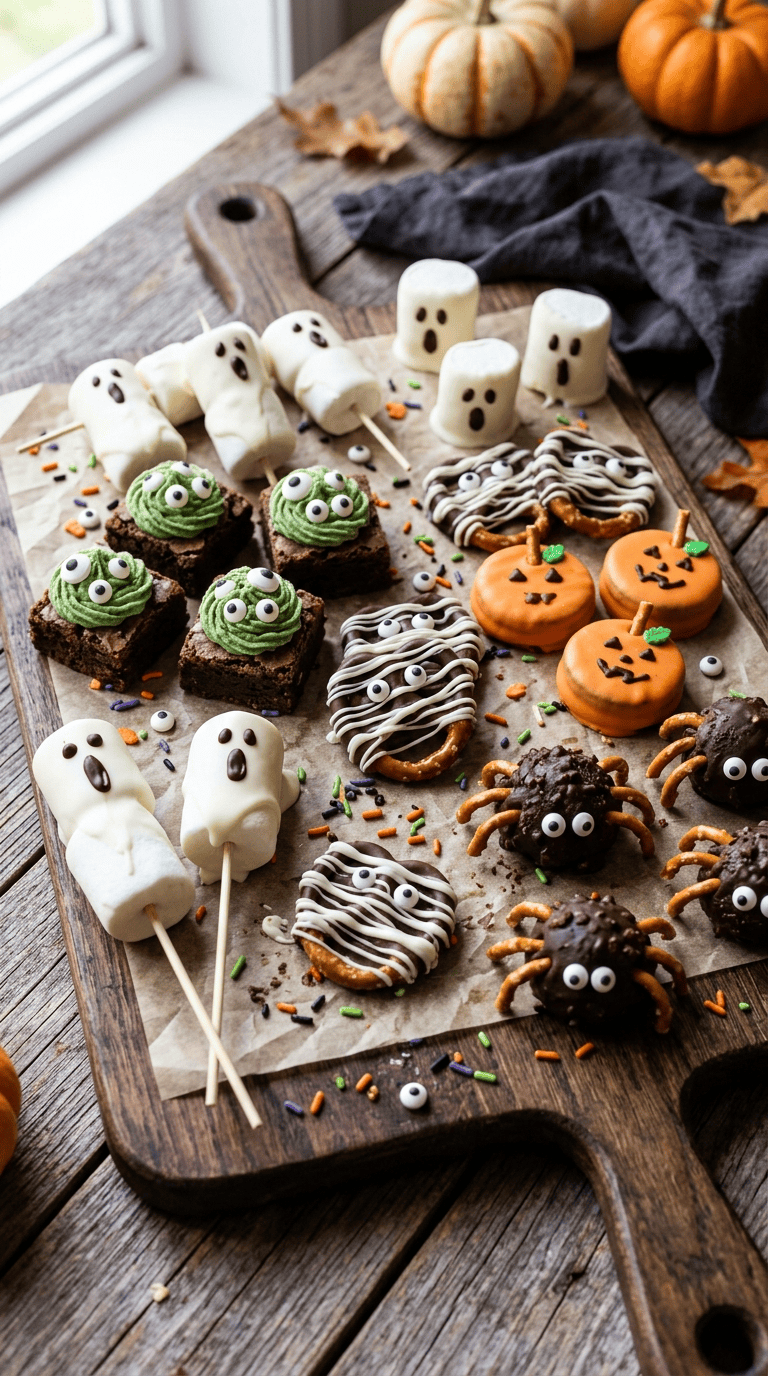
Make Them Nut-Free
These treats can easily stay nut-free by choosing ingredients that don’t contain nuts and checking the packaging for allergen information.
This makes them a handy option for many classroom or family gatherings, but always check the specific ingredient labels for your guests.
Make Them Dairy-Free
Use dairy-free chocolate chips, dairy-free candy melts, and a suitable dairy-free cream cheese alternative for the cookie balls.
Check every package carefully because chocolate and decorative candies can contain milk ingredients.
Create Different Halloween Characters
You can turn the same basic treats into different characters without changing the recipe.
Try:
- Ghosts: White coating with candy eyes
- Monsters: Green coating with several eyes
- Mummies: White chocolate drizzle over dark chocolate
- Pumpkins: Orange coating with chocolate details
- Spiders: Chocolate coating with piped chocolate legs
- Frankenstein: Green coating with dark chocolate hair and candy eyes
This trick saves money because you can buy a few basic ingredients and create several different designs.
Change the Chocolate
Dark chocolate gives the treats a richer flavor.
Milk chocolate makes them sweeter and more kid-friendly.
White chocolate works especially well for ghosts and mummies.
Serving Suggestions

These easy Halloween treats work almost anywhere you need a little spooky sweetness.
For a Halloween party, arrange different treats on a large platter. Place brownies in the center and surround them with chocolate-covered pretzels and marshmallow pops.
I like using small black, orange, and purple cupcake liners to separate individual treats. They make the platter look more organized without requiring extra decorating work.
For a Halloween movie night, serve the treats alongside popcorn, hot chocolate, apple cider, or your favorite cold drink.
If you’re making treats with kids, set up a little decorating station. Put the plain treats on one side and bowls of sprinkles, candy eyes, and melted chocolate on the other.
For school or neighborhood parties, individually wrap sturdy treats such as pretzels or brownie bites.
Just remember to check any school or event rules about homemade food and allergens before bringing them.
Related Recipes :
- Halloween Brownie Ideas That Look Scary and Delicious
- No-Bake Halloween Desserts for Busy Hosts
- Halloween Desserts for a Spooky Potluck Everyone Will Love
FAQ’s
How far ahead can I make Halloween treats?
You can usually make these treats 1–2 days ahead when you store them properly.
Keep chocolate-covered treats in an airtight container in a cool, dry place. Cookie balls containing cream cheese should stay refrigerated.
Can I freeze Halloween treats?
Some treats freeze better than others.
Chocolate-covered pretzels and brownies generally freeze well when wrapped tightly and placed in an airtight freezer container.
For decorated treats, freeze them in a single layer first so the decorations don’t stick together.
Thaw them in the refrigerator or at room temperature, depending on the treat.
Why did my melted chocolate become thick?
You may have overheated it or introduced moisture.
Next time, heat the chocolate in shorter intervals and stir between each one.
If it remains thick but hasn’t seized, a small amount of vegetable shortening can help loosen it.
Can I use regular chocolate instead of candy melts?
Absolutely.
Regular chocolate chips, chopped chocolate bars, or baking chocolate can all work.
Keep in mind that candy melts usually set more firmly and make decorating easier, while real chocolate often gives you a richer flavor.
How should I store Halloween treats?
Store chocolate-covered treats in an airtight container away from heat and direct sunlight.
Keep cream cheese-based cookie balls refrigerated.
Place parchment between layers if the treats have sticky decorations.
Can I make these Halloween treats without special decorating tools?
Yes.
You can use a zip-top bag with a tiny corner snipped off instead of a piping bag.
A toothpick can create small details, and a spoon works perfectly well for drizzling chocolate.
You really don’t need fancy equipment to make them look festive.
Final Thoughts
I’ve made plenty of Halloween desserts that looked impressive but left my kitchen looking like a chocolate storm had passed through it.
These easy Halloween treats are different. They let you have the fun part of Halloween baking without demanding perfect decorating skills or a huge ingredient list.
My favorite thing is watching everyone decorate their own treats. One person makes a three-eyed monster, someone else creates a slightly confused-looking mummy, and somehow the messy ones always disappear first.
So grab some chocolate, candy eyes, sprinkles, and whatever treats you already have in the pantry. Put on your favorite Halloween playlist and make a batch.
They don’t have to look perfect. They just need to be delicious, a little spooky, and fun enough that everyone wants another one.
Leave a Reply
You must be logged in to post a comment.