


Every Thanksgiving, I reach a point where the kitchen looks like a small bakery exploded.
There are mixing bowls everywhere, the oven is working overtime, and someone is always asking when dinner will be ready. The last thing I want is a dessert that needs constant attention or leaves me washing another mountain of dishes.
That’s where this easy Thanksgiving dessert for the whole family comes in.
I started making this apple crisp after one particularly hectic Thanksgiving when my pie crust refused to cooperate. I had a pile of apples on the counter, a few pantry staples, and not much patience left. I tossed everything together, sprinkled on a buttery oat topping, and hoped for the best.
It worked.
Actually, it worked so well that nobody missed the pie.
The apples become soft and syrupy while the topping turns golden and crisp around the edges. It smells like cinnamon and baked apples while it cooks, and you can serve it warm with vanilla ice cream for a dessert that feels special without requiring pastry skills.
I’ve made plenty of versions since then, but this remains my favorite when I want a dependable Thanksgiving dessert that I can prepare without stress.
Why You’ll Love This Recipe

- Beginner-friendly: You don’t need to roll dough, make a complicated filling, or use special equipment.
- Perfect for a crowd: One baking dish gives you plenty of warm dessert to pass around the table.
- Easy to prepare ahead: You can assemble much of it before guests arrive and bake it when you’re ready.
- Flexible: Use the apples you already have, adjust the spices, or add nuts to the topping.
- Cozy without being fussy: It looks homemade because it is homemade, and that’s exactly the point.
Ingredients
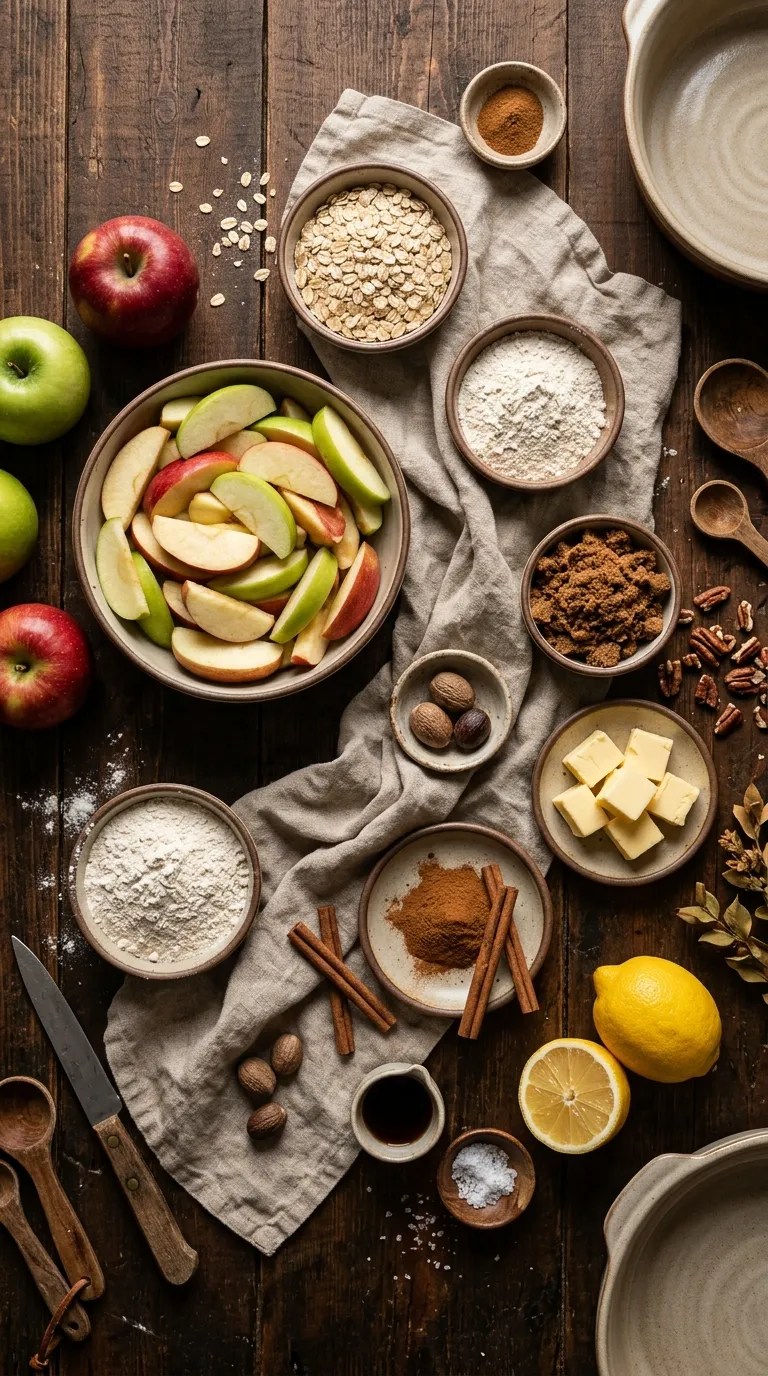
This recipe makes about 8 servings.
For the apple filling
- 6 medium apples, about 2½ pounds total
- 2 tablespoons lemon juice
- ⅓ cup packed light brown sugar
- 2 tablespoons all-purpose flour
- 1 teaspoon ground cinnamon
- ¼ teaspoon ground nutmeg
- ¼ teaspoon salt
- 1 teaspoon vanilla extract
For the crisp topping
- 1 cup old-fashioned rolled oats
- ¾ cup all-purpose flour
- ½ cup packed light brown sugar
- ½ teaspoon ground cinnamon
- ¼ teaspoon salt
- ½ cup unsalted butter, melted
- ½ cup chopped pecans or walnuts, optional
You can use a mixture of apples for more interesting flavor. I particularly like combining a tart apple with a sweeter variety.
If you need a nut-free dessert, simply leave out the pecans or walnuts. The topping still turns wonderfully crisp.
For a gluten-free version, use a certified gluten-free all-purpose flour blend and make sure your oats carry a gluten-free label if cross-contact matters for your household.
Step-by-Step Instructions
1. Heat the oven and prepare your baking dish — 5 minutes
Preheat your oven to 350°F (175°C).
Lightly grease a 9-by-13-inch baking dish with butter or cooking spray.
I usually use a glass or ceramic casserole dish for this. A metal baking pan works too, but keep an eye on the edges because they can brown a little faster.
2. Peel and slice the apples — 10 minutes
Peel the apples if you prefer a softer filling, then remove the cores and slice the apples into roughly ¼-inch-thick pieces.
They don’t need to look perfect.
In fact, I stopped worrying about making every slice identical years ago. Just aim for reasonably similar pieces so they cook at about the same rate.
Put the apples into a large mixing bowl.
3. Season the apple filling — 3 minutes
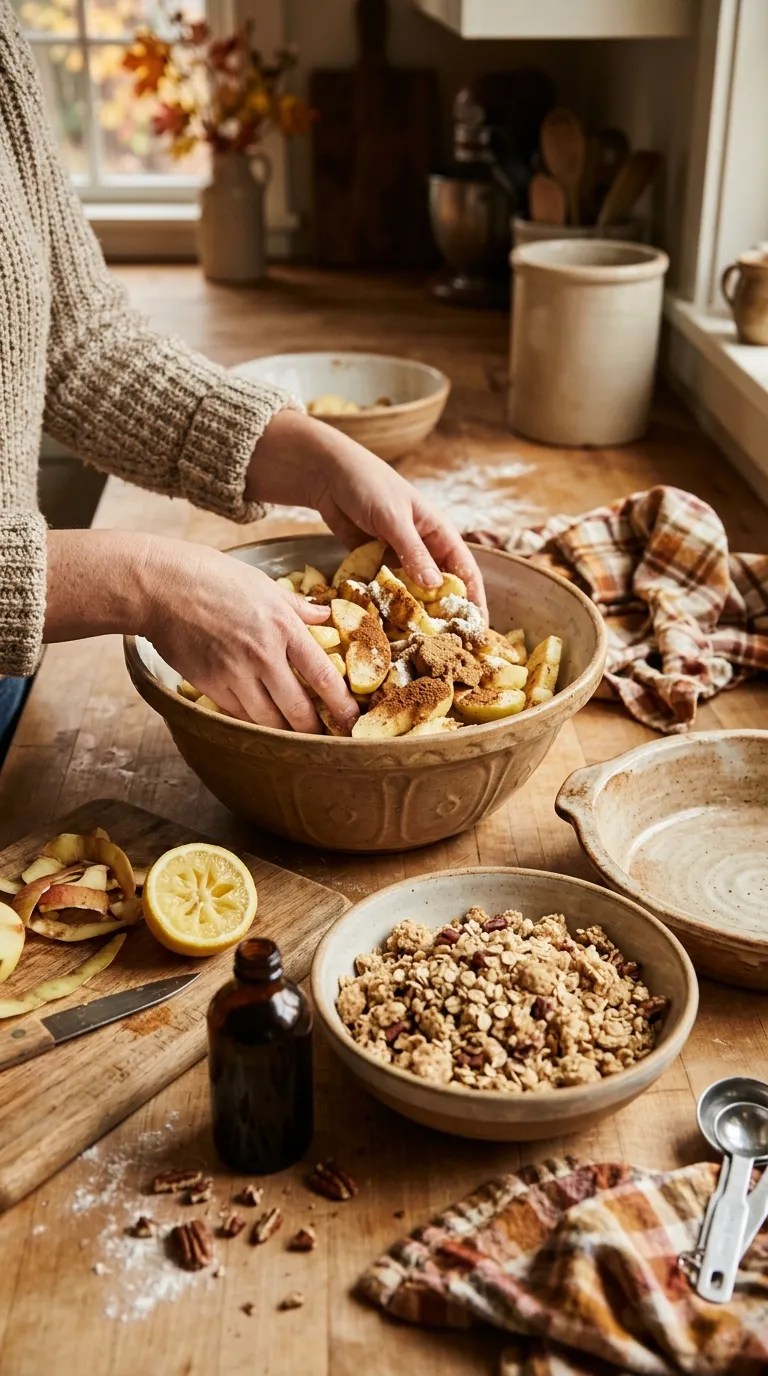
Add the lemon juice, brown sugar, flour, cinnamon, nutmeg, salt, and vanilla.
Toss everything together until the apples look evenly coated.
The flour might seem like a small addition, but it helps the juices thicken as the apples bake. Without it, the bottom of the crisp can sometimes turn more watery than you want.
Pour the apples into your prepared baking dish and spread them into an even layer.
4. Make the crisp topping — 5 minutes
In a clean bowl, stir together the oats, flour, brown sugar, cinnamon, salt, and chopped nuts if you’re using them.
Pour in the melted butter.
Stir with a fork until the mixture forms loose, chunky crumbs.
Here’s the visual cue I use: you want some small crumbs and some larger clumps. If the topping looks like perfectly even sand, keep stirring gently and squeeze a few portions together with your fingers.
Those larger clumps become some of the best crunchy bits.
5. Cover the apples with the topping — 2 minutes
Scatter the topping evenly over the apples.
Don’t press it down.
A loose topping gives the hot air plenty of room to move around, which helps it brown instead of turning into one dense layer.
6. Bake until bubbling and golden — 40–50 minutes
Place the baking dish in the oven and bake for 40 to 50 minutes.
Start checking around the 40-minute mark.
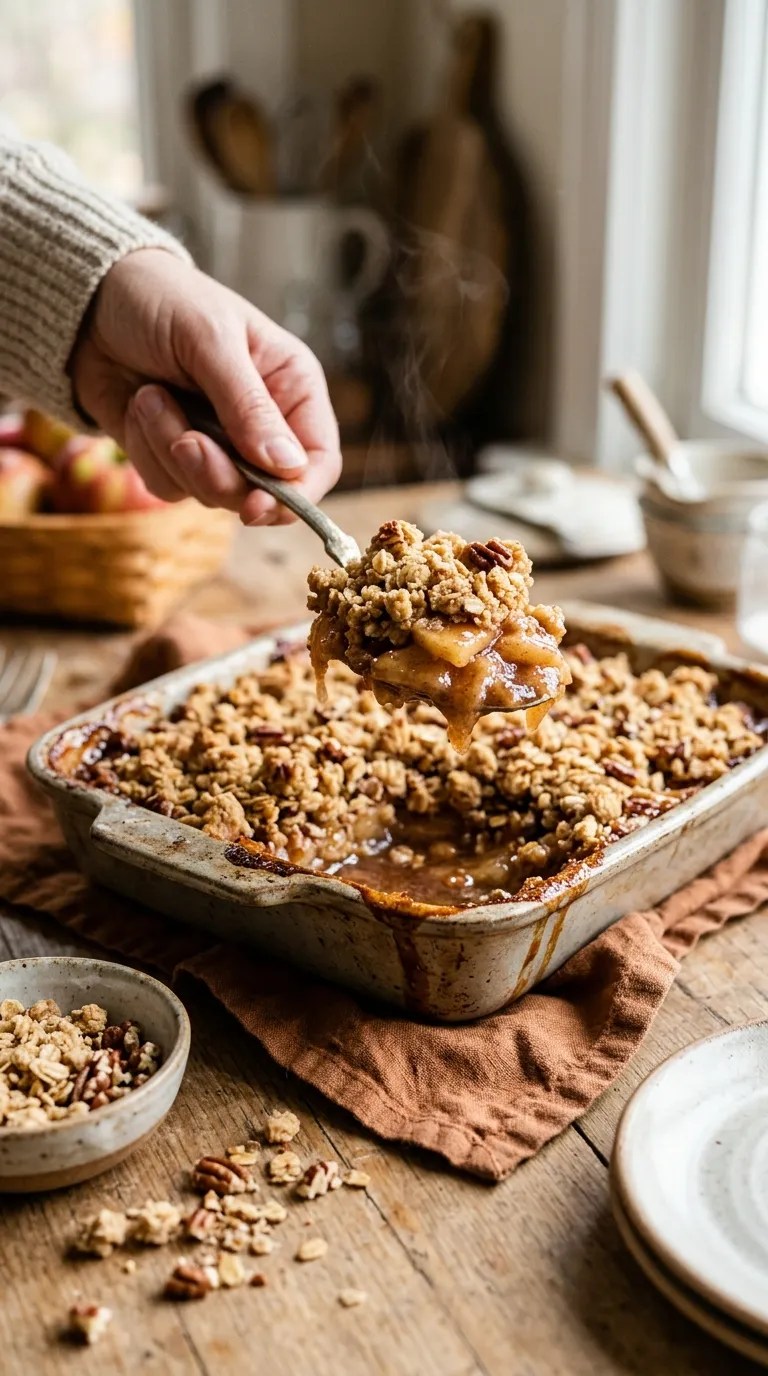
The topping should look golden brown, and you should see the apple juices bubbling around the edges. If you gently peek through a spot in the topping, the apples should look tender rather than firm and pale.
If the topping browns before the apples finish cooking, loosely cover the dish with aluminum foil and continue baking.
7. Let it rest — 15 minutes
This step tests my patience every single time.
Take the crisp out of the oven and let it sit for about 15 minutes before serving.
The filling will be extremely hot when it first comes out, and the juices need a little time to thicken. If you scoop into it immediately, you’ll get delicious apples and a puddle of syrupy juice.
Give it those few minutes, and the filling becomes much easier to spoon.
8. Serve it warm — 1 minute
Scoop the warm apple crisp into bowls and top each serving with vanilla ice cream.
The contrast between the warm cinnamon apples, crunchy topping, and cold melting ice cream is the part that makes everyone suddenly find room for dessert.
Pro Tips & Tricks
Choose apples that hold their shape
Some apples turn soft quickly in the oven, while others keep more texture.
For this crisp, I like using a combination rather than relying on one variety. Tart apples bring brightness, while sweeter apples add a mellow flavor.
Avoid cutting the apples into very thin slices. They can disappear into the filling before the topping finishes browning.
Don’t skip the resting time
I know it’s tempting to serve the crisp immediately, especially when everyone is hovering around the kitchen.
But those 15 minutes make a noticeable difference. The filling thickens, the topping settles, and the dessert becomes much easier to serve.
Keep the topping chunky
When you mix the melted butter into the dry ingredients, don’t work it until everything becomes one smooth paste.
You want crumbs and clumps.
If your topping seems unusually dry, let it sit for a minute after mixing. The oats and flour absorb some of the butter as they rest.
Make it ahead for Thanksgiving
You can peel and slice the apples earlier in the day and keep them refrigerated in an airtight container.
For the best topping texture, I prefer mixing the topping separately and refrigerating it until I’m ready to bake.
When dessert time gets close, assemble the crisp and put it straight into the oven.
If you assemble the entire unbaked crisp several hours ahead, the topping may soften slightly from the apple juices. It will still taste good, but you’ll get a crunchier topping if you keep the components separate until baking.
Store leftovers properly
Let leftover crisp cool, then cover the baking dish or transfer the dessert to an airtight container.
Keep it refrigerated and enjoy it within about 3 to 4 days for the best quality.
You can reheat individual portions in the microwave for a quick dessert, or warm several servings in a 350°F oven until heated through.
I prefer the oven when I have time because it helps bring some crispness back to the topping.
Variations & Substitutions
Add a little cranberry
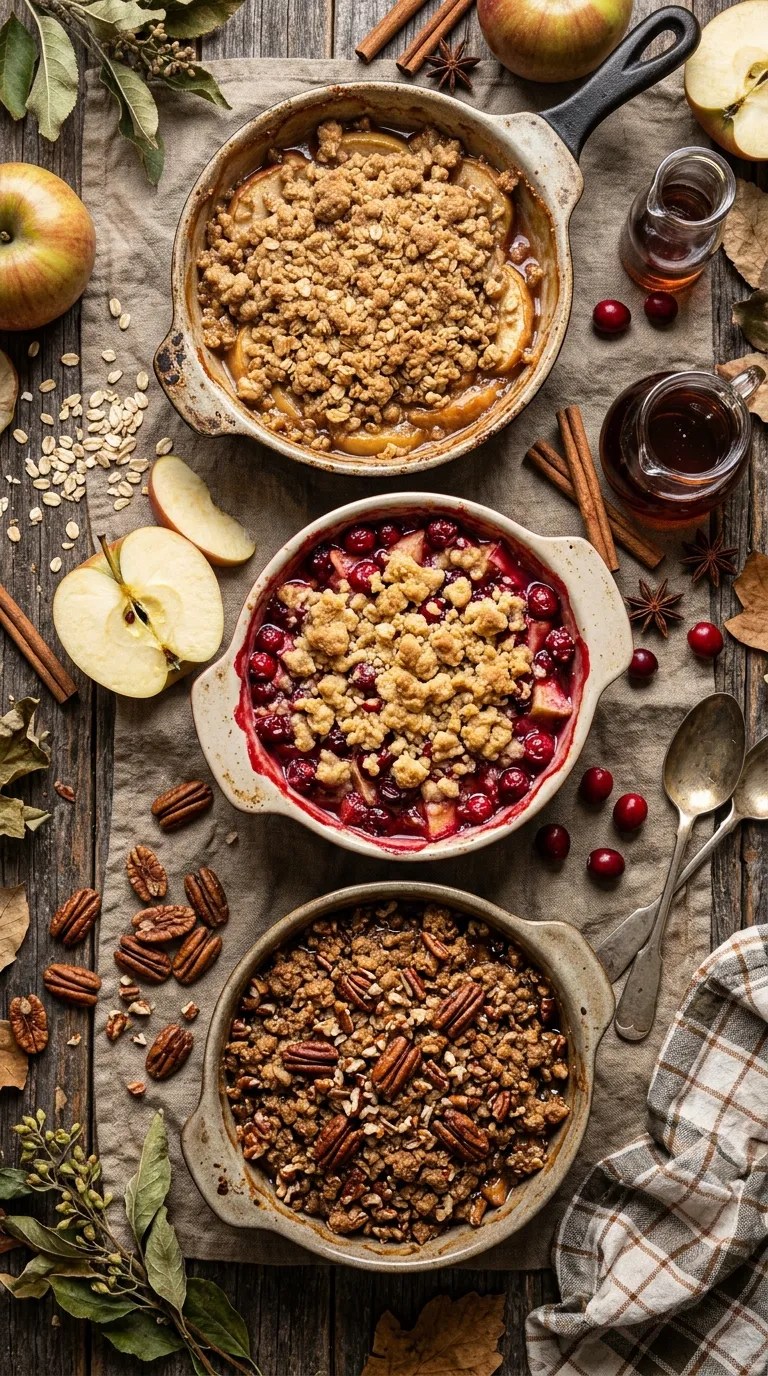
For a Thanksgiving twist, replace about 1 cup of the sliced apples with fresh or frozen cranberries.
The cranberries add a tart pop that works beautifully with the brown sugar and cinnamon. If you use a large amount, you may want to add another tablespoon or two of brown sugar to balance the tartness.
Make it extra nutty
If your family loves pecans, increase the nuts in the topping to ¾ cup.
You can also toast the chopped pecans in a dry skillet for a few minutes before adding them. Let them cool first.
That little extra step gives them a deeper roasted flavor.
Try a maple version
Replace 2 tablespoons of the brown sugar in the filling with pure maple syrup.
You can also add 1 tablespoon of maple syrup to the topping, but if you do, reduce the melted butter slightly so the topping doesn’t become too wet.
I like this version when I want the dessert to taste especially autumnal without adding a long list of ingredients.
Serving Suggestions

This apple crisp belongs on a Thanksgiving table, but you don’t need to save it for one particular holiday.
Serve it warm with vanilla ice cream for the classic combination.
Whipped cream works beautifully too, especially if you prefer something lighter than ice cream. A spoonful of plain or lightly sweetened yogurt can also work for a breakfast-style serving the next morning.
For a larger Thanksgiving meal, I like serving the crisp after the table has been cleared and the coffee has started brewing.
You can bake it while everyone finishes dinner, let it rest, and bring the whole dish to the table. There’s something wonderfully relaxed about letting people serve themselves.
If you’re feeding children, put the ice cream on the table and let them add their own scoop. It turns a simple dessert into part of the fun.
And if you’re taking the dessert to someone else’s Thanksgiving dinner, bake it in a disposable foil pan or a baking dish with a secure lid. Just remember that the dish will stay hot for quite a while after baking.
Related Recipes:
- Easy Pumpkin Dessert for Thanksgiving – Simple & Delicious Recipe
- Easy Maple Pecan Pie for Thanksgiving
- Easy Fall Truffles for Thanksgiving Dessert
- How to Make Pumpkin Bread Pudding for Thanksgiving
- Easy Pumpkin Dump Cake Recipe for Thanksgiving
FAQ’s
Can I make this Thanksgiving dessert without peeling the apples?
Absolutely.
Leaving the skins on saves time and adds a little texture. If your family prefers an especially soft filling, peel the apples. Otherwise, feel free to leave the skins on.
Can I use quick oats instead of old-fashioned oats?
You can, although I prefer old-fashioned rolled oats.
Old-fashioned oats give the topping more texture and chew. Quick oats produce a softer, more uniform topping.
I wouldn’t use steel-cut oats here because they need much more cooking time and won’t give you the texture you want.
Can I prepare apple crisp the day before Thanksgiving?
Yes.
For the best texture, prepare the apple mixture and topping separately, cover them, and refrigerate them overnight.
When you’re ready to bake, assemble everything in the baking dish.
If the chilled ingredients make the baking dish very cold, avoid putting a cold glass dish directly into a very hot oven because sudden temperature changes can cause glass to crack. Let the dish warm up appropriately according to the manufacturer’s guidance, or use a room-temperature metal baking pan for make-ahead preparation.
Why is my apple crisp watery?
The apples naturally release juice as they bake.
A little bubbling juice around the edges is completely normal. If the finished filling seems excessively loose, the apples may have released more liquid than expected, or the crisp may need a little more baking time.
Also make sure you include the flour in the filling and give the crisp time to rest after baking.
Can I freeze apple crisp?
You can freeze it, although the topping usually loses some of its original crispness after freezing and thawing.
For better texture, freeze the baked crisp in a well-sealed, freezer-safe container and thaw it in the refrigerator.
Reheat it in a 350°F oven until hot in the center. You can leave it uncovered during reheating to help the topping regain some crunch.
Can I make this dessert without nuts?
Yes.
Simply leave out the pecans or walnuts. You don’t need to replace them with anything.
If you want extra crunch without nuts, add a little more rolled oats instead.
Final Thought
I love complicated Thanksgiving desserts when I have the time and energy for them. But some years, I just want something warm, generous, and almost impossible to mess up.
That’s why this easy Thanksgiving dessert has earned a permanent place in my holiday rotation.
The apples do most of the work. The topping takes a few minutes to stir together. And once the baking dish goes into the oven, your kitchen starts smelling like cinnamon, butter, and baked apples while you get back to everything else.
If your Thanksgiving menu already has enough moving parts, this is the dessert I’d choose.
Make it once, put a scoop of vanilla ice cream on top, and see how quickly that supposedly “extra” serving disappears.
Leave a Reply
You must be logged in to post a comment.