

There’s a certain moment at the end of dinner when everyone suddenly gets quiet because dessert arrives. I love that moment.
A few years ago, I had friends coming over for dinner and realized, far too late, that I had planned an ambitious dessert with several complicated components. I abandoned the idea, pulled out some chocolate, cream, berries, and a few pantry basics, and improvised instead.
The result looked like something I had picked up from a fancy pastry shop.
Since then, I’ve stopped believing that impressive desserts need complicated techniques. Sometimes the secret comes down to choosing simple ingredients, putting them together neatly, and giving them enough attention to presentation.
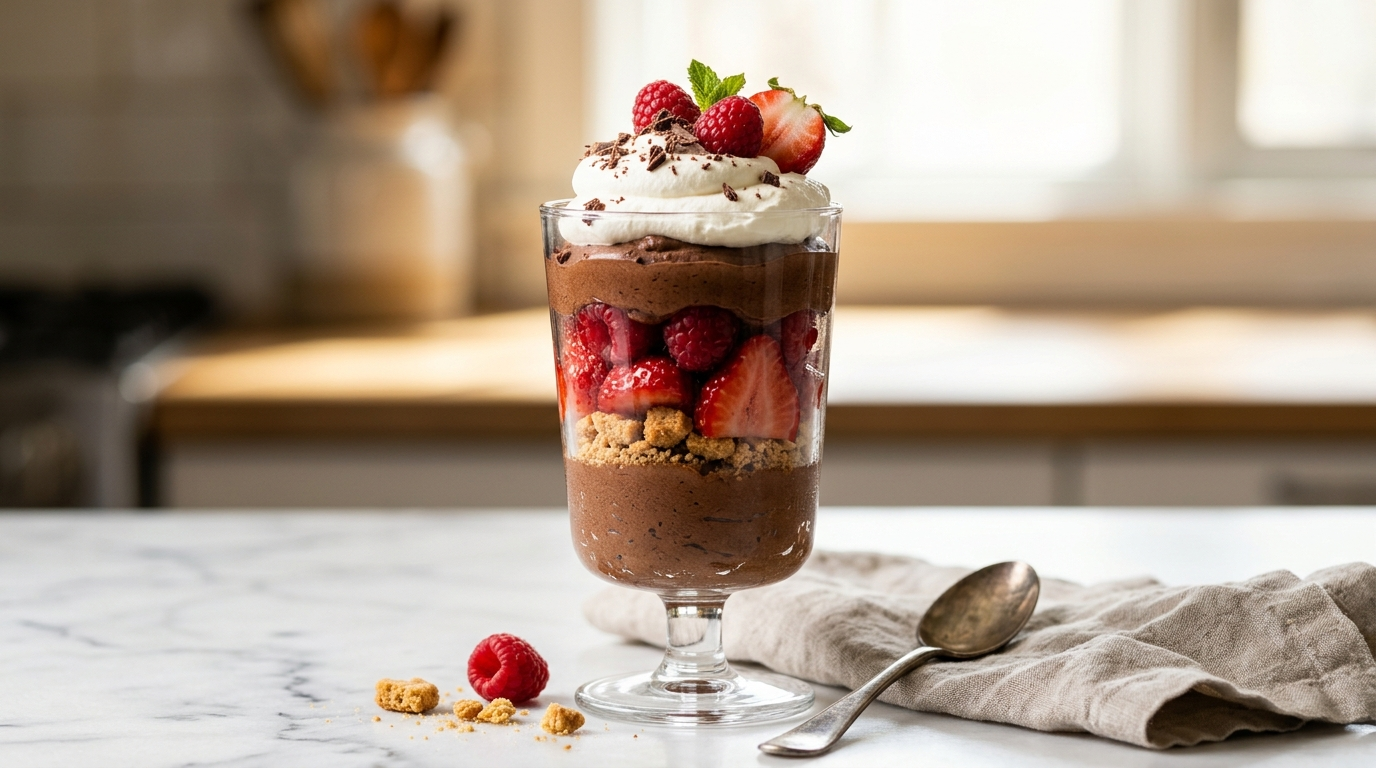
My favorite example is this easy chocolate mousse parfait with berries and crisp cookie crumbs. It has layers of silky chocolate mousse, juicy berries, buttery crumbs, and softly whipped cream. The individual parts are simple, but when you spoon them into clear glasses, the whole dessert suddenly looks restaurant-worthy.
And yes, I’ve made plenty of mistakes along the way. I once rushed the chocolate and ended up with little lumps in the mousse. Another time, I over-whipped the cream and had to start again. Those little lessons are exactly why I now make this dessert with a much calmer approach.
If you want a fancy dessert that looks impressive but doesn’t require pastry-school skills, this is the one I’d start with.
Why You’ll Love This Fancy Dessert

- It looks much harder than it is. Layers do most of the visual work for you.
- You can make it ahead. The mousse needs time to chill, so you can prepare it before guests arrive.
- No special pastry skills required. You don’t need to pipe perfect decorations or roll out delicate dough.
- The ingredients are easy to find. Chocolate, cream, berries, cookies, and a few basics do the heavy lifting.
- You can customize every layer. Change the fruit, cookies, chocolate, or toppings depending on what you have.
The best part is that each spoonful gives you something different: creamy mousse, crunchy crumbs, bright fruit, and fluffy cream.
Ingredients
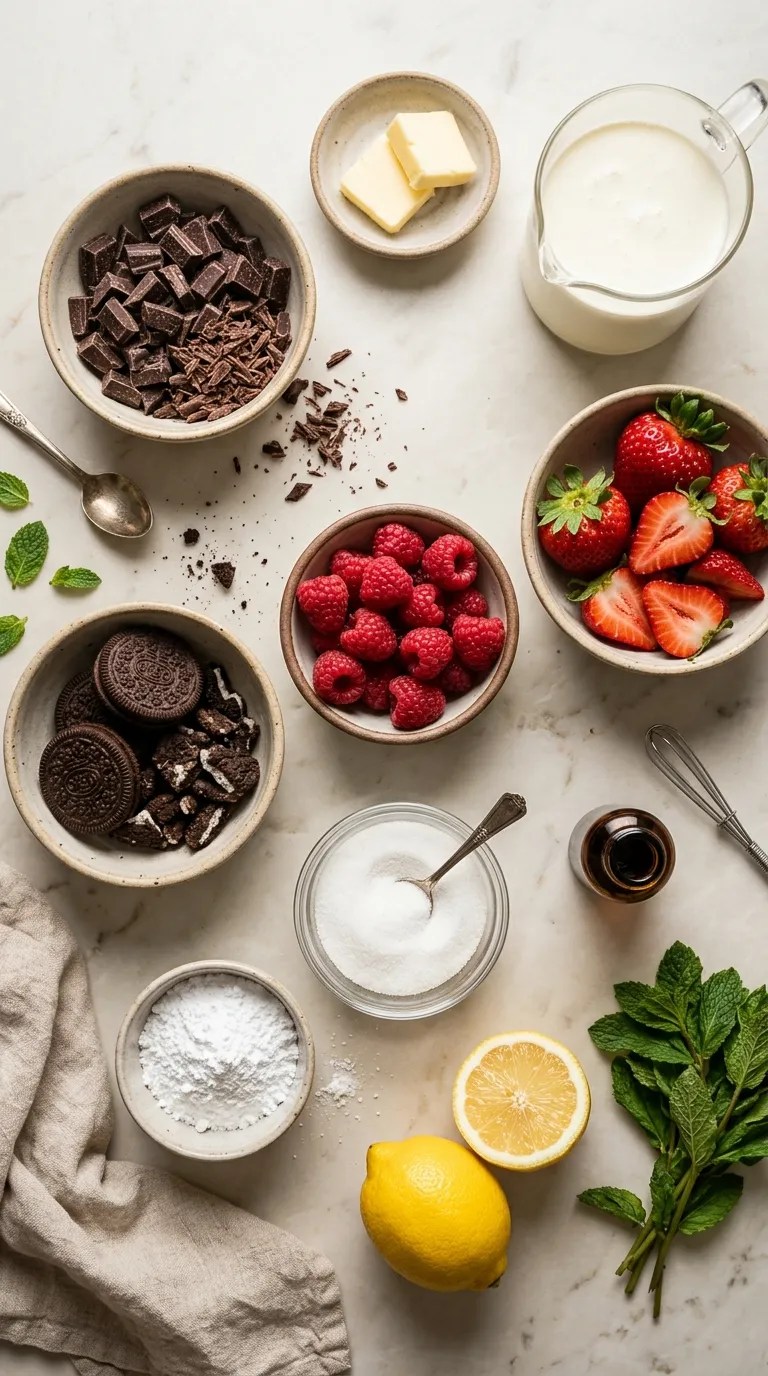
This recipe makes 6 generous dessert glasses.
For the Chocolate Mousse
- 6 ounces (170 g) semisweet chocolate, finely chopped
- 2 tablespoons unsalted butter
- 1 cup (240 ml) heavy whipping cream
- 2 tablespoons granulated sugar
- 1 teaspoon pure vanilla extract
- 1 small pinch of salt
You can use bittersweet chocolate if you prefer a deeper chocolate flavor. Milk chocolate also works, but reduce the added sugar because milk chocolate brings more sweetness.
For the Berry Layer
- 1 ½ cups (225 g) strawberries, sliced
- 1 cup (150 g) raspberries
- 1 tablespoon granulated sugar
- 1 teaspoon fresh lemon juice
Frozen berries can work in a pinch, although fresh berries give you a prettier finish. If you use frozen fruit, thaw and drain it well first.
For the Cookie Crumbs
- 8 chocolate sandwich cookies or chocolate wafer cookies
- 1 tablespoon unsalted butter, melted
- 1 tablespoon granulated sugar
You can swap the chocolate cookies for graham crackers, shortbread, vanilla wafers, or even leftover brownies.
For the Whipped Cream
- ¾ cup (180 ml) heavy whipping cream
- 1 tablespoon powdered sugar
- ½ teaspoon vanilla extract
For Decorating
- A handful of fresh berries
- Chocolate shavings
- Small mint leaves, optional
- Extra cookie crumbs, optional
You don’t need every garnish. Even one fresh raspberry and a few chocolate curls can make the glasses look beautiful.
Step-by-Step Instructions

1. Prepare the Chocolate
Time: 5 minutes
Place the chopped chocolate and butter in a heatproof bowl.
Set the bowl over a saucepan containing about an inch of gently simmering water. Make sure the bottom of the bowl doesn’t touch the water.
Stir slowly until the chocolate melts and looks smooth and glossy.
Remove the bowl from the heat and let the chocolate cool for about 5–10 minutes.
This cooling step matters. The first time I made mousse, I skipped it and folded warm chocolate into the cream. The mixture became much softer than I wanted.
You want the chocolate warm enough to stay fluid but not hot.
2. Whip the Cream for the Mousse
Time: 3–4 minutes
Pour 1 cup of cold heavy cream into a mixing bowl.
Add the granulated sugar, vanilla, and salt.
Using a hand mixer or stand mixer fitted with the whisk attachment, beat the cream on medium speed until you see soft peaks.
When you lift the beaters, the cream should form a peak that bends slightly at the tip.
Don’t keep whipping until the cream becomes stiff and chunky. You still need to fold it into the chocolate gently.
3. Combine the Chocolate and Cream
Time: 3 minutes
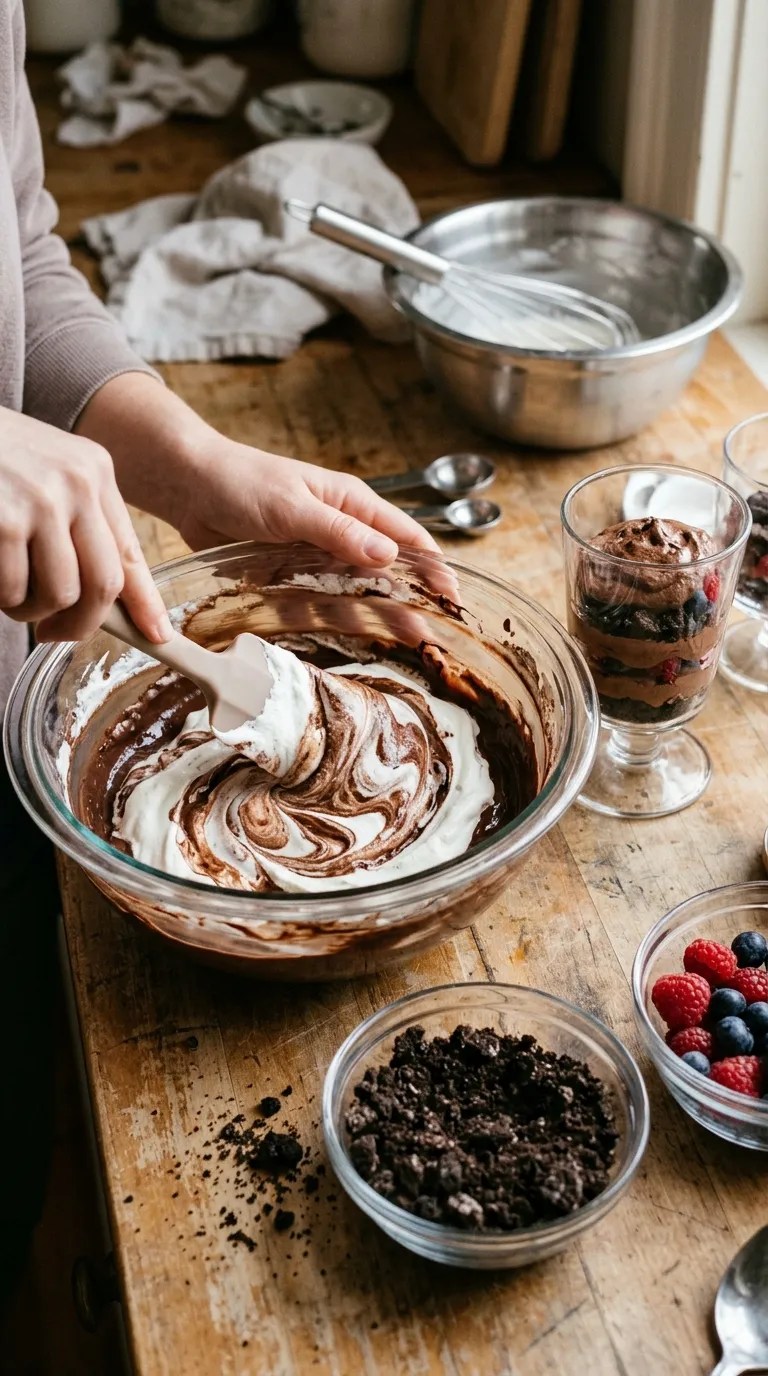
Spoon about one-third of the whipped cream into the cooled melted chocolate.
Fold gently with a silicone spatula.
Once the mixture looks lighter, add the remaining whipped cream in two additions.
Use a slow folding motion rather than stirring aggressively. Scrape along the bottom of the bowl and bring the chocolate mixture upward.
The finished mousse should look smooth, airy, and evenly colored.
Cover the bowl and refrigerate for at least 2 hours.
If you have time, you can leave it chilled for several hours. That makes dessert assembly even easier later.
4. Make the Berry Mixture
Time: 5 minutes
Place the sliced strawberries and raspberries in a bowl.
Add the sugar and lemon juice, then toss gently.
Let the berries sit for about 10 minutes.
This gives them enough time to release a little juice and develop a glossy, flavorful coating.
Don’t mash them. You want the fruit to keep its shape so the finished dessert has distinct layers.
5. Make the Cookie Crumbs
Time: 5 minutes
Put the cookies into a food processor and pulse until you get coarse crumbs.
You can also place them in a zip-top bag and crush them with a rolling pin. I actually use this method when I don’t want to wash another appliance.
Mix the crumbs with melted butter and sugar.
Spread them on a small baking sheet and bake at 350°F (175°C) for about 6–8 minutes, just until they smell toasted.
Let them cool completely.
The crumbs become crispier as they cool, so don’t worry if they seem slightly soft when they first come out.
6. Make the Whipped Cream
Time: 3 minutes
Pour the cold heavy cream into a chilled bowl.
Add the powdered sugar and vanilla.
Whip until you get medium-stiff peaks.
For the topping, I like the cream slightly firmer than the mousse because I want it to sit neatly on top of each glass.
Stop as soon as it reaches the right texture. Over-whipped cream can quickly become grainy.
7. Assemble the Dessert
Time: 10 minutes
Now comes the fun part.
Use six clear glasses, small dessert cups, or stemless wine glasses.
Add a spoonful of cookie crumbs to the bottom of each glass.
Next, add a layer of chocolate mousse.
Then add some berries.
Repeat the layers until the glasses are nearly full.
Finish each one with a small swirl or spoonful of whipped cream.
Top with a few fresh berries, chocolate shavings, and a sprinkle of cookie crumbs.
Don’t worry about making every layer perfectly even. Slightly irregular layers often look more homemade and inviting.
For a particularly polished look, wipe the inside rim of each glass with a clean paper towel before serving.
8. Chill Before Serving
Time: 30 minutes
Place the assembled desserts in the refrigerator for at least 30 minutes before serving.
This short chilling period helps everything settle together.
If you make the desserts several hours ahead, cover each glass loosely with plastic wrap and add delicate garnishes just before serving.
Pro Tips & Tricks
Let the Chocolate Cool Before Folding
This is probably the most important trick.
Hot melted chocolate can deflate whipped cream and create a mousse that’s too loose. Give the melted chocolate several minutes to cool before combining it with the cream.
Use Clear Glasses
A simple dessert instantly looks more elegant when people can see the layers.
Small tumblers, dessert glasses, stemless wine glasses, or even clean jam jars can work.
You don’t need special dessert dishes.
Don’t Crush the Cookies Too Finely
Aim for crumbs with a little texture.
Powder-fine crumbs can turn dense and muddy between the creamy layers. A few slightly larger pieces provide a pleasant crunch.
Keep Your Cream Cold
Cold cream whips more easily and holds its shape better.
If your kitchen feels warm, put your mixing bowl and beaters in the refrigerator for about 10 minutes before whipping.
I started doing this after one particularly frustrating summer afternoon when my cream refused to become fluffy.
Assemble Close to Serving Time
You can prepare the individual components ahead, but keep the cookie crumbs separate until assembly.
That preserves their crunch.
If you assemble the glasses too far ahead, the crumbs will soften as they sit next to the mousse and fruit.
Make the Garnish Simple
You don’t need a mountain of decorations.
A few berries, chocolate curls, and one small mint leaf can look much more elegant than an overloaded dessert.
Variations & Substitutions
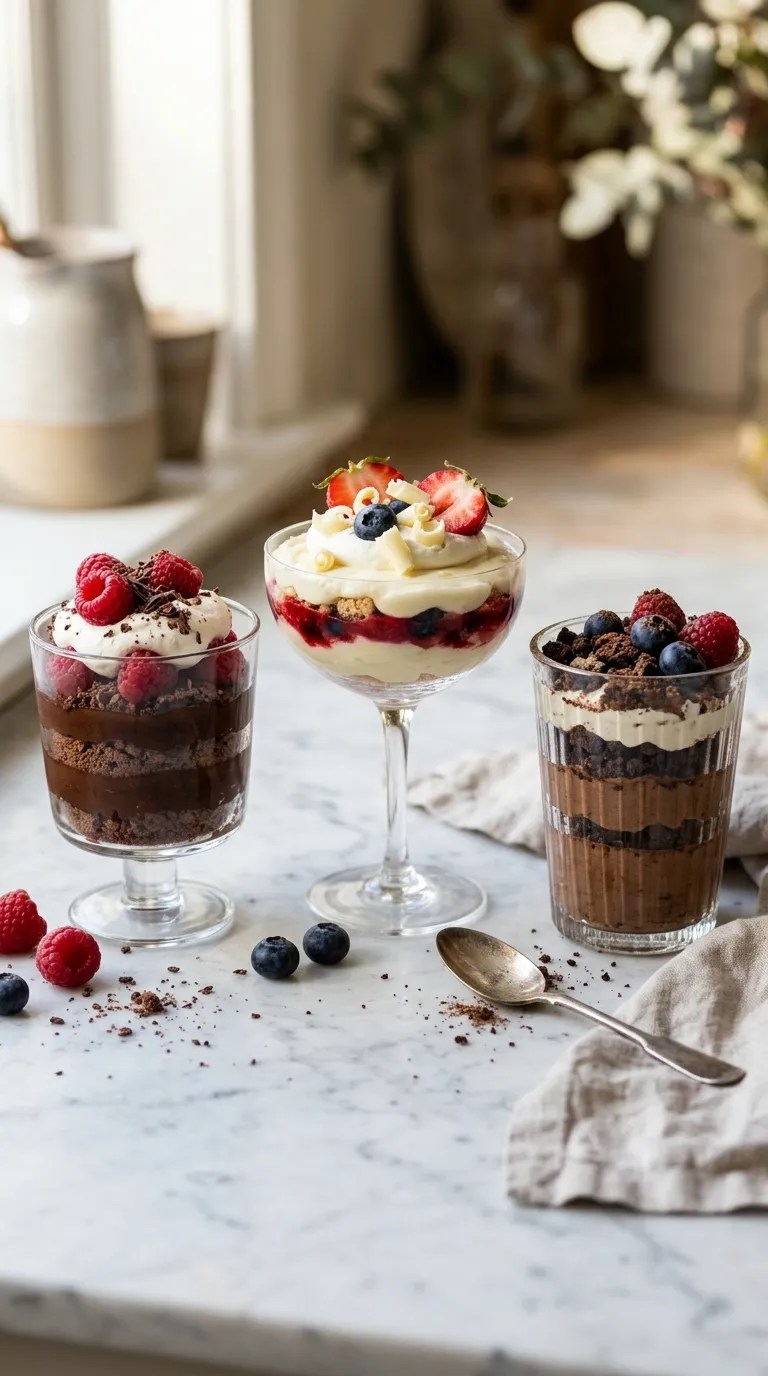
One reason I keep returning to this recipe is how easily it changes.
Make a White Chocolate Version
Replace the semisweet chocolate with 6 ounces (170 g) of white chocolate.
Because white chocolate tastes sweeter, you can reduce the sugar in the mousse to 1 tablespoon or leave it out entirely.
Pair it with strawberries, blueberries, or peaches for a completely different dessert.
Try a Coffee-Chocolate Version
Add 1 teaspoon of instant espresso powder to the melted chocolate.
The coffee won’t turn the mousse into a coffee dessert. Instead, it gives the chocolate a deeper flavor.
I especially like this version with raspberries.
Make It Gluten-Free
Use certified gluten-free chocolate cookies or another gluten-free cookie that crumbles well.
Check the labels on your chocolate and other packaged ingredients if you need to avoid gluten carefully.
Switch the Fruit
You don’t have to use berries.
Sliced peaches, mango, cherries, bananas, or pears can work beautifully.
For a winter version, try cooked cinnamon apples with chocolate mousse and crushed shortbread.
Use Brownies Instead of Cookies
If you have leftover brownies, cut them into small cubes and use them as the base.
This creates a richer, more substantial dessert.
It’s also one of my favorite ways to turn leftover brownies into something that feels completely new.
Serving Suggestions

This fancy dessert works particularly well after a dinner party because you can prepare most of it before your guests arrive.
I like serving it in smaller glasses after a rich meal. The portions look generous because of the layers, but you don’t need a huge serving to make an impression.
For a birthday dinner, add colorful berries and a few chocolate curls.
For Valentine’s Day, use strawberries and raspberries in the layers and serve the mousse in small wine glasses.
For a holiday table, swap the berries for spiced cooked apples and add a little cinnamon to the cookie crumbs.
If you’re serving it after a casual family dinner, don’t bother with elaborate garnishes. Spoon everything into glasses and let the layers speak for themselves.
A cup of coffee or tea makes an easy pairing.
If you want something refreshing alongside it, serve sparkling water with lemon or berries.
For a buffet, place the finished glasses on a tray and decorate the tray with extra berries. The whole group will look much more elaborate than the amount of work you actually put in.
Related Recipes:
- Classic Thanksgiving Dessert Recipes for Fall
- Easy Holiday Desserts for Every Celebration
- Easy Crockpot Desserts for Family Gatherings
- Easy Friendsgiving Dessert Ideas to Share
FAQ’s
Can I make this fancy dessert the day before?
Yes. Prepare the chocolate mousse and berry mixture the day before and keep them refrigerated in separate covered containers.
Make the cookie crumbs ahead as well.
For the best texture, assemble the desserts on the day you plan to serve them, preferably a few hours beforehand.
How long does chocolate mousse last in the refrigerator?
The mousse keeps well for about 2–3 days when covered and refrigerated.
For the best texture and flavor, I prefer serving it within the first two days.
Once you assemble the full dessert, the cookie layer will gradually soften.
Can I freeze chocolate mousse parfaits?
I don’t recommend freezing the fully assembled parfaits because the berries and whipped cream can change texture after thawing.
You can freeze the chocolate mousse on its own in a well-sealed container, but the texture may become slightly different after thawing.
For a dinner party, refrigeration gives you the better result.
Why did my mousse turn out too runny?
The most common causes are warm chocolate, under-whipped cream, or folding too aggressively.
Make sure the chocolate cools before you combine it with the whipped cream.
Also, whip the cream until it reaches soft peaks rather than leaving it very loose.
If the mousse already looks soft, refrigerate it for several hours before assembling. Chilling often gives it the structure it needs.
Can I use milk chocolate instead of semisweet chocolate?
Absolutely.
Milk chocolate gives you a sweeter, creamier mousse.
Because of that extra sweetness, reduce or omit the sugar in the mousse. Taste the mixture if you’re comfortable doing so before chilling it, and adjust the sweetness while you still can.
What can I use if I don’t have a food processor?
A zip-top bag and rolling pin work perfectly.
Put the cookies into the bag, squeeze out most of the air, seal it, and gently roll or tap the cookies until you have coarse crumbs.
Don’t pound them into dust. A little texture makes the finished dessert more interesting.
Final Thought
I love recipes like this because they remind me that impressive food doesn’t always require complicated techniques.
The first few times I made these chocolate mousse parfaits, I focused too much on making every layer perfect. Eventually, I realized that the dessert looked better when I relaxed and let the layers have a little personality.
That’s the trick I’d pass along to a friend: keep the individual components simple and spend your effort on the little details that people actually notice.
Use clear glasses. Keep the chocolate smooth. Chill the cream. Add colorful fruit. Finish with a few chocolate shavings.
That’s enough to turn everyday ingredients into a dessert that gets plenty of “How did you make this?” comments.
And if your first batch isn’t picture-perfect, don’t worry. Mine wasn’t either. The beauty of a layered dessert is that a slightly uneven spoonful disappears beautifully under the next layer.
Make it for a family dinner, a birthday, a holiday gathering, or simply because you feel like ending an ordinary evening with something special. Once you’ve made it a couple of times, you’ll probably find yourself changing the fruit, cookies, and toppings to create your own version.
That’s when a recipe stops feeling like a recipe and starts becoming one of those reliable kitchen tricks you keep coming back to.
Leave a Reply
You must be logged in to post a comment.