

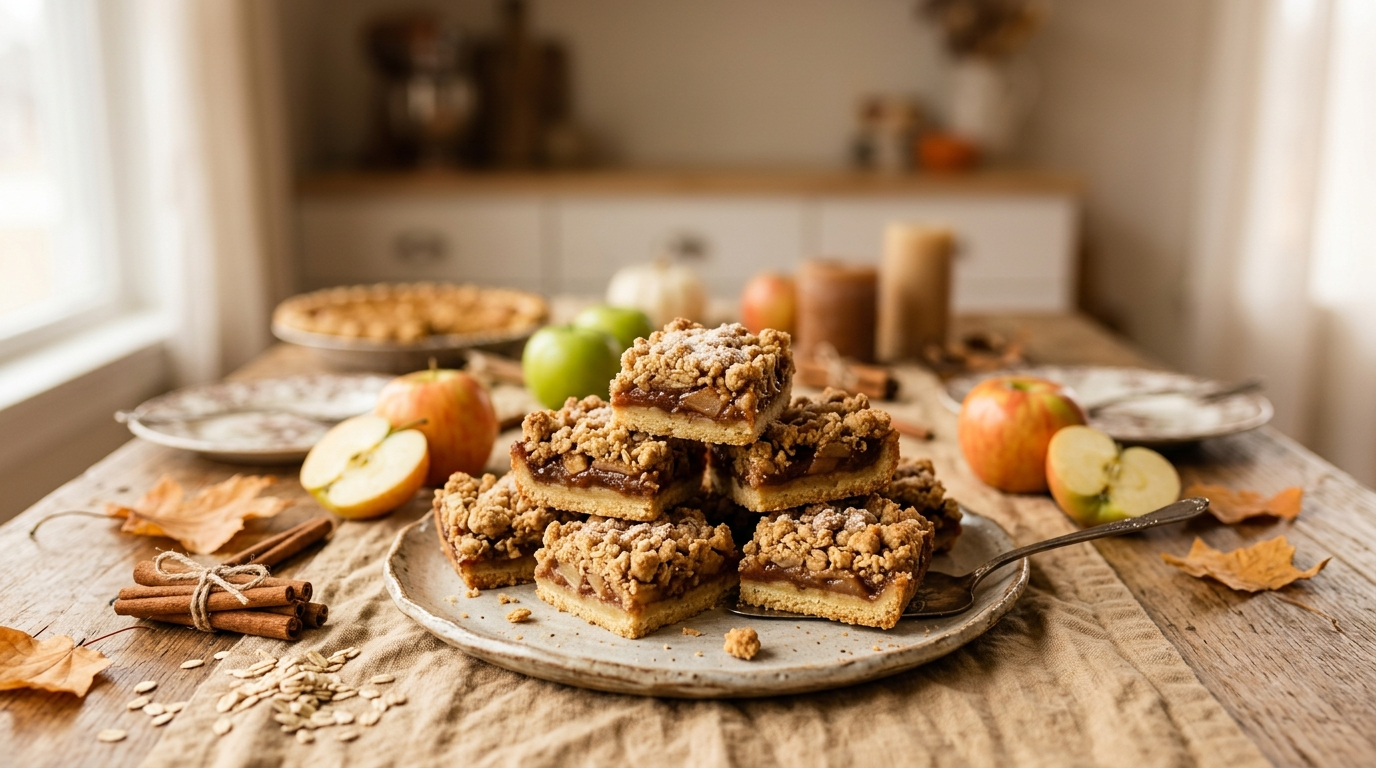
Every Friendsgiving gathering seems to have that one moment when everyone starts opening containers, moving plates around the kitchen, and asking who brought what. Someone arrives with mashed potatoes, another friend brings a favorite family casserole, and somebody inevitably shows up with a dessert they picked up on the way over. Honestly, I love that part of the celebration. Nobody has to make everything, and every dish tells a little story about the person who brought it.
When I want to bring something homemade without spending my entire afternoon in the kitchen, I reach for cinnamon apple crumble bars. They have everything I love about a classic apple crumble: tender apples, warm cinnamon, a buttery base, and a golden topping that gets slightly crisp around the edges. The best part? I cut the crumble into neat little squares, arrange them on a platter, and let everyone help themselves.
These cinnamon apple crumble bars make an especially lovely Friendsgiving dessert because they travel well, look inviting on a dessert table, and don’t require forks and plates for every guest. They’re also easier to share than a traditional pie, which can get messy when you’re trying to cut slices in a crowded kitchen.
I learned one useful trick while making apple desserts: let the apple filling cool a little before spreading it over the crust. My first instinct was to rush straight from the saucepan to the baking pan, but a cooler filling makes the layers easier to handle and helps the finished bars hold their shape.
This recipe combines a simple shortbread-style crust, a cinnamon apple filling, and a crumbly oat topping. You don’t need a stand mixer, complicated pastry techniques, or expensive ingredients. A mixing bowl, a saucepan, and an ordinary baking pan will do the job.
If you’re looking for an easy Friendsgiving dessert idea to share with friends, these apple crumble bars deserve a spot on your holiday menu.
Why You’ll Love These Friendsgiving Apple Crumble Bars
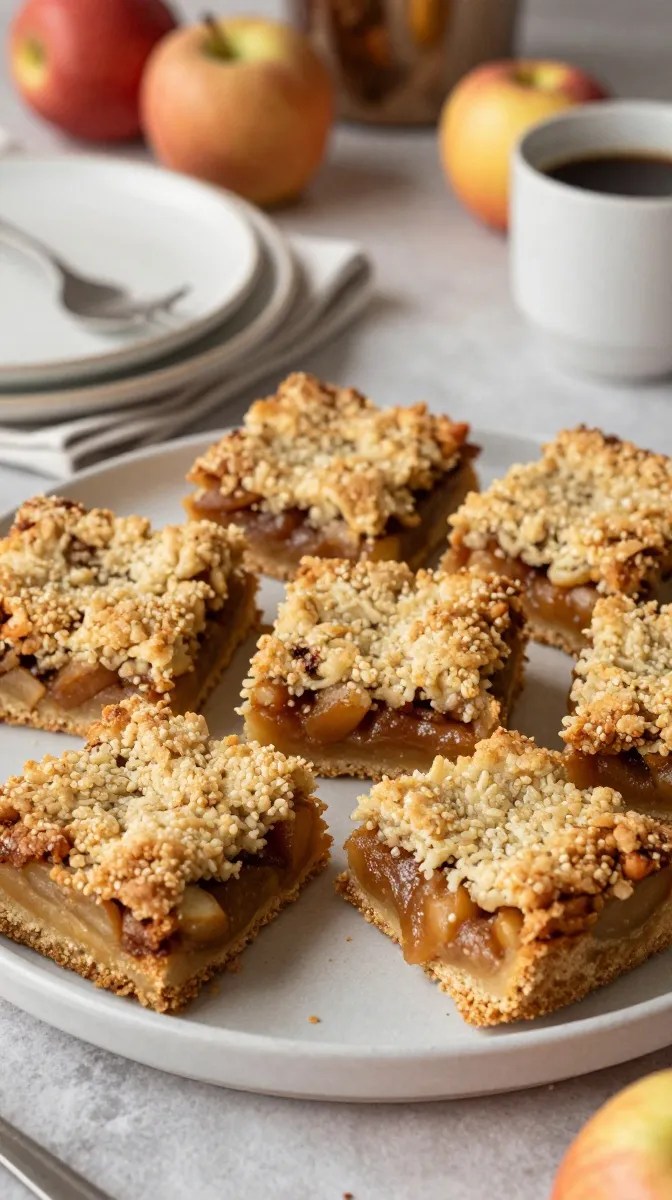
- Easy to make: You can prepare the crust, filling, and topping with basic kitchen tools and everyday ingredients.
- Perfect for sharing: Cut the cooled dessert into small squares so guests can grab a piece while chatting.
- Full of cozy fall flavor: Apples, cinnamon, brown sugar, and butter create the familiar flavors everyone expects from an autumn dessert.
- Budget-friendly: Apples, flour, oats, and pantry staples keep the ingredient list manageable.
- Make-ahead friendly: Bake the bars before your gathering, let them cool, and pack them in a container for easy transport.
I also love that these bars feel homemade without looking fussy. A little dusting of powdered sugar makes them pretty enough for a holiday dessert table, but they’re just as delicious served straight from the pan.
Ingredients for Cinnamon Apple Crumble Bars
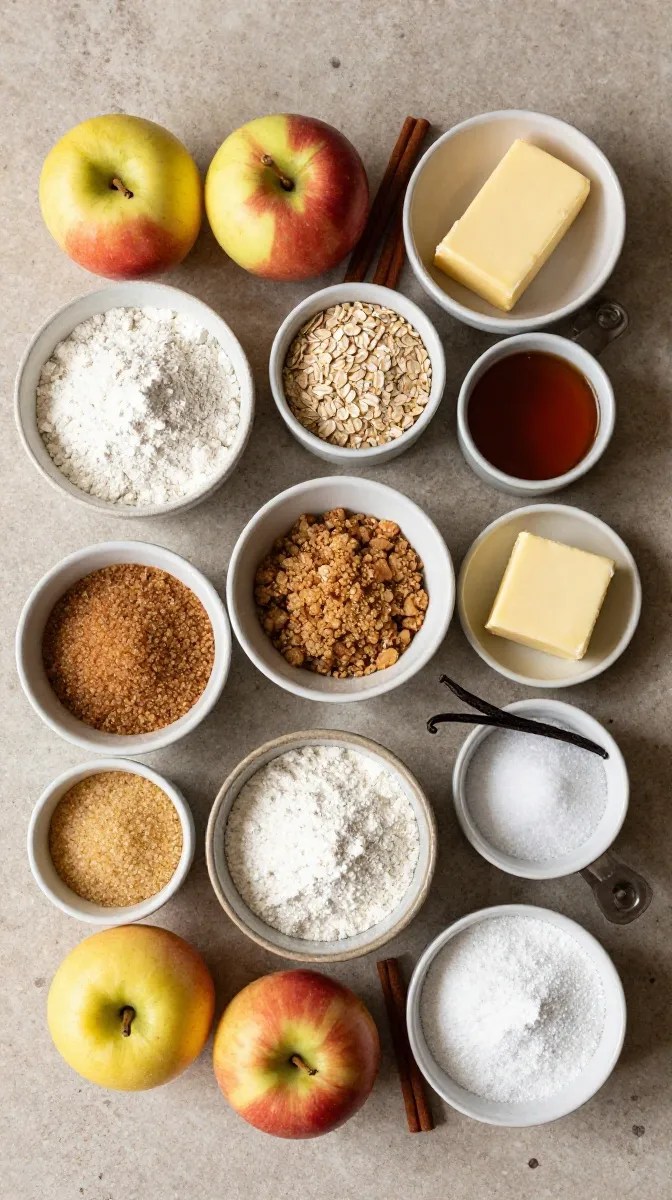
This recipe makes approximately 16 bars in an 8-inch square baking pan. You can cut them smaller if you’re serving a large group with several other desserts.
For the buttery crust
- 1 cup (125 g) all-purpose flour
- 1/4 cup (50 g) granulated sugar
- 1/2 cup (113 g) unsalted butter, melted
- 1/4 teaspoon fine salt
- 1/2 teaspoon vanilla extract
The crust gives the bars a sturdy base with a tender, buttery bite. Melted butter makes preparation especially easy because you won’t need to soften butter or use a mixer.
If you only have salted butter, you can use it and reduce the added salt slightly.
For the cinnamon apple filling
- 3 medium apples, about 450 g before peeling and coring
- 1/4 cup (50 g) packed light brown sugar
- 1 tablespoon fresh lemon juice
- 1 tablespoon cornstarch
- 1 teaspoon ground cinnamon
- 1/4 teaspoon ground nutmeg, optional
- 1 teaspoon vanilla extract
- 1 tablespoon water
Choose firm apples that keep some texture after cooking. Granny Smith apples provide a pleasantly tart flavor, while Honeycrisp apples bring extra sweetness and a crisp texture. Fuji apples also work well.
You can use one variety or combine two. I particularly like mixing a tart apple with a sweeter one because the filling tastes balanced rather than sugary.
For the oat crumble topping
- 3/4 cup (75 g) old-fashioned rolled oats
- 1/2 cup (65 g) all-purpose flour
- 1/3 cup (67 g) packed light brown sugar
- 1/2 teaspoon ground cinnamon
- 1/4 teaspoon fine salt
- 1/4 cup (57 g) unsalted butter, melted
Old-fashioned oats give the topping a hearty texture and help create those golden, crunchy crumbs. Quick oats will work in a pinch, although the topping may feel a little less textured.
Optional finishing touches
- 1 tablespoon powdered sugar for dusting
- 1/2 teaspoon ground cinnamon for an extra sprinkle
- Vanilla ice cream for serving
- Caramel sauce for drizzling
These extras are entirely optional. The bars already have plenty of flavor, so don’t feel that you need to buy anything special.
Step-by-Step Instructions
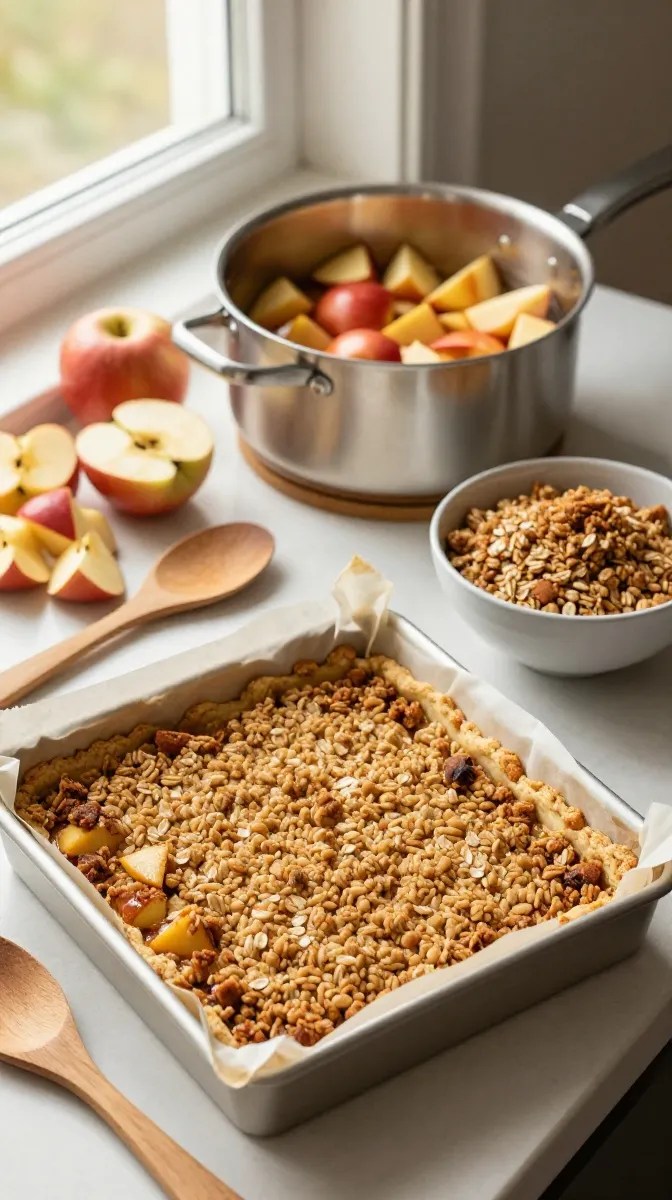
Step 1: Prepare the baking pan and oven
Time: 5 minutes
Preheat your oven to 350°F (175°C).
Line an 8-inch square baking pan with parchment paper, leaving a little overhang on two opposite sides. Those paper handles will help you lift the cooled bars from the pan without breaking the crust.
If you don’t have parchment paper, grease the pan thoroughly with butter. Parchment simply makes removal easier, especially when you want clean squares for a Friendsgiving platter.
Gather your ingredients before you start. This small step saves time when you move between the crust, filling, and topping.
Step 2: Make the buttery crust
Time: 5 minutes
Add the flour, granulated sugar, and salt to a medium mixing bowl. Stir until the ingredients look evenly combined.
Pour in the melted butter and vanilla extract. Mix with a fork or silicone spatula until the flour absorbs the butter and the mixture forms soft, moist crumbs.
Transfer the mixture to your prepared pan. Press it into an even layer using the back of a spoon, a flat-bottomed measuring cup, or clean fingertips.
Pay attention to the corners. A thin spot in one corner can make that part of the crust crumble when you cut the finished dessert.
Bake for 12–15 minutes, until the edges look lightly golden and the surface feels set. The center doesn’t need deep color because the crust will bake again with the filling and topping.
Remove the pan from the oven and let the crust rest while you prepare the apples.
Step 3: Prepare the cinnamon apple filling
Time: 10–12 minutes
Peel and core the apples, then cut them into small cubes about 1/4 inch wide. Smaller pieces cook more evenly and make the finished bars easier to slice.
Add the apples, brown sugar, lemon juice, cinnamon, nutmeg if using, vanilla, and water to a medium saucepan.
Place the saucepan over medium heat and stir occasionally for about 5–7 minutes. The apples should begin to soften and release a little juice, but they shouldn’t turn into applesauce.
In a small bowl, stir the cornstarch with a teaspoon or two of cold water until smooth. Add this mixture to the saucepan and stir well.
Cook for another 1–2 minutes, until the liquid thickens and lightly coats the apple pieces. If the filling looks watery, give it another minute over the heat while stirring gently.
Remove the saucepan from the stove and let the filling cool for about 5 minutes.
You want tender apples that still hold their shape. If you cook them until they’re completely soft at this stage, they’ll lose more structure during baking.
Step 4: Mix the oat crumble topping
Time: 5 minutes
In a clean bowl, combine the rolled oats, flour, brown sugar, cinnamon, and salt.
Pour in the melted butter. Stir with a fork until the mixture forms clusters of different sizes.
The texture should resemble damp, chunky sand, with some larger crumbs that hold together when you pinch them. If the mixture looks like a smooth paste, you’ve mixed it too much or added too much butter.
For extra texture, leave a few larger clusters intact. They’ll create crisp little pockets across the surface after baking.
Set the topping aside while you assemble the bars.
Step 5: Assemble the layers
Time: 3–5 minutes
Spread the slightly cooled apple filling over the baked crust. Use a spoon or spatula to distribute the apples evenly from corner to corner.
Try not to pour in a pool of excess liquid from the saucepan. A thick coating of filling gives you lovely apple flavor without making the crust soggy.
Scatter the oat crumble over the apples. Cover the surface evenly, but don’t press the topping down firmly. Loose crumbs allow the heat to circulate and help the topping develop a crisp texture.
A few exposed apple pieces are perfectly fine. They add color and make the bars look homemade rather than overly uniform.
Step 6: Bake until golden
Time: 25–30 minutes
Return the pan to the oven and bake at 350°F (175°C) for 25–30 minutes.
Start checking at the 25-minute mark. The crumble should look golden brown, the apple filling should bubble gently around the edges, and the kitchen should smell like cinnamon and baked apples.
If the topping still looks pale, give the bars another 3–5 minutes and check again. Oven temperatures vary, so use the appearance of the dessert rather than the timer alone.
Remove the pan from the oven and place it on a heat-safe surface.
Resist the temptation to cut into the bars immediately. The filling needs time to settle, and the crust becomes more stable as the dessert cools.
Step 7: Cool, slice, and serve
Time: 1–2 hours
Let the bars cool in the pan for at least 1 hour at room temperature. For the cleanest cuts, allow them to cool completely before slicing.
Use the parchment overhang to lift the dessert onto a cutting board. With a sharp knife, cut it into 16 squares, wiping the blade between cuts if the filling sticks.
If you want particularly neat edges, chill the cooled slab in the refrigerator for 30–45 minutes before cutting. This extra step helps the apple layer firm up.
Transfer the squares to a serving platter or pack them in a container for your Friendsgiving gathering.
A light dusting of powdered sugar adds a festive finishing touch. I usually wait until just before serving so the sugar stays visible instead of dissolving into the topping.
Pro Tips and Tricks for the Best Results
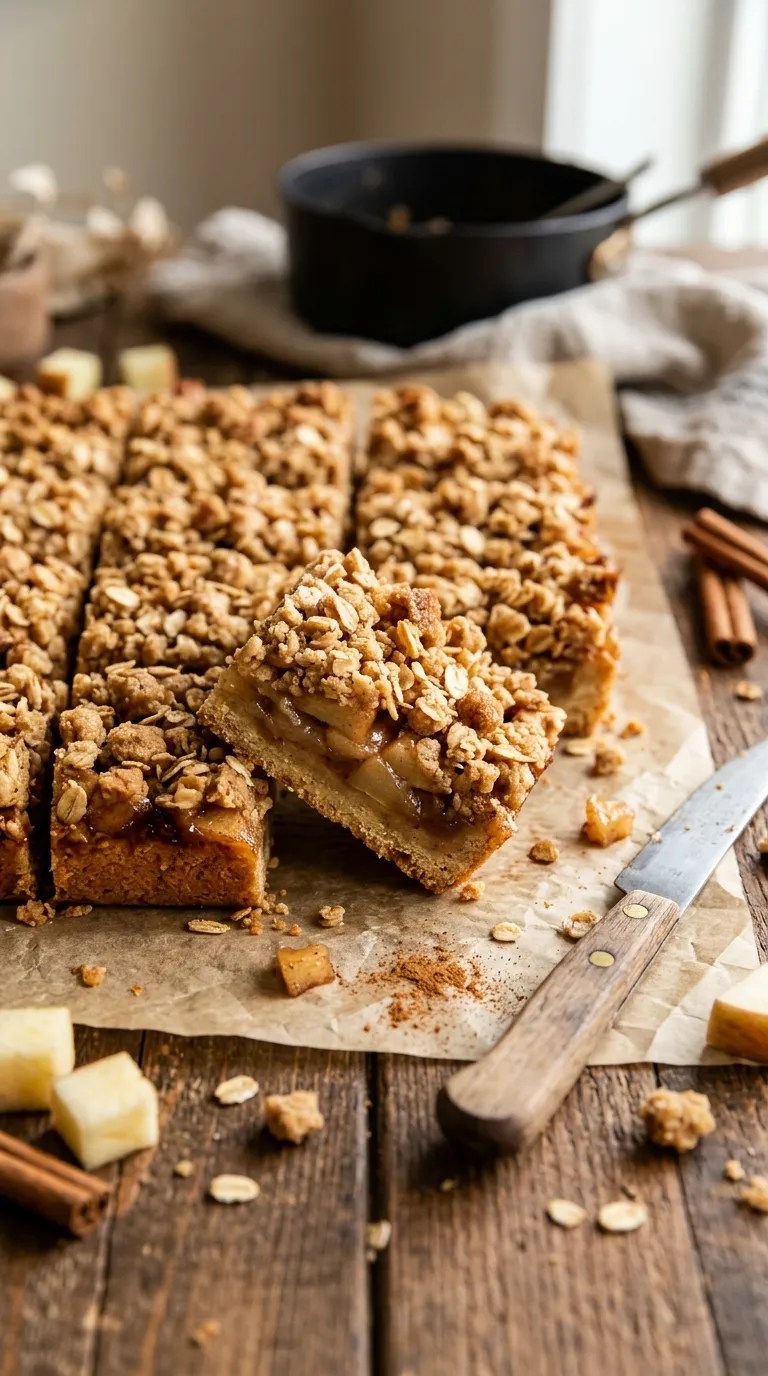
Choose apples that hold their shape
Not every apple behaves the same way in the oven. Firm varieties such as Granny Smith and Honeycrisp tend to maintain a pleasant texture, while softer apples may break down more quickly.
Cut the apples into pieces of similar size. Tiny pieces can turn mushy before larger chunks finish cooking, so try to keep the cubes relatively even.
Don’t skip the cornstarch
Apples release moisture as they cook. The cornstarch thickens that liquid and helps keep it from soaking into the crust.
Always mix cornstarch with a little cold water before adding it to the hot filling. Sprinkling dry cornstarch directly into the saucepan can leave unpleasant lumps.
Let the crust turn lightly golden
A crust that looks completely pale when you remove it for the first time may stay soft underneath the filling.
You don’t need to bake it until dark brown. Just look for lightly golden edges and a surface that no longer appears wet.
Give the bars enough cooling time
This is probably the most important tip for anyone bringing dessert to a party. Warm apple crumble bars taste wonderful, but they won’t necessarily cut into tidy squares.
If you slice them too early, the filling can slide and the crust may break apart. Let the pan cool completely, then chill it briefly if you want sharper edges.
Pack them carefully for travel
Once the bars have cooled, place them in a rigid container with a secure lid. If you need to stack them, separate the layers with parchment paper.
Keep the container level during transport. Even a sturdy crumble topping can shift if you slide the pan around in the car.
For a gathering with several desserts, I like to bring the bars already sliced. Guests can pick up a square easily, and the host doesn’t need to find a knife and cutting board.
Make them ahead without losing texture
You can bake these bars a day before Friendsgiving. Let them cool completely, refrigerate them in a covered container, and bring them out shortly before serving.
The topping may soften slightly during storage, but the flavor remains lovely. If you prefer a crisper surface, reheat the bars briefly in the oven before serving.
Avoid sealing the bars while they’re still warm. Trapped steam can soften the crumble and create condensation inside the container.
Variations and Substitutions
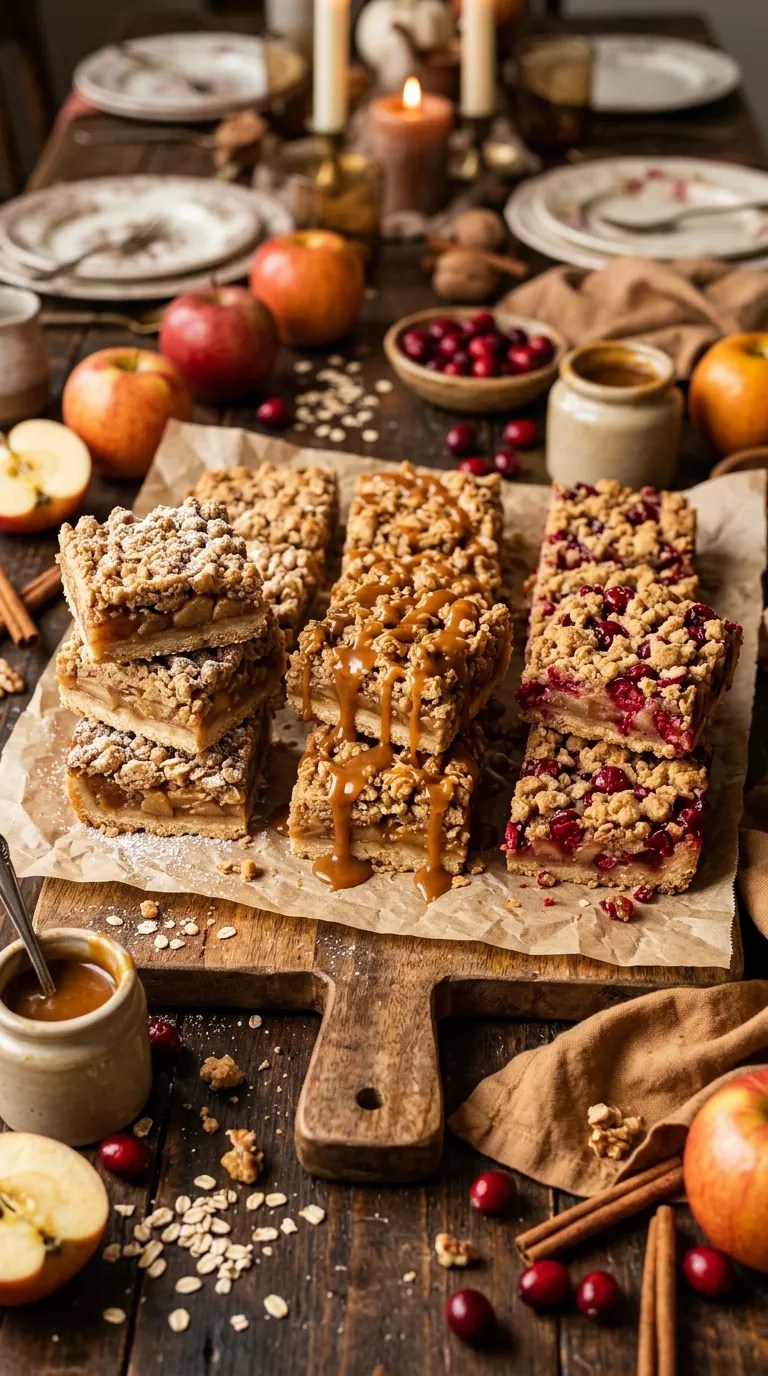
1. Caramel apple crumble bars
For a slightly more indulgent version, drizzle 2–3 tablespoons of caramel sauce over the cooled bars just before serving.
You can also add a small pinch of flaky salt to the caramel for a sweet-and-salty finish. Keep the drizzle light so the topping doesn’t become sticky and difficult to handle.
If you’re taking the bars to a party, bring the caramel separately and drizzle it shortly before dessert. That way, the crumble stays easier to pick up.
2. Cranberry apple crumble bars
For a seasonal twist, replace about 1/2 cup of the diced apples with fresh or frozen cranberries.
Cranberries bring a tart flavor that works beautifully with cinnamon and brown sugar. You may want to add another tablespoon of brown sugar if you prefer a sweeter filling.
If you use frozen cranberries, add them directly to the filling without thawing. Cook the mixture until the berries soften and the filling thickens.
This version looks especially pretty on a Thanksgiving or Friendsgiving dessert table because the cranberry pieces add little pops of red.
3. Gluten-free apple crumble bars
To make a gluten-free version, replace the all-purpose flour in both the crust and topping with a reliable measure-for-measure gluten-free baking blend. Use certified gluten-free oats as well.
Check the blend’s instructions because some products absorb more moisture than regular flour. The crust mixture should still form moist crumbs when you stir in the butter. If it looks unusually dry, add a small amount of melted butter.
Keep the apple filling the same, provided your cornstarch and other ingredients meet your dietary needs.
The final texture may vary slightly depending on the flour blend, so let the bars cool completely before slicing. For anyone with celiac disease, also check labels and prevent cross-contact with gluten-containing utensils and surfaces.
Serving Suggestions for Friendsgiving

One reason I keep returning to cinnamon apple crumble bars is that they fit almost any kind of gathering. They work just as well for a casual evening with a few friends as they do for a crowded potluck.
Here are a few easy ways to serve them.
Add a scoop of vanilla ice cream
For a sit-down dessert, warm a bar slightly and serve it with a scoop of vanilla ice cream. The cold, creamy ice cream melts against the cinnamon apple filling and creates a comforting combination.
If you’re serving a buffet, keep the ice cream in the freezer until dessert time and offer it separately.
Arrange them on a holiday platter
Place the cooled squares on a large plate or wooden serving board. Add a small bowl of caramel sauce nearby, along with a dessert server or cocktail napkins.
You can sprinkle a little cinnamon over the platter for decoration, but avoid adding too much powdered sugar if the bars will sit out for a while.
Pair them with coffee or tea
The buttery crust and warm spices pair nicely with black coffee, chai, or a mug of lightly sweetened tea.
This combination works especially well for Friendsgiving gatherings that stretch into the evening, when everyone wants one more little treat while catching up.
Build a simple dessert table
If your friends are bringing several desserts, cut the bars into 24 smaller pieces instead of 16. Small portions let guests sample different treats without feeling committed to a full serving of everything.
Pair them with pumpkin bread, brownies, or a simple fruit platter. You don’t need every dessert to be elaborate; a mixture of homemade favorites often makes the table feel more inviting.
Bring them as a host gift
Pack a few bars in a small food-safe box lined with parchment paper. Add a handwritten note if you like, especially if you’re visiting someone who loves homemade treats.
This also makes the recipe useful beyond Friendsgiving. You can bring the same bars to a neighborhood gathering, school bake sale, family dinner, or autumn picnic.
Related Recipes:
- Creative Halloween Dessert Ideas for Parties
- Cozy Pumpkin Dessert for Autumn
- Easy Halloween Desserts for Beginners
- Easy Halloween Party Desserts for All Ages
FAQ’s
Can I make cinnamon apple crumble bars the day before Friendsgiving?
Yes. Bake the bars, cool them completely, and refrigerate them in a covered container. For the best texture, wait until they’re cold before cutting them into squares.
You can serve them chilled or let them sit out briefly before dessert. If you want a crispier topping, warm them in the oven just before serving.
How should I store leftover apple crumble bars?
Because the filling contains cooked fruit and moisture, refrigerate leftover bars in an airtight container within two hours of serving.
They generally keep well for about 3–4 days in the refrigerator when handled and stored properly. Keep them covered to prevent them from absorbing other refrigerator odors.
Discard any leftovers that have spent too long at room temperature or show signs of spoilage.
Can I freeze these apple crumble bars?
Yes. Let the bars cool completely, then cut them into squares and arrange them in a freezer-safe container with parchment between the layers.
Freeze them for up to 2–3 months for best quality. Thaw them in the refrigerator overnight before serving.
The topping may lose a little crispness after freezing, but a short session in the oven can help restore some of its texture.
How do I reheat apple crumble bars without making them soggy?
For the best result, place the bars on a baking sheet and warm them in a 300°F (150°C) oven for about 8–12 minutes, depending on their size and starting temperature.
Check that the centers feel warm before serving. Avoid wrapping the bars tightly in foil during reheating because trapped steam can soften the topping.
A microwave works for a quick individual portion, but it tends to soften the crumble rather than crisp it.
Can I use canned apple pie filling instead of fresh apples?
You can, although the finished bars will taste sweeter and have a softer filling.
Use approximately 1 to 1 1/4 cups of canned apple pie filling, depending on its thickness. Chop any large apple slices into smaller pieces and omit the filling’s sugar, lemon juice, cornstarch, and added water.
Keep the cinnamon only if you want extra spice, and spread the filling in a relatively thin, even layer. Since canned filling already contains moisture and thickener, you may notice a different texture from the original recipe.
Why did my crumble bars fall apart when I cut them?
The most common reason is that the bars haven’t cooled enough. The filling needs time to thicken, and the butter in the crust needs time to firm up.
Another possibility is an uneven crust. Press the base into a consistent layer and make sure the apple filling isn’t excessively watery.
If your bars still crumble a little, chill the pan before slicing and use a sharp knife. Small imperfections won’t affect the flavor, and you can always serve the less tidy pieces as a casual dessert with ice cream.
Final Thought
Friendsgiving doesn’t need to feel like a cooking competition. The best gatherings usually happen when everyone brings something they enjoy making, everyone finds a seat somewhere, and the table fills with dishes that people want to pass around.
These cinnamon apple crumble bars are my kind of contribution. They use familiar ingredients, fill the kitchen with the smell of cinnamon, and turn a classic fall dessert into something easy to share. You can make them ahead, carry them to a friend’s house, and serve them without worrying about cutting a perfect pie slice.
If you’re planning your Friendsgiving menu, give this recipe a try. Use your favorite apples, make the crumble as chunky as you like, and add a little caramel if that sounds good to you.
And don’t worry if every square doesn’t come out perfectly neat. A few crumbly edges are part of the charm.
I’d love to hear how your apple crumble bars turn out. Tell me which apple variety you used, whether you added cranberries or caramel, and what other desserts your friends brought to the table. Sometimes those little variations become the recipes everyone asks for again next year.
Leave a Reply
You must be logged in to post a comment.