

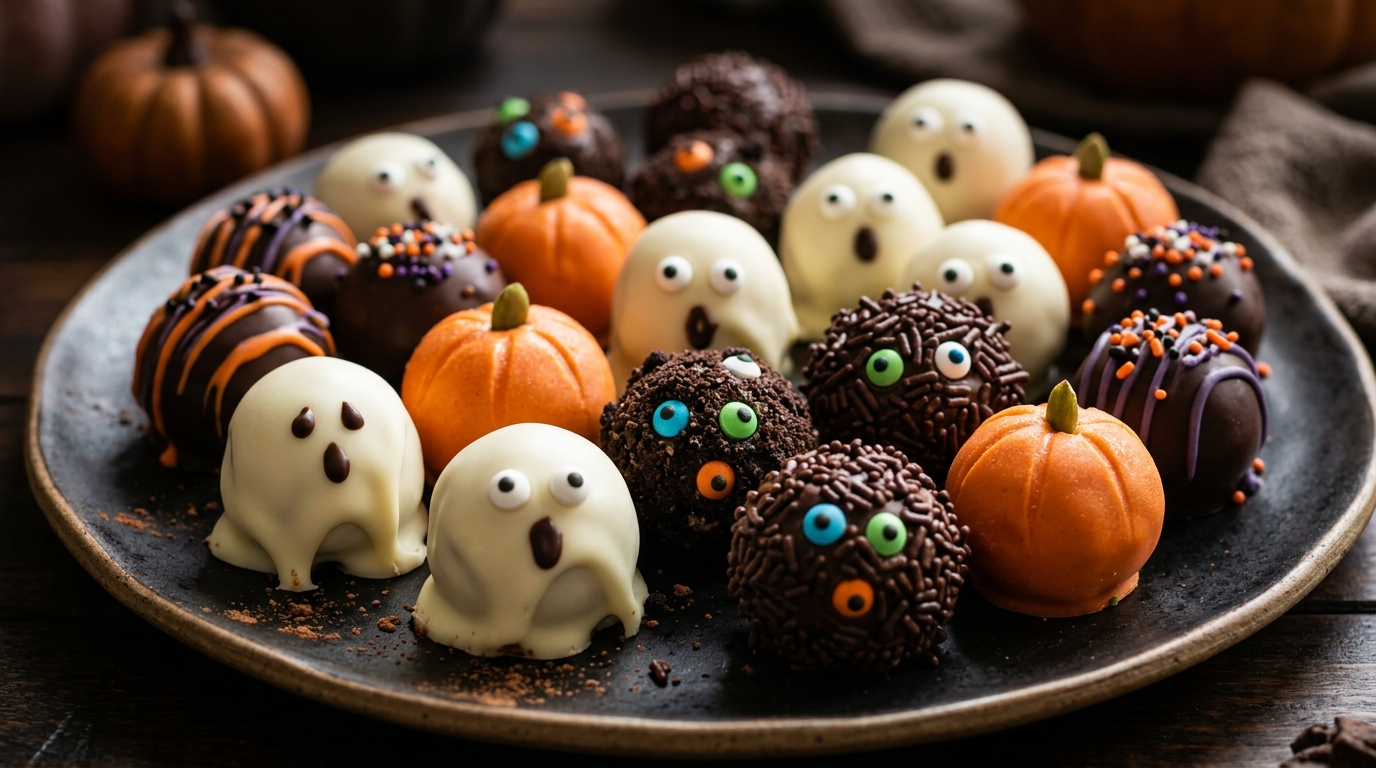
Every Halloween, I seem to convince myself that I have plenty of time to make elaborate desserts. Then October gets busy, the costume needs fixing, the house needs decorating, and suddenly I’m standing in the kitchen wondering why I ever planned a dessert with seventeen decorating steps.
That’s exactly how these Halloween truffles became one of my favorite party treats.
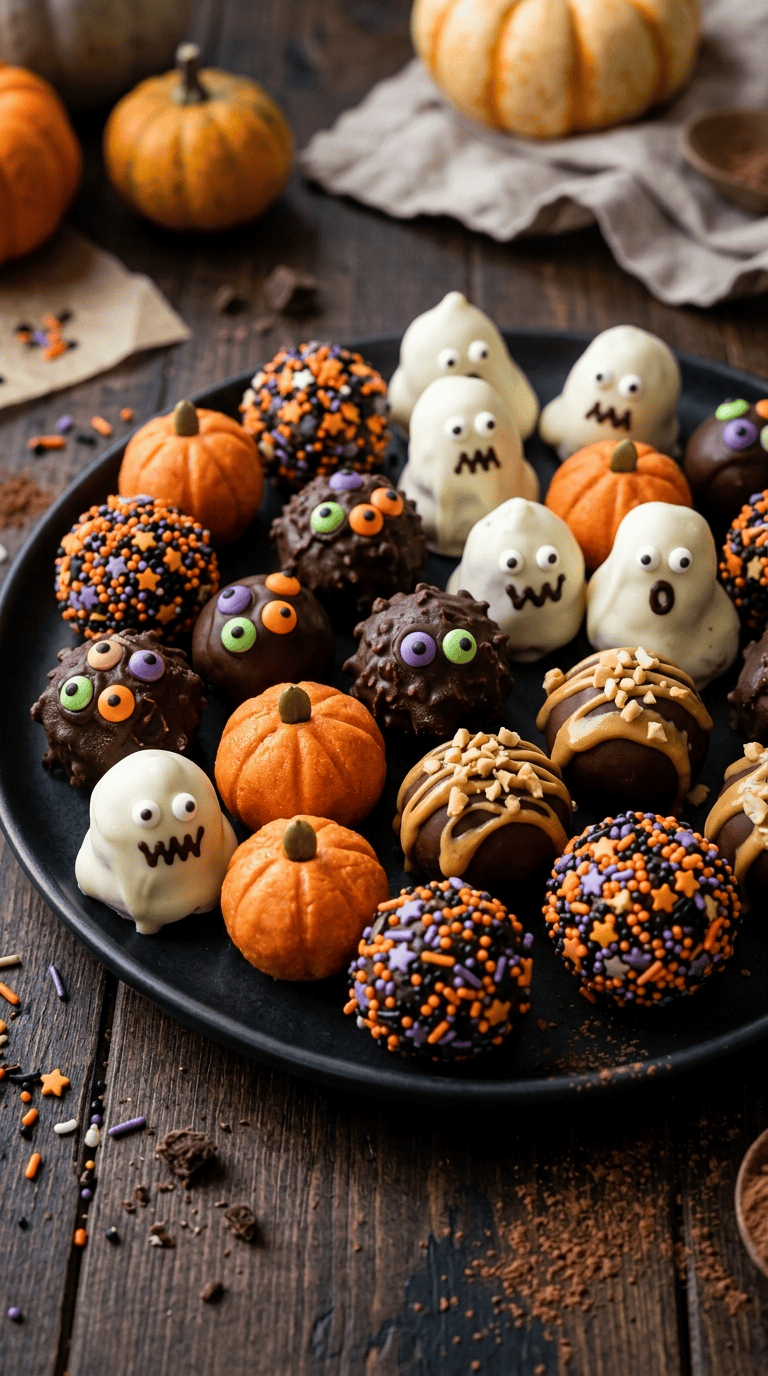
I first made a batch when I wanted something cute enough for a Halloween table but much easier than decorating a full cake. I rolled the mixture into little balls, dipped them in melted chocolate, and started playing around with decorations. A few candy eyes later, I had tiny ghosts, monsters, pumpkins, and little chocolate creatures staring back at me.
The best part? They looked much more complicated than they actually were.
These Halloween truffles have a soft, rich center with a smooth chocolate coating, and you can decorate them in dozens of ways. I love making them the night before a party because the flavors actually get better after a little time in the refrigerator.
And if one or two mysteriously disappear before the guests arrive, I’m definitely not naming names.
Why You’ll Love This Recipe

- Easy enough for beginners: You don’t need fancy pastry skills or complicated equipment.
- Perfect for parties: One batch makes plenty of bite-sized treats for a Halloween dessert table.
- So much fun to decorate: Make ghosts, pumpkins, monsters, spiders, or silly little faces.
- Great make-ahead dessert: Prepare them a day or two before your Halloween gathering.
- Easy to customize: Change the chocolate, filling, colors, and decorations to match your party.
Ingredients You’ll Need
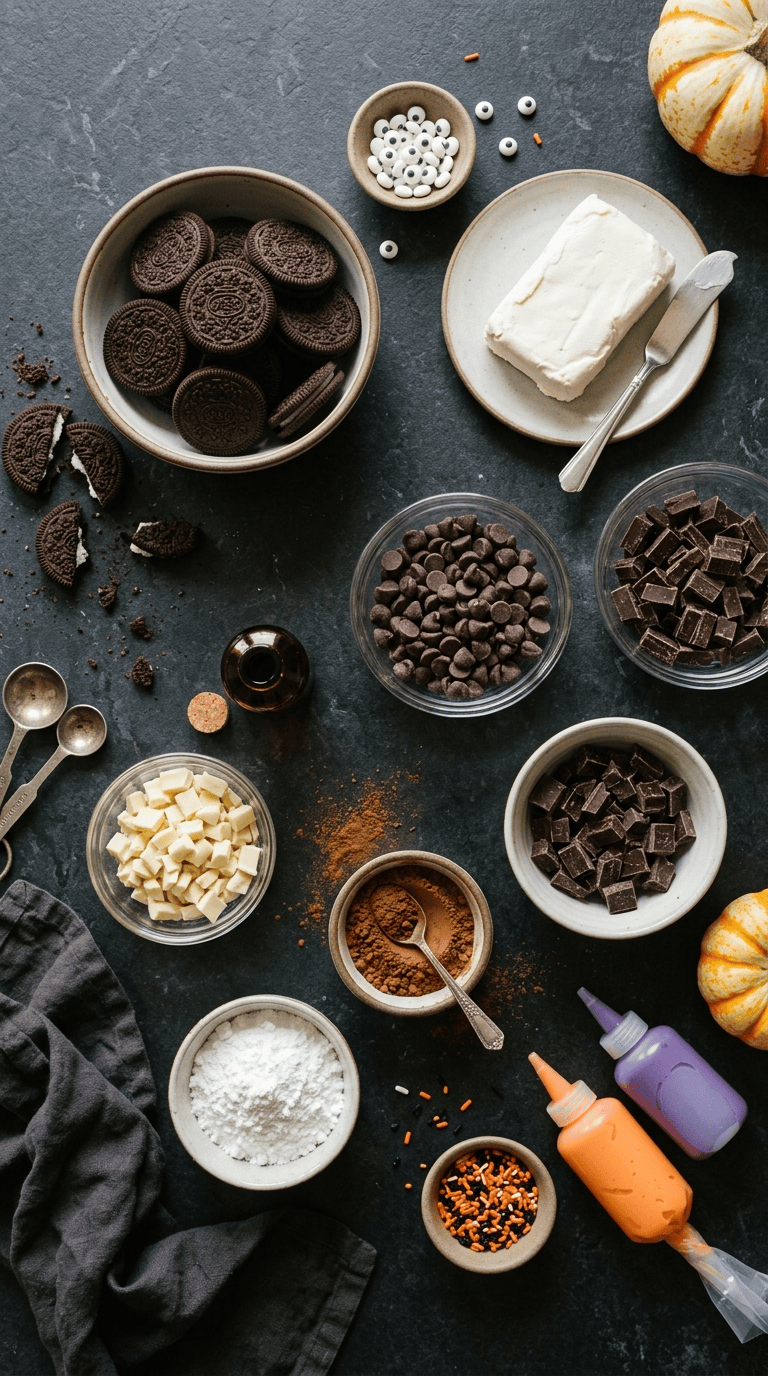
This recipe makes about 24 Halloween truffles, depending on how large you roll them.
For the Truffle Centers
- 8 ounces (225 g) cream cheese, softened to room temperature
- 2 cups (200 g) chocolate cookie crumbs
- 1 cup (170 g) semisweet chocolate chips, melted and slightly cooled
- 1 teaspoon vanilla extract
- 1 tablespoon unsweetened cocoa powder
- 2 tablespoons powdered sugar
For the Chocolate Coating
- 12 ounces (340 g) white chocolate melting wafers or white chocolate chips
- 6 ounces (170 g) semisweet or dark chocolate melting wafers
- 1 teaspoon vegetable shortening or coconut oil, optional
For Halloween Decorations
- Candy eyeballs
- Orange, black, purple, or green sprinkles
- Halloween-themed sprinkles
- Black decorating icing
- Orange decorating icing
- Green decorating icing
- Mini chocolate chips
- Small candy pieces for pumpkin stems
- Optional edible glitter or sanding sugar
I usually use chocolate melting wafers because they melt smoothly and set with a nice finish. If you only have regular chocolate chips, they work too. Adding a tiny amount of coconut oil or shortening can make the coating easier to dip.
For the cookie crumbs, chocolate sandwich cookies work beautifully. You can use regular chocolate cookies instead if that’s what you have in the pantry.
Step-by-Step Instructions
1. Crush the Cookies
Time: 5 minutes
Place the chocolate cookies in a food processor and pulse until you get fine crumbs.
You want the crumbs to look almost like damp sand. Large cookie chunks can make the truffle mixture difficult to roll, so take an extra minute to get them nice and fine.
If you don’t have a food processor, place the cookies in a sturdy zip-top bag and crush them with a rolling pin.
That method works surprisingly well. It also gives you an excellent excuse to take out a little Halloween frustration.
2. Soften the Cream Cheese
Time: 20–30 minutes
Let the cream cheese sit at room temperature until it feels soft when you press it with your finger.
Soft cream cheese blends much more easily than cold cream cheese.
Place it in a large mixing bowl and beat it with a hand mixer or stand mixer until smooth and creamy.
3. Add the Cookie Crumbs and Flavorings
Time: 2–3 minutes
Add the chocolate cookie crumbs, cocoa powder, powdered sugar, and vanilla extract.
Mix until everything comes together.
The mixture should look thick and fudgy rather than runny. When you squeeze a little between your fingers, it should hold together easily.
If the mixture feels unusually soft, add another tablespoon or two of cookie crumbs.
4. Mix in the Melted Chocolate
Time: 2 minutes
Melt the semisweet chocolate chips in a microwave-safe bowl in short 20-second bursts.
Stir between each burst until smooth.
Let the chocolate cool for a few minutes before adding it to the cream cheese mixture. You want it warm and fluid, not piping hot.
Pour the melted chocolate into the bowl and mix until completely combined.
The mixture should become thick, rich, and easy to scoop.
5. Chill the Mixture
Time: 30–45 minutes
Cover the bowl and refrigerate the truffle mixture for about 30 to 45 minutes.
Don’t skip this step.
I learned this the messy way. The first time I made these, I got impatient and started rolling them immediately. The mixture stuck to my hands, the balls lost their shape, and my kitchen counter looked like a chocolate crime scene.
A short chill makes everything easier.
6. Roll the Truffles
Time: 10–15 minutes
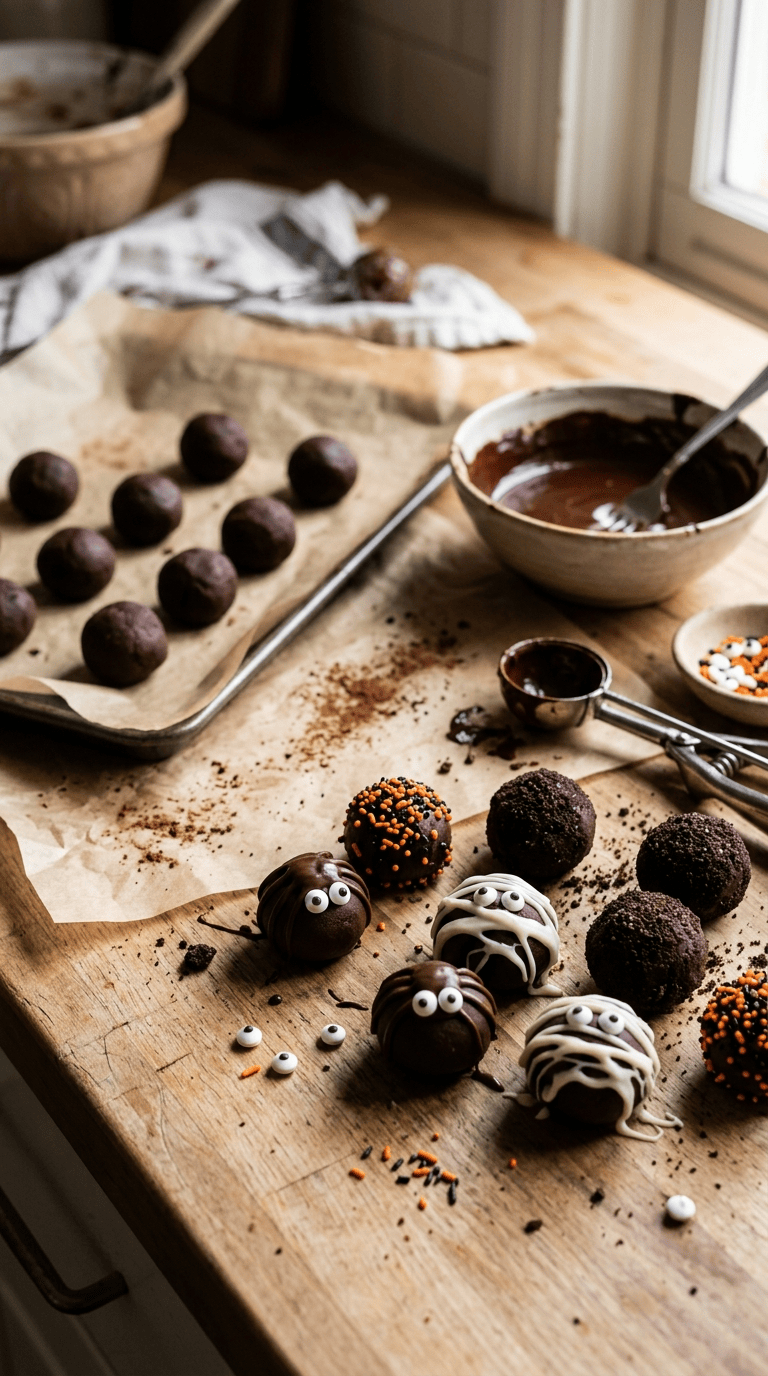
Line a baking sheet with parchment paper.
Use a small cookie scoop or tablespoon to portion out the mixture. Roll each portion between your palms until you have a smooth ball.
Aim for roughly 1 inch in diameter.
Place each truffle on the prepared baking sheet.
If the mixture starts sticking to your hands, wash and dry your hands or chill the mixture for another 10 minutes.
7. Chill the Rolled Truffles
Time: 20 minutes
Place the tray in the refrigerator for about 20 minutes.
This extra chill helps the truffles stay firm when you dip them into the warm chocolate.
It also gives you a little time to set up your decorating station.
8. Melt the Coating Chocolate
Time: 5 minutes
Melt the white chocolate and dark chocolate separately.
Use short microwave intervals and stir often.
Chocolate can go from perfectly smooth to scorched surprisingly fast, so don’t walk away while it melts.
If the chocolate seems too thick for dipping, stir in about 1 teaspoon of vegetable shortening or coconut oil.
9. Dip the Truffles
Time: 10–15 minutes
Take a chilled truffle and place it into the melted chocolate.
Use a fork to gently lift it out, allowing excess chocolate to drip back into the bowl.
Place the coated truffle on the parchment-lined baking sheet.
For ghost truffles, use white chocolate.
For little monsters, use colored candy melts or decorate dark chocolate-coated truffles with colorful icing.
For pumpkins, orange-colored coating makes the cutest result.
10. Decorate Before the Chocolate Sets
Time: 10 minutes
This is where the Halloween fun really starts.
Add candy eyes while the coating is still wet so they stick properly.
Use black decorating icing to draw tiny mouths. Add green icing for pumpkin stems or monster hair.
Sprinkle immediately if you want a textured finish.
For simple ghost truffles, add two candy eyes and a tiny black mouth. That’s it. They somehow look ridiculously adorable for something that takes about thirty seconds to decorate.
11. Let Them Set
Time: 20–30 minutes
Allow the truffles to sit at room temperature until the coating becomes firm.
You can also place the tray in the refrigerator for about 15 minutes to speed things up.
Once completely set, transfer the truffles to an airtight container.
Pro Tips & Tricks
Chill Before Dipping
Cold truffles are much easier to coat. If they become soft while you decorate the first few, put the remaining ones back in the refrigerator.
Don’t Overheat the Chocolate
This is probably the most common mistake.
Use short microwave intervals and stir frequently. Chocolate keeps melting from its own residual heat, so it often needs less time than you think.
Keep Your Decorations Ready
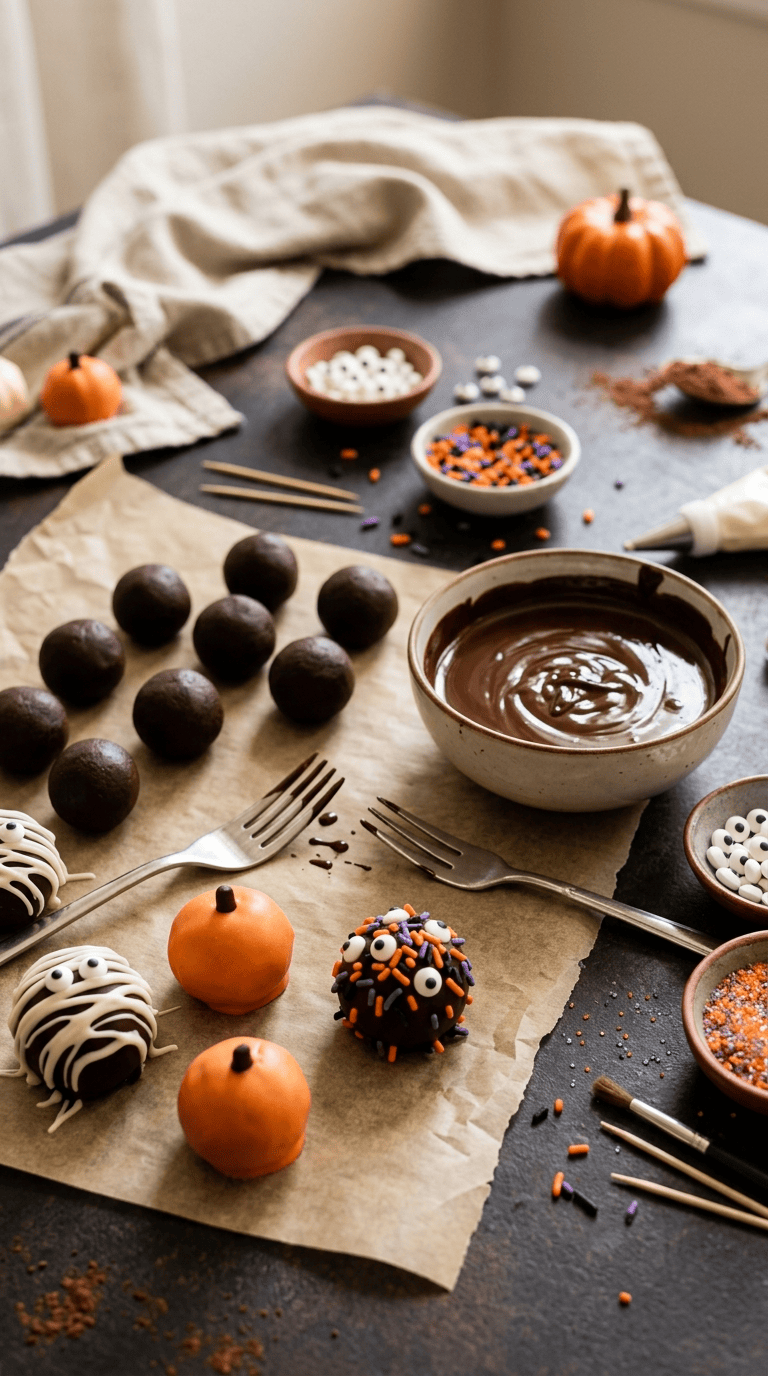
Have the candy eyes, sprinkles, icing, and other decorations sitting beside you before you start dipping.
The coating can set quickly, and you don’t want to be searching through the pantry while your chocolate is already firming up.
Make Them Uniform
A small cookie scoop makes this job much easier.
Uniform truffles look more polished on a party platter, and everyone gets roughly the same amount of chocolate goodness.
Make Them Ahead
These truffles are ideal for preparing ahead of time.
I usually make them one day before serving. Store them in an airtight container in the refrigerator and take them out shortly before serving.
Variations & Substitutions
Peanut Butter Halloween Truffles
Add ½ cup creamy peanut butter to the truffle mixture and reduce the cream cheese slightly if needed to keep the mixture firm.
Coat them in milk or dark chocolate and decorate with candy eyes.
Chocolate and peanut butter together always seem to disappear first at my house.
Oreo-Style Pumpkin Truffles
Use chocolate sandwich cookie crumbs and white chocolate for the coating.
Tint some of the melted white chocolate orange with an oil-based candy color. Dip the truffles, then pipe thin dark lines around the outside to make them resemble tiny pumpkins.
Add a small green candy piece or green icing stem.
White Chocolate Ghost Truffles
Use white chocolate for the coating and keep the decorations simple.
Two candy eyes and a tiny mouth create an adorable ghost without any complicated piping.
You can also add a little white sanding sugar while the coating remains wet for extra sparkle.
Dairy-Free Version
Use dairy-free cream cheese, dairy-free chocolate, and dairy-free chocolate cookies.
Always check the package labels if you need to avoid dairy because ingredients can vary between brands.
Serving Suggestions

These Halloween truffles look especially cute when you pile them onto a black or orange serving platter.
For a Halloween party, arrange different designs together so guests can choose their favorite. I like mixing ghosts, pumpkins, monsters, and simple sprinkle-covered truffles instead of making every piece identical.
You can also place each truffle in a small paper candy cup. It makes serving easier and keeps the chocolate from rubbing against the other decorations.
For a children’s Halloween party, set the truffles beside cupcakes, cookies, or brownies and let the truffles act as the bite-sized treats.
For an adult Halloween gathering, a simple dessert board with dark chocolate, fruit, cookies, and these truffles looks festive without requiring much extra work.
If you’re making them for a school party, check the event’s allergy guidelines before choosing ingredients.
Related Recipes :
- Cute and Creepy Halloween Baking Ideas for a Spooky Celebration
- Halloween Cupcakes That Are Easy to Decorate
- Halloween Cookies with Spooky Designs
FAQ’s
How long do Halloween truffles last?
Store the finished truffles in an airtight container in the refrigerator for up to 5 days. Keep them covered well so they don’t absorb refrigerator odors.
Can I make Halloween truffles the day before?
Absolutely. In fact, I prefer making them the day before a party. The centers firm up nicely, and you don’t have to worry about making dessert when you’re already busy with everything else.
Can I freeze Halloween truffles?
Yes. Place the finished truffles in a freezer-safe airtight container with parchment paper between layers. Freeze for up to 2 months for the best quality.
Thaw them in the refrigerator before serving.
Why is my truffle mixture too sticky?
The mixture may need more chilling time. Place it back in the refrigerator for 15–20 minutes.
If it still feels too soft, mix in a little extra cookie crumb, one tablespoon at a time, until you can roll it comfortably.
Why did my chocolate coating crack?
The truffle center may have been very cold while the coating was much warmer.
Let the coated truffles sit at room temperature rather than moving them immediately into a very cold refrigerator. Also avoid making the coating excessively thick.
Can I use candy melts instead of chocolate?
Yes. Candy melts work particularly well for colorful Halloween designs because they come in shades such as orange, green, purple, and black.
Follow the package melting instructions, and thin the coating slightly if it feels too thick for dipping.
Final Thoughts
Halloween desserts don’t have to become an all-day decorating project.
That’s what I love most about these truffles. You can make the centers ahead of time, dip them in chocolate, and then let your imagination handle the rest. Even simple decorations look festive when you put a whole platter of little chocolate ghosts and monsters together.
And don’t worry if your first few don’t look perfect. Mine certainly didn’t. One ghost had a crooked mouth, another looked more surprised than spooky, and one monster somehow ended up with three candy eyes.
Nobody complained.
If anything, those were the ones everyone wanted.
So grab some chocolate, your favorite Halloween decorations, and a baking sheet. Make a batch, get creative with the faces, and don’t be afraid to make a few delightfully weird ones along the way. Those usually turn out to be the most memorable treats on the table.
Leave a Reply
You must be logged in to post a comment.