

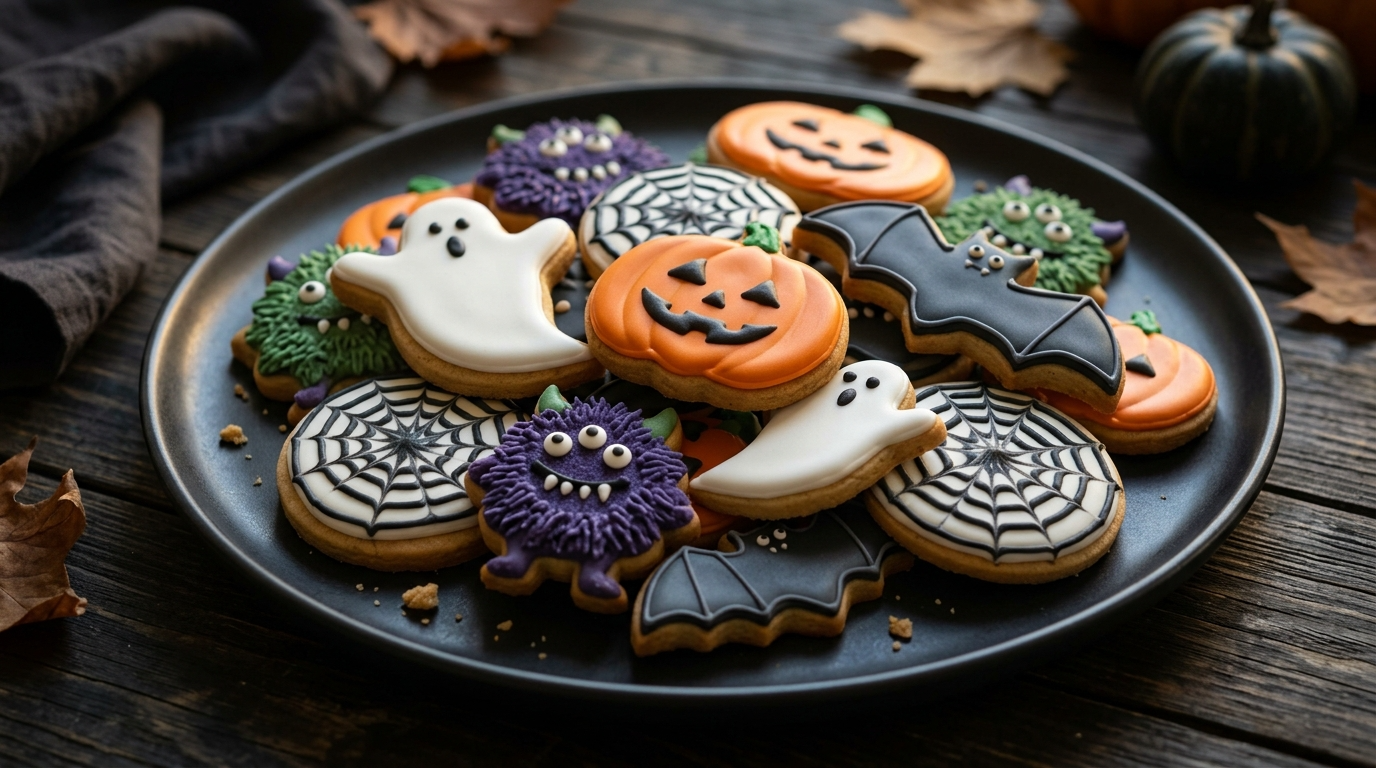
Every October, I reach the point where I start looking for excuses to put candy eyes on absolutely everything. Cookies are usually the first victims.
I started making Halloween cookies with spooky designs after one particularly chaotic Halloween afternoon when I had a bowl of sugar-cookie dough, a few tubes of icing, and no real plan. I expected a cute little batch. Instead, I ended up with crooked ghosts, lopsided pumpkins, and one cookie that looked suspiciously like a tiny green monster.
And honestly? Everyone loved them.
That experience taught me something important about decorated Halloween cookies: they don’t need to look perfect. A little wobble in the icing actually makes them more charming, especially when you’re baking with kids.
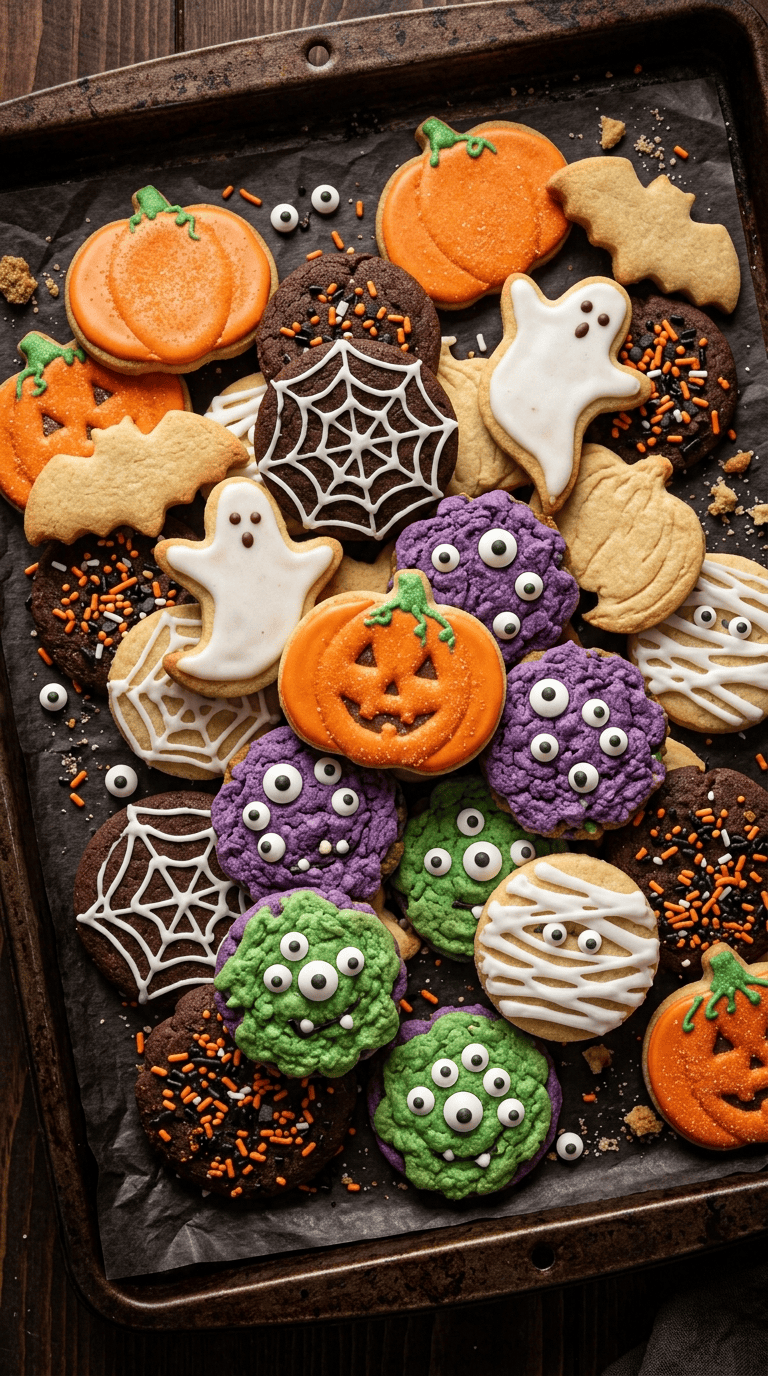
The cookie base in this recipe stays soft in the center with lightly crisp edges, while the simple icing gives you plenty of room to create ghosts, bats, pumpkins, spiderwebs, monsters, and anything else your Halloween imagination can dream up.
I’ve made these cookies many times since that first messy batch, and I’ve learned a few tricks that make the dough easier to handle and the decorations much less stressful.
Why You’ll Love These Halloween Cookies

- Fun without fancy equipment: A piping bag helps, but you can also use small zip-top bags.
- Soft, buttery cookies: The centers stay tender while the edges hold their shape.
- Perfect for decorating: The flat surface gives you plenty of space for spooky designs.
- Great for parties: Kids and adults can decorate their own cookies.
- Make-ahead friendly: You can prepare the dough ahead and bake the cookies when you have time.
- Easy to customize: Change the colors, shapes, and decorations to match your Halloween party.
My favorite part is that you can make these look elaborate without actually being an expert cookie decorator. I’ve had plenty of icing lines wander off course, and nobody has ever complained.
Ingredients for Halloween Cookies
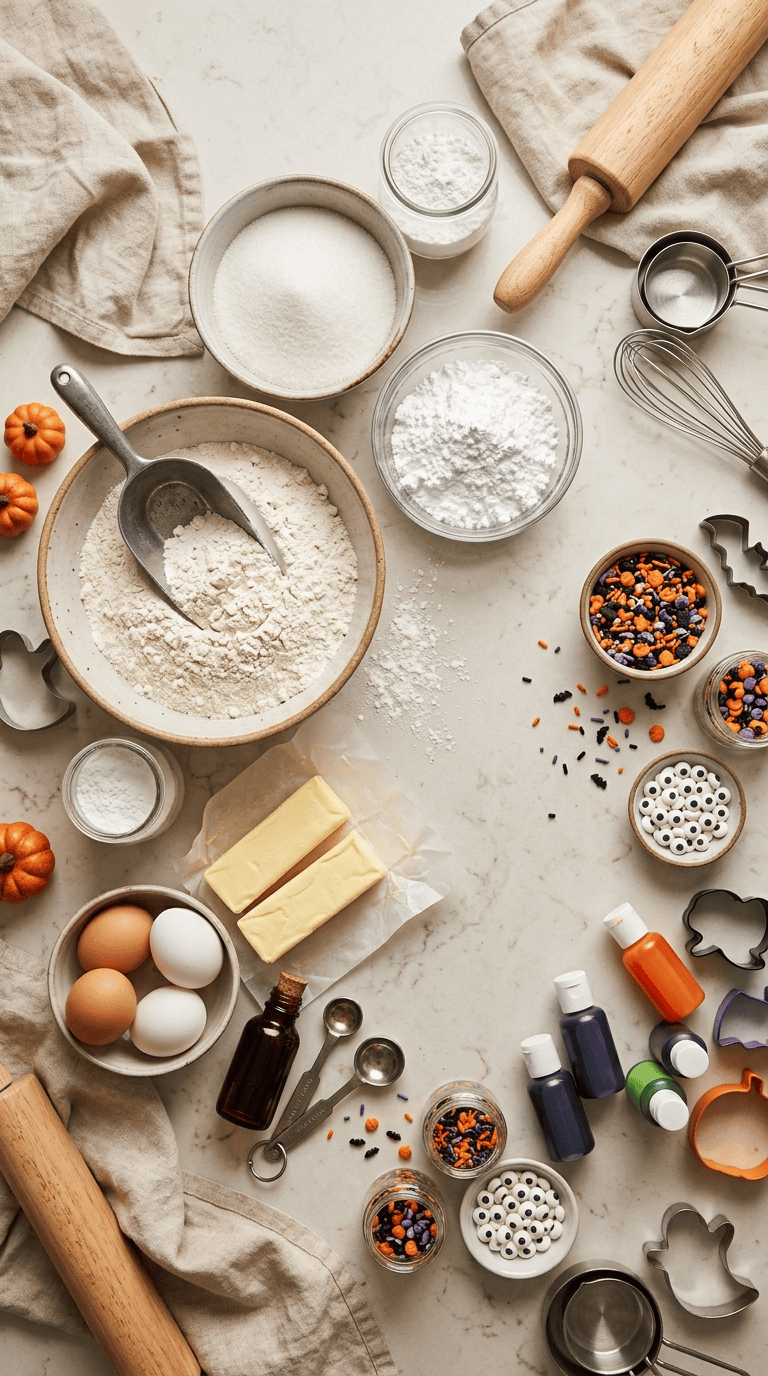
For the Cookie Dough
- 2 ¾ cups (345 g) all-purpose flour
- 1 teaspoon baking powder
- ½ teaspoon salt
- 1 cup (226 g) unsalted butter, softened
- 1 cup (200 g) granulated sugar
- 1 large egg, room temperature
- 2 teaspoons vanilla extract
- ½ teaspoon almond extract, optional
The almond extract adds a subtle bakery-style flavor, but you can leave it out if you prefer a simple vanilla cookie.
For the Decorating Icing
- 3 cups (360 g) powdered sugar
- 3 tablespoons meringue powder
- 5–6 tablespoons warm water
- ½ teaspoon vanilla extract
- Gel food coloring in orange, black, purple, green, and white
You can adjust the water slightly depending on how thick you want your icing.
Optional Decorations
- Candy eyeballs
- Halloween sprinkles
- Black sanding sugar
- Orange or purple decorating sugar
- Mini chocolate chips
- Edible glitter, if desired
Gel food coloring works especially well because it gives you strong Halloween colors without adding too much liquid to the icing.
Step-by-Step Instructions
1. Mix the Dry Ingredients — 5 Minutes
Start by whisking the flour, baking powder, and salt together in a medium bowl.
I like to do this first because it prevents me from accidentally forgetting the salt later. Yes, I’ve done that before. The cookies survived, but my confidence did not.
Set the bowl aside.
2. Cream the Butter and Sugar — 3 to 4 Minutes
Place the softened butter and granulated sugar in the bowl of a stand mixer fitted with the paddle attachment.
Beat on medium speed for about 3 to 4 minutes, until the mixture looks pale and fluffy.
If you don’t have a stand mixer, use a hand mixer. You can also mix by hand with a sturdy wooden spoon, although your arm will get a Halloween workout.
Don’t use melted butter here. Softened butter gives the cookies enough structure to hold their spooky shapes.
3. Add the Egg and Flavorings — 1 Minute
Add the egg, vanilla extract, and almond extract if you’re using it.
Mix until everything looks smooth.
Scrape down the sides of the bowl with a spatula so you don’t leave a pocket of butter hiding at the bottom.
4. Add the Dry Ingredients — 1 to 2 Minutes
Add the flour mixture gradually.
Mix on low speed just until the dough comes together.
Stop as soon as you no longer see dry flour. Overmixing can make the cookies tougher than you want.
The finished dough should feel soft and smooth rather than sticky.
5. Chill the Dough — 30 to 60 Minutes
Divide the dough into two portions and flatten each portion into a thick disk.
Wrap the disks in plastic wrap and refrigerate for at least 30 minutes.
I prefer chilling the dough for about 45 minutes. It gives the butter enough time to firm up without making the dough rock-hard.
If you chill it overnight, let it sit at room temperature for several minutes before rolling.
6. Roll Out the Dough — 5 to 10 Minutes
Lightly flour your work surface and rolling pin.
Roll the dough to about ¼ inch thick.
Try to keep the thickness even. Thin areas can bake too quickly, while thick areas may stay soft and puffy.
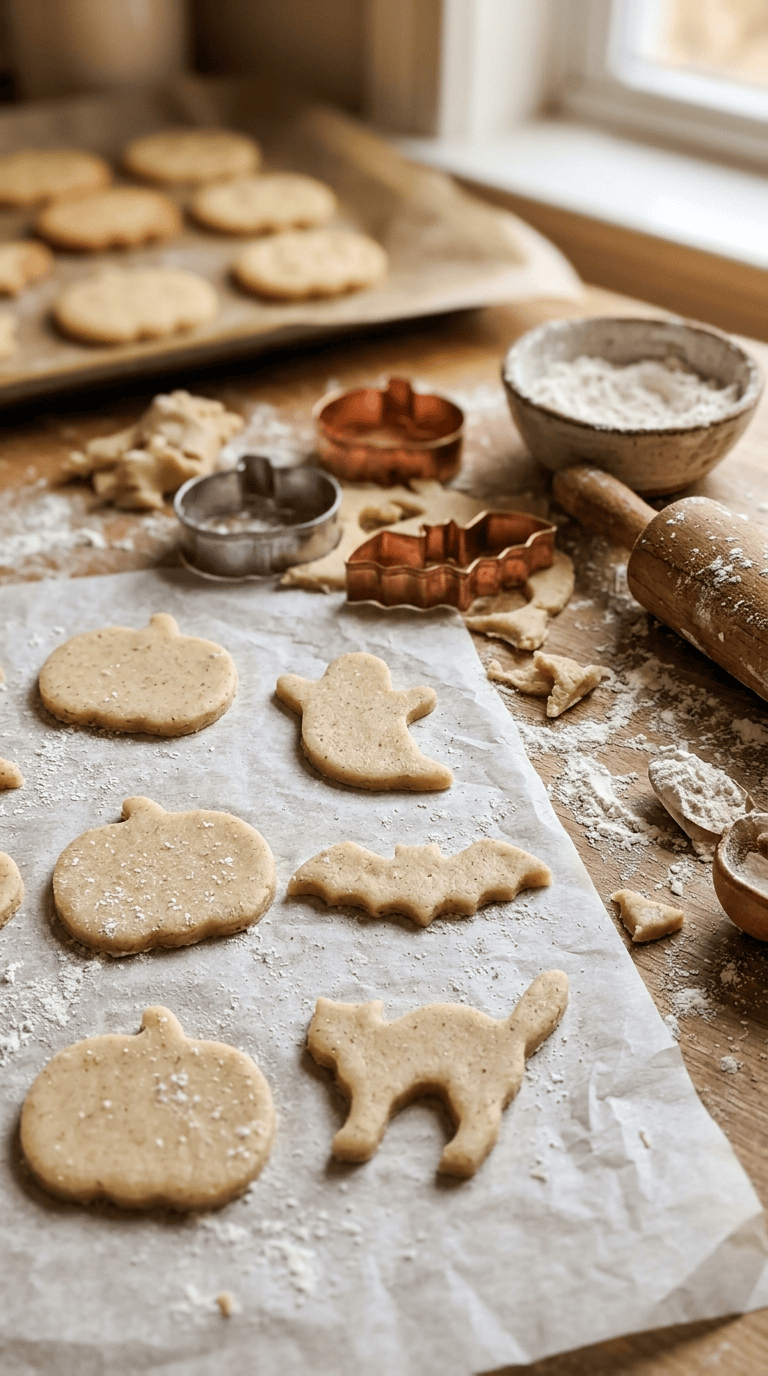
For Halloween cookies, use cutters shaped like pumpkins, ghosts, bats, cats, skulls, moons, or simple circles.
Place the cutouts on parchment-lined baking sheets, leaving about 1 inch between cookies.
7. Bake the Cookies — 8 to 11 Minutes
Preheat your oven to 350°F (175°C).
Bake the cookies for about 8 to 11 minutes, depending on their size.
Look for set edges and a surface that no longer looks wet. The centers may still look slightly soft.
Don’t wait for the cookies to turn deeply golden. You want a pale cookie that gives you a clean canvas for decorating.
Let the cookies cool on the baking sheet for about 5 minutes before transferring them to a wire rack.
Cool them completely before adding icing.
This part matters. Warm cookies and royal icing are not friends.
8. Prepare the Decorating Icing — 5 Minutes
Add powdered sugar and meringue powder to a mixing bowl.
Add 5 tablespoons of warm water and the vanilla extract.
Beat until the icing becomes smooth and glossy.
Add more water a few drops at a time if the icing feels too thick.
For outlining cookies, keep the icing relatively thick.
For filling larger areas, thin a portion slightly so it spreads smoothly without running over the edges.
9. Divide and Color the Icing — 5 Minutes
Divide the icing among small bowls.
Tint each portion with gel food coloring.
For classic Halloween designs, I usually prepare:
- White for ghosts and spiderwebs
- Black for bats and outlines
- Orange for pumpkins
- Green for monsters
- Purple for accents
Use toothpicks to add tiny amounts of coloring at first. Gel colors become surprisingly strong after mixing.
10. Create the Spooky Designs — 10 to 30 Minutes
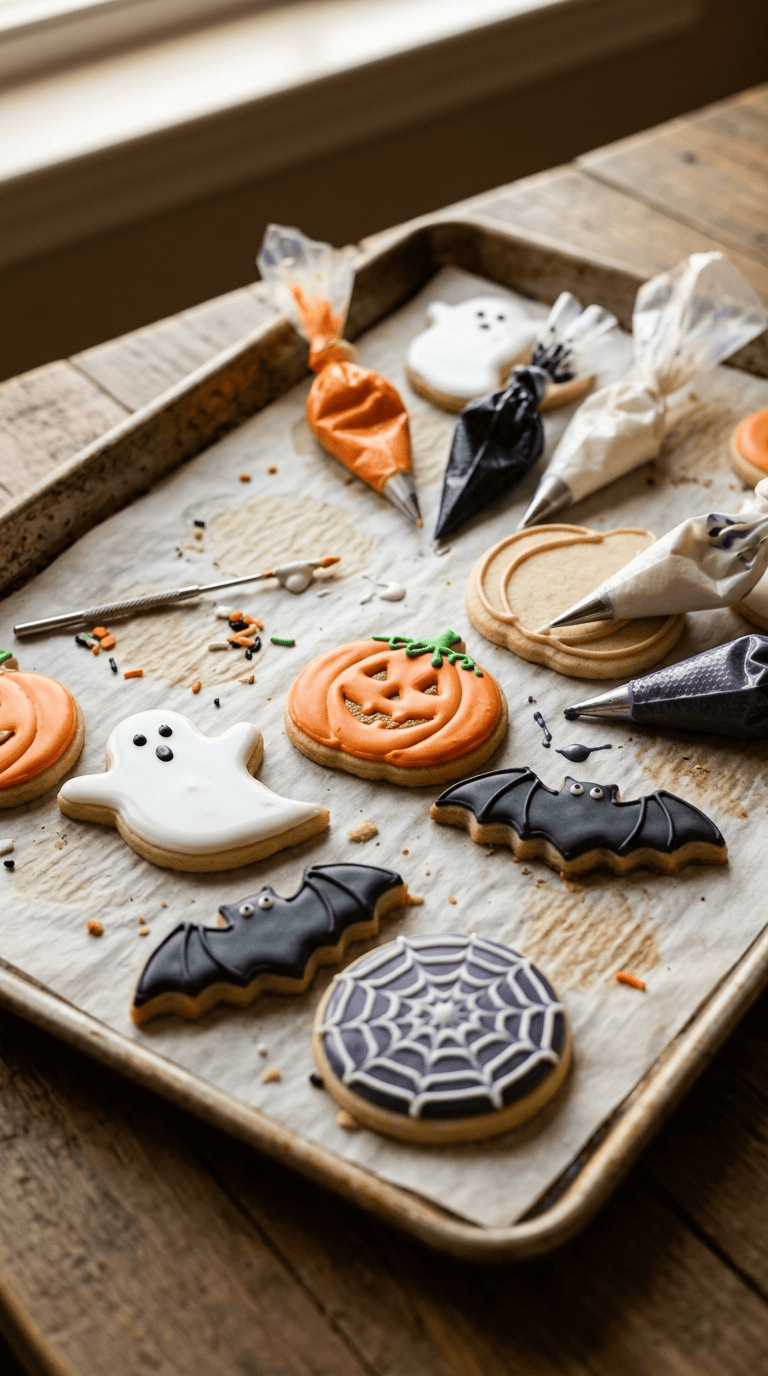
Transfer the icing into piping bags or small zip-top bags with a tiny corner snipped off.
Start with an outline around each cookie.
For pumpkins, pipe the outer shape first, then fill the center with orange icing. Add black eyes, a little mouth, and a green stem once the orange layer sets slightly.
For ghosts, use white icing and add black eyes.
For bats, pipe the wings and body with black icing.
For spiderwebs, draw several thin circles or curved lines and drag a toothpick gently from the center toward the edge.
Don’t worry if every line isn’t perfectly straight. Halloween cookies look better when they have a little personality.
11. Let the Icing Set — 4 to 8 Hours
Leave the decorated cookies uncovered at room temperature until the icing becomes firm.
For simple designs, a few hours may be enough.
For stacking or packaging, I prefer letting them dry overnight.
Once the icing has completely hardened, you can arrange the cookies on a platter without worrying about smearing your designs.
Pro Tips & Tricks
Chill the Dough Before Cutting
Cold dough holds its shape much better.
If your kitchen feels warm, refrigerate the cut cookies for 10 minutes before baking. This small step can make a surprisingly big difference.
Don’t Overbake the Cookies
This is probably my biggest tip.
The cookies should look set around the edges but still feel slightly soft in the center when they come out of the oven.
They continue cooking from the residual heat on the baking sheet.
Keep Your Icing Covered
Royal icing forms a crust quickly when exposed to air.
Place a piece of plastic wrap directly against the surface of the icing when you’re not using it.
This little trick saves you from discovering a bowl of hardened icing halfway through decorating.
Let Each Icing Layer Set
If you’re creating detailed designs, don’t pile wet colors on top of one another.
Let the first layer sit for a few minutes before adding tiny details.
For example, let the orange pumpkin base firm up before adding the black eyes and mouth.
Use Gel Coloring
Gel food coloring gives you bold colors without making the icing watery.
Start with a tiny amount and add more gradually.
Make the Dough Ahead
You can prepare the cookie dough up to 2 days ahead and keep it refrigerated.
You can also freeze the wrapped dough for up to about 2 months.
Thaw frozen dough in the refrigerator before rolling.
Variations & Substitutions
Chocolate Halloween Cookies
For a darker cookie base, replace ¼ cup of the flour with ¼ cup unsweetened cocoa powder.
Chocolate cookies work especially well with orange, purple, and white icing.
Gluten-Free Halloween Cookies
Use a good-quality 1-to-1 gluten-free baking flour blend designed for cookies.
Check that your other decorating ingredients also meet your dietary requirements.
The texture may vary slightly depending on the flour blend, so bake a small test cookie first.
Vegan Halloween Cookies
Use plant-based butter designed for baking and replace the egg with a suitable baking egg replacer.
Choose a vegan-friendly decorating icing as well.
The dough may feel slightly different, so avoid adding extra flour unless the dough truly feels too sticky to roll.
Spiced Halloween Cookies
For a cozy fall flavor, add 1 teaspoon ground cinnamon and ¼ teaspoon ground nutmeg to the dry ingredients.
The warm spices pair beautifully with orange pumpkin designs.
Serving Suggestions

These Halloween cookies belong at a party where people can actually admire them.
Arrange them on a large black or orange serving platter and scatter a few Halloween sprinkles around the edges.
For a Halloween dessert table, serve them alongside cupcakes, brownies, caramel apples, or other homemade treats.
They’re also wonderful for school parties, family movie nights, neighborhood gatherings, and Halloween cookie-decorating afternoons.
One of my favorite ideas is to make a big batch of undecorated cookies and set out bowls of icing, sprinkles, and candy eyes.
Let everyone decorate their own.
Expect some masterpieces.
Expect some monsters.
Expect at least one cookie that looks nothing like the original plan.
That’s part of the fun.
For gifting, place completely dried cookies into clear treat bags and tie them with black, orange, or purple ribbon.
If you’re stacking them, place small pieces of parchment between the cookies.
Related Recipes :
- Halloween Cake Ideas for a Spooky Celebration
- Easy Halloween Treats You Can Make at Home
- Halloween Brownie Ideas That Look Scary and Delicious
FAQ’s
How should I store Halloween cookies?
Store completely cooled and decorated cookies in an airtight container at room temperature.
Place parchment between layers if the cookies have detailed icing.
They usually stay enjoyable for several days when properly sealed.
Can I make Halloween cookies ahead of time?
Absolutely.
You can make the dough ahead and refrigerate it for up to 2 days.
You can also bake the cookies a day or two before decorating.
For a party, I often bake them the day before and decorate them when I have more time.
Can I freeze these decorated cookies?
Yes.
For best results, freeze the baked, undecorated cookies in an airtight freezer-safe container with parchment between layers.
Thaw them at room temperature before decorating.
You can also freeze fully decorated cookies, but the icing needs to dry completely first, and delicate decorations may become less crisp after thawing.
Why did my Halloween cookies spread in the oven?
Warm dough usually causes spreading.
Make sure you chill the dough before cutting and avoid placing fresh dough shapes onto a hot baking sheet.
If your kitchen runs warm, chill the cut cookies for a few minutes before baking.
Why is my icing too runny?
Add a little more powdered sugar and mix again.
Add it gradually so you don’t make the icing too thick.
If you’re flooding cookies, you want the icing to flow smoothly but still hold the general shape of the area you’re filling.
Can I use regular buttercream instead of royal icing?
Yes.
Buttercream gives the cookies a softer, creamier finish and tastes delicious.
However, royal icing works better for thin outlines, spiderwebs, tiny facial details, and designs that need to dry firm.
A Few Final Thoughts From My Kitchen
I love these Halloween cookies because they give you plenty of room to be creative without requiring perfect decorating skills.
The cookie dough stays simple, and the spooky designs do most of the visual work.
If you’re new to decorating, start with ghosts and pumpkins. They’re forgiving shapes and don’t require complicated piping.
Once you feel comfortable, try spiderwebs, bats, monsters, or little haunted houses.
And don’t throw away the “ugly” cookies.
Those are usually the ones people reach for first.
Put on some Halloween music, grab your icing bags, and let the kitchen get a little messy. Make the ghosts wonky, give the monsters ridiculous faces, and let the kids add way too many sprinkles.
That’s what makes homemade Halloween cookies special.
If you make a batch, I’d love to hear which spooky design became your favorite.
Leave a Reply
You must be logged in to post a comment.