


Every Thanksgiving, I try to convince myself that I’ll make something new for dessert. Then the smell of cinnamon and baked apples starts drifting through the kitchen, and I remember why I keep coming back to caramel apple crisp.
The first time I made it, I slightly underestimated how much the apples would shrink. I pulled the dish from the oven expecting a mountain of fruit and found a much more modest layer hiding under a beautifully browned topping. It still tasted fantastic, but I learned my lesson: use plenty of apples and slice them evenly.
Now this caramel apple crisp has become one of those desserts I can make without thinking too hard. The apples turn soft and jammy, the caramel melts into the filling, and the oat topping develops those irresistible crisp edges while staying tender underneath.
It also feels right at home on a Thanksgiving table. You get all the cozy flavors people expect from fall without having to wrestle with pie dough.
Why You’ll Love This Recipe

- No pie crust required. A buttery oat topping gives you plenty of crunch without rolling, chilling, or crimping dough.
- It tastes homemade. Fresh apples, cinnamon, brown sugar, and caramel create that classic fall combination.
- You can make it ahead. Assemble it earlier in the day and bake it when you’re ready.
- It feeds a crowd. One 9-by-13-inch baking dish gives everyone a generous scoop.
- It loves ice cream. A warm serving with vanilla ice cream and extra caramel sauce is hard to beat.
Ingredients
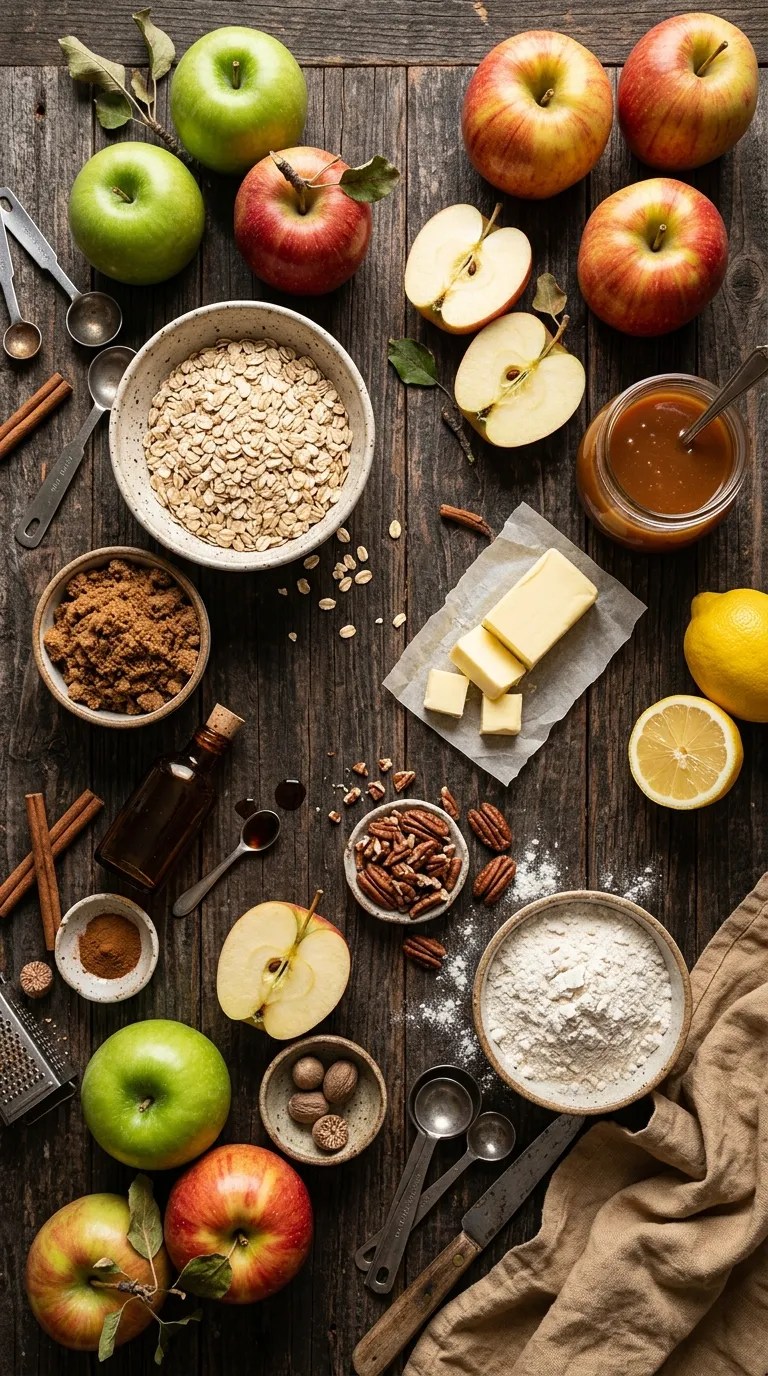
I usually reach for apples that hold their shape during baking rather than apples that turn completely soft. A mix of sweet and tart apples gives the filling more personality.
For the Apple Filling
- 8 medium apples, about 3 pounds total, peeled, cored, and sliced about ¼-inch thick
- ⅓ cup packed light brown sugar
- 2 tablespoons all-purpose flour
- 1 tablespoon fresh lemon juice
- 1½ teaspoons ground cinnamon
- ½ teaspoon ground nutmeg
- ¼ teaspoon fine salt
- 1 teaspoon vanilla extract
- ½ cup caramel sauce, plus more for serving
Apple choices: Granny Smith, Honeycrisp, Pink Lady, Braeburn, or a combination work well. I especially like using half tart apples and half sweeter apples.
For the Crisp Topping
- 1½ cups old-fashioned rolled oats
- 1 cup all-purpose flour
- ¾ cup packed light brown sugar
- ½ teaspoon ground cinnamon
- ¼ teaspoon fine salt
- ½ cup unsalted butter, melted
- 1 teaspoon vanilla extract
- ½ cup chopped pecans or walnuts, optional
If you need a nut-free dessert, simply leave out the nuts. The topping still develops plenty of crunch from the oats.
For a richer flavor, you can replace some of the brown sugar with dark brown sugar. You can also use store-bought caramel sauce when you want to save time. I’ve done both, and nobody at the Thanksgiving table has ever complained about the shortcut.
Step-by-Step Instructions
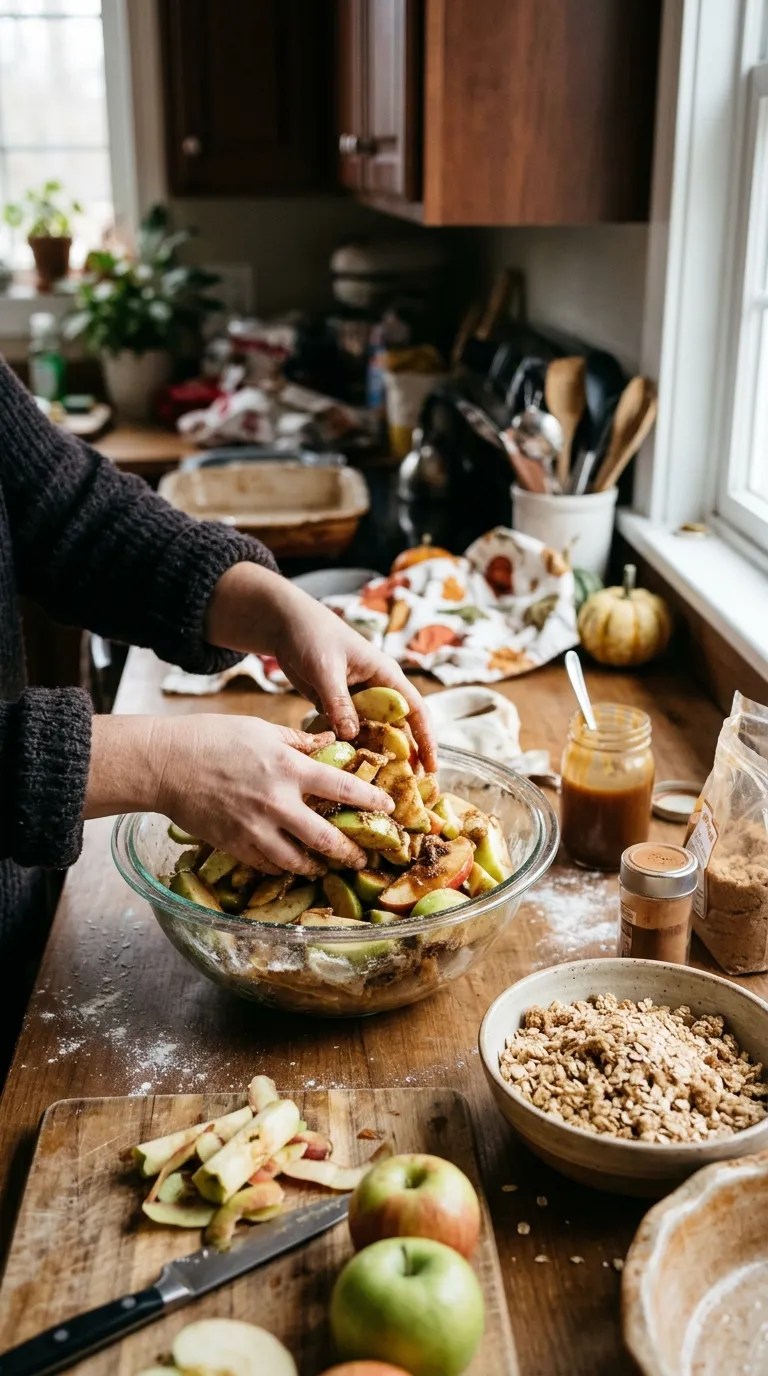
1. Heat the Oven and Prepare the Baking Dish — 5 Minutes
Set your oven to 350°F (175°C).
Lightly butter a 9-by-13-inch baking dish. I like using a glass or ceramic casserole dish because it makes the crisp easy to serve straight from the oven.
Give the oven plenty of time to preheat. A fully heated oven helps the topping brown properly instead of slowly drying out while the fruit cooks.
2. Prepare the Apples — 10 Minutes
Peel and core the apples, then slice them into pieces about ¼ inch thick.
Try to keep the slices reasonably similar in size. They don’t need to look perfect, but very thin pieces can turn mushy while thick pieces may stay too firm.
Place the apples in a large mixing bowl.
Add the brown sugar, flour, lemon juice, cinnamon, nutmeg, salt, and vanilla. Toss everything together until the apples look evenly coated.
The flour might look like a small addition, but it helps thicken the juices that the apples release as they bake.
3. Add the Caramel — 2 Minutes
Pour ½ cup of caramel sauce over the apples and gently toss again.
Don’t worry about coating every single slice in caramel. The sauce will loosen as it heats and mingle with the apple juices in the oven.
Transfer the apples to your prepared baking dish and spread them into an even layer.
4. Make the Crisp Topping — 5 Minutes
In a separate bowl, combine the oats, flour, brown sugar, cinnamon, and salt.
Pour in the melted butter and vanilla. Stir with a fork or wooden spoon until the mixture forms moist, irregular crumbs.
If you’re using pecans or walnuts, stir them in now.
Here’s the texture you’re looking for: when you squeeze a handful of the mixture, it should hold together briefly before breaking apart into chunky pieces.
If the topping looks unusually dry, add another tablespoon of melted butter. If it looks excessively wet, add a spoonful of oats.
5. Cover the Apples — 2 Minutes
Scatter the topping evenly over the apples.
Don’t press it down firmly. Loose clusters give you those wonderful crisp, craggy pieces that brown beautifully.
Make sure you cover most of the fruit, but don’t worry if a few little patches of apple peek through.
6. Bake the Caramel Apple Crisp — 45 to 55 Minutes
Place the baking dish in the center of the oven.
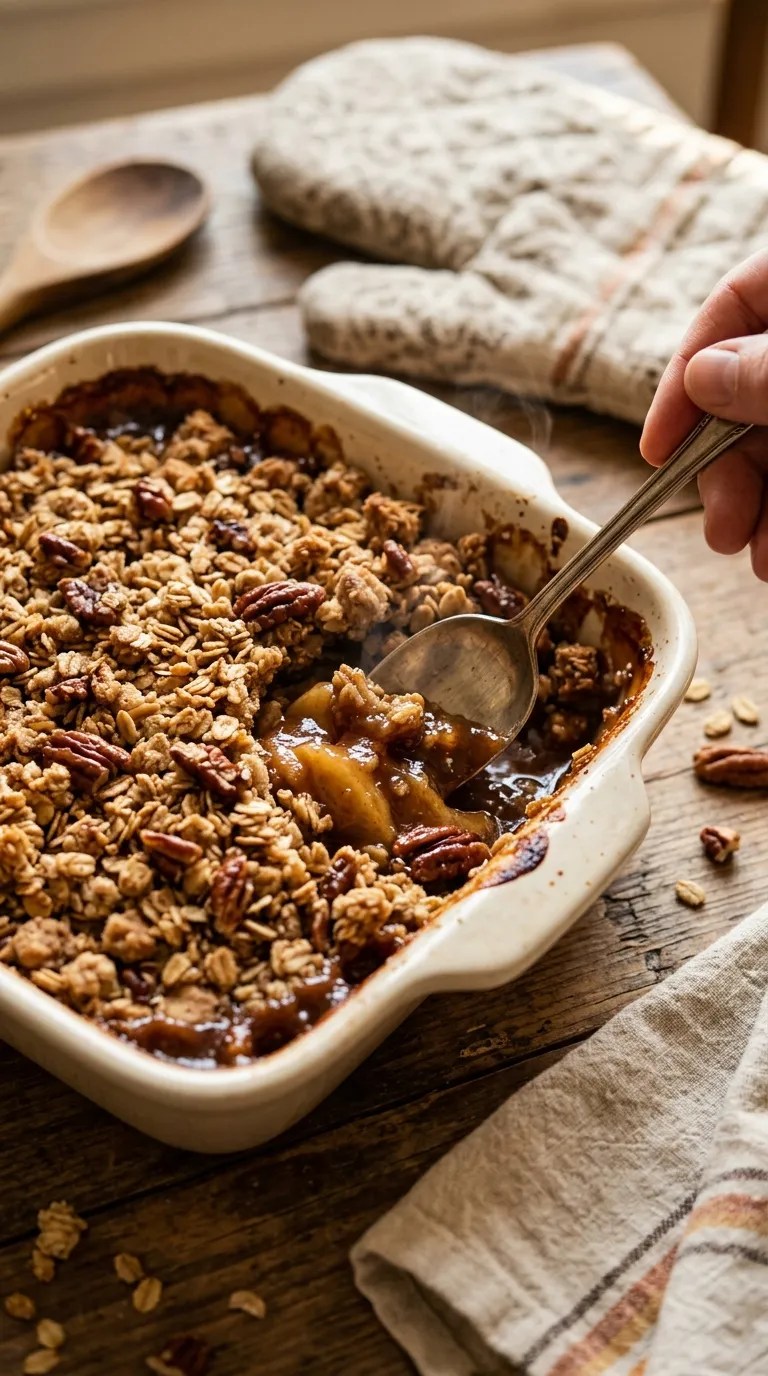
Bake for 45 to 55 minutes, until the topping looks golden brown and the apple filling bubbles around the edges.
This is one of those recipes where the visual cues matter more than the clock.
The topping should look deeply golden rather than pale. The filling should bubble noticeably, especially around the sides of the dish.
If the topping browns before the apples become tender, loosely cover the dish with aluminum foil and continue baking.
To check the apples, slide a thin knife into the center. It should meet some resistance but pass through the apple fairly easily.
7. Let It Rest — 15 to 20 Minutes
This step tests my patience every single time.
Let the crisp sit for at least 15 minutes before serving. The filling stays extremely hot right out of the oven, and the juices also need a little time to thicken.
If you serve it immediately, the filling can look more liquid than it will after resting.
I usually use this time to put the coffee on, scoop ice cream, and sneak one piece of crispy topping from the edge of the dish.
Pro Tips & Tricks
Pick Apples That Can Handle the Oven
Not every apple behaves the same way in a crisp.
I like using a combination of Granny Smith and Honeycrisp because the tart Granny Smith balances the sweetness while the Honeycrisp adds a naturally sweet, fragrant flavor.
Avoid using only very soft apples if you want the filling to retain some texture.
Don’t Slice the Apples Too Thin
Thin slices can disappear into the filling.
Aim for roughly ¼-inch slices. They soften enough to become tender but still give you recognizable pieces of apple in every bite.
Don’t Pack Down the Topping
I made this mistake once because I thought a firmly packed topping would create a better crust.
It didn’t.
A loose topping gives the butter, oats, and flour room to brown and crisp. Keep the mixture crumbly and scatter it over the fruit.
Watch the Caramel
Caramel contains sugar, so it can become quite dark if it sits directly against a hot surface for too long.
That’s another reason I prefer mixing some caramel into the apple filling rather than pouring a huge amount over the top before baking.
Save the extra caramel for serving.
Make It Ahead
You can assemble the apple filling and topping separately several hours before baking.
Keep the prepared apples covered in the refrigerator and store the topping in a separate airtight container. Sprinkle the topping over the apples just before baking.
This approach works especially well for Thanksgiving because you can prepare the components earlier and keep your oven schedule more manageable.
Storage
Once the crisp cools, cover the baking dish and refrigerate leftovers for up to 4 days.
The topping will soften somewhat in the refrigerator, but reheating brings some of that texture back.
For individual portions, microwave them until warm, then add a scoop of ice cream. For the crispest topping, reheat portions in a 350°F oven or toaster oven until warmed through.
Variations & Substitutions
Make It Gluten-Free
Use a certified gluten-free all-purpose flour blend in the filling and topping, and choose certified gluten-free rolled oats.
The rest of the ingredients naturally fit into the recipe without major changes.
Try a Brown Butter Version
If you have an extra few minutes, brown the butter before adding it to the topping.
Melt the butter in a saucepan over medium heat and continue cooking until it smells nutty and develops golden-brown flecks. Let it cool slightly before mixing it into the dry ingredients.
That little extra step gives the topping a deeper, toasted flavor that works beautifully with apples and caramel.
Add Warm Holiday Spice
For a more spiced Thanksgiving version, add ¼ teaspoon of ground ginger and a tiny pinch of ground cloves to the apple filling.
I wouldn’t go overboard. Cinnamon should remain the main flavor rather than letting the spice mixture overpower the apples.
Make It Dairy-Free
Use a plant-based butter that works well for baking and choose a dairy-free caramel sauce.
Check the labels on your caramel and butter substitutes because formulations vary by brand.
Serving Suggestions

Warm caramel apple crisp practically begs for something cold and creamy alongside it.
A scoop of vanilla ice cream is my first choice. The ice cream melts into the warm apples and caramel, creating a sauce that gathers at the bottom of the bowl.
Whipped cream works beautifully too, especially if you want something lighter.
For a Thanksgiving dinner, I like serving modest portions because the meal usually leaves everyone pleasantly full. You can always offer seconds.
For a little extra texture, sprinkle toasted pecans over each serving.
And don’t forget the caramel sauce. Warm a small amount and drizzle it over the top just before serving.
If you’re serving coffee after dinner, this dessert pairs particularly well with a medium or dark roast. The slightly bitter coffee balances the sweetness of the caramel.
Related Recipes:
- Pumpkin Crisp Bars
- No-Bake Pumpkin Cheesecake Ball
- How to Make Caramel Apple Streusel Cheesecake
- How to Make Pecan Pie Cheesecake From Scratch
- Southern Pecan Pie Cheesecake for Thanksgiving
FAQ’s
Can I make caramel apple crisp the day before Thanksgiving?
Yes. You can bake it a day ahead, let it cool completely, cover it, and refrigerate it.
For the best topping texture, though, I prefer assembling the components ahead and baking the crisp on Thanksgiving. If you bake it the day before, reheat it uncovered in a 350°F oven until warm.
What are the best apples for caramel apple crisp?
Granny Smith, Honeycrisp, Pink Lady, Braeburn, and similar firm apples work well.
I prefer combining two varieties rather than relying on just one. A tart apple and a sweeter apple create a more balanced filling.
Why did my apple crisp turn out watery?
Apples naturally release juice as they bake. Very juicy apples, extra-thin slices, or an underbaked crisp can all contribute to a looser filling.
The flour in this recipe helps absorb and thicken those juices. Also, give the crisp time to rest after baking before serving.
If the filling still looks very loose, return the dish to the oven for another 5 to 10 minutes and check it again.
Can I freeze caramel apple crisp?
Yes, but the topping may lose some of its original crisp texture after freezing.
For best results, cool the baked crisp completely, wrap it tightly, and freeze it in a freezer-safe container. Thaw it in the refrigerator, then reheat it uncovered in a 350°F oven until hot.
You can also freeze the topping separately for future use.
Can I use canned apple pie filling?
You can, but I recommend fresh apples for this recipe.
Fresh apples let you control the sweetness, spices, and texture, and they pair especially well with the caramel sauce. If you use canned filling, reduce or omit the added brown sugar in the filling so the dessert doesn’t become overly sweet.
How do I keep the crisp topping crunchy?
Start with old-fashioned rolled oats, don’t compress the topping, and bake until properly golden brown.
For leftovers, reheating in the oven or toaster oven works better than microwaving if you want to restore some of the crunch.
Final Thought
There’s something wonderfully uncomplicated about bringing a bubbling dish of caramel apple crisp to the Thanksgiving table.
It doesn’t need perfect slices or fancy decoration. It just needs tender apples, a generous handful of buttery crumbs, warm spices, and enough caramel to make everyone lean toward the serving spoon.
I’ve made plenty of desserts that require more precision, but this is the one I reach for when I want the kitchen to smell incredible while I get everything else ready for dinner.
And if a few people hover around the oven asking when dessert will be ready, take that as a good sign.
Make the crisp, let it rest, add a scoop of vanilla ice cream, and drizzle on that extra caramel. Then grab your own serving before the dish mysteriously empties.
Leave a Reply
You must be logged in to post a comment.