

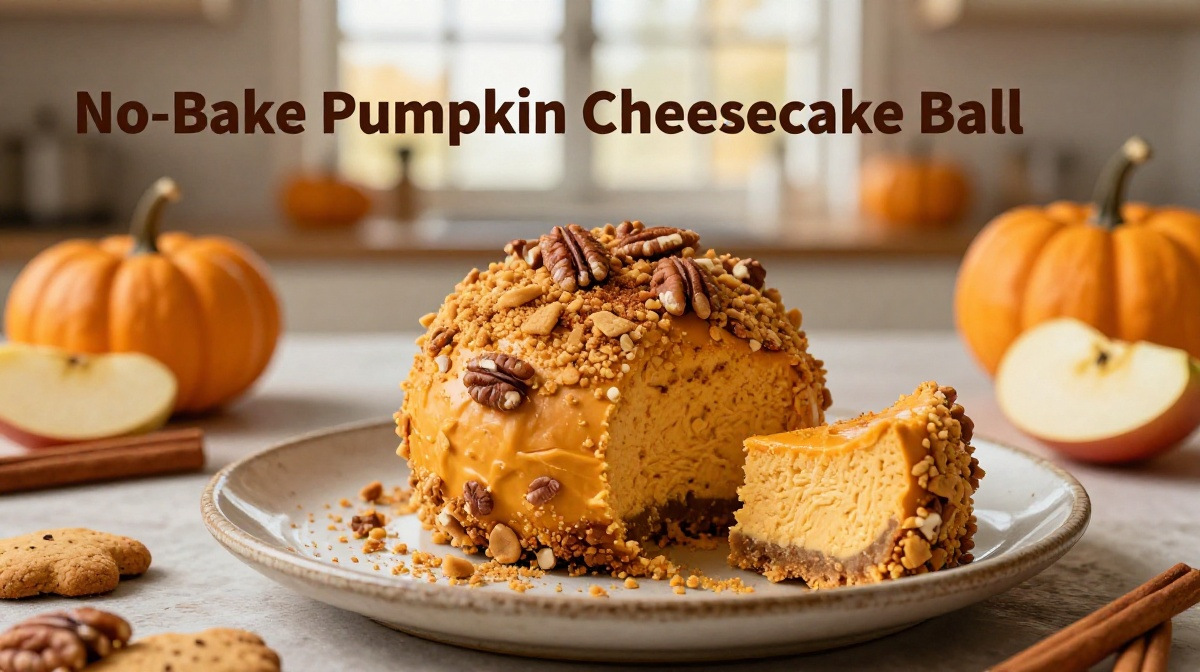
There’s a certain point every fall when I start adding pumpkin to practically everything. Pumpkin bread, pumpkin pancakes, pumpkin muffins—and eventually, this no-bake pumpkin cheesecake ball makes an appearance.
I first made it because I had a tub of cream cheese in the fridge and wanted something festive without committing to an entire cheesecake. I figured I’d mix everything together, chill it, and hope for the best.
The first attempt was delicious but hilariously soft. I had rushed the chilling time and tried to shape it too soon. Once I gave the mixture more time in the refrigerator, everything changed. It firmed up beautifully, rolled into a neat ball, and became one of those recipes I kept making whenever friends or family came over.
The best part? You don’t need a springform pan, water bath, or oven. You simply mix, chill, shape, and coat it.
And if your kitchen smells like pumpkin spice while you make it, that’s just a bonus.
Why You’ll Love This Recipe

- No oven required. Perfect when you want a fall dessert without heating up the kitchen.
- Quick to assemble. The hands-on work takes about 15 minutes.
- Great for sharing. Put it on a platter with cookies and fruit, and everyone can help themselves.
- Easy to customize. Change the coating or spices to suit your taste.
- Make-ahead friendly. It actually tastes better after it has had time to chill and firm up.
Ingredients
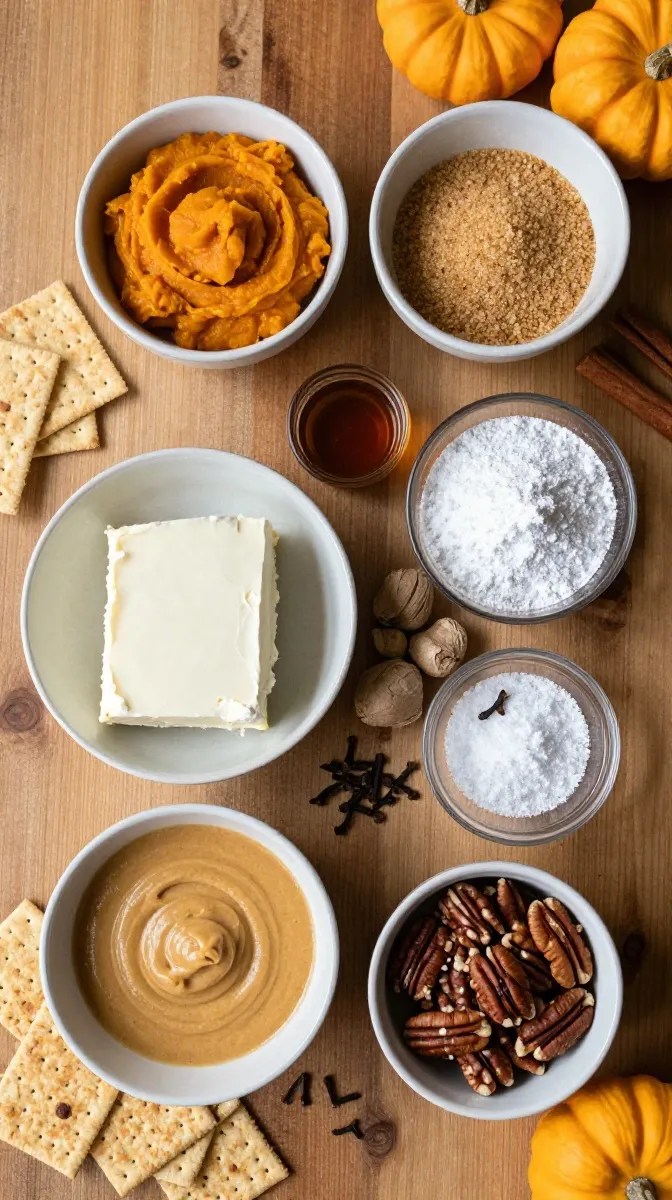
For the Pumpkin Cheesecake Ball
- 8 ounces (226 g) cream cheese, softened
- 1/2 cup (120 g) pumpkin puree, preferably plain canned pumpkin
- 1/2 cup (60 g) powdered sugar
- 1/4 cup (50 g) packed light brown sugar
- 1 teaspoon vanilla extract
- 1 teaspoon ground cinnamon
- 1/2 teaspoon ground ginger
- 1/4 teaspoon ground nutmeg
- 1/8 teaspoon ground cloves
- 1/4 teaspoon salt
- 1 1/2 cups (135 g) graham cracker crumbs, divided
- 1/2 cup (60 g) finely chopped pecans or walnuts, optional
For the Coating
- 1/2 cup (60 g) finely chopped pecans or walnuts
- 1/2 cup (45 g) graham cracker crumbs
- 1 tablespoon brown sugar
- 1/2 teaspoon ground cinnamon
You can use all graham cracker crumbs if you don’t have nuts. For a nut-free version, finely crushed gingersnap cookies also make a wonderful coating.
A Note About the Pumpkin
Use plain pumpkin puree, not pumpkin pie filling. Pumpkin pie filling already contains sugar and spices, so using it here would throw off the flavor and texture.
Also, don’t add extra pumpkin because you want a stronger pumpkin flavor. I made that mistake once, and the mixture became much harder to shape. The spices and vanilla do plenty of work.
Step-by-Step Instructions
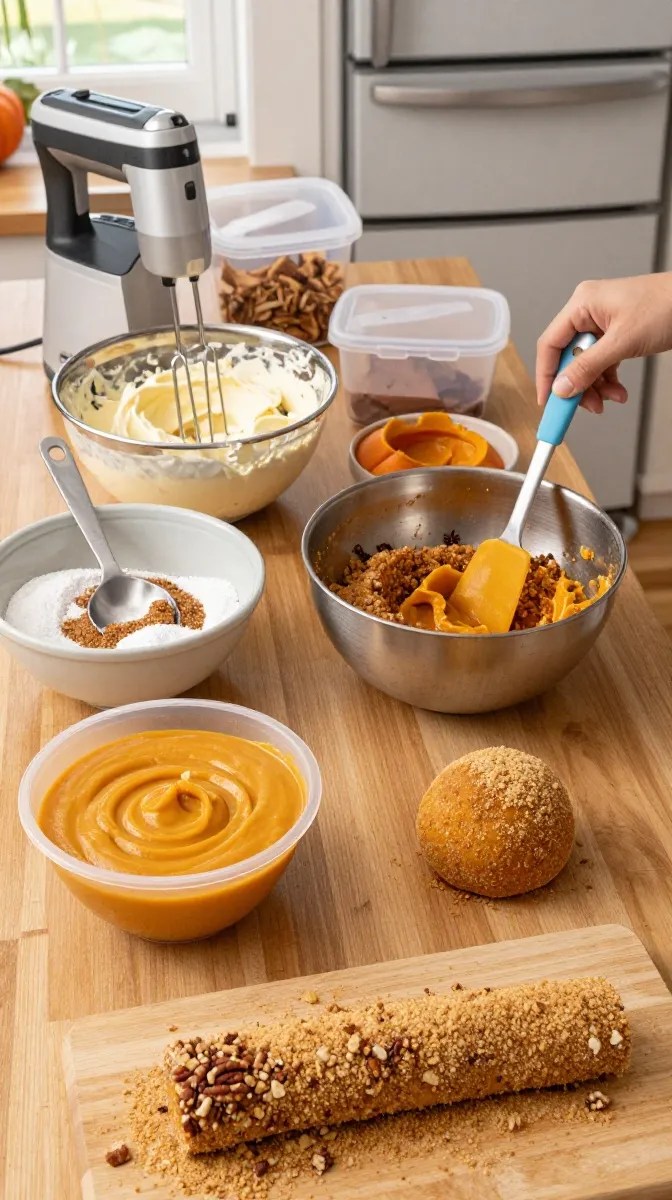
1. Soften the Cream Cheese — About 30 Minutes
Take the cream cheese out of the refrigerator and let it soften at room temperature.
You want it soft enough that a spoon or mixer can blend it smoothly, but it shouldn’t feel warm or melted.
If you forget to soften it ahead of time, cut it into small cubes. Smaller pieces soften much faster.
2. Mix the Cream Cheese and Sugars — 2 to 3 Minutes
Place the softened cream cheese in a large mixing bowl.
Add the powdered sugar and brown sugar. Beat everything together with a hand mixer or stand mixer until the mixture looks smooth and creamy.
Scrape down the sides of the bowl once or twice. Cream cheese loves to hide in those corners.
The mixture should look fluffy rather than lumpy before you continue.
3. Add the Pumpkin and Flavorings — 1 to 2 Minutes
Add the pumpkin puree, vanilla extract, cinnamon, ginger, nutmeg, cloves, and salt.
Mix until everything comes together evenly.
At this point, the mixture should have a beautiful orange color and smell like pumpkin pie.
Give it a taste before adding the crumbs. If you prefer a stronger cinnamon flavor, you can add a small pinch more. I recommend going slowly with cloves because even a little can become noticeable quickly.
4. Add the Graham Cracker Crumbs — 1 to 2 Minutes
Add 1 cup of the graham cracker crumbs and mix well.
The crumbs absorb some of the moisture and give the cheesecake ball enough structure to hold its shape.
Now check the consistency. The mixture should be thick and scoopable, similar to very soft cookie dough.
If it still looks loose, add the remaining 1/2 cup of graham cracker crumbs a few tablespoons at a time.
Don’t dump everything in automatically. Different pumpkin purees can contain slightly different amounts of moisture, so your mixture may need a little more or a little less.
5. Chill the Mixture — At Least 2 Hours
Cover the bowl with plastic wrap or a reusable bowl cover and refrigerate it for at least 2 hours.
Overnight works even better.
This step matters more than it might seem. The mixture needs enough time to become firm before you try shaping it.
I used to think chilling was just a formality. It isn’t. If you try rolling the mixture while it’s still soft, you’ll end up fighting with it.
6. Prepare the Coating — 5 Minutes
While the cheesecake mixture chills, prepare the coating.
Combine the chopped pecans or walnuts, graham cracker crumbs, brown sugar, and cinnamon in a shallow bowl or plate.
Stir everything together until the ingredients are evenly distributed.
A shallow dish works better than a deep bowl because you can easily roll the cheesecake ball through the coating.
7. Shape the Cheesecake Ball — About 5 Minutes
Once the mixture feels firm, take it out of the refrigerator.
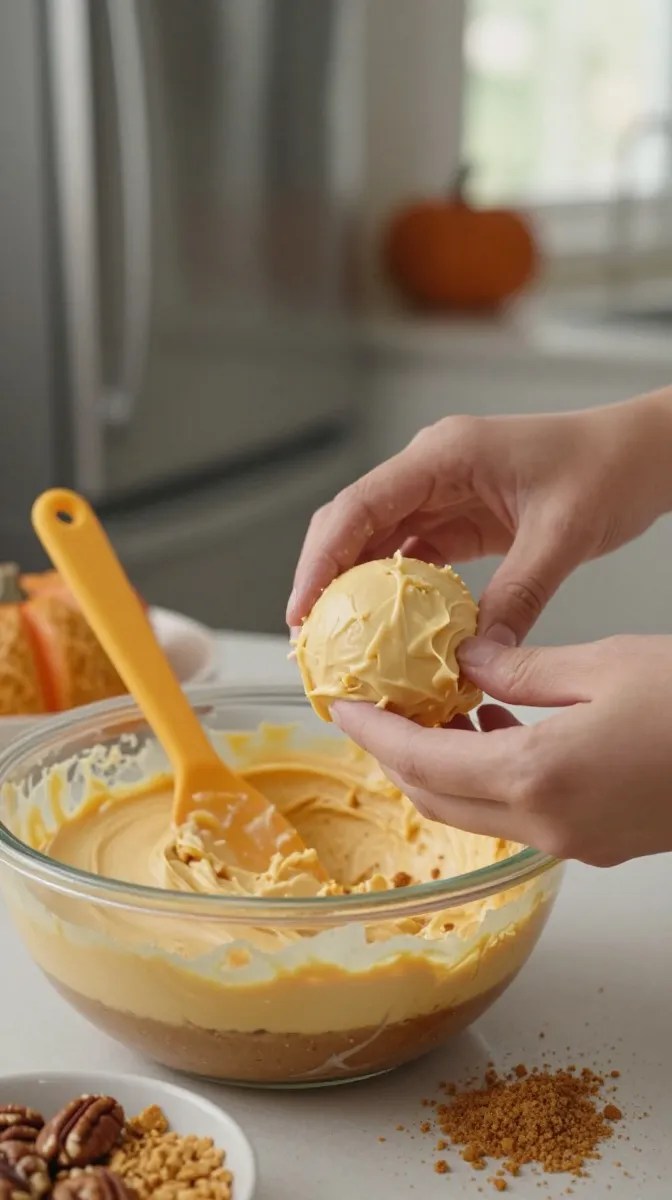
Use a large spoon or cookie scoop to gather the mixture, then gently press it together with clean hands.
Shape it into one round ball.
If the mixture feels sticky, don’t panic. Lightly dampen your hands or chill the mixture for another 20 to 30 minutes.
You don’t need to make it perfectly round. A slightly rustic shape makes it look homemade in the best possible way.
8. Coat It Completely — 2 to 3 Minutes
Place the cheesecake ball into the coating mixture.
Gently roll it around until the outside is covered.
Use your hands to press the crumbs and nuts lightly against any bare patches. You want a generous coating so every bite gets a little crunch.
9. Chill Again — At Least 1 Hour
Transfer the finished cheesecake ball to a serving plate or small tray.
Cover it loosely and refrigerate for at least another hour before serving.
This second chill gives the ball a firmer texture and lets the pumpkin spice flavor settle together.
If you’re serving it at a party, you can make it the day before and leave it refrigerated until you’re ready to put it out.
Pro Tips & Tricks
Don’t Skip the Chill Time
This is the biggest lesson I’ve learned from making this recipe repeatedly.
A soft cheesecake mixture may look impossible to shape, but more refrigerator time usually solves the problem. Give it a solid two hours before shaping, and don’t hesitate to chill it longer.
Use Full-Fat Cream Cheese for the Best Texture
Full-fat block cream cheese gives this dessert a rich, sturdy texture.
Avoid using whipped cream cheese from a tub if you want the firmest result. Tub-style cream cheese often has a softer consistency, which can make the finished ball difficult to shape.
Don’t Overdo the Pumpkin
Pumpkin adds flavor and moisture, but too much can make the mixture soft.
Stick with the measured 1/2 cup. If you want more pumpkin-pie flavor, increase the cinnamon or ginger slightly rather than adding extra puree.
Make the Crumbs Fine
Large graham cracker pieces can make the mixture harder to shape and can create gaps in the coating.
For fine crumbs, place graham crackers in a food processor and pulse until they resemble sand.
You can also put them in a zip-top bag and crush them with a rolling pin. That’s my favorite method when I don’t feel like washing another appliance.
Let It Sit Briefly Before Serving
Take the cheesecake ball out of the refrigerator about 10 to 15 minutes before serving.
It should remain cool and firm, but the texture becomes more pleasant when it isn’t refrigerator-cold.
Don’t leave it sitting out for hours, though. Since it contains cream cheese, keep it chilled when you’re not actively serving it.
Store Leftovers Properly
Keep leftovers covered in the refrigerator.
The cheesecake ball should keep well for about 3 to 4 days when stored properly. The coating may soften slightly over time, but the flavor stays delicious.
Variations & Substitutions
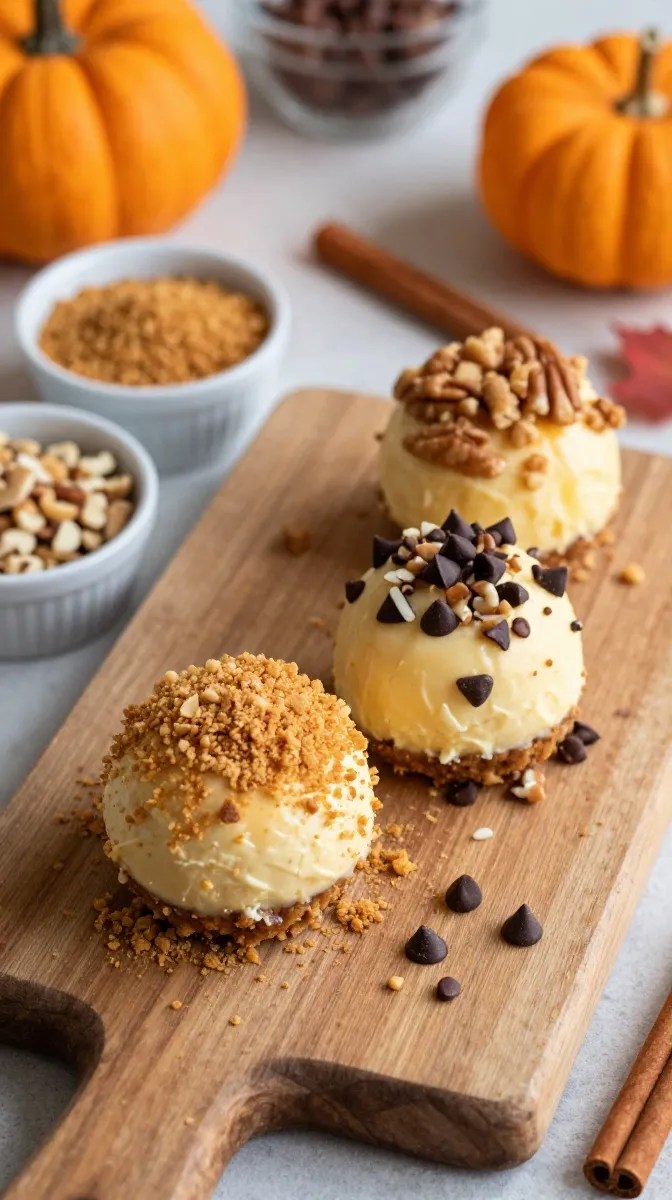
Make It Extra Ginger-Spiced
For a stronger gingerbread-style flavor, replace some of the graham cracker crumbs with finely crushed gingersnap cookies.
Try using 1/2 cup gingersnap crumbs and 1/2 cup graham cracker crumbs in the mixture.
You can also use gingersnap crumbs in the outside coating. The extra ginger gives the pumpkin flavor a lovely little kick.
Try a Chocolate-Pecan Coating
If you’re a chocolate-and-pumpkin person, mix finely chopped pecans with mini chocolate chips and graham cracker crumbs for the outside.
Keep the chocolate pieces small so they stick to the cheesecake ball instead of falling off.
Semi-sweet chocolate works especially well because it balances the sweetness without making the dessert taste overly sugary.
Make a Nut-Free Version
Skip the pecans or walnuts completely.
For the coating, use extra graham cracker crumbs, crushed gingersnaps, or finely crushed vanilla wafer cookies.
If you’re serving the dessert to someone with a nut allergy, check the labels on your packaged ingredients and avoid cross-contact during preparation.
Make It Gluten-Free
Use certified gluten-free graham crackers or gluten-free cookies in both the cheesecake mixture and coating.
The rest of the ingredients are naturally easy to adapt, but always check individual package labels if you’re preparing the dessert for someone who needs to avoid gluten.
Serving Suggestions

This pumpkin cheesecake ball works beautifully as part of a dessert spread.
Place it in the center of a serving platter and surround it with:
- Graham crackers
- Gingersnap cookies
- Vanilla wafers
- Apple slices
- Pear slices
- Pretzel sticks
- Cinnamon cookies
- Shortbread
I especially like serving it with crisp apple slices because the fresh fruit gives you a nice contrast to the creamy, sweet cheesecake.
For a fall gathering, arrange everything on a wooden board with a few cinnamon sticks or small decorative pumpkins around the edges. It looks festive without requiring much extra work.
This also makes a fun Thanksgiving appetizer-style dessert, Halloween party treat, Friendsgiving addition, or casual weekend dessert.
If you’re taking it to someone’s house, transport it in a covered container with an ice pack and keep it refrigerated until serving.
Related Recipes:
- Easy Pecan Coffee Cake With a Crumb Topping – Moist & Delicious
- Easy Apple Dessert for Thanksgiving Dinner
- Pumpkin Bars With Cream Cheese Frosting – Easy & Moist Recipe
- Pumpkin Cupcakes With Cinnamon Cream Cheese Frosting
- Pumpkin Cheesecake Recipe Without Cream Cheese
FAQ’s
Can I make a pumpkin cheesecake ball ahead of time?
Absolutely. In fact, I prefer making it a day ahead.
Prepare and coat the cheesecake ball, then cover it and refrigerate overnight. The extra resting time gives the spices a chance to blend and makes the texture nicely firm.
How long does a pumpkin cheesecake ball last in the refrigerator?
Store it covered in the refrigerator for about 3 to 4 days.
For the best texture, keep the cheesecake ball chilled and take it out shortly before serving.
Can I freeze pumpkin cheesecake balls?
Yes, you can freeze the cheesecake mixture or the finished ball.
Wrap the ball tightly, place it in a freezer-safe container, and freeze it for up to about 1 month for best quality. Thaw it in the refrigerator rather than on the counter.
The coating may lose some of its original texture after freezing and thawing, so if presentation matters, you can add a fresh layer of crumbs and nuts after thawing.
Why is my cheesecake mixture too soft?
The most common reason is excess moisture from the pumpkin or not enough chilling time.
First, refrigerate the mixture for another 30 to 60 minutes. If it’s still too soft, mix in a few tablespoons of graham cracker crumbs at a time until you can scoop and shape it.
Avoid adding a large amount of crumbs all at once. You don’t want to turn a creamy cheesecake texture into something dry and crumbly.
Can I use pumpkin pie filling instead of pumpkin puree?
I don’t recommend it.
Pumpkin pie filling already contains added sugar and spices, so substituting it for plain pumpkin puree can make the finished dessert much sweeter and change the spice balance.
Use plain pumpkin puree for the most predictable result.
Can I make individual pumpkin cheesecake balls instead?
Yes, and they’re adorable for parties.
After chilling the mixture, use a small cookie scoop to portion it into individual pieces. Roll each one between your palms and coat them with the graham cracker mixture.
Chill the individual cheesecake bites for about an hour before serving.
They’re especially convenient when you don’t want guests cutting into a shared dessert.
Final Thought
There are plenty of complicated pumpkin desserts that deserve a spot on the holiday table, but sometimes I want something much simpler.
That’s where this no-bake pumpkin cheesecake ball earns its place.
You mix a handful of familiar ingredients, give everything plenty of time to chill, roll it in a crunchy coating, and suddenly you have a dessert that looks like you put in much more effort than you actually did.
The first time you make it, pay special attention to the texture before shaping. That little detail makes the biggest difference.
And don’t worry if your ball isn’t perfectly round. Mine rarely is, and nobody seems to complain once they start dipping their crackers into it.
If you make this for your next fall gathering, I hope it becomes one of those easy recipes you keep coming back to whenever pumpkin season rolls around.
Leave a Reply
You must be logged in to post a comment.