

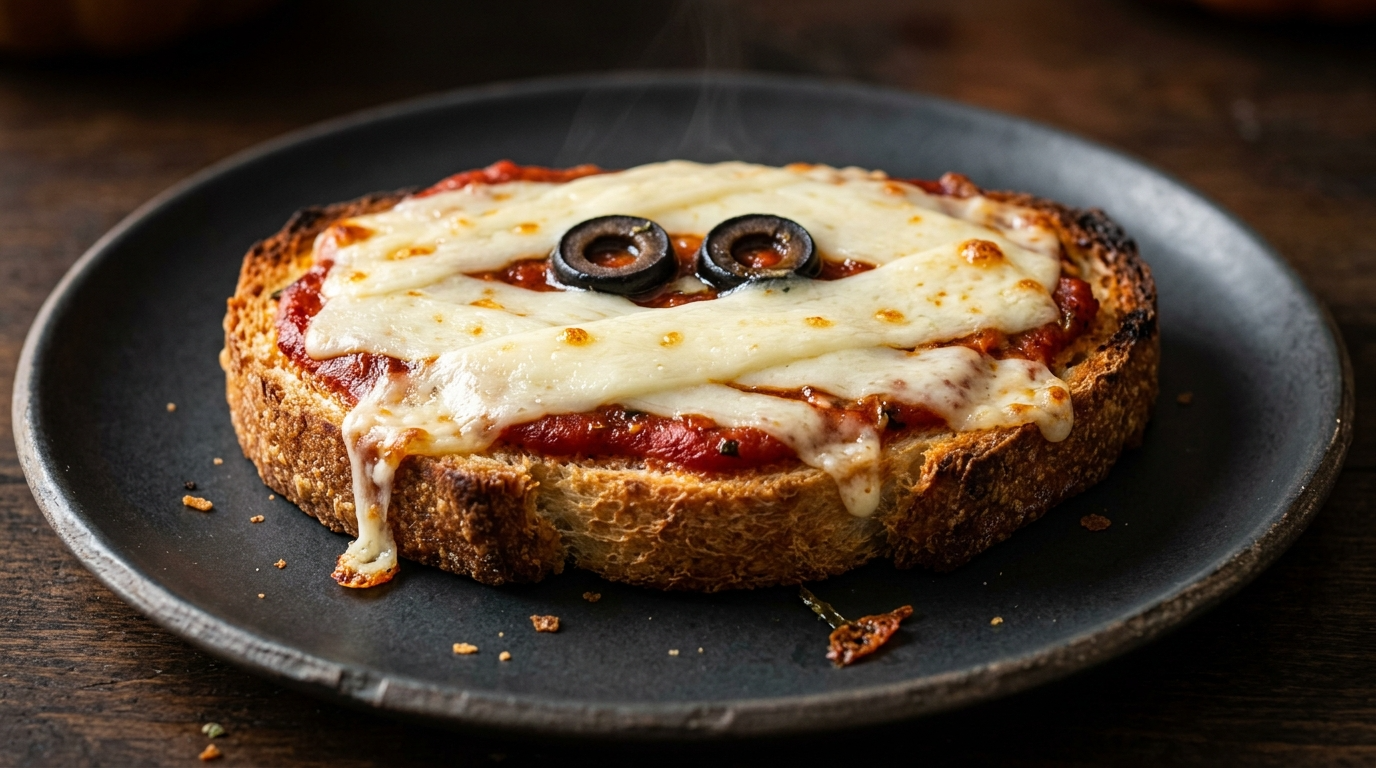
Every Halloween, I end up wanting to make something fun without turning my kitchen into a disaster zone. I love the spooky treats that look impressive, but I’m not interested in spending three hours decorating one plate of food. That’s exactly how these Mummy Pizza Toasts became one of my favorite Halloween snacks for kids.
The first time I made them, I honestly thought the cheese strips would slide all over the toast. A few of them did, and those mummies looked more like they had survived a tiny cheese avalanche. The next batch turned out much better once I cut the cheese a little thinner and placed the strips in different directions.
The best part? Kids can help make them.
They can spread the pizza sauce, arrange the cheese, and add the little olive eyes. My kitchen usually gets a little messy during the process, but that feels like part of the Halloween fun.
These spooky pizza toasts take simple everyday ingredients and turn them into something that looks completely different. They’re crispy around the edges, cheesy in the middle, and just creepy enough to make kids giggle before they take the first bite.
Why You’ll Love This Recipe

- Super easy: You only need a handful of everyday ingredients.
- Kid-friendly: Children can help assemble the mummy faces.
- Quick: The whole recipe takes around 20 minutes.
- Budget-friendly: Bread, sauce, cheese, and olives do most of the work.
- Perfect for Halloween: Serve them at a Halloween party, school snack, movie night, or spooky family dinner.
I also love that you don’t need special Halloween-shaped cutters or fancy decorating equipment. The mummy effect comes from the cheese, so even if your decorating skills are questionable, these still turn out cute.
Ingredients You’ll Need
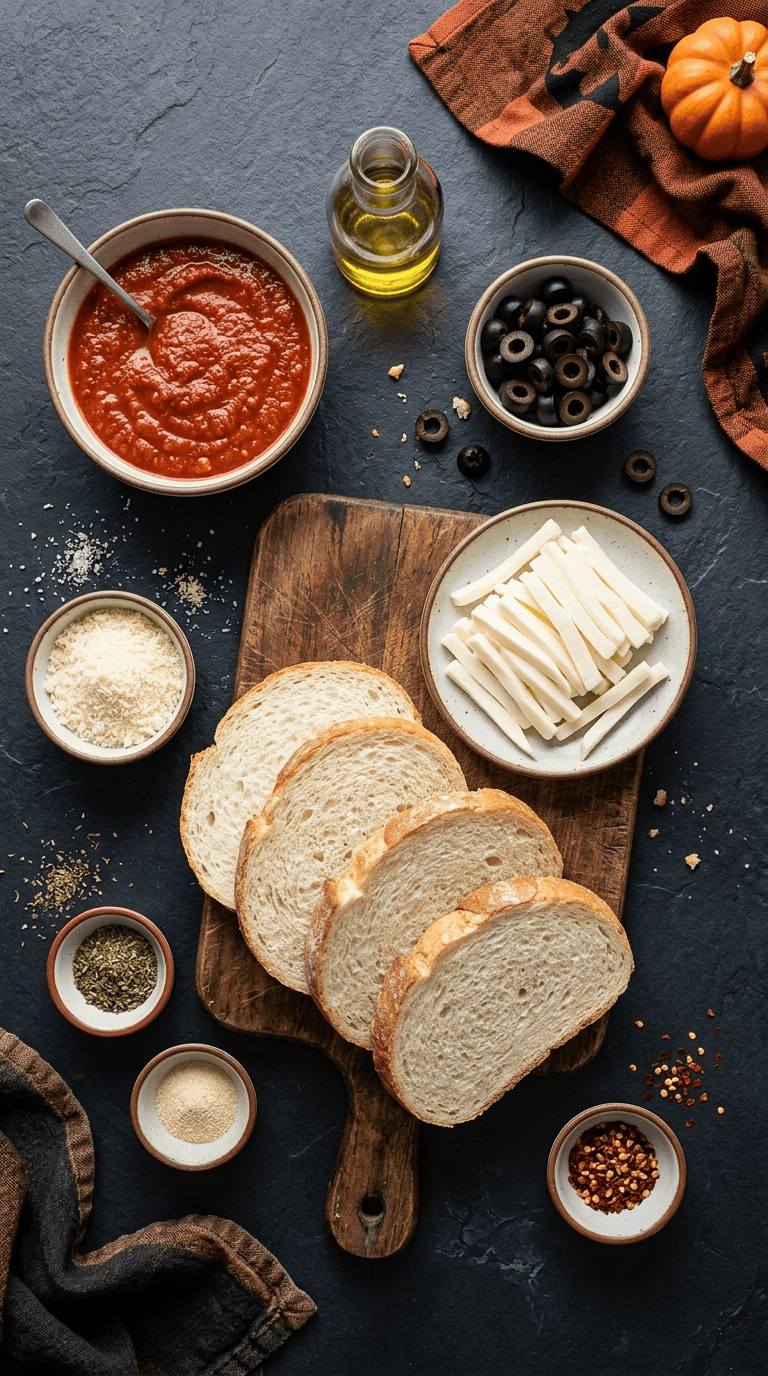
For the Mummy Pizza Toast
- 6 slices thick sandwich bread or Texas toast
- ½ cup pizza sauce
- 1½ cups mozzarella cheese, sliced into thin strips
- 12 small black olive slices
- 1 tablespoon grated Parmesan cheese, optional
- 1 teaspoon Italian seasoning
- ½ teaspoon garlic powder
- 1 tablespoon olive oil or melted butter
- ¼ teaspoon crushed red pepper flakes, optional
A Few Ingredient Notes
Bread: I prefer thick white bread because it holds the toppings well and develops crisp edges. Sourdough also works if you want a slightly more rustic flavor.
Pizza sauce: Jarred pizza sauce keeps this recipe quick. Marinara sauce works too, although I like pizza sauce because it usually has a thicker texture.
Mozzarella: Low-moisture mozzarella gives you those lovely melty cheese strips without making the toast soggy.
Olives: Black olives make the easiest mummy eyes. If your kids don’t like olives, use tiny pieces of bell pepper instead.
Parmesan: This isn’t essential, but a little Parmesan adds extra flavor and helps the toast taste more like a mini pizza.
Red pepper flakes: Skip these if you’re serving young children or anyone who doesn’t enjoy spicy food.
Step-by-Step Instructions
1. Preheat the Oven
Start by heating your oven to 400°F (200°C).
Line a baking sheet with parchment paper. You can also lightly grease the sheet with olive oil if you don’t have parchment.
Give the oven about 10 minutes to heat properly. A hot oven helps the bread crisp instead of slowly drying out.
2. Prepare the Bread
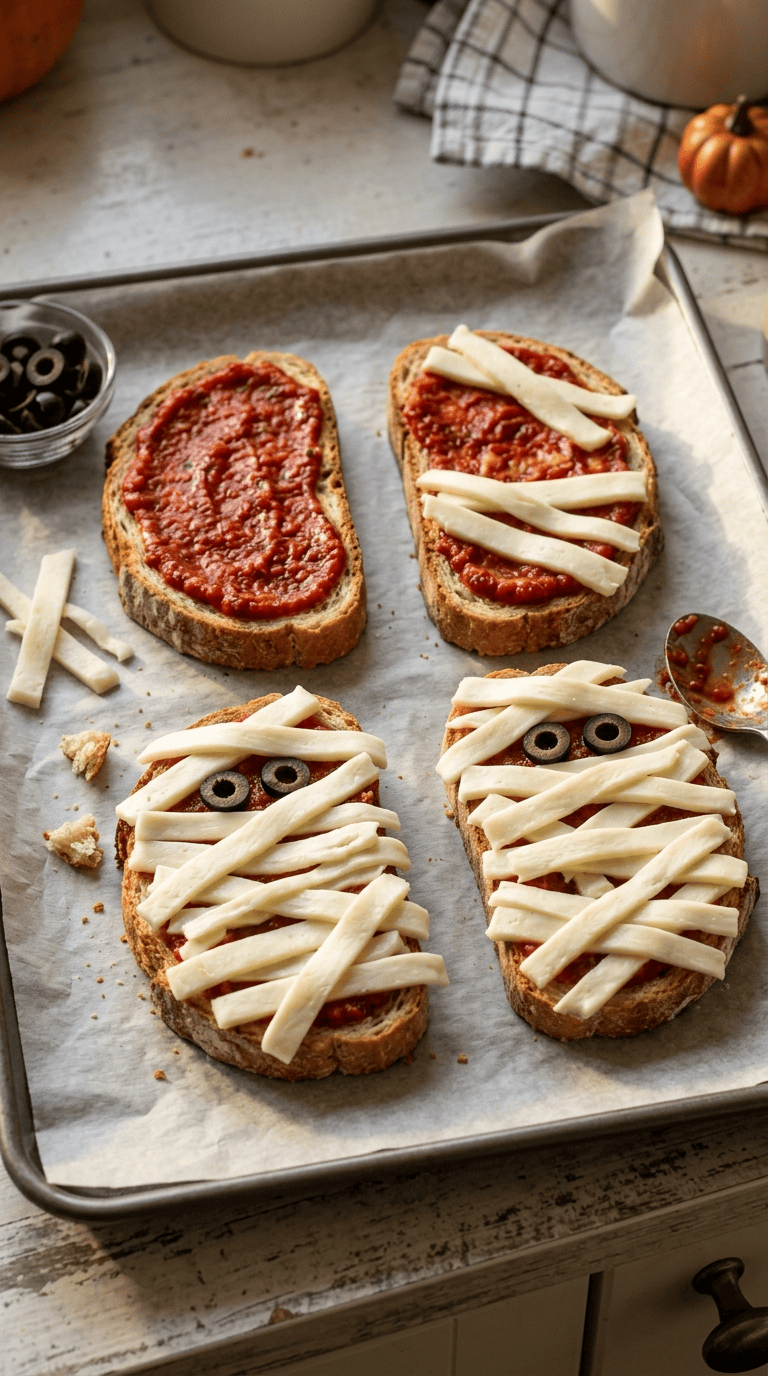
Place the six slices of bread on your baking sheet.
Brush the tops lightly with olive oil or melted butter. Don’t soak the bread. A thin coating is enough to help the edges become golden and crisp.
I like to leave a little space between each slice so the hot air can circulate around them.
3. Add the Pizza Sauce
Spread about 1½ tablespoons of pizza sauce over each slice.
Leave a small border around the edges. You don’t need to cover every tiny corner because too much sauce can make the bread soft.
If you’re making these with kids, this is a great job for them. Just give each child a spoon and let them spread the sauce.
4. Add a Little Seasoning
Sprinkle a tiny amount of Italian seasoning and garlic powder over the sauce.
Don’t go overboard here. The sauce and cheese already bring plenty of flavor, and too much seasoning can overpower the simple pizza taste.
If you want a little heat for adults, add a pinch of crushed red pepper flakes.
5. Cut the Mozzarella Into Strips
Now comes the fun part.
Cut your mozzarella into thin, uneven strips. They don’t need to look perfect. In fact, slightly different lengths make the mummy faces look more realistic.
Try to keep the strips fairly thin. Thick pieces can become heavy and slide off the toast while baking.
6. Create the Mummy
Lay the mozzarella strips across each piece of toast in different directions.
Don’t arrange them in perfectly straight rows. Overlap some pieces and leave small gaps between others.
Think of wrapping a little mummy rather than covering the whole toast with cheese.
Leave a small space near the upper portion of each toast for the eyes.
This is one of those steps where kids can really get involved. Just remind them that the cheese doesn’t need to look perfect.
7. Add the Eyes
Place two small black olive slices near the top of each pizza toast.
Press them gently into the cheese.
If your olive slices are too large, cut them into smaller circles. You want the eyes to look like tiny peeking eyes rather than two giant black buttons.
If you don’t use olives, small pieces of red or green bell pepper can work too.
8. Add Parmesan
If you’re using Parmesan, sprinkle a very small amount over the exposed areas.
I like doing this because it gives the pizza toast a little extra savory flavor and creates tiny golden spots as it bakes.
9. Bake Until Golden and Melty
Place the baking sheet in the preheated oven.
Bake for about 8–12 minutes, depending on the thickness of your bread and how crisp you like it.
Keep an eye on them during the final few minutes.
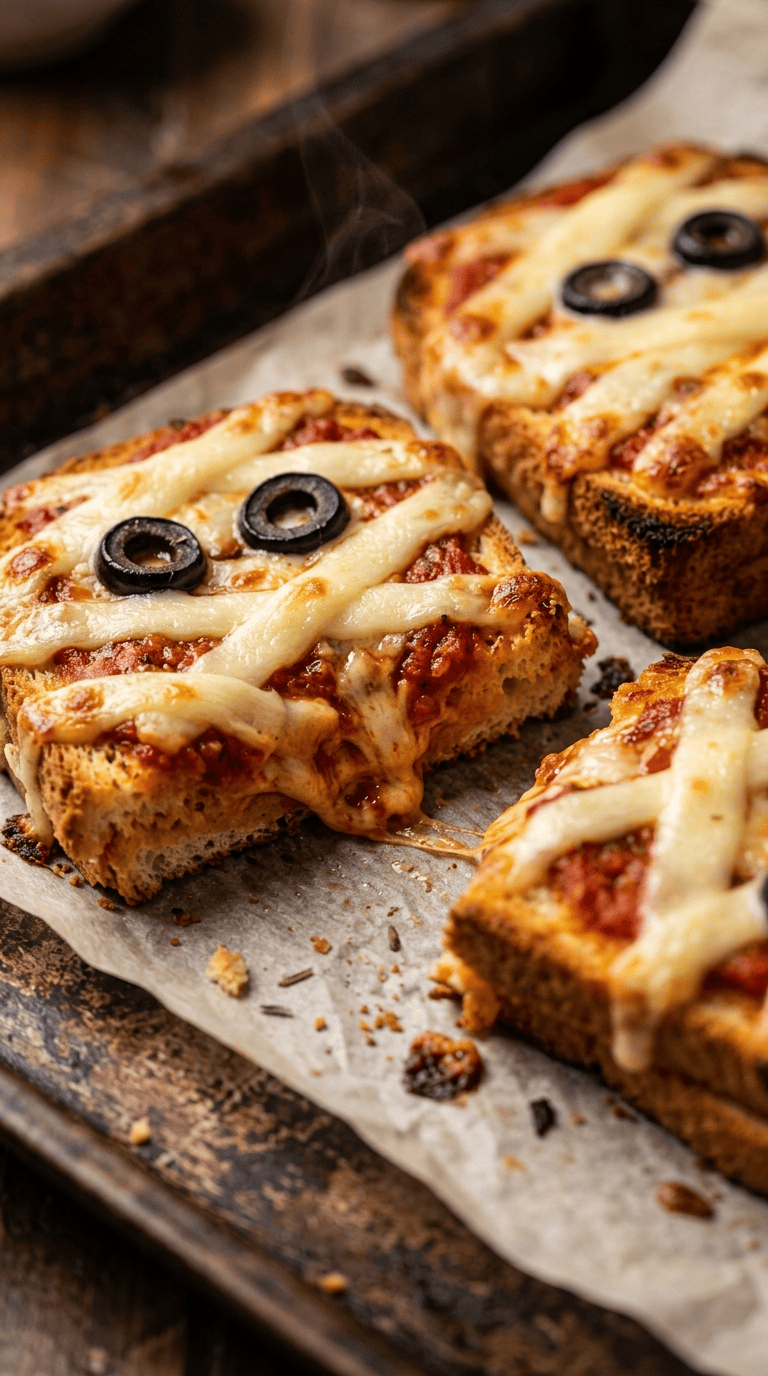
The edges should look golden brown, the cheese should be melted, and the toast should feel crisp underneath.
If you want slightly darker cheese around the edges, turn on the broiler for about 30–60 seconds at the end.
Stay close during broiling because cheese can go from beautifully browned to burnt surprisingly fast.
10. Let Them Cool Briefly
Remove the mummy pizza toasts from the oven and let them cool for about 2–3 minutes.
The cheese will be extremely hot straight from the oven, especially if children are eating them.
Serve them warm while the cheese still looks stretchy and gooey.
Pro Tips & Tricks
Don’t Use Too Much Sauce
This was one of my first mistakes.
I thought more sauce would make the pizza toast tastier, but it actually made the bread softer than I wanted.
A thin layer gives you enough tomato flavor without turning the toast soggy.
Cut the Cheese Thinly
Thin cheese strips work much better for the mummy design.
If the strips are too thick, they can cover the entire toast and lose the wrapped mummy effect. Thin strips also melt more evenly.
Don’t Make the Mummy Too Perfect
This sounds strange, but it really matters.
If you line every cheese strip up neatly, the toast can look more like a regular cheese pizza.
Overlap the strips at different angles and leave a few little gaps. The messy look actually makes the mummy design better.
Keep the Eyes Near the Top
Place the eyes toward the upper third of the bread rather than directly in the center.
That small detail makes the mummy face much easier to recognize.
Make Them Ahead
You can assemble the pizza toasts a few hours ahead of time.
Place the prepared, unbaked toasts on a tray, cover them loosely, and refrigerate them until you’re ready to bake.
For the best texture, bake them fresh rather than leaving them cooked for hours.
Store Leftovers Properly
Place cooled leftovers in an airtight container and refrigerate them.
They taste best within 2–3 days.
For reheating, use an oven, toaster oven, or air fryer instead of the microwave when possible. The dry heat helps bring the crisp texture back.
Variations & Substitutions
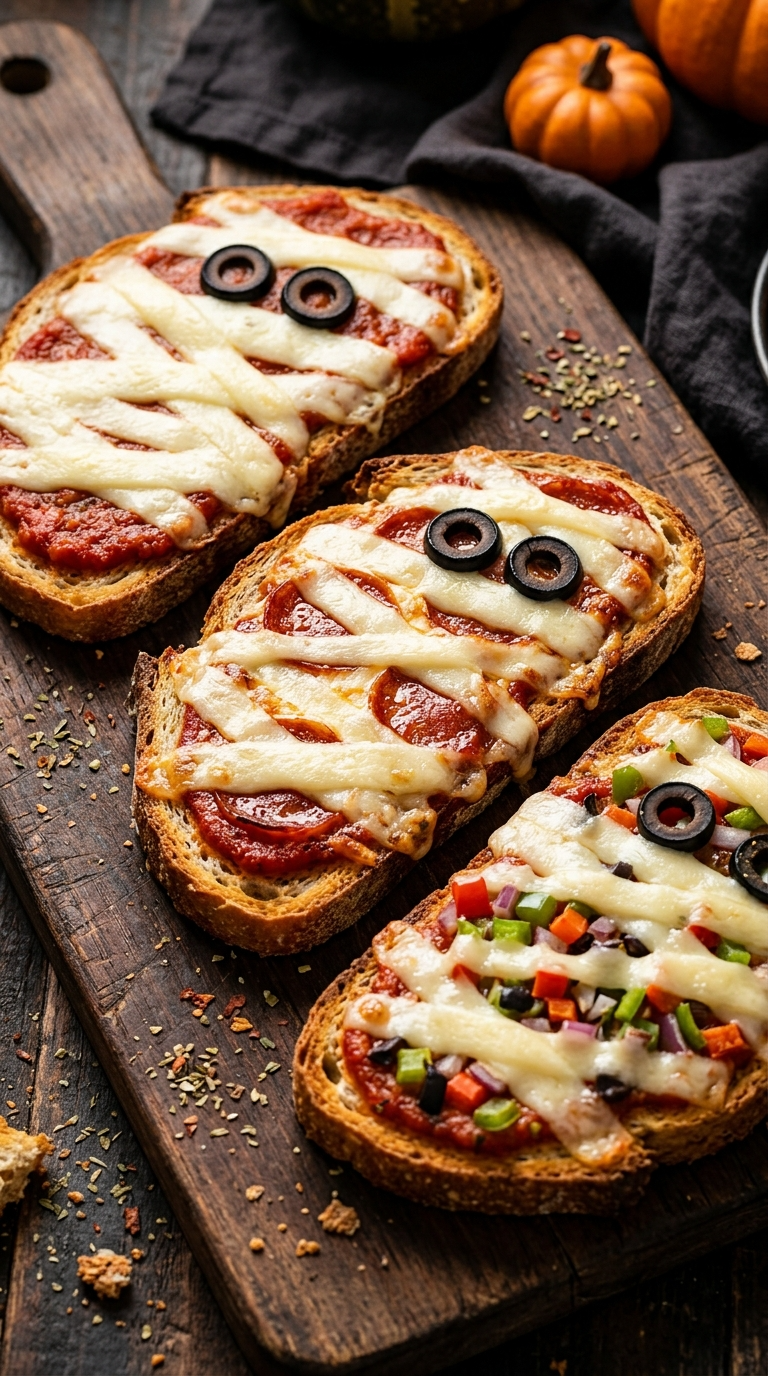
Pepperoni Mummy Pizza Toast
If your kids love pepperoni, place a few tiny pieces underneath the mozzarella strips.
Keep the pepperoni pieces small so they don’t interfere with the mummy design.
You can also use cooked crumbled sausage for a heartier version.
Veggie Mummy Pizza Toast
Add finely chopped vegetables underneath the cheese.
Bell peppers, mushrooms, spinach, or finely chopped olives work nicely.
Just avoid piling on too many vegetables because extra moisture can make the bread soft.
Cheddar Cheese Mummies
You don’t have to stick with mozzarella.
Try mild cheddar, Monterey Jack, or a mozzarella-cheddar blend. White mozzarella creates the classic mummy appearance, but yellow cheese gives the mummies a funny, slightly spooky look.
For the most convincing mummy effect, use mozzarella for the strips and add a tiny amount of cheddar underneath.
Gluten-Free Version
Use your favorite sturdy gluten-free bread and check the labels on your pizza sauce and seasonings if you need to avoid gluten.
Choose a bread that can handle toppings without becoming too soft.
Serving Suggestions

These Mummy Pizza Toasts work especially well as part of a Halloween snack table.
I like serving them with a bowl of warm marinara sauce for dipping. Kids can dunk the crispy corners into the sauce, which somehow makes the whole thing even more fun.
For a Halloween party, arrange the mummy toasts on a large serving board with the eyes facing upward. Add a few simple Halloween decorations around the tray rather than putting decorations directly on the food.
You can also serve them with:
- Fresh fruit
- Carrot and cucumber sticks
- Apple slices
- Popcorn
- A simple green salad
- Tomato soup
- Halloween-themed fruit punch
For a Halloween movie night, make smaller versions using small bread slices. Kids can grab one without needing a knife and fork.
They’re also fun for a Halloween breakfast-for-dinner night. Yes, pizza toast for dinner is absolutely allowed. Halloween has different rules.
FAQ’s
Can I make Mummy Pizza Toasts with regular sandwich bread?
Yes. Regular sandwich bread works well, although thick bread gives you a crispier and sturdier base.
If your bread is very thin, watch the baking time closely because it can brown quickly.
Can I use shredded mozzarella instead of cheese strips?
You can, but cheese strips create a much clearer mummy appearance.
If you only have shredded cheese, sprinkle it over the sauce and then arrange a few longer pieces across the top to imitate mummy bandages.
Can I prepare these Halloween pizza toasts ahead of time?
Yes. Assemble them several hours before serving and keep them covered in the refrigerator.
Bake them shortly before serving for the best texture.
How do I stop the cheese from sliding off?
Use thin cheese strips and avoid adding too much sauce underneath.
Also, don’t overload the bread with toppings. A lighter layer keeps everything in place as the cheese melts.
Can I freeze Mummy Pizza Toast?
You can freeze them, but I prefer making them fresh because the bread can lose some of its crispness after freezing.
If you do freeze them, cool them completely, wrap them well, and store them in a freezer-safe container for up to about 1 month.
Reheat them directly in the oven or air fryer until hot and crisp.
Why did my toast turn soggy?
The most common reason is too much sauce or using ingredients with lots of moisture.
Spread the sauce thinly, use low-moisture mozzarella, and avoid adding watery vegetables.
Also, make sure your oven reaches 400°F before the toast goes inside.
A Few Final Thoughts
Halloween food doesn’t have to involve complicated decorations or a kitchen full of specialty ingredients.
Sometimes a few slices of bread, some pizza sauce, mozzarella, and two little olive eyes can create something much more exciting than you expect.
I especially love these Mummy Pizza Toasts because they’re easy enough for a busy parent to make but fun enough that kids actually want to help. The slightly messy cheese strips are part of the charm, and every mummy ends up with its own funny little personality.
If you’re making these for Halloween, let the kids arrange the cheese themselves. Some mummies may look neat, some may look completely tangled, and one will probably end up with an eye somewhere it definitely shouldn’t be.
That’s okay.
Grab your ingredients, turn on the oven, and make a tray of spooky little mummies. Then enjoy them while they’re warm, crispy, and wonderfully cheesy. And if your family makes a particularly funny-looking mummy, I’d love to hear about it!
Leave a Reply
You must be logged in to post a comment.