

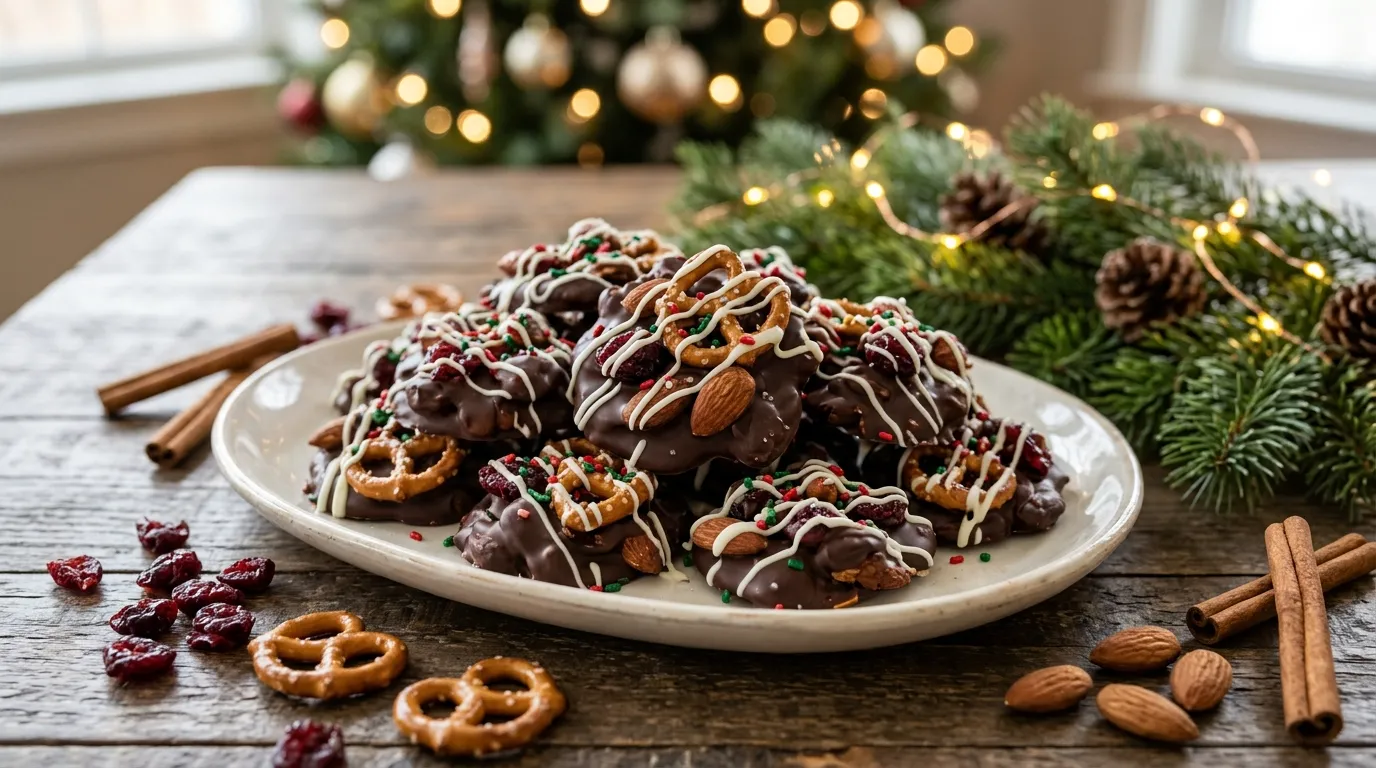
There’s something about Christmas baking that makes an ordinary afternoon feel special. Maybe it’s the smell of melted chocolate, the sparkle of colorful sprinkles, or the way a simple homemade treat can turn a kitchen counter into a little holiday wonderland.
One of my favorite things about the Christmas season is making sweets that look festive without requiring hours of work. Between wrapping presents, decorating the tree, and planning holiday meals, I don’t always have time for complicated desserts. That’s why these easy Christmas chocolate treats have become such a lovely addition to my holiday baking plans.
This Christmas Treat Recipe combines creamy melted chocolate, crunchy pretzels, roasted nuts, and cheerful holiday sprinkles into bite-sized sweets that look beautiful on a dessert platter. The best part? You don’t need a mixer, special baking skills, or even an oven.
The first time I made chocolate holiday treats like these, I discovered that the simplest decorations often look the prettiest. A little red and green color, a few crushed nuts, and a drizzle of white chocolate can make ordinary ingredients look ready for a Christmas party.
These treats are perfect for sharing with family, packing into gift boxes, serving after Christmas dinner, or enjoying with a warm cup of cocoa while watching your favorite holiday movie.
If you’re looking for an easy holiday sweet that feels homemade, tastes delicious, and doesn’t create a mountain of dirty dishes, this recipe is worth adding to your Christmas traditions.
Why You’ll Love This Christmas Treat Recipe

There are plenty of reasons to keep this easy Christmas sweet on your holiday menu.
- Quick and simple: You can prepare the treats in about 20 minutes, then let the refrigerator do the rest of the work.
- No oven required: This recipe is especially useful when your oven is already full of holiday meals, cookies, or roasted vegetables.
- Easy to customize: Change the chocolate, nuts, pretzels, and toppings to suit your family’s preferences.
- Perfect for sharing: Arrange the treats on a platter, tuck them into festive tins, or wrap them in small food-safe gift bags.
- Budget-friendly: A handful of familiar ingredients can create a generous batch of colorful holiday sweets.
Another thing I love is that this recipe welcomes a little imperfection. Your chocolate clusters don’t need identical shapes, and your sprinkles don’t need to land in perfect patterns. The homemade look is part of their charm.
Ingredients for Easy Christmas Chocolate Treats
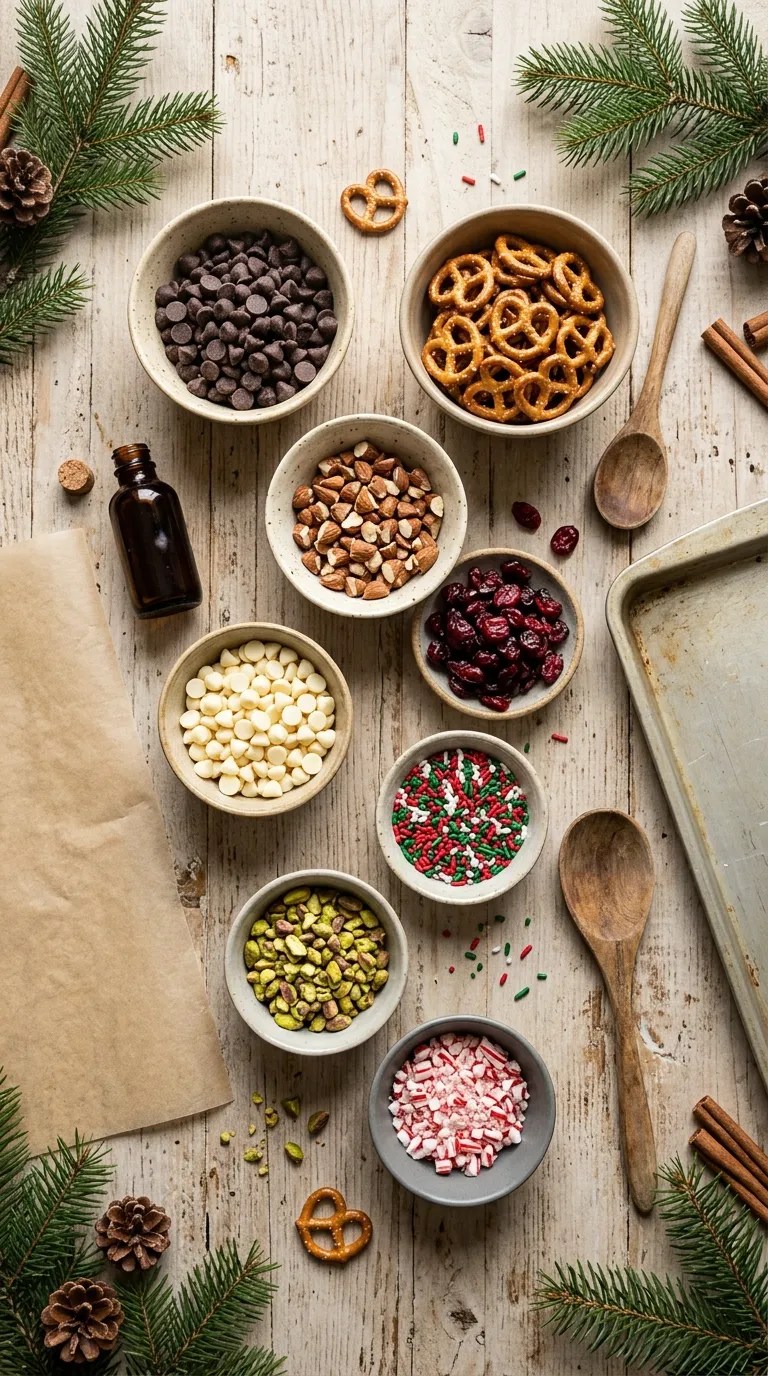
This recipe makes approximately 24 small chocolate treats, depending on how large you make each portion.
For the chocolate mixture
- 12 ounces (340 g) semi-sweet chocolate chips or chopped chocolate
- 1 cup (about 100 g) mini pretzels, broken into small pieces
- 3/4 cup (90 g) roasted almonds or cashews, roughly chopped
- 1/2 cup (60 g) dried cranberries
- 1 teaspoon vanilla extract
- 1/4 teaspoon fine sea salt, optional
For the festive decoration
- 1/3 cup (60 g) white chocolate chips
- 2–3 tablespoons red, green, white, or gold holiday sprinkles
- 2 tablespoons finely chopped pistachios, optional
- 1 tablespoon crushed candy canes, optional
Equipment you’ll need
- One microwave-safe bowl or a heatproof bowl for a double boiler
- A silicone spatula or wooden spoon
- Two baking sheets or large trays
- Parchment paper
- A teaspoon or small cookie scoop
- A small microwave-safe bowl for the white chocolate
You don’t need expensive equipment. A regular mixing bowl and a spoon work perfectly well, and parchment paper makes cleanup much easier.
Choosing the right chocolate
Semi-sweet chocolate offers a pleasant balance of sweetness and cocoa flavor. If you prefer a sweeter treat, use milk chocolate. Dark chocolate works beautifully if you enjoy a deeper, less sugary flavor.
Chocolate chips are convenient, but chopped chocolate bars also work well. For the smoothest finish, choose chocolate that melts evenly and tastes good on its own.
White chocolate adds a pretty finishing touch, although you can skip it if you prefer a simpler look.
Step-by-Step Instructions for Christmas Treats
Step 1: Prepare your baking trays
Time: 3 minutes
Line two baking sheets or large trays with parchment paper. Make sure you have enough room in your refrigerator for at least one tray.
Place your pretzels in a bowl and break them into small pieces with your hands. Aim for a mixture of little chunks and crumbs rather than crushing everything into powder.
Roughly chop your almonds or cashews if you haven’t already done so. Measure out the dried cranberries, sprinkles, and other toppings before melting the chocolate.
This little bit of preparation makes the rest of the recipe feel much easier. Melted chocolate starts to set as it cools, so having everything ready helps you work without rushing.
Step 2: Melt the semi-sweet chocolate
Time: 3–5 minutes
Place the chocolate chips in a clean, completely dry microwave-safe bowl.
Microwave the chocolate for 20–30 seconds at a time, stirring thoroughly after each interval. Continue until the chocolate looks mostly melted, then stir until the remaining small pieces disappear.
Chocolate can hold its shape even when it has started to melt, so don’t rely on appearance alone. Stirring helps distribute the heat and creates a smoother mixture.
If you prefer using the stovetop, place the chocolate in a heatproof bowl over a saucepan of gently simmering water. Keep the bottom of the bowl above the water rather than letting it touch the surface. Stir until smooth.
Avoid letting water or steam enter the chocolate. Even a small amount of moisture can make melted chocolate seize and become thick or grainy.
If the chocolate feels extremely hot, let it cool for a minute before adding the remaining ingredients.
Step 3: Stir in the vanilla and crunchy ingredients
Time: 2 minutes
Add the vanilla extract and optional sea salt to the melted chocolate. Stir gently until everything looks evenly combined.
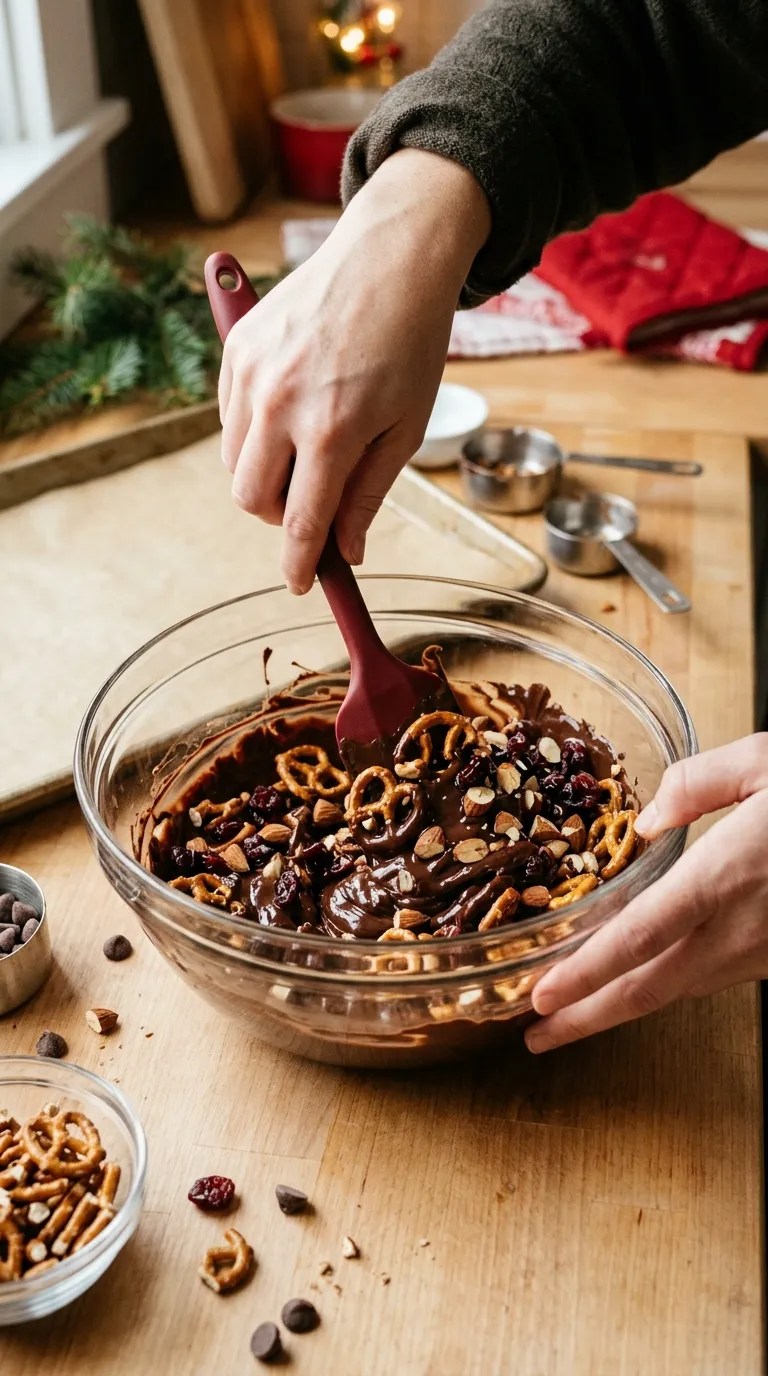
Fold in the pretzel pieces, chopped nuts, and dried cranberries. Use a silicone spatula to coat the ingredients thoroughly.
The mixture should look thick and chunky, with enough chocolate to hold the ingredients together. If you see a few exposed pretzel pieces, that’s perfectly fine.
This is also the moment to make the recipe your own. If you enjoy extra crunch, add a little more pretzel. If you prefer a fruitier bite, include a few additional dried cranberries.
Just avoid adding too many dry ingredients at once. You want the chocolate to hold the mixture together rather than leave you with loose crumbs.
Step 4: Shape the Christmas treats
Time: 5–7 minutes
Use a teaspoon or small cookie scoop to drop portions of the chocolate mixture onto your prepared trays.
Leave a little space between each portion so they don’t accidentally touch. You can make rounded clusters or gently flatten them into small discs.
Don’t worry about making every piece exactly the same size. Slightly irregular shapes give these treats a homemade appearance.
If the mixture starts to thicken while you’re working, stir it gently and continue. If it becomes too firm to scoop comfortably, warm it briefly for a few seconds, then stir again.
Work carefully around the warm bowl, especially if children are helping in the kitchen.
Step 5: Add the festive toppings
Time: 3 minutes
While the chocolate is still soft, sprinkle the tops with red and green decorations, chopped pistachios, or crushed candy canes.
For a classic Christmas appearance, use a mixture of red, green, and white sprinkles. For a more understated look, try chopped pistachios and a small pinch of flaky sea salt.
You can also add a few dried cranberries to the top of each cluster so the ingredients show clearly.
Press larger toppings gently into the chocolate. This helps them stay in place after the treats harden.
Try not to overload each piece with decorations. A little color goes a long way, especially when you plan to arrange the finished treats on a serving platter.
Step 6: Drizzle with white chocolate
Time: 3–4 minutes
Place the white chocolate chips in a small microwave-safe bowl. Heat them in 15–20-second intervals, stirring between each interval, until smooth.
If the white chocolate seems too thick to drizzle, stir it patiently before considering any adjustment. White chocolate can scorch quickly, so short heating intervals work better than one long burst.
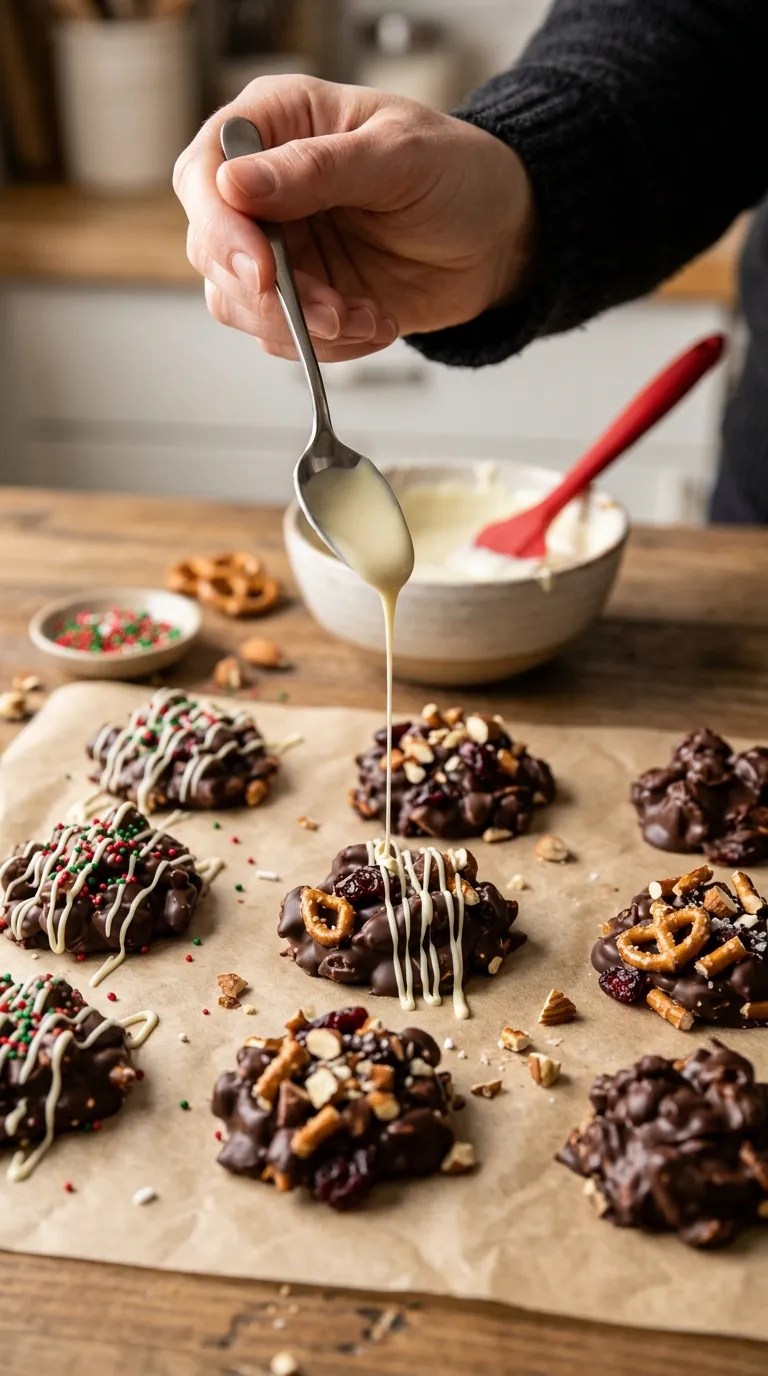
Transfer the melted white chocolate to a small piping bag or use a teaspoon to drizzle thin lines across the chocolate clusters.
Move your hand back and forth to create a simple striped pattern. Don’t worry about perfectly straight lines; a loose drizzle looks lovely on homemade Christmas treats.
If you don’t want to use white chocolate, skip this step. The treats will still look festive with their colorful toppings.
Step 7: Chill until firm
Time: 30–45 minutes
Place the trays in the refrigerator for about 30–45 minutes, or until the chocolate feels firm and the clusters lift easily from the parchment paper.
The exact setting time depends on the size of your treats and the temperature of your refrigerator.
Check one cluster before removing the entire batch. If the center still feels soft, give the treats another 10–15 minutes.
Once firm, gently peel the treats away from the parchment paper and transfer them to an airtight container or serving plate.
Your Christmas chocolate treats are ready to share!
Pro Tips and Tricks for Perfect Holiday Sweets
A simple no-bake recipe can still benefit from a few small details. These are the things that help the treats turn out consistently well.
1. Keep every bowl and utensil dry
Water is one of the biggest problems when melting chocolate. Make sure your bowl, spoon, and spatula are dry before you begin.
If you use the double-boiler method, keep the water at a gentle simmer rather than a rolling boil. Excessive steam increases the chance of moisture getting into the chocolate.
2. Stir more often than you think you need to
Chocolate doesn’t always look melted when it actually is. Stirring between heating intervals distributes the heat and prevents the edges from overheating.
Stop heating when only a few small pieces remain, then stir until they melt. This technique helps you avoid burnt chocolate and unnecessary waste.
3. Don’t skip the parchment paper
Chocolate can stick to an unlined tray, making it frustrating to remove the finished treats.
Parchment paper provides a clean surface and makes transferring the clusters much easier. Silicone baking mats also work, provided you use a clean, dry mat.
4. Let the decorations do the work
You don’t need several expensive toppings to create a beautiful holiday sweet.
Choose two or three colors and repeat them throughout the batch. Red cranberries, green pistachios, and white chocolate drizzle create a cheerful combination without requiring elaborate decorating skills.
5. Store the treats away from heat
Chocolate softens when temperatures rise, particularly in a warm kitchen.
Keep the finished treats in an airtight container in a cool place. Refrigerate them if your kitchen stays warm, and let them sit at room temperature briefly before serving if you prefer a softer bite.
For gifting, choose a sturdy food-safe container and keep the treats away from direct sunlight or other heat sources.
Variations and Substitutions
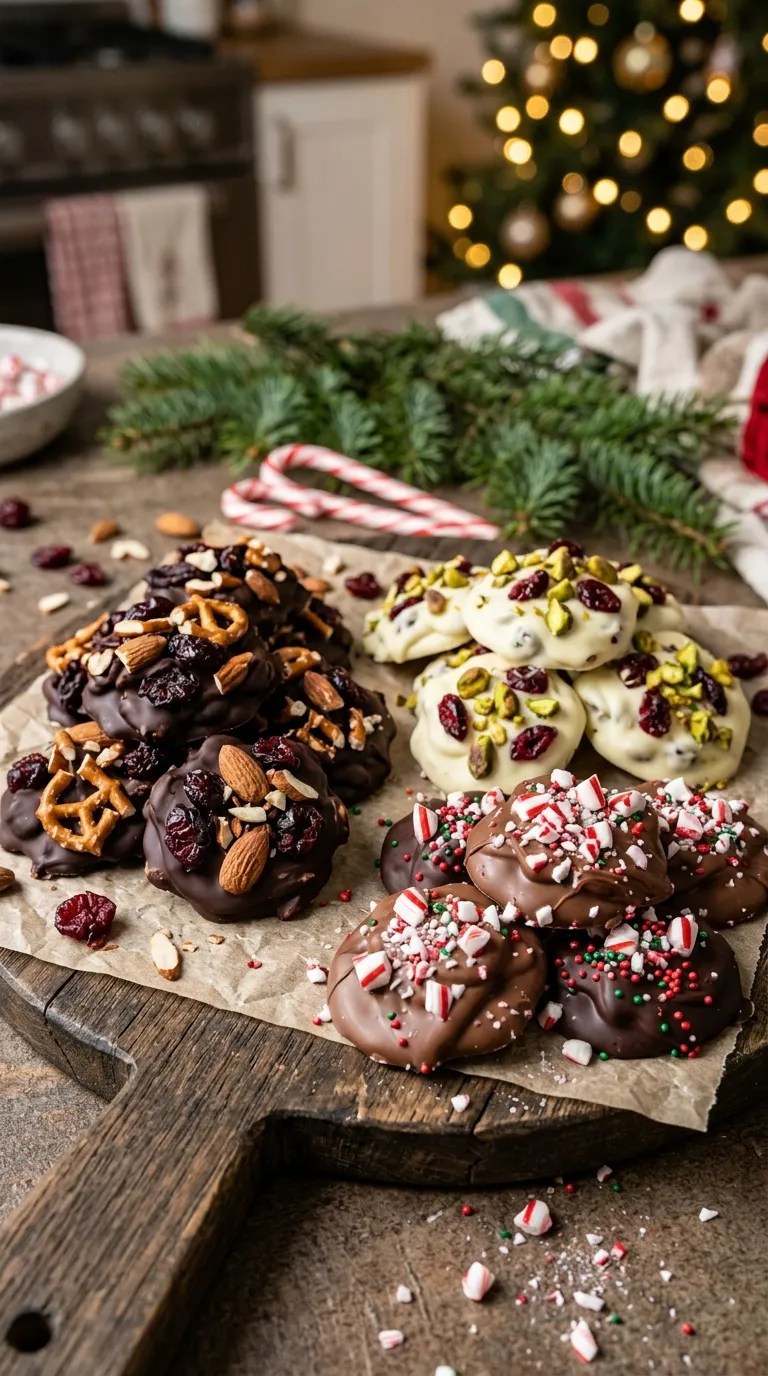
One of the nicest things about this Christmas treat recipe is how easily you can adapt it to different tastes.
Peanut butter chocolate Christmas treats
For a nutty twist, replace a small portion of the chocolate with approximately 2 tablespoons of smooth peanut butter. Stir it into the melted chocolate before adding the crunchy ingredients.
The mixture will have a richer flavor and a slightly different texture. If you try this version, keep the peanut butter addition modest so the chocolate still sets properly.
You can finish these clusters with chopped peanuts or a light drizzle of additional melted chocolate.
Remember to check for peanut allergies before sharing the treats.
White chocolate cranberry treats
For a sweeter, fruit-forward version, replace the semi-sweet chocolate with white chocolate and keep the dried cranberries.
Use about 12 ounces (340 g) of white chocolate, along with the pretzels and cranberries. Because white chocolate tastes sweeter than semi-sweet chocolate, you may want to reduce the amount of other sweet decorations.
White chocolate can be particularly sensitive to overheating, so melt it slowly in short intervals.
Pistachios make an attractive topping for this variation and add a pleasant contrast in texture.
Vegan and dairy-free Christmas treats
You can make a dairy-free version by choosing certified dairy-free dark chocolate and checking that the pretzels, sprinkles, and other toppings contain no dairy ingredients.
Replace the white chocolate drizzle with a suitable dairy-free alternative or leave it out entirely.
Check every ingredient label if you’re preparing the treats for someone with a food allergy or dietary restriction. Product ingredients and manufacturing practices can vary by brand.
Gluten-free holiday clusters
For a gluten-free version, replace the regular pretzels with certified gluten-free pretzels. Check the chocolate, sprinkles, and other packaged ingredients as well.
The remaining ingredients are easy to adapt, and the method stays exactly the same.
If you’re preparing treats for someone with celiac disease or a serious gluten sensitivity, pay attention to cross-contact during preparation and use clean utensils and surfaces.
Serving Suggestions for Christmas Treats

These little chocolate clusters work for much more than a Christmas dessert plate. Their size makes them easy to share, and you can dress them up or down depending on the occasion.
Arrange them on a Christmas dessert platter
Place the treats on a white or festive-colored platter and mix them with other small sweets, such as shortbread cookies, gingerbread biscuits, or chocolate truffles.
A combination of different shapes, colors, and textures makes the platter look inviting without requiring elaborate decoration.
If you’re serving guests with food allergies, keep different treats clearly separated and label the ingredients where appropriate.
Serve them with warm drinks
Pair the chocolate clusters with hot cocoa, coffee, or tea. The crunchy pretzels and creamy chocolate make a lovely contrast with a warm drink on a cold evening.
For a cozy family gathering, arrange a few treats on small plates beside mugs of cocoa and let everyone choose their favorite toppings.
Package them as homemade gifts
Once the chocolate has fully set, place the treats in small food-safe gift boxes or tins. Separate layers with parchment paper to help prevent sticking.
A simple ribbon and a handwritten note make the package feel thoughtful. You can also add a small ingredient label, particularly if you’re giving the treats to friends, neighbors, teachers, or coworkers.
Keep the treats cool during transport so the chocolate doesn’t soften.
Add them to a holiday dessert table
Serve these treats alongside brownies, cookies, fruit, or a Christmas cake. Because the clusters are small, guests can enjoy one without committing to a large dessert portion.
They also make a practical option for potlucks and casual holiday parties because you can prepare them ahead of time and transport them in a sturdy container.
Related Recipes:
- Christmas Dinner Recipe – Easy Holiday Favorite
- Christmas Baking Recipe – Easy Holiday Favorite
- Christmas Cookie Recipe – Easy Holiday Treat
- Christmas Candy Recipe – Easy Holiday Treat
FAQ’s
How long do homemade Christmas chocolate treats last?
For the best flavor and texture, enjoy these treats within about one week when stored in an airtight container in the refrigerator.
Keep them away from moisture and strong-smelling foods. The exact storage life depends on the freshness of your ingredients and how you handle the finished treats.
Can I make this Christmas treat recipe ahead of time?
Yes! These chocolate clusters work well as a make-ahead holiday sweet.
Prepare them one or two days before your gathering, allow them to set completely, and store them in an airtight container in the refrigerator. This gives you one less task to manage on the day of your celebration.
You can also prepare the ingredients in advance, but wait until you’re ready to assemble the treats before melting the chocolate.
Can I freeze the chocolate treats?
Yes, you can freeze them for longer storage.
Arrange the fully set clusters in a freezer-safe container, separating the layers with parchment paper. Seal the container well to protect the treats from moisture and freezer odors.
For best quality, aim to enjoy them within about two months. When you’re ready to serve them, thaw the container in the refrigerator first, then allow the treats to come closer to room temperature while still covered. This gradual approach helps reduce condensation on the chocolate.
Why did my melted chocolate become thick and grainy?
Chocolate can seize when even a small amount of water or steam enters the bowl. It can also become thick or develop a scorched flavor if you heat it too aggressively.
Use a completely dry bowl, melt the chocolate in short intervals, and stir frequently.
If the chocolate has burned, it usually won’t return to its original smooth texture. Starting with a fresh batch is often the best option for a recipe that depends on a neat chocolate coating.
What can I use instead of pretzels?
You have several options.
Try crisp rice cereal, broken plain biscuits, toasted coconut flakes, or chopped roasted nuts. Each ingredient gives the treats a different texture, so add it gradually and check that the chocolate still holds everything together.
If you use a sweet biscuit or sugary cereal, consider choosing dark chocolate to balance the overall sweetness.
Can I make these Christmas treats without nuts?
Absolutely. Simply leave out the almonds or cashews and increase the pretzels slightly, or replace the nuts with crisp rice cereal.
You can also add a few extra dried cranberries for more texture.
If you’re preparing the treats for someone with a nut allergy, check every ingredient label and take steps to prevent cross-contact. A recipe without nuts as an ingredient isn’t automatically safe for someone with a severe allergy.
Do I need to temper the chocolate?
No. Tempering isn’t necessary for this easy homemade version because the treats set in the refrigerator.
However, untempered chocolate may develop a dull finish or light streaks if its temperature changes during storage. Properly tempered chocolate generally produces a glossier finish and a firmer snap, but the extra technique isn’t essential for a casual homemade batch.
For most family gatherings, the simple melting method works well.
Can I use a different kind of chocolate?
Yes. Semi-sweet, dark, and milk chocolate all work.
White chocolate also works, although it melts differently and can scorch more easily. Choose a good-quality product that you enjoy eating on its own, since the chocolate provides most of the flavor.
If you use a particularly sweet chocolate, balance it with unsweetened nuts, salty pretzels, or tart dried cranberries.
Final thought
The best holiday recipes don’t always require hours in the kitchen or a long list of ingredients. Sometimes, a bowl of melted chocolate, a few crunchy additions, and a handful of colorful sprinkles are all you need to create something worth sharing.
That’s what makes this Christmas Treat Recipe such a lovely choice for the festive season. You can prepare it on a quiet afternoon, involve the family in decorating, or make a batch when you need a quick homemade gift.
Don’t feel you have to follow every topping suggestion exactly. Use the ingredients you already have, experiment with your favorite chocolate, and let each batch reflect your own taste.
Once you’ve made these easy Christmas treats, I’d love to hear how you customized them. Did you choose dark chocolate and pistachios, add crushed candy canes, or try a completely different combination?
Leave a comment with your favorite variation, and enjoy bringing a little extra sweetness to your holiday celebrations.
Leave a Reply
You must be logged in to post a comment.