

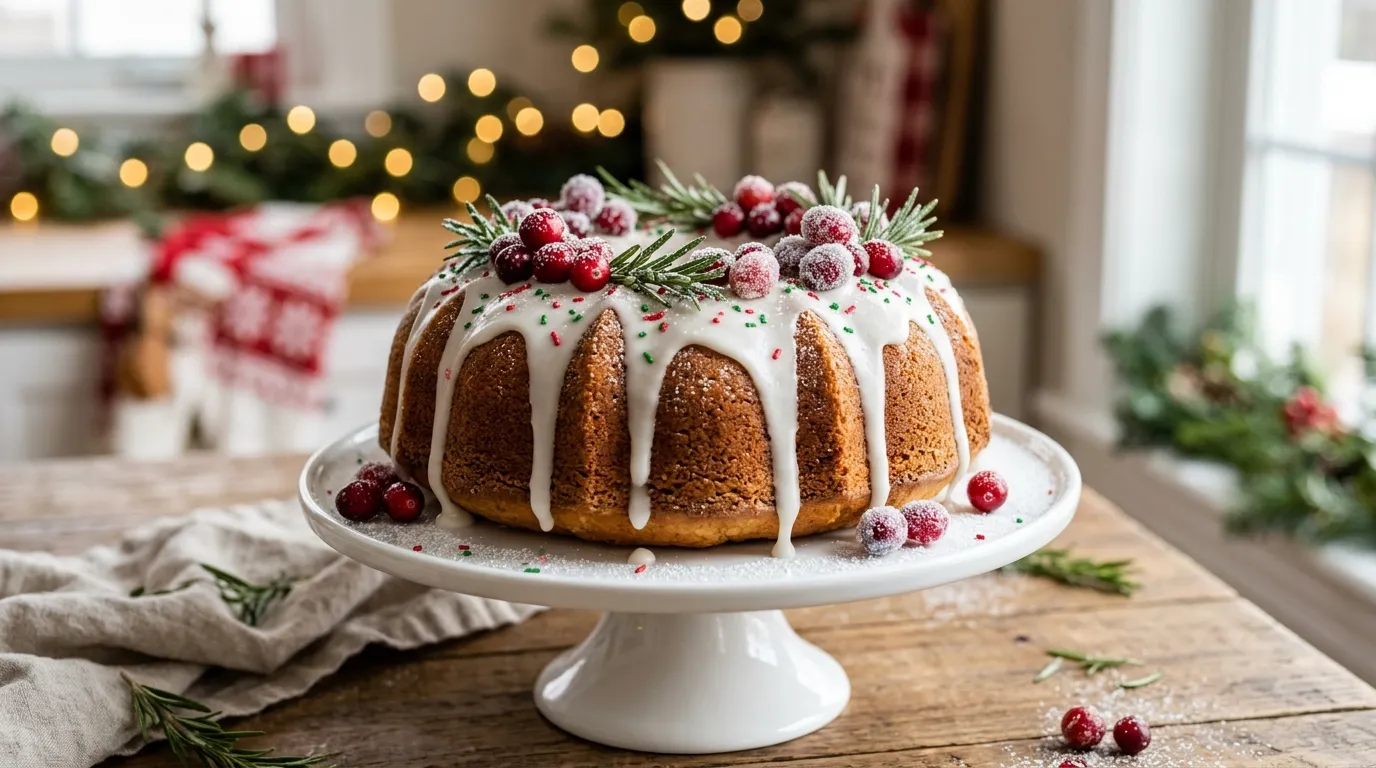
There is something special about baking during Christmas. The kitchen feels warmer, the house smells wonderful, and even an ordinary afternoon suddenly feels like a celebration. For me, one of the best parts of holiday baking is pulling a beautiful cake out of the oven and watching everyone gather around to see it.
A Christmas Bundt Cake has a way of making that moment even more memorable. Its pretty ring shape, golden edges, festive decorations, and sweet vanilla aroma make it look like something straight from a holiday bakery.
I love making this cake when family or friends visit during December. It looks impressive on the dessert table, but the preparation is surprisingly straightforward. You don’t need complicated decorating skills, expensive ingredients, or hours of work to make it look beautiful.
The first time I made a Bundt cake for Christmas, I was a little too eager to remove it from the pan. I turned it over while it was still warm, and a small section stuck to the bottom. Thankfully, a generous drizzle of icing and a handful of cranberries saved the day!
That experience taught me two important things: always grease the Bundt pan carefully, and never rush the cooling process.
This Christmas Bundt Cake recipe produces a soft, buttery, moist cake with hints of vanilla, orange, and warm holiday spices. A simple vanilla glaze runs beautifully over the ridges, while cranberries, rosemary sprigs, and festive sprinkles give it a cheerful Christmas appearance.
Whether you’re hosting Christmas dinner, attending a holiday gathering, or simply craving something homemade with your afternoon tea, this cake deserves a place on your baking list.
Why You’ll Love This Christmas Bundt Cake Recipe

There are plenty of reasons to make this festive cake, especially when you want something beautiful without spending the entire day in the kitchen.
- Beautiful presentation: The Bundt pan creates an elegant shape without requiring complicated cake decorating.
- Moist and tender texture: Butter, sour cream, and the right mixing technique create a soft cake that stays enjoyable for several days.
- Simple ingredients: You can find everything you need at an ordinary grocery store.
- Perfect for gatherings: One cake gives you plenty of slices for family dinners, Christmas parties, and holiday potlucks.
- Easy to customize: Add cranberries, chocolate chips, nuts, or your favorite holiday spices to make it your own.
Another thing I appreciate is that you can bake this cake a day before your celebration. That means one less thing to worry about when your kitchen is already busy preparing Christmas dinner.
Ingredients
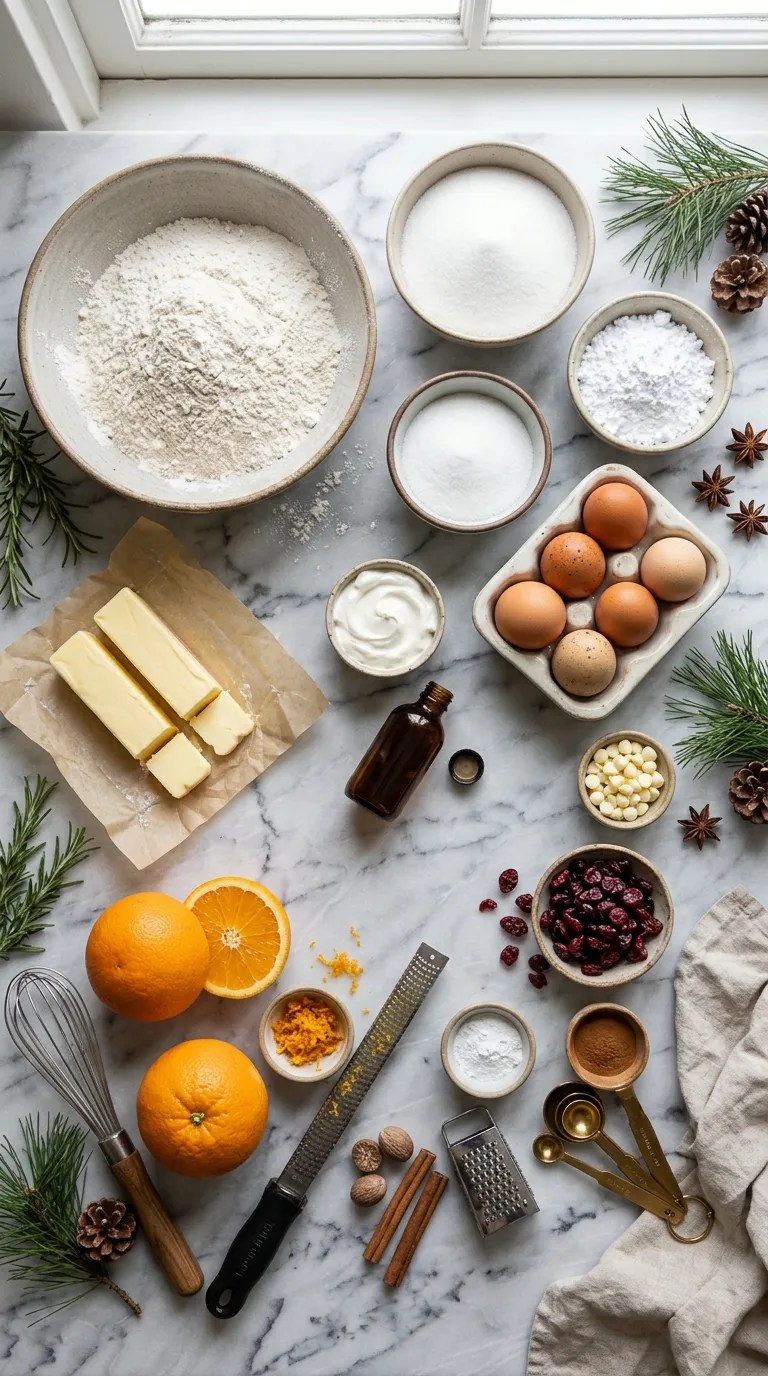
This recipe makes one large Bundt cake, approximately 12 servings. A standard 10- to 12-cup Bundt pan works well.
I recommend measuring your ingredients before starting. It keeps the process organized and helps prevent the little mistakes that happen when you’re rushing.
For the Cake
- 3 cups (375 g) all-purpose flour
- 2 teaspoons baking powder
- ½ teaspoon baking soda
- ½ teaspoon salt
- 1 teaspoon ground cinnamon
- ¼ teaspoon ground nutmeg
- 1 cup (227 g) unsalted butter, softened
- 1¾ cups (350 g) granulated sugar
- 4 large eggs, at room temperature
- 1 cup (240 g) sour cream, at room temperature
- 2 teaspoons pure vanilla extract
- 1 tablespoon finely grated orange zest
- ¼ cup (60 ml) fresh orange juice
- ½ cup (75 g) dried cranberries
- ½ cup (85 g) white chocolate chips (optional)
For the Vanilla Glaze
- 1½ cups (180 g) powdered sugar
- 2–3 tablespoons milk or heavy cream
- ½ teaspoon vanilla extract
- 1 teaspoon fresh orange juice (optional)
For the Christmas Decorations
- 2 tablespoons dried or sugared cranberries
- 1 tablespoon red and green Christmas sprinkles
- A few small fresh rosemary sprigs
- 1–2 tablespoons white chocolate chips or white chocolate shavings (optional)
Ingredient substitution notes:
- Sour cream: Plain, full-fat Greek yogurt works as a substitute. It provides a similar creamy texture.
- Orange juice: You can use milk if you prefer a more traditional vanilla cake flavor.
- Dried cranberries: Raisins or chopped dried cherries work nicely.
- White chocolate chips: Leave them out or replace them with chopped pecans or walnuts.
- Unsalted butter: If you only have salted butter, reduce the added salt slightly.
Equipment You’ll Need
You don’t need professional baking equipment for this recipe.
- 10- to 12-cup Bundt pan
- Electric hand mixer or stand mixer
- Large mixing bowls
- Whisk
- Measuring cups and spoons
- Rubber spatula
- Fine grater or zester
- Cooling rack
- Small bowl for the glaze
A stand mixer such as a KitchenAid makes creaming butter and sugar easier, but a regular electric hand mixer works perfectly well.
Step-by-Step Instructions
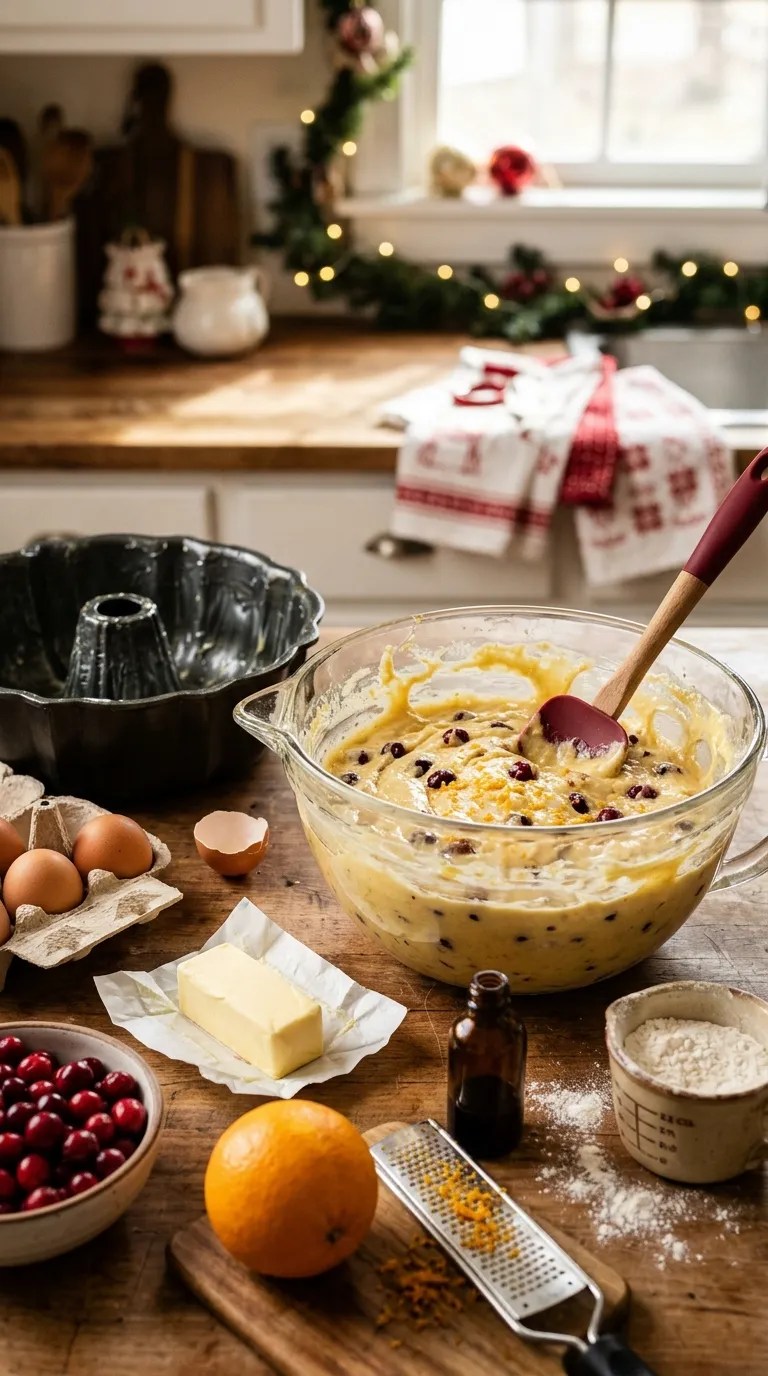
Follow these steps, and you’ll have a beautiful holiday cake with a soft center, golden crust, and delicious vanilla-orange flavor.
Step 1: Prepare Your Oven and Bundt Pan
Time: 10 minutes
Start by preheating your oven to 350°F (175°C).
Take your Bundt pan and grease every surface thoroughly, including the center tube, the grooves, and the bottom edges.
I like using softened butter and a pastry brush to reach the smaller details. You can also use a baking spray designed for cakes.
Dust the greased pan lightly with flour, then tap out the excess.
Don’t skip this step. Bundt pans have lots of curves, and even a small ungreased spot can cause the cake to stick.
Step 2: Mix the Dry Ingredients
Time: 3 minutes
Take a medium-sized mixing bowl and add:
- All-purpose flour
- Baking powder
- Baking soda
- Salt
- Ground cinnamon
- Ground nutmeg
Whisk everything together until evenly combined.
This step distributes the baking ingredients throughout the flour, helping the cake rise evenly.
Set the bowl aside while you prepare the butter mixture.
Step 3: Cream the Butter and Sugar
Time: 4–5 minutes
Add the softened butter and granulated sugar to a large mixing bowl.
Using an electric mixer, beat them together on medium speed until the mixture looks pale, creamy, and fluffy.
This usually takes around four to five minutes.
Don’t rush this stage. Creaming helps incorporate air into the batter, which contributes to the cake’s texture.
If your butter looks greasy or melted, it was probably too warm. Ideally, softened butter should feel cool and yield gently when pressed with a finger.
Step 4: Add the Eggs and Flavorings
Time: 3 minutes
Add the eggs one at a time, mixing after each addition.
Scrape down the sides of the bowl with a rubber spatula whenever necessary.
Next, add the vanilla extract and orange zest.
The orange zest makes a wonderful difference. It gives the batter a fresh citrus fragrance that balances the buttery sweetness.
If the mixture looks slightly curdled after adding the eggs, don’t panic. This can happen when the ingredients have different temperatures. Adding the flour mixture gradually usually brings the batter together.
Step 5: Add the Dry Ingredients and Sour Cream
Time: 3–4 minutes
Reduce the mixer speed to low.
Add about one-third of the dry ingredients and mix briefly.
Next, add half of the sour cream and half of the orange juice.
Continue alternating the dry ingredients, sour cream, and orange juice until everything comes together.
Start and finish with the flour mixture.
Mix only until you no longer see dry flour. Overmixing can make the finished cake dense or tough.
Use a rubber spatula to gently scrape the bottom of the bowl and check for any pockets of flour.
The batter should look thick, creamy, and smooth.
Step 6: Fold in the Cranberries and White Chocolate
Time: 2 minutes
Add the dried cranberries and optional white chocolate chips.
Gently fold them into the batter using a spatula.
Try not to stir too aggressively because you want to keep as much of the air in the batter as possible.
If you prefer cranberries distributed evenly throughout the cake, toss them with a teaspoon of flour before folding them in. This can help prevent them from sinking.
Step 7: Fill the Bundt Pan
Time: 3 minutes
Carefully spoon the batter into your prepared Bundt pan.
Spread it evenly with a spatula, paying attention to the center tube.
Give the pan a gentle tap against your countertop to release large trapped air bubbles.
Smooth the top so the batter sits evenly.
Avoid filling the pan beyond approximately three-quarters full. If your pan is smaller than the recommended size, bake any extra batter in a separate muffin tin rather than overfilling it.
Step 8: Bake the Cake
Time: 50–65 minutes
Place the Bundt pan on the center rack of your preheated oven.
Bake for approximately 50–65 minutes.
Baking time varies depending on your oven and pan, so begin checking around the 50-minute mark.
The cake is ready when:
- The top looks golden brown.
- The edges begin pulling slightly away from the pan.
- A wooden skewer inserted into the thickest part comes out clean or with a few moist crumbs.
- The center feels set rather than liquid.
If the top starts browning too quickly, loosely cover it with aluminum foil during the remaining baking time.
Avoid opening the oven repeatedly during the first 40 minutes because sudden temperature changes can affect the cake’s rise.
Step 9: Cool the Cake Before Removing It
Time: 15 minutes in the pan, followed by additional cooling
This is one of the most important steps.
Remove the cake from the oven and place the pan on a wire cooling rack.
Let it rest for approximately 15 minutes.
Then gently run a thin silicone spatula around any accessible edges if necessary. Invert the pan onto the cooling rack and carefully lift it away.
If you greased the pan properly, the cake should release with little effort.
Allow the cake to cool completely before adding the glaze. Warm cake can melt the icing and cause it to run straight off the surface.
Step 10: Prepare the Vanilla Glaze
Time: 5 minutes
While the cake cools, prepare the glaze.
Add the powdered sugar and vanilla extract to a small bowl.
Pour in two tablespoons of milk or cream and whisk until smooth.
Add the optional orange juice if you want a subtle citrus flavor.
Check the consistency.
- If the glaze looks too thick, add another teaspoon of milk.
- If it looks too thin, add a little more powdered sugar.
You want a thick but pourable consistency that slowly drips from a spoon.
Step 11: Decorate Your Christmas Bundt Cake
Time: 5–10 minutes
Place your completely cooled cake on a serving plate or cake stand.
Slowly drizzle the vanilla glaze over the top, allowing it to naturally flow down the ridges.
Add dried or sugared cranberries, white chocolate shavings, and Christmas sprinkles while the glaze is still slightly wet.
Arrange a few rosemary sprigs around the cake for a festive green touch.
If you want a snowy Christmas appearance, dust a little powdered sugar over the decorations just before serving.
Your Christmas Bundt Cake is ready!
Pro Tips and Tricks
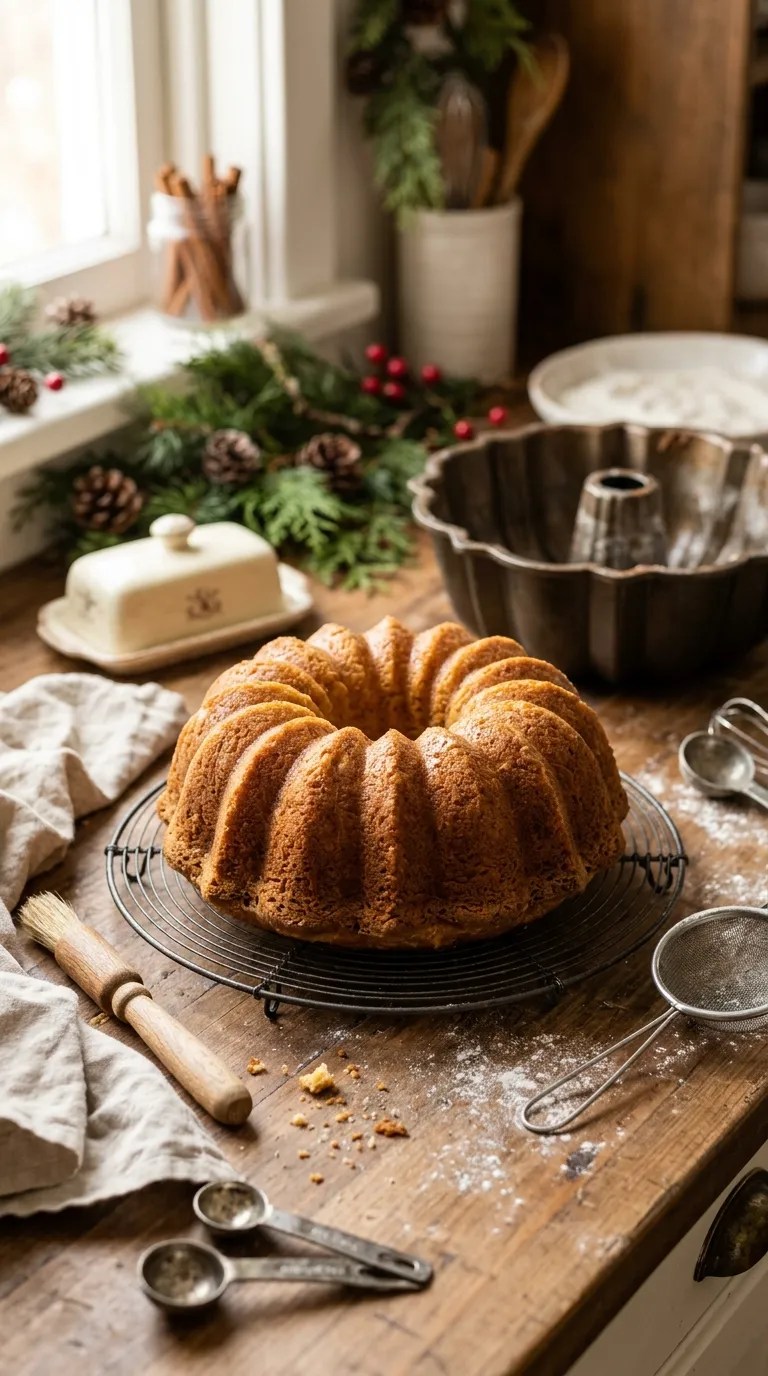
A few small details can make the difference between an average cake and one that everyone asks you to make again.
1. Use Room-Temperature Ingredients
Cold eggs and sour cream can make the batter difficult to combine smoothly.
Take them out of the refrigerator about 30–45 minutes before baking.
Room-temperature ingredients blend more easily and help create a consistent batter.
If you forget, place the eggs in a bowl of lukewarm water for a few minutes. Avoid using hot water.
2. Grease Every Part of the Bundt Pan
This deserves repeating because a stuck Bundt cake can be frustrating.
Pay particular attention to the center tube and the narrow decorative grooves.
Use a pastry brush to spread softened butter evenly, or choose a baking spray suitable for cakes.
Don’t leave thick pools of butter in the pan because they can affect the cake’s surface.
3. Don’t Overmix the Batter
Once you add the flour, mix gently and only until combined.
Overmixing develops gluten in the flour, which can make the cake tougher.
A rubber spatula is especially useful for the final mixing stage.
4. Check the Cake Before the Timer Goes Off
Every oven behaves differently.
A cake might need 50 minutes in one oven and closer to 65 minutes in another.
Start checking early and use a wooden skewer to test the center.
Remember that a few moist crumbs are fine. Wet batter means the cake needs more time.
5. Let the Cake Cool Properly
Resist the temptation to remove it immediately.
Fifteen minutes in the pan usually gives the cake enough time to settle while remaining warm enough to release easily.
Don’t leave it in the pan for several hours either, because moisture can collect underneath and make removal more difficult.
6. Make the Cake Ahead of Time
This is one of my favorite ways to reduce Christmas-day kitchen stress.
Bake the cake one day ahead, let it cool completely, and wrap it tightly in plastic wrap.
Keep it at room temperature in a cool, dry place if your kitchen isn’t too warm.
Prepare the glaze and decorations closer to serving time for the prettiest appearance.
Variations and Substitutions
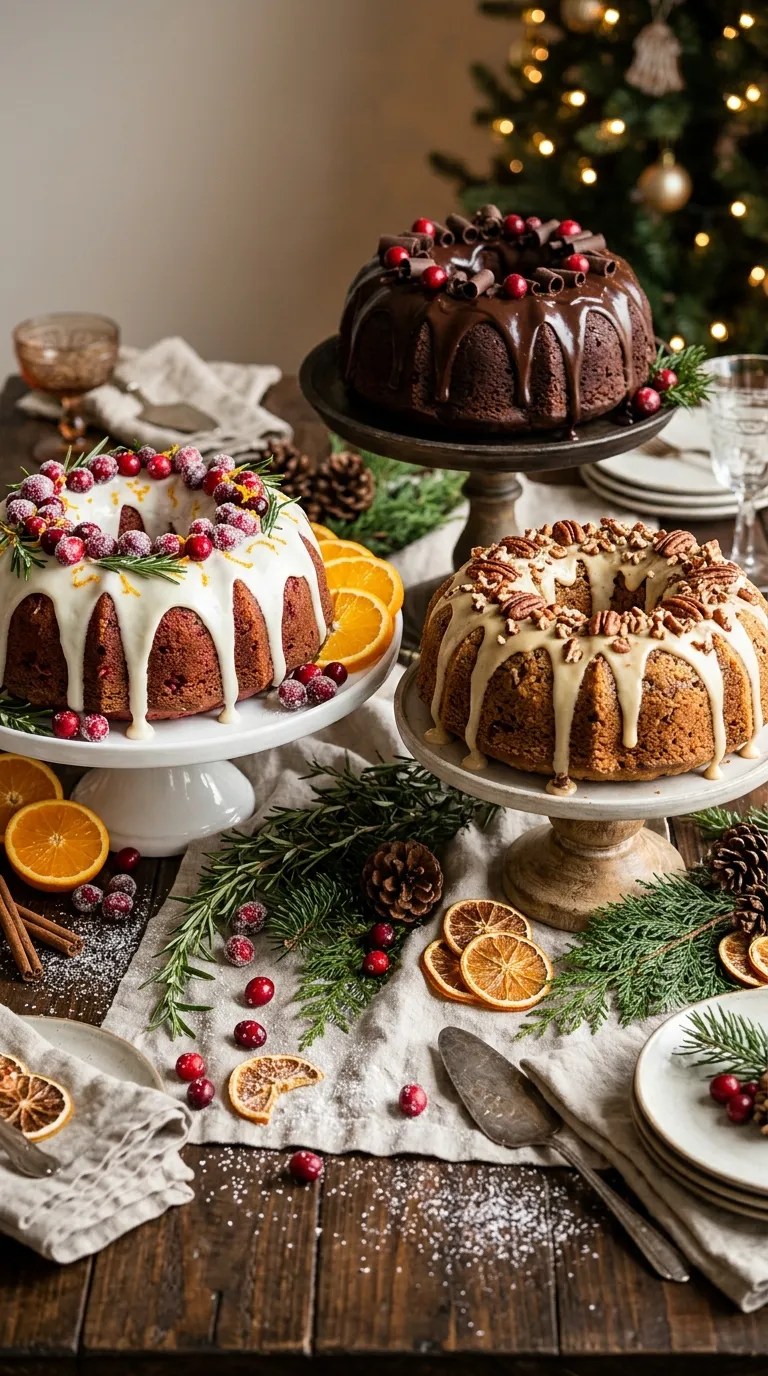
One of the nicest things about a Christmas Bundt Cake is how easily you can change the flavor without changing the basic recipe.
Here are a few ideas worth trying.
1. Cranberry Orange Christmas Bundt Cake
If you enjoy fruity holiday desserts, this variation is a lovely choice.
Increase the orange zest to 2 tablespoons and use ¾ cup dried cranberries instead of ½ cup.
You can also add a little orange extract if you want a stronger citrus aroma.
For extra decoration, top the cake with sugared cranberries and a few thin strips of orange zest.
The combination of sweet orange and tart cranberries makes every slice feel festive.
2. Chocolate Christmas Bundt Cake
Chocolate lovers can easily turn this recipe into a richer holiday dessert.
For a chocolate version, use a chocolate Bundt cake recipe as your base rather than simply adding cocoa powder to this batter.
Replace the vanilla glaze with melted dark chocolate or a simple chocolate ganache.
Finish with white chocolate shavings and red and green sprinkles.
It looks especially pretty when you serve it on a white cake stand.
3. Nutty Holiday Bundt Cake
For a little crunch, add ½ cup chopped pecans or walnuts to the batter.
You can lightly toast the nuts in a dry skillet for a few minutes before adding them.
Let them cool completely first.
Pecans pair particularly well with cinnamon, nutmeg, orange zest, and vanilla.
For a decorative finish, sprinkle a few toasted nuts over the glaze.
Can You Make This Cake Gluten-Free?
Yes, you can experiment with a good-quality gluten-free all-purpose baking flour blend that contains a suitable binding ingredient.
Choose a blend designed for cakes rather than one intended only for bread.
Follow the manufacturer’s substitution guidance, as different blends absorb moisture differently.
The texture may vary from the original recipe, so check the cake carefully while baking.
Can You Make It Dairy-Free?
You can try a dairy-free butter alternative and an unsweetened, thick dairy-free yogurt in place of butter and sour cream.
Choose products designed for baking, and make sure they have a similar consistency to the original ingredients.
The flavor and texture may differ slightly, but the festive decorations will still make it a lovely holiday dessert.
Serving Suggestions

A Christmas Bundt Cake looks beautiful on its own, but serving it with a few simple extras makes the dessert experience even better.
Here are some of my favorite ideas.
With coffee or tea: Serve a slice with freshly brewed coffee, black tea, or a warm cup of cinnamon tea. The buttery cake pairs wonderfully with a slightly bitter drink.
With whipped cream: Add a spoonful of lightly sweetened whipped cream beside each slice.
With vanilla ice cream: A scoop of vanilla ice cream makes this cake feel especially indulgent. This combination works beautifully when the cake is at room temperature.
With fresh fruit: Arrange fresh orange slices, raspberries, or strawberries around the serving platter for extra color.
With a Christmas dessert spread: Serve it alongside gingerbread cookies, chocolate truffles, shortbread, and other holiday treats.
This cake is particularly suitable for:
- Christmas Eve gatherings
- Christmas Day dessert tables
- Holiday office parties
- Family dinners
- Winter birthday celebrations
- Homemade edible gifts
For a pretty presentation, use a white cake stand and arrange fresh rosemary, cranberries, and a few pinecones around the base. Keep decorative greenery and non-food items away from the cake itself unless they’re food-safe.
Related Recipes:
- Christmas Fudge Recipe – Easy & Festive Sweet
- Christmas Trash Mix Recipe
- Christmas Bread Recipe – Easy Holiday Favorite
- Christmas Simmer Pot Recipe Gift
FAQ’s
1. How Do I Store Christmas Bundt Cake?
Store the completely cooled, uncut cake in an airtight container at room temperature for up to 2 days, provided your kitchen stays reasonably cool.
If your kitchen is warm or the cake contains a perishable filling or topping, refrigerate it instead.
For refrigerated storage, keep it covered and enjoy it within approximately 4–5 days.
Allow refrigerated slices to sit at room temperature for 20–30 minutes before serving for a softer texture.
2. Can I Make Christmas Bundt Cake a Day Ahead?
Absolutely!
In fact, making it a day ahead can make holiday entertaining much easier.
Bake the cake, cool it completely, and wrap it tightly without adding the glaze.
Store it in an airtight container at room temperature in a cool kitchen.
Prepare the glaze and decorations on the day you plan to serve it.
This approach helps the cake retain its moisture while keeping the decorations fresh and attractive.
3. Can I Freeze Christmas Bundt Cake?
Yes. This cake freezes well when you prepare it properly.
Allow the cake to cool completely, then wrap it tightly in plastic wrap.
Add another layer of aluminum foil or place the wrapped cake in a freezer-safe container.
Freeze for up to 2–3 months for the best quality.
You can freeze individual slices too, which makes it convenient to enjoy a small dessert later.
Thaw the cake overnight in the refrigerator or for several hours at room temperature while still wrapped.
Add fresh glaze and decorations after thawing.
4. How Do I Reheat Christmas Bundt Cake?
You don’t need to reheat this cake, but slightly warming a slice can make it especially enjoyable.
Place an individual slice on a microwave-safe plate and warm it for approximately 10–15 seconds.
Check the temperature and add a few more seconds if needed.
Avoid overheating because it can dry out the cake.
If you’ve already added the glaze, keep the warming time short.
5. Why Did My Bundt Cake Stick to the Pan?
The most common reasons are insufficient greasing, an unsuitable pan coating, or removing the cake at the wrong time.
Bundt pans have detailed shapes, so it’s important to grease every groove and the center tube.
Allow the cake to rest for approximately 15 minutes after baking before turning it out.
If it sticks, let the pan sit upside down on the cooling rack for a few minutes. Sometimes the cake releases with a little patience.
6. Why Is My Bundt Cake Dry?
Dry cake usually comes from too much flour, overbaking, or mixing the batter for too long.
For accurate measurements, use a kitchen scale whenever possible.
If you’re measuring with cups, spoon flour gently into the measuring cup and level it with a straight edge rather than packing it down.
Also, begin checking the cake around the 50-minute mark.
The sour cream and butter help keep this recipe moist, but proper baking time matters just as much.
7. Can I Use Fresh Cranberries Instead of Dried Cranberries?
Yes, but fresh cranberries contain more moisture and have a much sharper flavor.
You can use approximately ¾ cup fresh cranberries, rinsed, dried, and cut in half.
Fold them gently into the batter.
Fresh cranberries create little tart pockets throughout the cake, which contrast nicely with the sweet glaze.
Avoid adding extra orange juice to compensate for their tartness.
8. What Size Bundt Pan Should I Use?
A 10- to 12-cup Bundt pan is suitable for this recipe.
A 10-cup pan may be closer to its capacity, so avoid filling it more than approximately three-quarters full.
If you have leftover batter, bake it separately in a small loaf pan or muffin tin.
Always follow the pan manufacturer’s guidance for filling capacity.
Final Thought
Christmas baking doesn’t have to involve complicated recipes or perfect decorating skills.
Sometimes, the most memorable desserts are the ones you make in your own kitchen, with familiar ingredients, a little patience, and plenty of holiday spirit.
This Christmas Bundt Cake brings together everything I enjoy about festive baking: a soft buttery crumb, warm spices, fresh orange flavor, sweet vanilla glaze, and a beautiful presentation that makes everyone want a slice.
I especially love how easily you can prepare it ahead of time. Once the cake has baked and cooled, you can decorate it whenever you’re ready, leaving more time to enjoy the celebrations.
Don’t worry if your glaze drips a little unevenly or your decorations don’t look exactly like a bakery display. That’s part of the charm of homemade baking.
Make this cake for your next Christmas gathering, serve it with your favorite hot drink, and enjoy the smiles when you bring it to the table.
If you try this recipe, I’d love to hear how it turns out! Leave a comment sharing your favorite decoration, any variations you tried, or the little touches that made your cake special.
Happy Christmas baking! 🎄
Leave a Reply
You must be logged in to post a comment.