


There is something special about the smell of freshly baked cookies during Christmas. The moment butter, vanilla, and sugar start warming in the oven, the whole kitchen feels a little more festive. Add colorful sprinkles, holiday cookie cutters, and a dusting of powdered sugar, and suddenly an ordinary afternoon turns into a Christmas memory.
I love making Christmas cookies when the weather gets cooler and the holiday decorations start coming out. One of my favorite parts is setting everything on the kitchen counter, putting on some Christmas music, and making a little mess with flour and sprinkles. The cookies don’t need to look perfect. In fact, some of the funniest holiday baking memories come from cookies that turn out a little crooked!
This Cookie Recipe Christmas is one of those easy recipes that makes holiday baking enjoyable rather than stressful. The dough comes together with everyday ingredients, the cookies hold their shape beautifully, and you can decorate them in almost any way you like.
Whether you’re preparing a Christmas dessert table, filling homemade gift boxes, planning a family baking afternoon, or simply craving something sweet with your evening tea, these festive sugar cookies fit the occasion.
The best part? You don’t need professional baking equipment or complicated decorating skills. A mixing bowl, a rolling pin, a few cookie cutters, and a baking tray will get you started.
Let’s make a batch of buttery, soft-centered Christmas cookies with lightly crisp edges and plenty of holiday charm!
Why You’ll Love This Christmas Cookie Recipe

There are plenty of Christmas cookie recipes around, but this one earns a regular place in my holiday baking plans for a few simple reasons.
- Easy ingredients: You probably already have most of the ingredients in your pantry and refrigerator.
- Beginner-friendly: You don’t need advanced baking experience to prepare a beautiful batch.
- Perfect for decorating: The dough holds its shape, making it ideal for Christmas trees, stars, gingerbread people, bells, and snowflakes.
- Great for sharing: These cookies make lovely homemade gifts for friends, neighbors, teachers, and family members.
- Easy to customize: Change the colors, add chocolate, use different extracts, or decorate each cookie with your favorite festive toppings.
Another thing I appreciate is how flexible the recipe feels. You can prepare the dough ahead of time, bake the cookies the next day, and decorate them whenever you have a little free time.
Ingredients for Easy Christmas Holiday Cookies
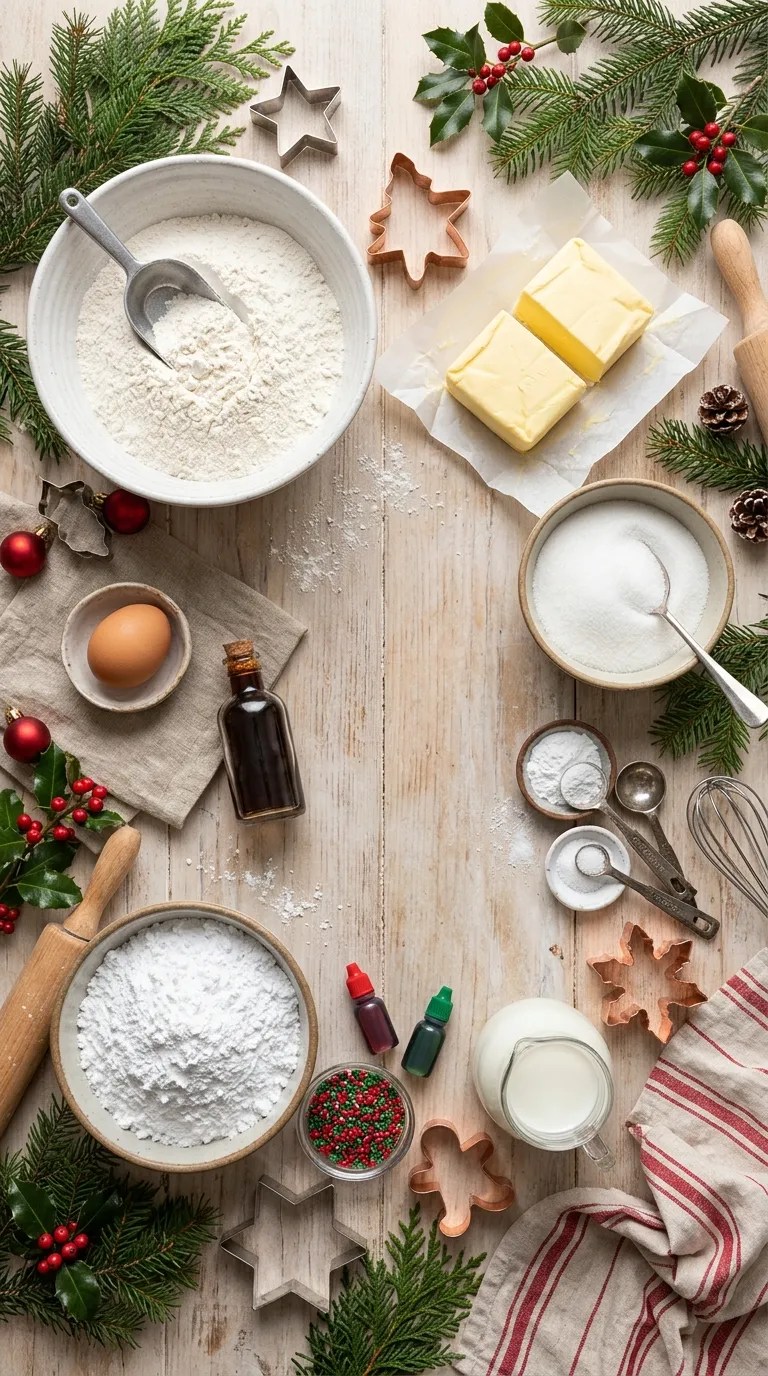
This recipe makes approximately 24–30 medium-sized cookies, depending on the cookie cutters you use.
For the cookie dough
- 2 ½ cups (315 g) all-purpose flour
- ¾ cup (170 g) unsalted butter, softened
- ¾ cup (150 g) granulated white sugar
- 1 large egg, at room temperature
- 2 teaspoons pure vanilla extract
- ½ teaspoon almond extract (optional)
- ½ teaspoon baking powder
- ¼ teaspoon salt
- 1 tablespoon milk, if needed
For the festive decoration
- 1 cup (120 g) powdered sugar
- 1–2 tablespoons milk
- ½ teaspoon vanilla extract
- Red, green, white, and gold sprinkles
- Colored decorating sugar
- Mini chocolate chips (optional)
- Food coloring in your preferred Christmas colors
You can use ready-made royal icing instead of the simple powdered sugar icing if you prefer more detailed decorations.
Ingredient notes and helpful substitutions
Butter: Unsalted butter gives you better control over the salt level. If you only have salted butter, reduce the added salt slightly.
Flour: Regular all-purpose flour works perfectly. For a gluten-free option, choose a reliable 1:1 gluten-free baking flour that includes a suitable binder.
Sugar: Granulated sugar gives these cookies their familiar sweetness and helps create lightly crisp edges.
Vanilla: Pure vanilla extract adds a lovely bakery-style aroma. You can use vanilla essence if that’s what you have at home.
Almond extract: This ingredient is optional, but I enjoy the subtle flavor it adds. If you’re not a fan of almond flavor, simply leave it out.
Milk: Add milk only if the dough feels unusually dry or crumbly. Start with one teaspoon rather than adding the entire tablespoon.
Step-by-Step Instructions for Perfect Christmas Cookies
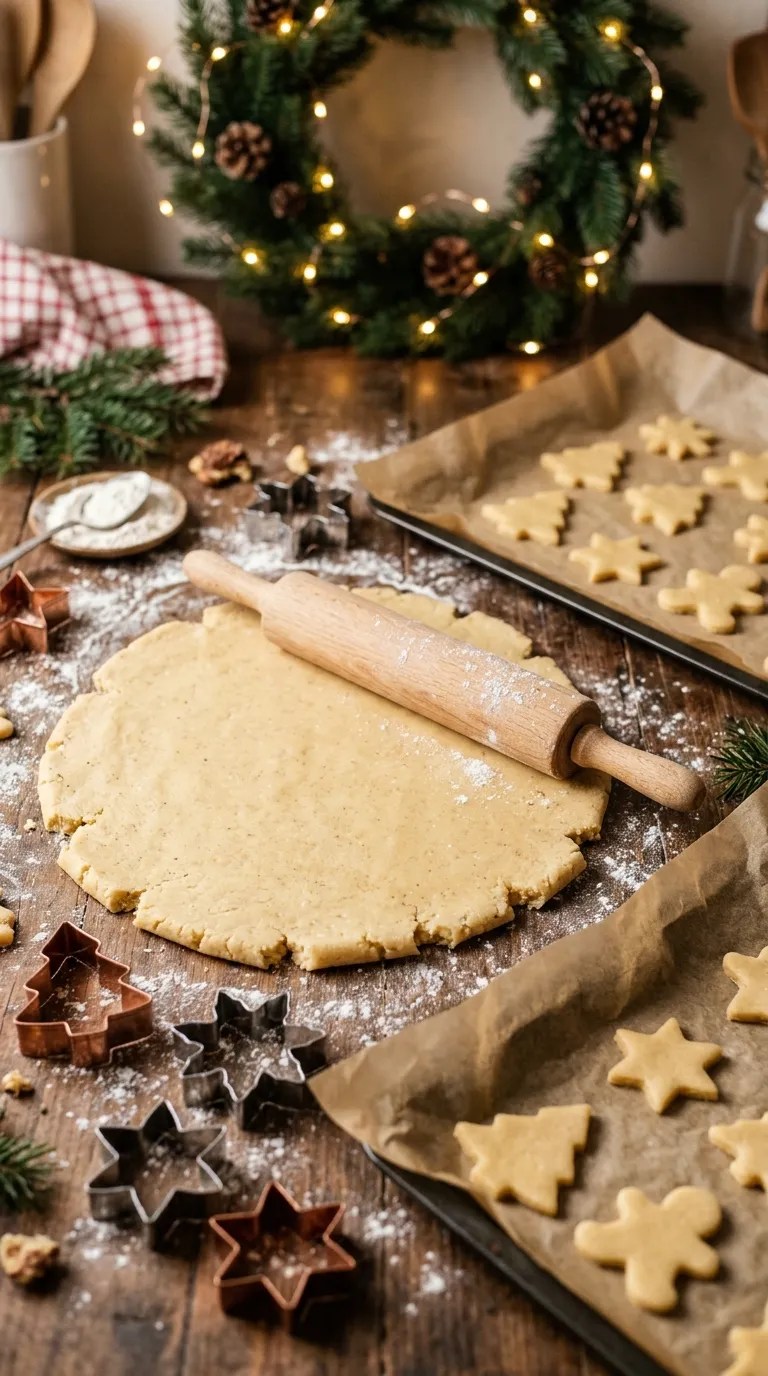
Before starting, gather your ingredients and equipment. You’ll need a large mixing bowl, measuring cups or a kitchen scale, an electric hand mixer or stand mixer, a rolling pin, cookie cutters, parchment paper, and a baking tray.
A stand mixer such as a KitchenAid makes mixing convenient, but a regular hand mixer works just as well.
Step 1: Prepare your baking area (5 minutes)
Preheat your oven to 350°F (175°C).
Line two baking trays with parchment paper. This helps prevent sticking and makes cleanup much easier.
Measure your ingredients before mixing. I find this little step especially helpful during holiday baking because it keeps the process organized.
Step 2: Cream the butter and sugar (3–4 minutes)
Place the softened butter and granulated sugar in a large mixing bowl.
Beat them with an electric mixer on medium speed for approximately 3–4 minutes.
The mixture should look pale, creamy, and fluffy. Scrape down the sides of the bowl with a spatula so everything mixes evenly.
Don’t rush this step. Properly creamed butter and sugar help create a pleasant cookie texture.
One small discovery I’ve made over time is that butter temperature matters more than I initially thought. Butter straight from the refrigerator makes mixing difficult, while melted butter can create a dough that spreads too much.
Aim for butter that feels soft when you press it but still holds its shape.
Step 3: Add the egg and extracts (1–2 minutes)
Add the egg to the butter mixture.
Pour in the vanilla extract and almond extract, if using.
Beat everything until smooth and combined. Scrape the bowl again if you notice butter collecting around the edges.
Don’t worry if the mixture looks slightly uneven at first. Continue mixing gently until the ingredients come together.
Step 4: Combine the dry ingredients (2 minutes)
In a separate bowl, whisk together the all-purpose flour, baking powder, and salt.
This distributes the baking powder and salt throughout the flour, helping the cookies bake more evenly.
Add the dry ingredients to the butter mixture in two or three portions.
Mix on low speed until a soft dough forms.
Avoid overmixing. Once you no longer see dry flour, stop the mixer. Overworking the dough can make the finished cookies tougher than you want.
If the dough looks a little crumbly, gently bring it together with your hands. Add milk one teaspoon at a time only if necessary.
Step 5: Chill the cookie dough (30–45 minutes)
Divide the dough into two equal portions.
Shape each portion into a flat disc and wrap it in plastic wrap or place it in an airtight container.
Refrigerate for 30–45 minutes.
This is an important step because chilled dough feels easier to roll and helps the cookies maintain their shapes in the oven.
I once skipped chilling because I was in a hurry to finish a batch before dinner. The cookies still tasted good, but some of the smaller shapes spread more than I wanted.
Since then, I always make room for this little waiting period.
Step 6: Roll out the dough (5–10 minutes)
Lightly flour your countertop or a large pastry mat.
Remove one portion of dough from the refrigerator and let it sit for a few minutes if it feels too firm.
Use a rolling pin to roll the dough to approximately ¼ inch (6 mm) thickness.
Try to maintain an even thickness across the entire sheet. Thin areas may bake faster, while thicker sections can remain softer in the middle.
If the dough sticks to your rolling pin, sprinkle a little flour over the surface. Avoid adding too much because excess flour can make the cookies dry.
Step 7: Cut out festive shapes (5–10 minutes)
Use Christmas-themed cookie cutters to cut out your favorite shapes.
Some lovely choices include:
- Christmas trees
- Stars
- Snowflakes
- Gingerbread people
- Candy canes
- Christmas bells
- Stockings
- Snowmen
Place each cutout onto your prepared baking tray, leaving approximately 1–2 inches between cookies.
Gather the leftover dough, gently bring it together, and roll it out again.
If the dough becomes too soft while you work, return it to the refrigerator for 10 minutes.
Step 8: Bake the Christmas cookies (9–12 minutes)
Place the baking tray in your preheated oven.
Bake for approximately 9–12 minutes, depending on the size and thickness of your cookies.
Watch the edges carefully. The cookies should look set, with lightly golden edges and mostly pale tops.
Don’t wait for the entire cookie to turn golden brown. These cookies continue to firm up as they cool.
Remove the tray from the oven and let the cookies rest for 5 minutes.
Then carefully transfer them to a wire cooling rack.
Allow them to cool completely before decorating.
Step 9: Prepare the simple decorating icing (5 minutes)
Add powdered sugar to a small mixing bowl.
Pour in one tablespoon of milk and the vanilla extract.
Stir until you get a smooth, thick but spreadable icing.
If the icing feels too thick, add a few drops of milk. If it looks too runny, add a little more powdered sugar.
Divide the icing into separate bowls if you want different colors.
Add a tiny amount of red or green food coloring and mix until you achieve your preferred shades.
Step 10: Decorate your festive cookies (10–20 minutes)
Now comes the most enjoyable part!
Spread or pipe icing over the cooled cookies.
Add sprinkles, decorating sugar, or mini chocolate chips while the icing remains wet.
Try making green Christmas trees with tiny red decorations, white snowflakes with silver-colored sprinkles, or simple red-and-white striped cookies.
You don’t need to decorate every cookie in the same way. A mixture of simple and colorful designs makes a cookie platter look more interesting.
Let the icing dry before stacking or packaging the cookies. Depending on the thickness of the icing, this may take 1–3 hours.
Your homemade Christmas cookies are ready to enjoy!
Pro Tips and Tricks for Better Christmas Cookies
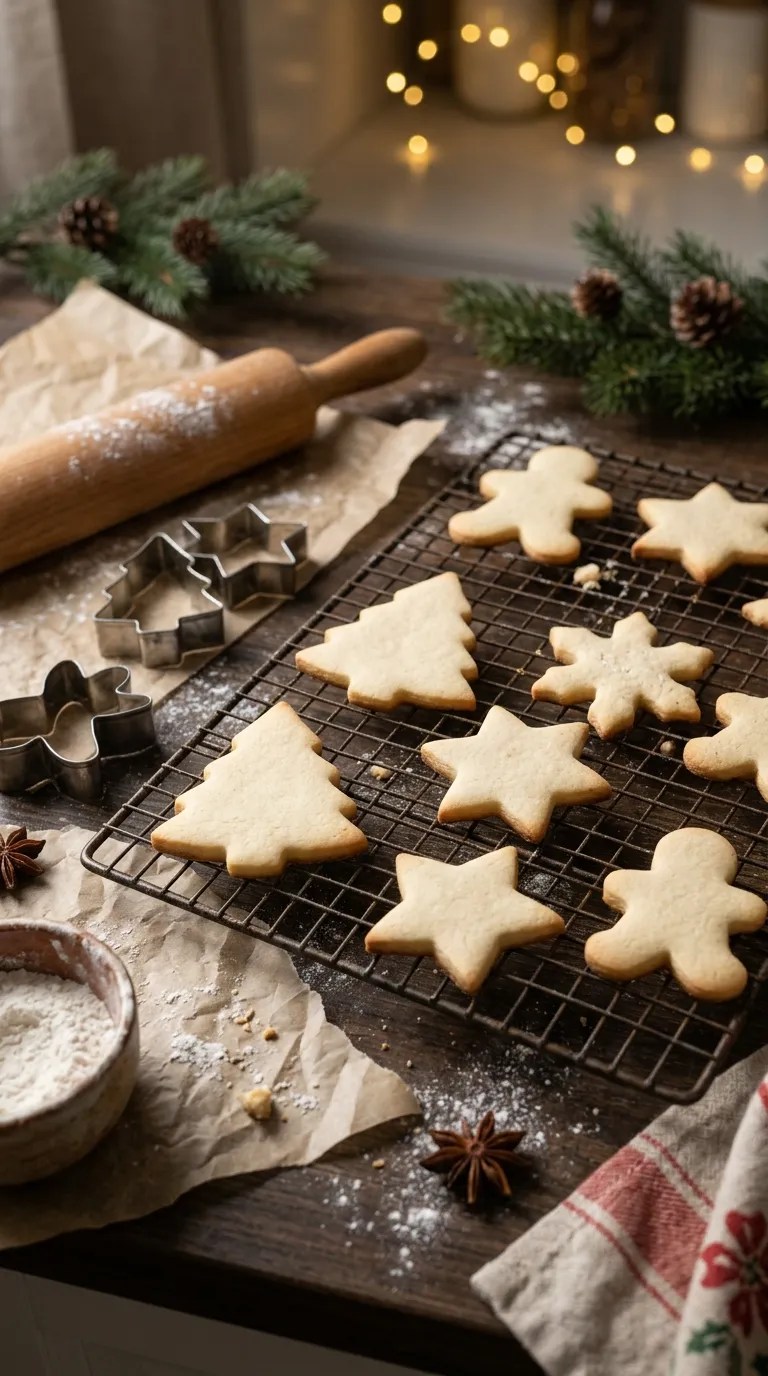
A few small details can make a noticeable difference when baking holiday cookies. These are the tips I’d share with anyone making this recipe for the first time.
1. Don’t skip chilling the dough
Chilling helps firm up the butter and makes the dough easier to handle.
It also helps the cookies maintain their shapes during baking. If your kitchen feels warm, refrigerate the dough for a little longer.
2. Roll the dough evenly
Try to keep the dough around ¼ inch thick.
An adjustable rolling pin with thickness guides can make this easier, especially if you’re making cookies with several different shapes.
Even thickness helps prevent some cookies from becoming too dark while others remain underbaked.
3. Avoid adding too much flour
It’s tempting to keep sprinkling flour over sticky dough, but too much can change the texture.
Use a light dusting on your countertop and rolling pin. If the dough feels very sticky, chilling usually works better than adding lots of extra flour.
4. Let the cookies cool completely
Warm cookies and icing don’t make the best combination.
The icing can melt, slide off, or become messy. Give the cookies enough time to cool on a wire rack before decorating.
5. Store them properly
Once the icing dries, place the cookies in an airtight container.
Separate layers with parchment paper to protect the decorations.
Keep them in a cool, dry place away from direct sunlight and heat.
For longer storage, you can freeze undecorated cookies and decorate them after thawing.
Make-ahead baking tip
You can prepare the dough up to 2 days ahead and keep it refrigerated.
You can also freeze the unbaked dough for approximately 2–3 months in a well-sealed freezer-safe container.
When you’re ready to bake, thaw frozen dough in the refrigerator until it becomes easy to roll.
Variations and Substitutions

One reason I enjoy this recipe is that you can change the flavor and appearance without completely changing the method.
Here are a few ideas for your next holiday baking session.
Chocolate Christmas Cookies
If your family loves chocolate, try turning part of the dough into a chocolate version.
Replace ¼ cup of the flour with ¼ cup unsweetened cocoa powder.
Mix as usual and chill the dough before rolling.
You can decorate these cookies with white icing, chocolate drizzle, or crushed peppermint candy.
The combination of chocolate and peppermint gives them a lovely holiday flavor.
Gluten-Free Christmas Cookies
For a gluten-free version, replace the all-purpose flour with a good-quality 1:1 gluten-free baking flour.
Choose a blend designed for cookies and baking rather than plain rice flour.
The dough may need slightly different handling depending on the flour brand, so chill it thoroughly before rolling.
If it feels fragile, roll it between two sheets of parchment paper.
Dairy-Free Christmas Cookies
You can make a dairy-free variation by using a suitable plant-based butter alternative and dairy-free milk.
Choose a baking-style plant butter that behaves similarly to regular butter.
Check the consistency of the dough before rolling, as some alternatives contain more moisture than traditional butter.
Also check your sprinkles and decorating ingredients if you need to avoid specific dairy ingredients.
Peppermint Christmas Cookies
For a refreshing seasonal flavor, replace the almond extract with ¼ teaspoon peppermint extract.
You can also sprinkle crushed peppermint candy over the icing.
Start with a small amount of peppermint extract because its flavor can become quite strong.
Serving Suggestions

Freshly decorated Christmas cookies taste wonderful on their own, but a little presentation can make them feel even more special.
Here are some simple ways to serve them.
With hot chocolate: Arrange a few cookies beside mugs of hot chocolate. Chocolate cookies and vanilla sugar cookies both make lovely companions.
With tea or coffee: Serve them with black tea, green tea, or freshly brewed coffee for a relaxed afternoon treat.
On a Christmas dessert platter: Mix your sugar cookies with brownies, chocolate truffles, gingerbread cookies, and homemade fudge.
Use a large serving plate or wooden board to create an attractive holiday dessert display.
As homemade gifts: Place cooled and decorated cookies inside clear food-safe bags or small gift boxes. Tie each package with a festive ribbon and add a handwritten holiday note.
For Christmas parties: Arrange cookies in different shapes and colors on a tiered serving stand. They look lovely on a dessert table and make an easy grab-and-go treat.
For family baking afternoons: Set out bowls of icing, sprinkles, and decorating sugar. Let everyone decorate a few cookies. This is a wonderful way to make holiday memories without needing complicated activities.
Related Recipes:
- Christmas Cake Recipe – Festive & Easy Dessert
- Christmas Treat Recipe – Easy Holiday Sweet
- Easy Christmas Cookie Recipe
- Christmas Simmer Pot Recipe
FAQ’s
How long do homemade Christmas cookies stay fresh?
When you store them in an airtight container in a cool, dry place, these cookies generally stay fresh for about 5–7 days.
Keep decorated cookies in a single layer when possible, or separate layers with parchment paper.
Humidity and the type of icing can affect their texture, so avoid leaving them uncovered for long periods.
Can I prepare Christmas cookie dough ahead of time?
Absolutely!
Prepare the dough, divide it into discs, wrap it tightly, and refrigerate it for up to 2 days.
When you’re ready to bake, let the dough soften slightly if it feels too firm to roll.
This approach makes holiday baking much easier because you can spread the work across two days.
Can I freeze Christmas cookies?
Yes. You can freeze both baked cookies and unbaked cookie dough.
For baked cookies, allow them to cool completely before placing them in freezer-safe containers with parchment paper between the layers.
For dough, wrap each portion tightly and place it in a freezer-safe bag.
Both options can generally last around 2–3 months in the freezer when properly packaged.
For the best decorating results, freeze undecorated cookies and add the icing after thawing.
Why did my Christmas cookies spread in the oven?
Several things can cause cookies to spread.
The butter may have been too soft, the dough may not have chilled long enough, or the kitchen may have been too warm.
Too much liquid or an incorrect flour measurement can also affect the dough.
Next time, chill the dough thoroughly and place the cutouts on a cool baking tray before putting them in the oven.
Can I make these Christmas cookies without a stand mixer?
Of course!
An electric hand mixer works perfectly, but you can also use a sturdy whisk and a wooden spoon.
Creaming butter and sugar by hand takes more effort, but it is completely manageable.
Make sure the butter has softened before you begin.
How do I know when the cookies are finished baking?
Look for set edges with a very light golden color.
The centers may still look slightly soft when you remove the tray from the oven.
That’s normal. The cookies continue to firm up as they cool.
Avoid baking them until the entire surface turns dark golden, as this can make them too crisp.
Can I decorate Christmas cookies the day before serving?
Yes!
Bake and cool the cookies, decorate them with icing, and allow the icing to dry completely.
Store the finished cookies in an airtight container at room temperature if your icing and room conditions allow it.
This makes them convenient for Christmas parties, school celebrations, and holiday gatherings.
What can I use instead of Christmas cookie cutters?
You don’t need special cutters to enjoy this recipe.
Use the rim of a small glass to make round cookies, or cut simple shapes with a clean butter knife.
You can also make small dough balls, flatten them gently, and decorate the tops with festive sprinkles.
The flavor matters much more than having perfectly shaped cookies!
Final Thought
Christmas baking doesn’t have to involve complicated recipes, expensive equipment, or hours of preparation.
Sometimes, a simple batch of homemade cookies creates the happiest holiday moments. The smell of vanilla and butter, the colorful sprinkles scattered across the counter, and the excitement of decorating each cookie make the whole experience worthwhile.
This easy Cookie Recipe Christmas is a lovely place to start if you want something delicious, festive, and simple enough for the whole family to enjoy.
Make a batch for your Christmas dessert table, wrap a few as homemade gifts, or save some for a quiet afternoon with your favorite cup of tea.
And don’t worry if your first Christmas tree looks more like a little green triangle or your snowflakes turn out a bit uneven. That’s part of the fun of homemade baking!
I’d love to hear how your cookies turn out. Try your favorite holiday colors, experiment with different decorations, and make this recipe your own.
Happy Christmas baking!
Leave a Reply
You must be logged in to post a comment.