

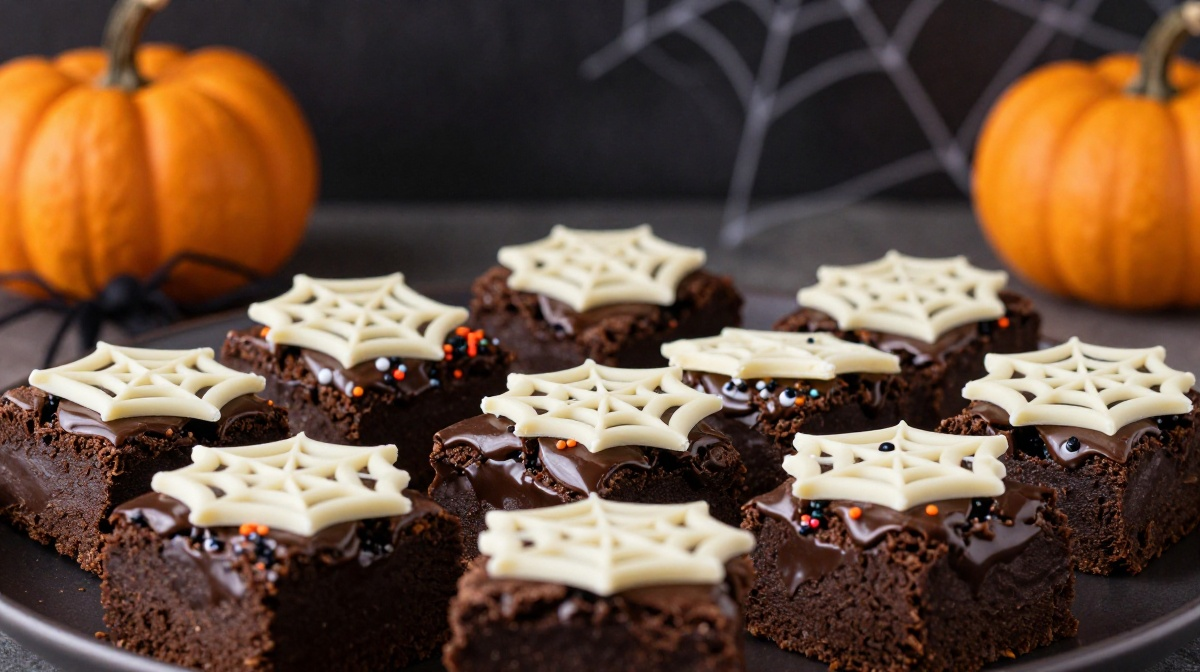
The first time I made these Spiderweb Brownie Bites, I had grand plans for a perfectly spooky Halloween dessert. I pictured neat little brownie squares with delicate white webs, arranged beautifully on a tray.
Reality looked a little different.
My first few webs came out wobbly, one brownie disappeared before I finished decorating, and I accidentally made one web look more like a tiny snowflake. But once I stopped trying to make every brownie identical, the whole thing became much more fun.
That is exactly why I keep coming back to this recipe.
These brownie bites look impressive on a Halloween dessert table, but they don’t require fancy decorating skills. You get fudgy little brownies, a creamy white chocolate topping, and a simple web design that makes everyone reach for one.
I especially love making them for Halloween parties because guests can grab one without needing a plate and fork. They also work beautifully for school celebrations, family movie nights, bake sales, or a Halloween-themed afternoon with friends.
The best part? You can make the brownies ahead of time and save the decorating for the day of the party.
Why You’ll Love This Recipe

- Party-friendly: Small brownie bites are easy to pick up and serve.
- Beginner-friendly decorating: The spiderweb design doesn’t need artistic precision.
- Make-ahead friendly: Bake the brownies a day or two before your party.
- Chocolatey and fudgy: The brownies stay soft in the center instead of turning into dry cake.
- Easy to customize: Change the toppings, colors, or decorations to match your Halloween theme.
Ingredients
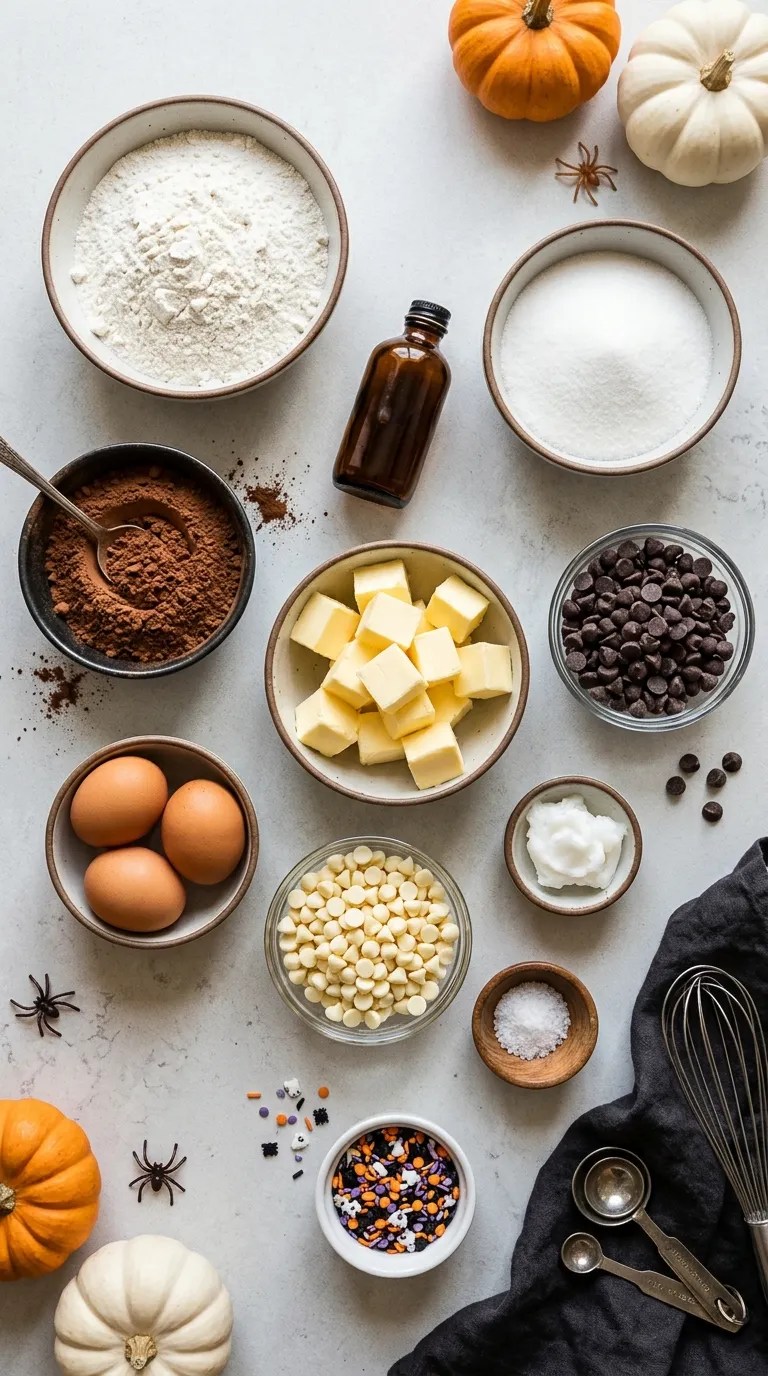
This recipe makes about 24 small brownie bites, depending on the size of your pan and how you cut them.
For the brownies
- 1 cup (226 g) unsalted butter
- 1 ¾ cups (350 g) granulated sugar
- ¾ cup (75 g) unsweetened cocoa powder
- 1 teaspoon vanilla extract
- ¼ teaspoon salt
- 4 large eggs
- 1 cup (125 g) all-purpose flour
- ½ cup (90 g) semisweet chocolate chips
You can use salted butter if that’s what you have. Just reduce the added salt slightly.
For a deeper chocolate flavor, swap the semisweet chocolate chips for dark chocolate chips. Milk chocolate works too, although the brownies will taste sweeter.
For the spiderweb topping
- 1 cup (170 g) white chocolate chips or white melting wafers
- 2 teaspoons vegetable shortening or coconut oil, optional
- ¼ cup (60 g) chocolate frosting or melted semisweet chocolate
The shortening helps loosen white chocolate if it becomes thick while melting. You don’t need much.
Optional Halloween decorations
- Halloween sprinkles
- Candy eyes
- Orange or black decorating sugar
- Mini chocolate candies
- Edible Halloween-themed decorations
Keep the extras simple. The spiderweb itself already does most of the decorating work.
Step-by-Step Instructions
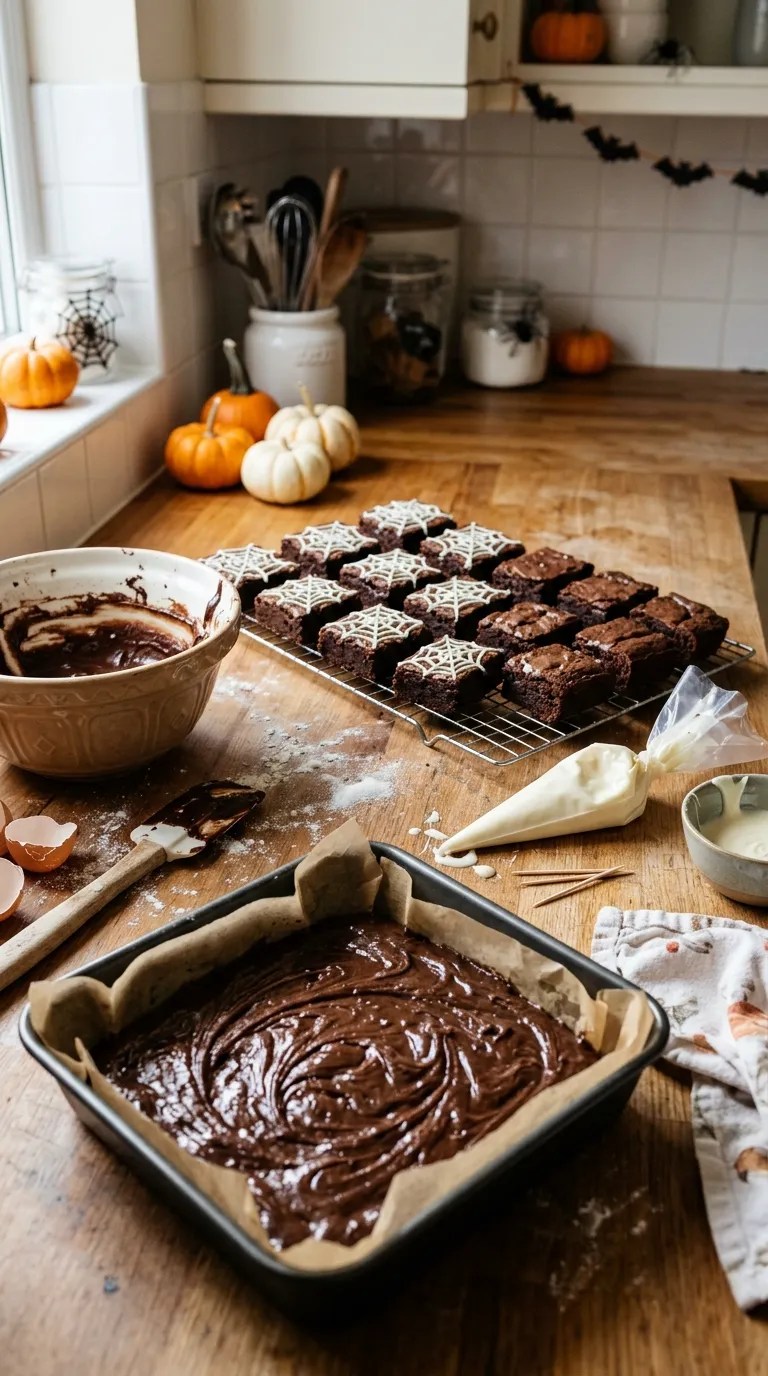
1. Prepare the pan — 10 minutes
Heat your oven to 350°F (175°C).
Line an 8-inch or 9-inch square baking pan with parchment paper, leaving a little paper hanging over two sides. That overhang will make lifting the brownies out much easier later.
Give the parchment a light coating of nonstick cooking spray.
I learned the parchment trick the hard way. The first time I skipped it, I spent far too long trying to coax the brownies out of the pan without breaking them.
2. Melt the butter and chocolate — 5 minutes
Add the butter to a medium saucepan and melt it over low heat.
Remove the pan from the heat and whisk in the cocoa powder and sugar.
The mixture will look thick and glossy. Don’t worry if it doesn’t look like traditional brownie batter yet.
Add the chocolate chips and stir until they begin to melt into the warm mixture.
If you prefer using a microwave, melt the butter in a microwave-safe bowl in short 20-second bursts. Stir between each burst, then mix in the cocoa powder, sugar, and chocolate chips.
3. Add the eggs and vanilla — 3 minutes
Let the chocolate mixture cool for a few minutes so it feels warm rather than piping hot.
Whisk in the eggs one at a time.
Add the vanilla and salt, then whisk until the mixture looks smooth and shiny.
Don’t rush this part. Adding the eggs gradually helps everything blend evenly.
4. Fold in the flour — 2 minutes
Add the flour and gently fold it into the chocolate mixture with a spatula.
Stop mixing as soon as you no longer see dry streaks of flour.
Overmixing can make brownies tougher, and we’re after that lovely soft, fudgy texture.
The finished batter should look thick and glossy.
5. Bake the brownies — 22 to 28 minutes
Spread the batter evenly in your prepared pan.
Bake for 22 to 28 minutes, depending on the pan size and your oven.
Start checking around the 22-minute mark.
The edges should look set, while the center should still have a slight softness. Insert a toothpick into the center. You want a few moist crumbs rather than completely clean, dry crumbs.
Don’t wait for the brownies to look completely firm in the oven. They’ll continue setting as they cool.
6. Cool completely — 45 to 60 minutes
Place the pan on a cooling rack and let the brownies cool completely.
This part tests my patience every time, especially when the kitchen smells like chocolate.
Resist cutting them while they’re hot. Warm brownies can crumble when you try to create small, neat pieces.
Once cool, lift the brownie slab out using the parchment paper.
7. Cut into brownie bites — 5 minutes
Trim the edges if you want especially neat pieces, then cut the brownies into approximately 24 small squares.
For party-size bites, aim for roughly 1½-inch squares.
If your knife gets sticky, wipe it with a warm, slightly damp kitchen towel between cuts. You’ll get cleaner edges.
8. Melt the white chocolate — 5 minutes
Place the white chocolate in a microwave-safe piping bag or small bowl.
Heat it in 15- to 20-second intervals, stirring after each interval.
White chocolate can go from beautifully melted to thick and grainy surprisingly quickly, so use gentle heat.
If it seems too thick for piping, stir in a tiny amount of shortening or coconut oil.
You want the chocolate fluid enough to make thin lines without running everywhere.
9. Create the spiderwebs — 10 minutes
Pipe a small circle near the center of each brownie bite.
Add two or three larger circles around it, leaving a little space between the rings.
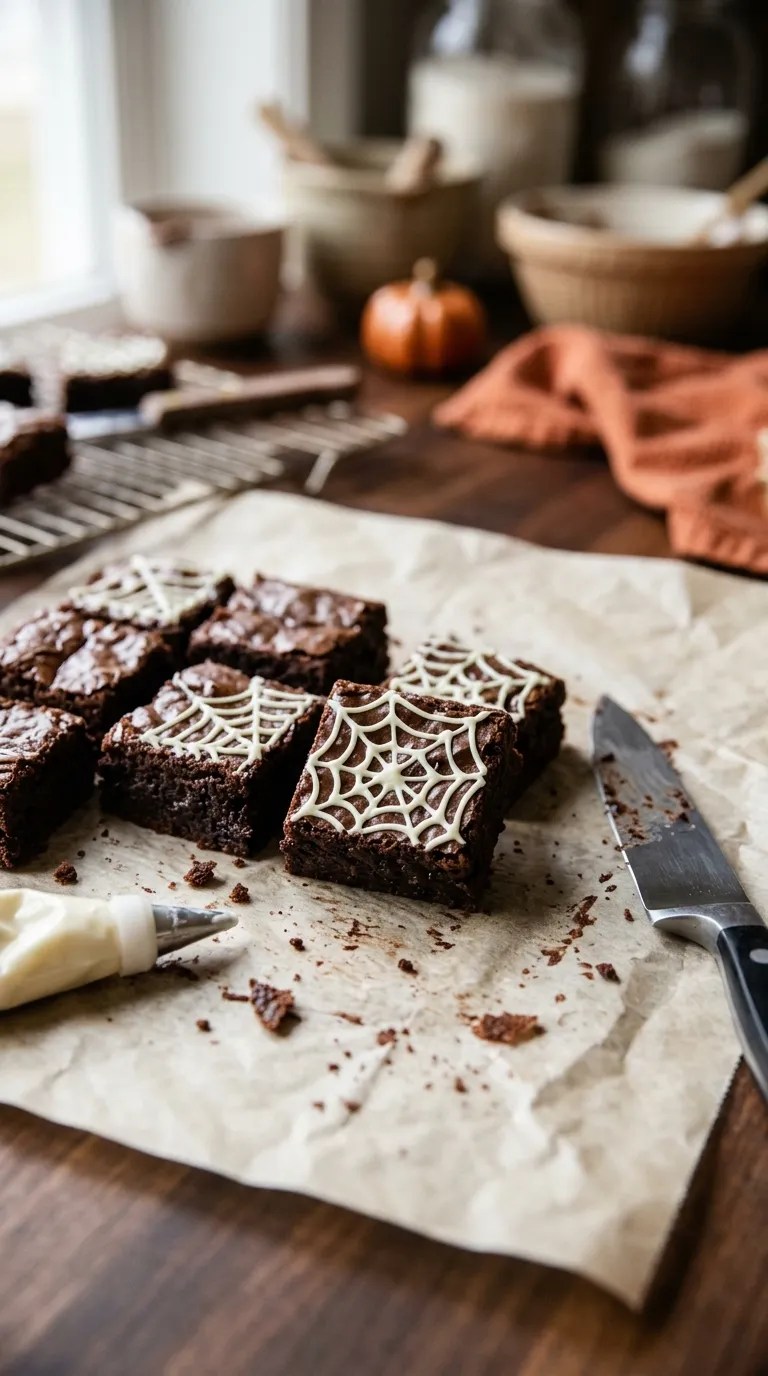
Now use a toothpick to pull lines from the center outward.
Drag the toothpick through the chocolate in one direction, then repeat around the brownie.
The lines will pull the circles into a web shape.
Don’t worry about perfection. In fact, slightly uneven webs look more handmade and playful.
If you want to make the process even faster, decorate several brownies at once rather than finishing each one completely before moving on.
10. Add the final spooky touches — 5 minutes
While the white chocolate remains soft, add a few Halloween sprinkles or a tiny candy decoration.
You can also pipe a small chocolate spider onto the center of some brownies if you feel like getting creative.
Let the topping set for about 20 to 30 minutes at room temperature.
Once the chocolate feels firm, transfer the brownie bites to a serving tray.
Pro Tips & Tricks
Don’t overbake the brownies
This is probably the biggest mistake to avoid.
The brownies should look set around the edges but remain slightly soft in the middle. If you bake until the center looks completely firm, your brownie bites may turn out more cake-like than fudgy.
Let them cool before cutting
I know. You want to cut them immediately.
But completely cooled brownies give you cleaner little squares and make decorating much easier.
For extra-clean cuts, chill the cooled brownies for about 20 minutes before slicing.
Use a piping bag or sandwich bag
You don’t need a professional decorating kit.
A disposable piping bag works beautifully, but a small food-safe sandwich bag can also do the job. Snip an extremely tiny opening in one corner.
Start small. You can always make the opening bigger, but you can’t make it smaller again.
Keep the white chocolate warm, not hot
If your chocolate becomes thick halfway through decorating, gently warm it again.
Avoid overheating it. White chocolate contains less cocoa solids than regular chocolate, so it can behave differently when melted.
Make them ahead
Bake the brownies 1 to 2 days before the party and keep them tightly covered at room temperature.
Decorate them the day of the event for the freshest-looking spiderwebs.
If your kitchen runs very warm, refrigerate the undecorated brownies, then let them come close to room temperature before decorating.
Variations & Substitutions
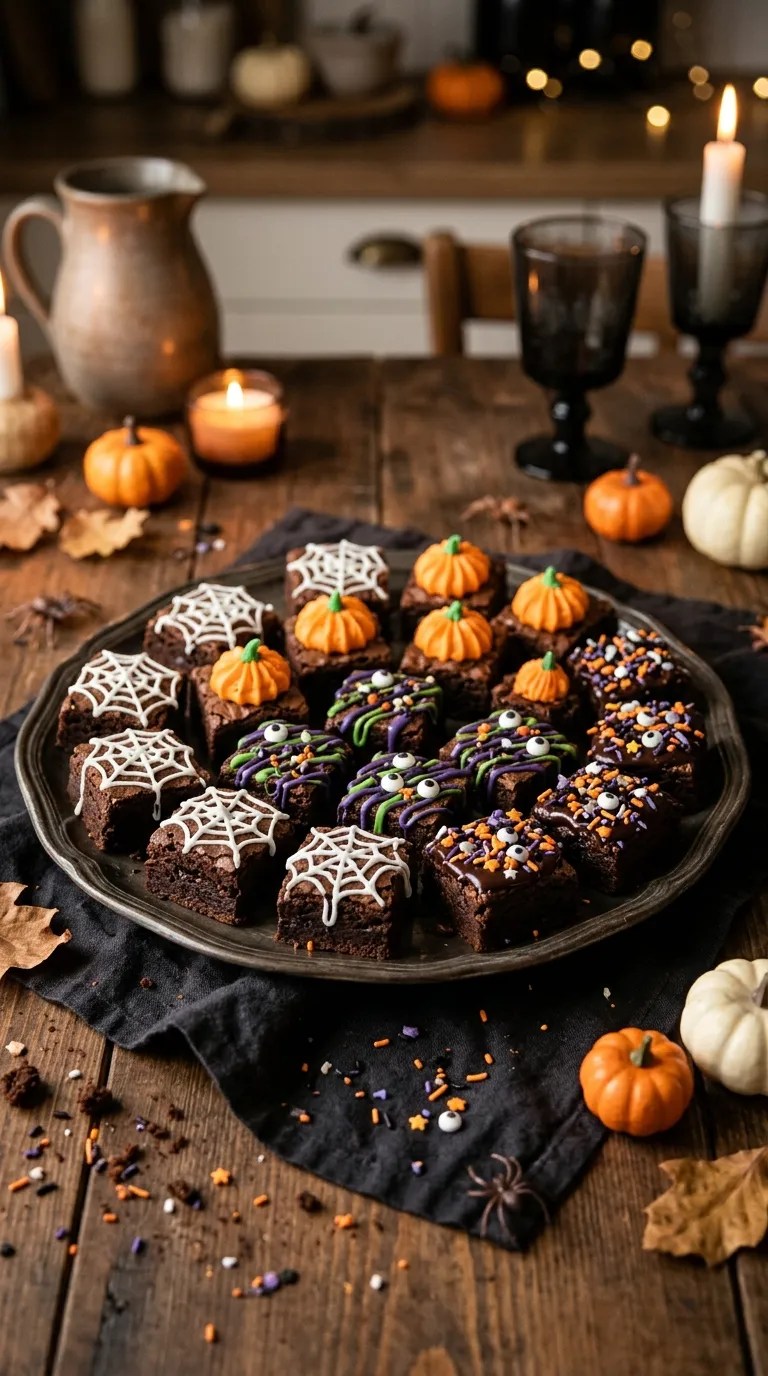
Make colorful monster brownie bites
Instead of white spiderwebs, use colored candy melts in orange, purple, or green.
You can make each brownie a different color for a fun Halloween dessert platter.
Turn them into mini pumpkin brownies
Skip the web design and pipe small orange pumpkin shapes onto the brownies.
Add tiny green stems using green decorating icing.
This version takes a little longer but looks adorable on a children’s Halloween dessert table.
Try a gluten-free version
Use a 1-to-1 gluten-free all-purpose flour blend designed for baking in place of regular all-purpose flour.
Choose a blend that already contains a binder such as xanthan gum if the package instructions call for one.
Because different gluten-free flour blends absorb moisture differently, check the brownies a few minutes early.
Make them dairy-free
Use a dairy-free butter substitute and dairy-free chocolate products labeled for your dietary needs.
Check every chocolate and decorating ingredient carefully, since some products that look dairy-free may contain milk ingredients or traces.
Serving Suggestions

These Spiderweb Brownie Bites fit almost any Halloween gathering.
For a party, arrange them on a large platter with a few Halloween sprinkles scattered around the edges. You can place them on a black, orange, or purple serving tray to make the white webs stand out.
For a dessert table, serve them alongside other small treats rather than one large dessert. Guests can sample a brownie bite without committing to a huge portion.
They also make a fun addition to a Halloween movie night. Put the brownies on a tray next to popcorn, fruit, and other easy-to-grab snacks.
If you’re serving them at a school or community event, check the event’s rules about homemade food and allergens before bringing them.
For an especially playful presentation, place each brownie in a small Halloween cupcake liner. It keeps sticky fingers away from the chocolate and makes serving much easier.
Related Recipes:
- Easy Halloween Desserts for Beginners
- Easy Spooky Potluck Food Ideas for Halloween Party Favorites
- Easy Halloween Dessert Ideas for Parties Spooky Chocolate Spiderweb Brownies
- Easy Halloween Sweets for Kids and Adults Spooky Chocolate
FAQ’s
Can I make these Halloween brownie bites ahead of time?
Absolutely. Bake the brownies up to two days ahead and store them in an airtight container.
For the best appearance, decorate them closer to serving time. The brownies themselves will still taste great when made ahead.
How should I store leftover Spiderweb Brownie Bites?
Keep them in an airtight container at room temperature for about 3 to 4 days.
Place parchment or wax paper between layers if you stack them so the decorations don’t stick together.
If your kitchen is particularly warm, refrigeration can help the chocolate topping stay firm, although refrigerated brownies may become a little less soft.
Can I freeze the brownies?
Yes. Freeze the undecorated brownies for the best result.
Wrap the cooled brownie slab tightly in plastic wrap, then place it in a freezer-safe container or bag. Freeze for up to about 2 months for the best quality.
Thaw it in the refrigerator or at room temperature, then cut and decorate.
Why did my white chocolate become thick?
The chocolate may have overheated, or it may simply need a little more fat to loosen it.
Try stirring in a very small amount of shortening or coconut oil.
Next time, melt it more gently and stir frequently.
Can I use chocolate frosting instead of melted chocolate for the web?
Yes, although the lines may look softer and less crisp.
Use a decorating bag with a very small round tip if you have one. Refrigerate the brownies briefly afterward if the frosting feels too soft.
What if my brownie pieces crumble when I cut them?
They probably need more cooling time.
Let the brownies cool completely before cutting. If they’re still difficult to handle, chill them for 15 to 20 minutes and try again with a sharp knife.
Also check that you didn’t overbake them, since very dry brownies tend to crumble more easily.
Final Thought
I still laugh a little when I remember that first batch of Spiderweb Brownie Bites. I wanted every web to look identical, but the brownies had other plans.
Now I actually like the slightly wonky ones best.
They look homemade, they’re fun to decorate, and nobody at a Halloween party cares whether every spiderweb has exactly the same number of lines. They care that the brownies are fudgy, chocolatey, and easy to grab while they’re busy enjoying the party.
If you’re making these for Halloween this year, put on some music, let the kids or friends help with the decorating, and don’t stress about perfect webs.
A little chocolate chaos is part of the fun.
And if one brownie mysteriously disappears before the party starts, I won’t ask any questions.
Leave a Reply
You must be logged in to post a comment.