

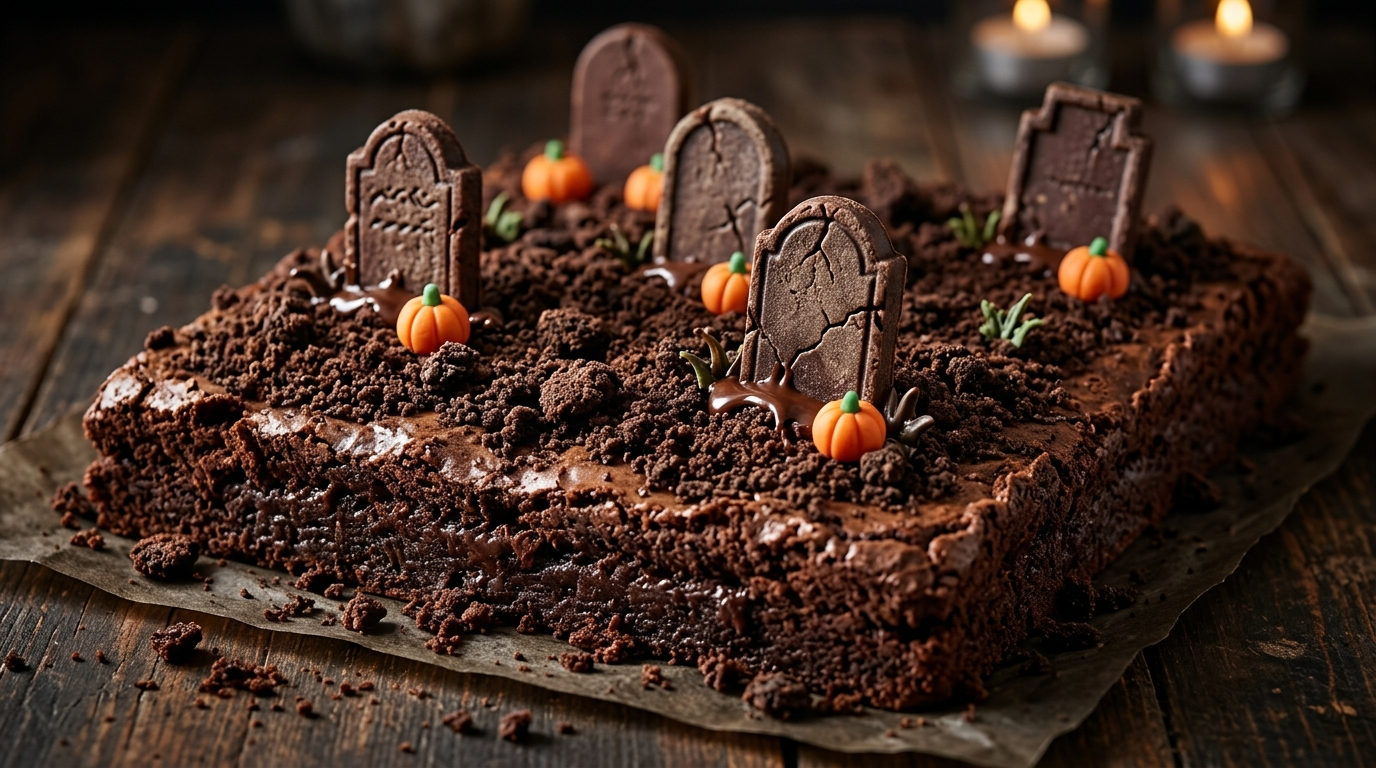
Every Halloween, I seem to convince myself that I need to make something complicated. Then I remember that the best treats are usually the ones people grab before they even ask what they are.
These spooky chocolate graveyard brownies became one of my favorite Halloween desserts for exactly that reason. The brownies stay rich and fudgy, while crushed chocolate cookies turn the top into a little edible graveyard. Add a few candy pumpkins, chocolate cookie “tombstones,” and a drizzle of chocolate, and suddenly a basic brownie pan looks like it belongs at a Halloween party.
I first made these when I had a half-used package of chocolate cookies sitting in the pantry. I almost skipped the decoration because I was tired, but I’m very glad I didn’t. The kids went straight for the little candy pumpkins, and the adults quietly claimed the corner pieces.
I’ve made these several times since then, and I’ve learned one important thing: don’t overbake the brownies. You want the center to look just slightly underdone when you pull them from the oven. They firm up as they cool and give you that soft, fudgy texture that makes a chocolate brownie worth eating.
Why You’ll Love This Recipe

- Easy Halloween dessert: You don’t need fancy decorating skills or special equipment.
- Rich and chocolatey: Cocoa powder, chocolate chips, and chocolate cookies give every bite plenty of chocolate flavor.
- Great for parties: You can cut the brownies into small squares so one pan feeds a crowd.
- Make-ahead friendly: Bake the brownies a day ahead and decorate them closer to serving time.
- Kids can help: Let little helpers crush cookies, place candy pumpkins, and decorate the tombstones.
Ingredients You’ll Need
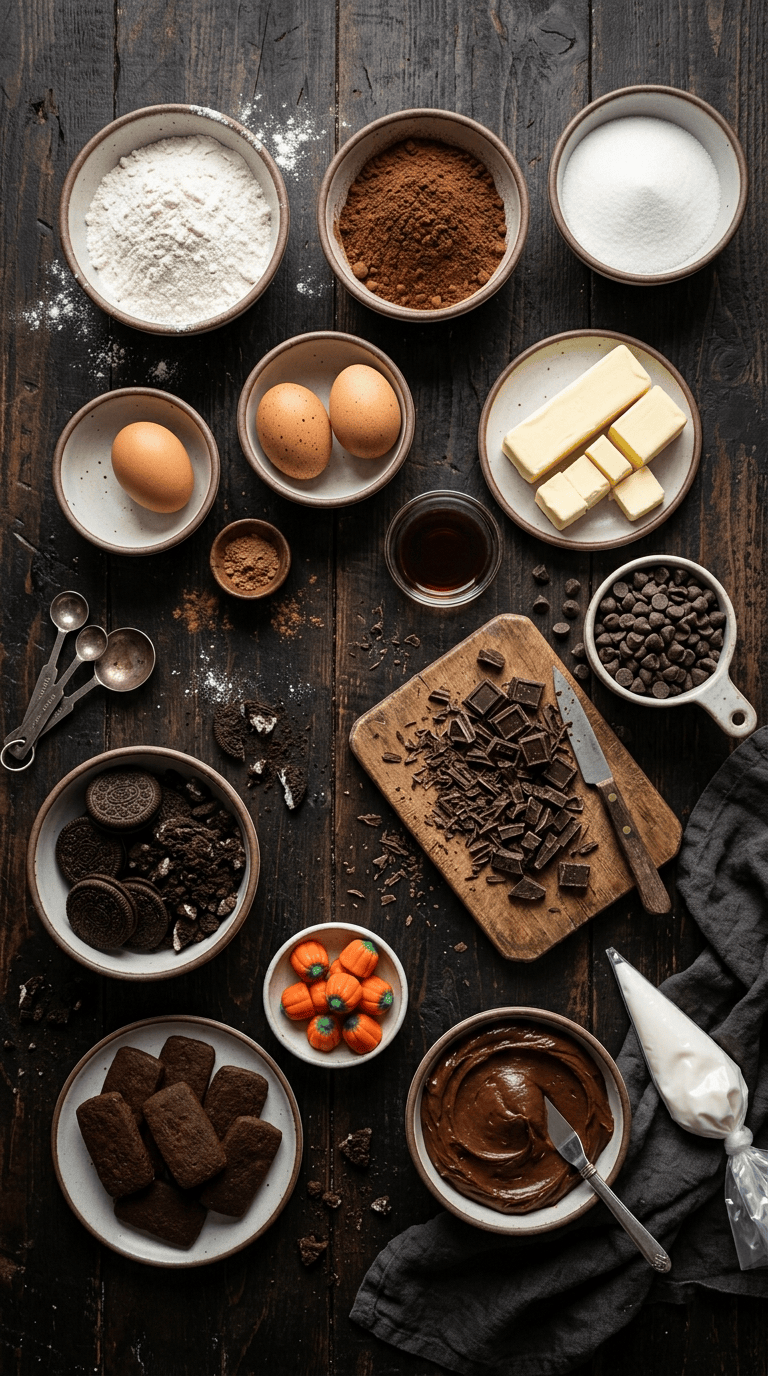
For the Chocolate Brownies
- 1 cup unsalted butter, melted and slightly cooled
- 1 ¾ cups granulated sugar
- 4 large eggs
- 2 teaspoons vanilla extract
- 1 cup all-purpose flour
- ¾ cup unsweetened cocoa powder
- ½ teaspoon salt
- 1 cup semi-sweet chocolate chips
- ½ cup chopped semi-sweet chocolate
For the Spooky Graveyard Topping
- 18 chocolate sandwich cookies
- ½ cup semi-sweet chocolate chips
- 1 teaspoon vegetable oil or coconut oil
- 12–16 small candy pumpkins
- 8–10 chocolate wafer cookies or rectangular chocolate cookies
- 2 tablespoons white decorating icing
- 2 tablespoons chocolate frosting
You can use dark chocolate instead of semi-sweet chocolate if you prefer a deeper chocolate flavor. Milk chocolate works too, although the finished brownies will taste sweeter.
If you don’t have candy pumpkins, orange and yellow candy-coated chocolates make an easy substitute.
Step-by-Step Instructions
1. Prepare the Pan
Preheat your oven to 350°F (175°C).
Line a 9-by-13-inch baking pan with parchment paper, leaving some paper hanging over the sides. This little trick makes the brownies much easier to lift out later.
Lightly grease the parchment with butter or cooking spray.
Time: 5 minutes
2. Mix the Brownie Batter
Pour the melted butter into a large mixing bowl.
Add the sugar and whisk for about 1 minute until the mixture looks glossy.
Add the eggs one at a time, whisking well after each addition. Stir in the vanilla extract.
In a separate bowl, whisk together the flour, cocoa powder, and salt.
Add the dry ingredients to the wet mixture. Use a rubber spatula or wooden spoon to fold everything together just until no obvious streaks of flour remain.
Don’t keep mixing once the batter comes together. Overmixing can make the brownies cakey instead of fudgy.
Fold in the chocolate chips and chopped chocolate.
The batter should look thick, glossy, and very chocolatey.
Time: 8–10 minutes
3. Bake the Brownies
Spread the batter evenly into your prepared pan.
Smooth the top with a spatula.
Bake for 25–30 minutes.
Start checking around the 25-minute mark. Insert a toothpick into the center. You should see a few moist crumbs attached to it, but you shouldn’t see completely wet batter.
If the toothpick comes out perfectly clean, you’ve probably baked them a little too long for a fudgy texture.
Let the brownies cool completely in the pan.
Time: 25–30 minutes
4. Crush the Chocolate Cookies
While the brownies cool, place the chocolate sandwich cookies into a zip-top bag.
Crush them with a rolling pin or the bottom of a measuring cup.
Don’t turn every cookie into fine powder. I like leaving some small chunks because they look more like loose dirt on the graveyard.
Set the crushed cookies aside.
Time: 3–5 minutes
5. Make the Chocolate Tombstones
Melt the ½ cup chocolate chips in a microwave-safe bowl in 20-second intervals, stirring after each interval.
Once smooth, dip the bottom edge of each rectangular chocolate cookie into the melted chocolate.
Place them on parchment paper and let the chocolate set.
Use white decorating icing to write tiny messages such as RIP, BOO, or little crosses.
Don’t worry about making them perfect. Slightly messy tombstones actually make the brownies look more homemade and spooky.
Time: 10 minutes
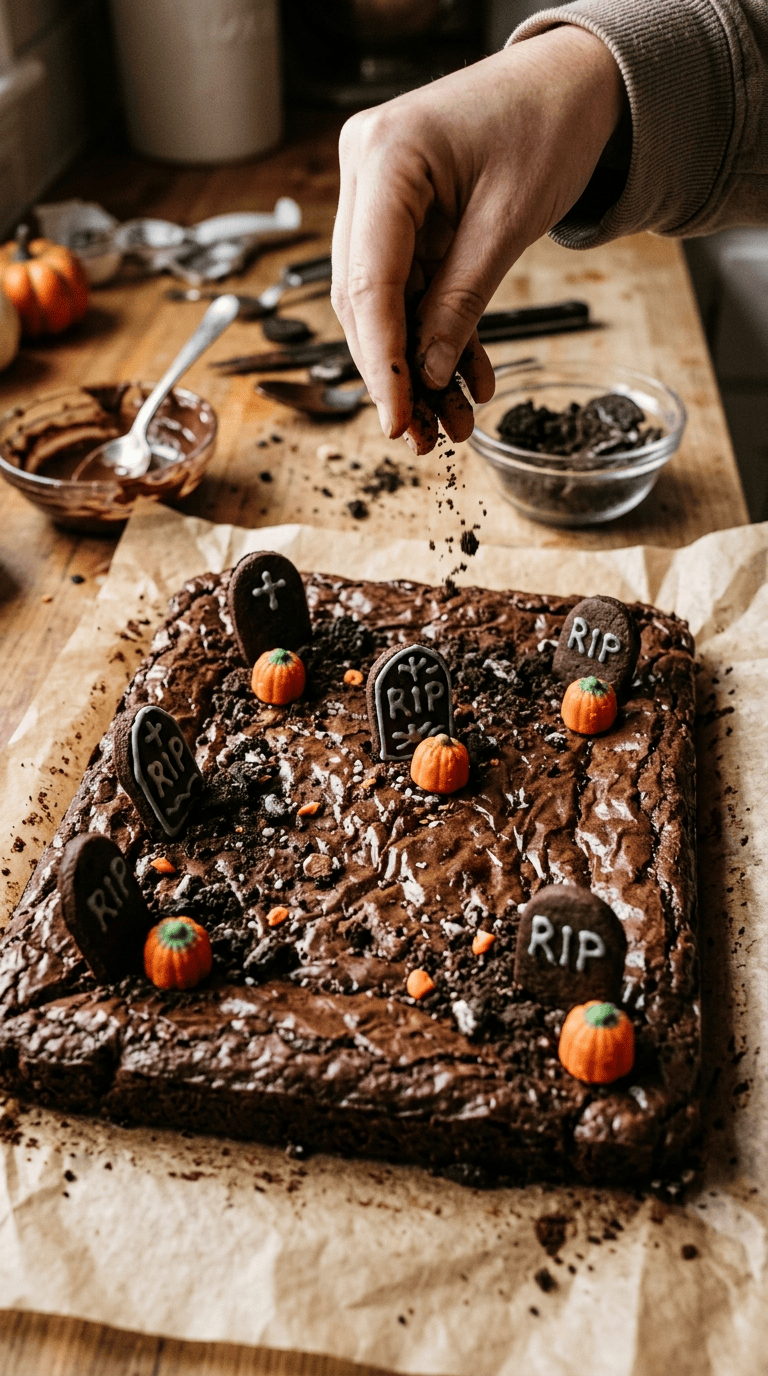
6. Add the Graveyard Dirt
Once the brownies have completely cooled, spread a thin layer of chocolate frosting over the surface.
You don’t need much. The frosting simply helps the crushed cookies stick.
Sprinkle the crushed chocolate cookies over the top.
Gently press them into the frosting with your fingertips.
Now you have your edible graveyard soil.
7. Decorate the Brownies
Insert the chocolate tombstones into the brownies.
Place candy pumpkins around the tombstones.
For a little extra drama, drizzle the remaining melted chocolate across a few areas of the brownie surface.
If you want to add more Halloween detail, pipe tiny white ghosts onto a few candy pieces or add small candy bones.
Refrigerate the decorated brownies for about 15–20 minutes to help everything set.
Then slice and serve.
Decoration time: 15–20 minutes
Pro Tips & Tricks
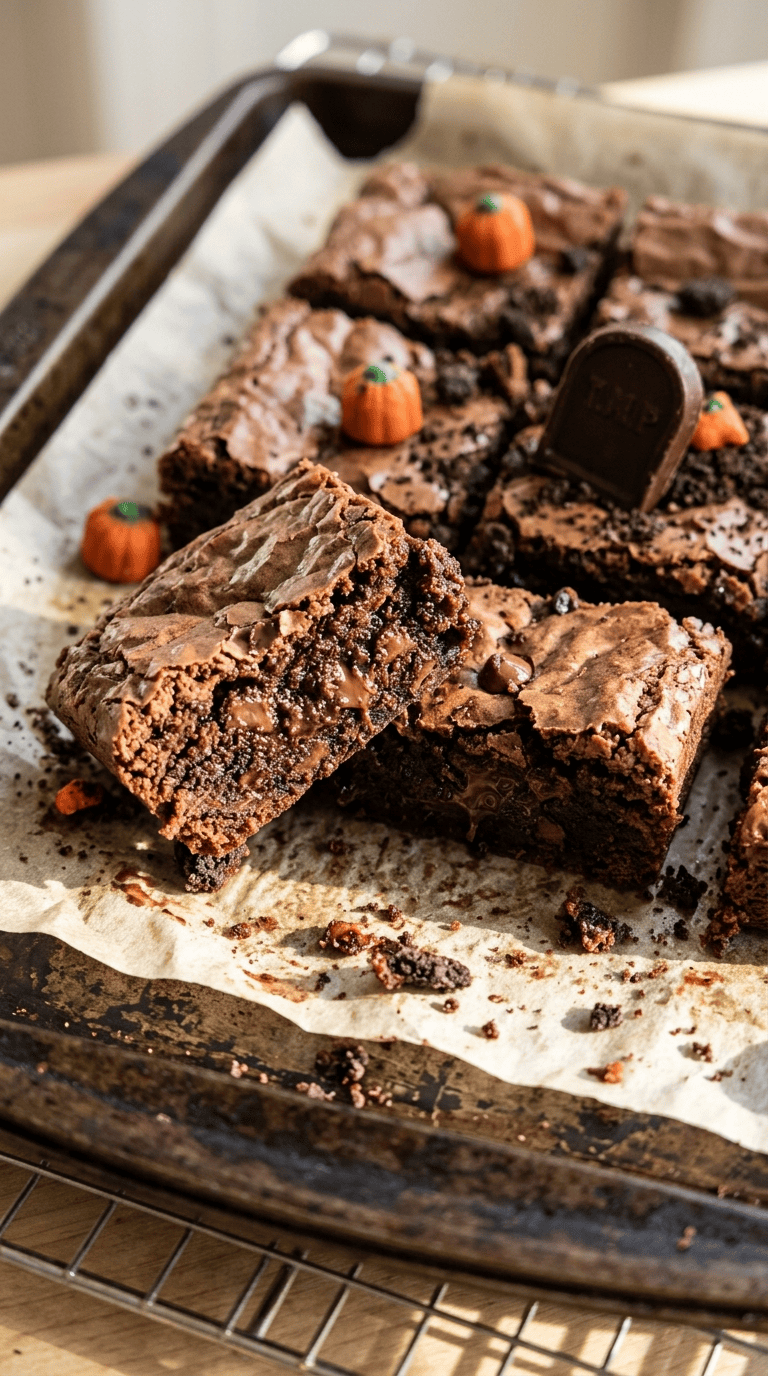
Don’t Overbake the Brownies
This is the biggest tip I can give you.
Chocolate brownies continue cooking from their residual heat after you remove them from the oven. Pull them out when the center still looks slightly soft.
If you wait for the center to look completely firm, your brownies may turn dry after cooling.
Cool Them Before Decorating
I know it’s tempting to start decorating as soon as the brownies leave the oven.
Don’t.
Warm brownies will melt the frosting, make the cookie crumbs greasy, and cause the tombstones to lean or sink.
Let the brownies cool completely first.
Make the Tombstones Ahead
You can make the chocolate tombstones several hours ahead or even the day before.
Keep them in an airtight container at room temperature. Place parchment between layers if you stack them.
This makes Halloween party day much easier.
Use a Plastic Knife for Cleaner Cuts
Once the brownies chill, use a sharp plastic or warm metal knife to cut them.
Wipe the knife clean after every few cuts.
For party-sized servings, cut the pan into 24 small squares. For larger dessert portions, make 12–16 pieces.
Don’t Crush All the Cookies Into Dust
This sounds like a tiny detail, but it makes a difference visually.
A mixture of fine crumbs and small cookie pieces gives the topping more texture and makes it look like actual graveyard soil.
Variations & Substitutions
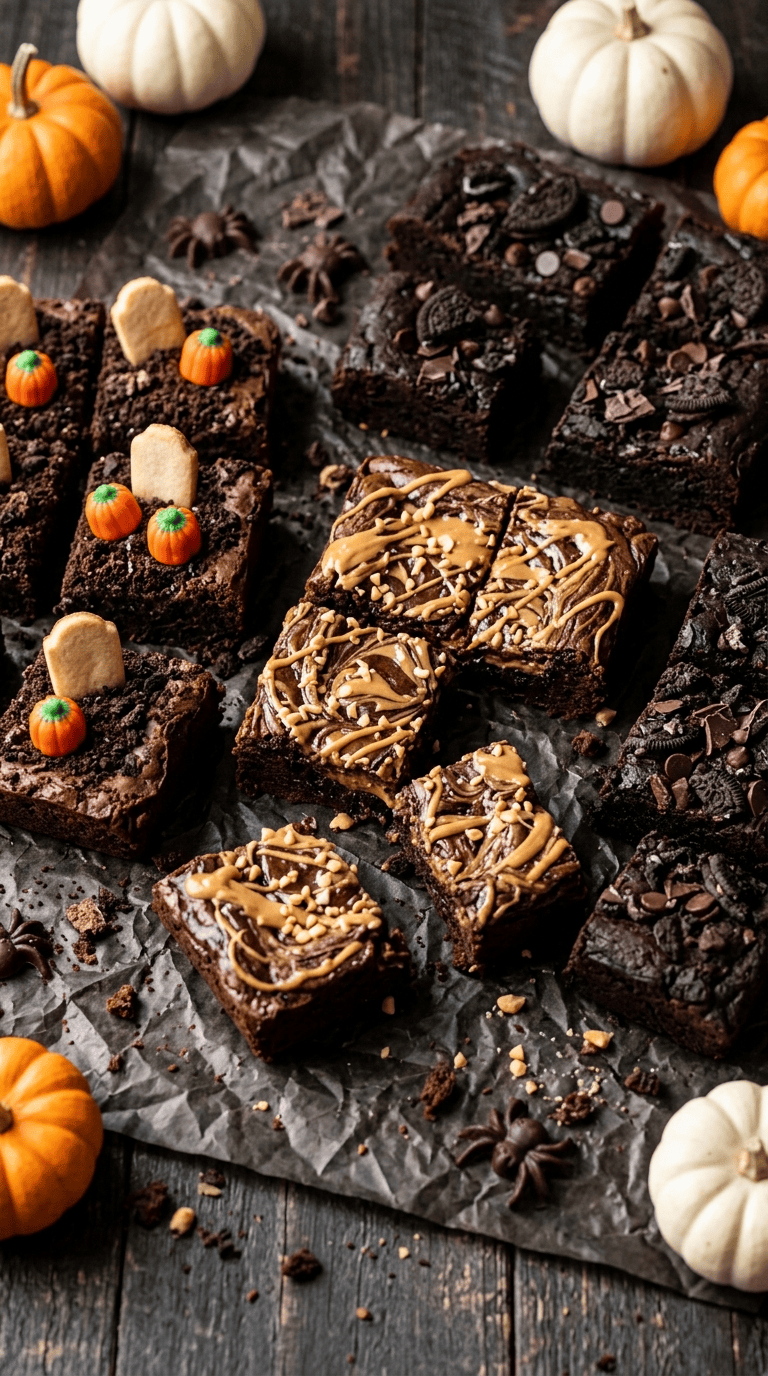
Peanut Butter Chocolate Graveyard Brownies
Add ½ cup creamy peanut butter to the brownie batter along with the chocolate chips.
You can also drizzle melted peanut butter over the cooled brownies before adding the cookie crumbs.
The salty peanut butter works beautifully with the rich chocolate.
Extra-Dark Chocolate Brownies
Use dark cocoa powder and dark chocolate chips instead of regular cocoa and semi-sweet chocolate.
The result tastes richer and less sweet, which works especially well with the candy topping.
Gluten-Free Halloween Brownies
Use a good 1-to-1 gluten-free all-purpose flour blend instead of regular flour.
Also check the labels on your cookies and decorations to make sure they fit your needs.
Mint Chocolate Version
Add ½ teaspoon peppermint extract to the brownie batter and use chocolate-mint sandwich cookies for the graveyard topping.
I wouldn’t add more than ½ teaspoon because peppermint can take over very quickly.
Serving Suggestions

These brownies fit right into a Halloween party dessert table.
Serve them alongside bowls of popcorn, caramel apples, chocolate-covered strawberries, or simple Halloween cookies.
For an adults-only gathering, pair a brownie with hot coffee or a mug of unsweetened tea. The slight bitterness balances the candy and chocolate’s sweetness.
For kids, serve small brownie squares with cold milk or hot chocolate.
If you’re hosting a Halloween movie night, arrange the brownies on a large black or dark-colored platter. Scatter a few extra candy pumpkins around the edges, and you’ve got an easy centerpiece without spending an hour decorating the table.
You can also make these for a school Halloween party, neighborhood gathering, bake sale, or fall birthday party.
Just remember that small portions work best when you’re serving several desserts.
Related Recipes :
- Halloween Dessert Ideas You Can Make Ahead
- Halloween Treats That Look Like Monsters and Ghosts
- Mummy Pizza Toast Spooky Halloween Food Idea for Kids
FAQ’s
How should I store Halloween chocolate brownies?
Store the decorated brownies in an airtight container at room temperature for up to 3 days.
If your kitchen runs very warm, refrigerate them instead. Let them sit at room temperature for a few minutes before serving so the brownie texture softens.
Can I make these Halloween brownies ahead of time?
Absolutely.
Bake the brownies 1–2 days ahead, cool them completely, and store them tightly covered.
Make the tombstones ahead as well. Add the cookie crumbs, pumpkins, and other decorations on the day you plan to serve them.
Can I freeze the brownies?
Yes. Freeze the undecorated brownies for up to 2 months for the best quality.
Wrap the brownie slab tightly in plastic wrap and place it inside a freezer-safe bag or container.
Thaw it in the refrigerator overnight, then bring it close to room temperature before decorating.
I don’t recommend freezing the fully decorated version because the cookies can lose their crisp texture.
Why did my brownies turn out cakey?
You may have overbaked them or mixed the batter too much after adding the flour.
For fudgy brownies, mix only until the flour disappears and remove the pan when the center still has a few moist crumbs.
Can I use boxed brownie mix?
Absolutely.
If you’re short on time, prepare a boxed brownie mix according to the package directions and focus your energy on the spooky topping.
The graveyard decoration does most of the visual work, so nobody needs to know you took a shortcut.
What can I use instead of candy pumpkins?
Use orange candy-coated chocolates, gummy pumpkins, candy corn, orange jelly candies, or small fondant pumpkins.
You can also skip them completely and use extra chocolate tombstones.
Final Thoughts
There is something wonderfully fun about turning an ordinary pan of brownies into a tiny Halloween scene.
I love that this recipe doesn’t require perfect decorating skills. A crooked tombstone or a few uneven cookie crumbs actually make the dessert feel more playful.
The first time you make these, don’t worry about copying the decoration exactly. Let the kids help. Make ridiculous tombstone messages. Add too many pumpkins. Eat one brownie before the party starts because, honestly, someone has to check that they’re good.
These spooky chocolate brownies are meant to be enjoyed, not admired from across the kitchen.
So grab your cocoa, crush some cookies, and make yourself a little edible Halloween graveyard. If you make them, I’d love to hear what spooky decorations you add to yours.
Leave a Reply
You must be logged in to post a comment.