

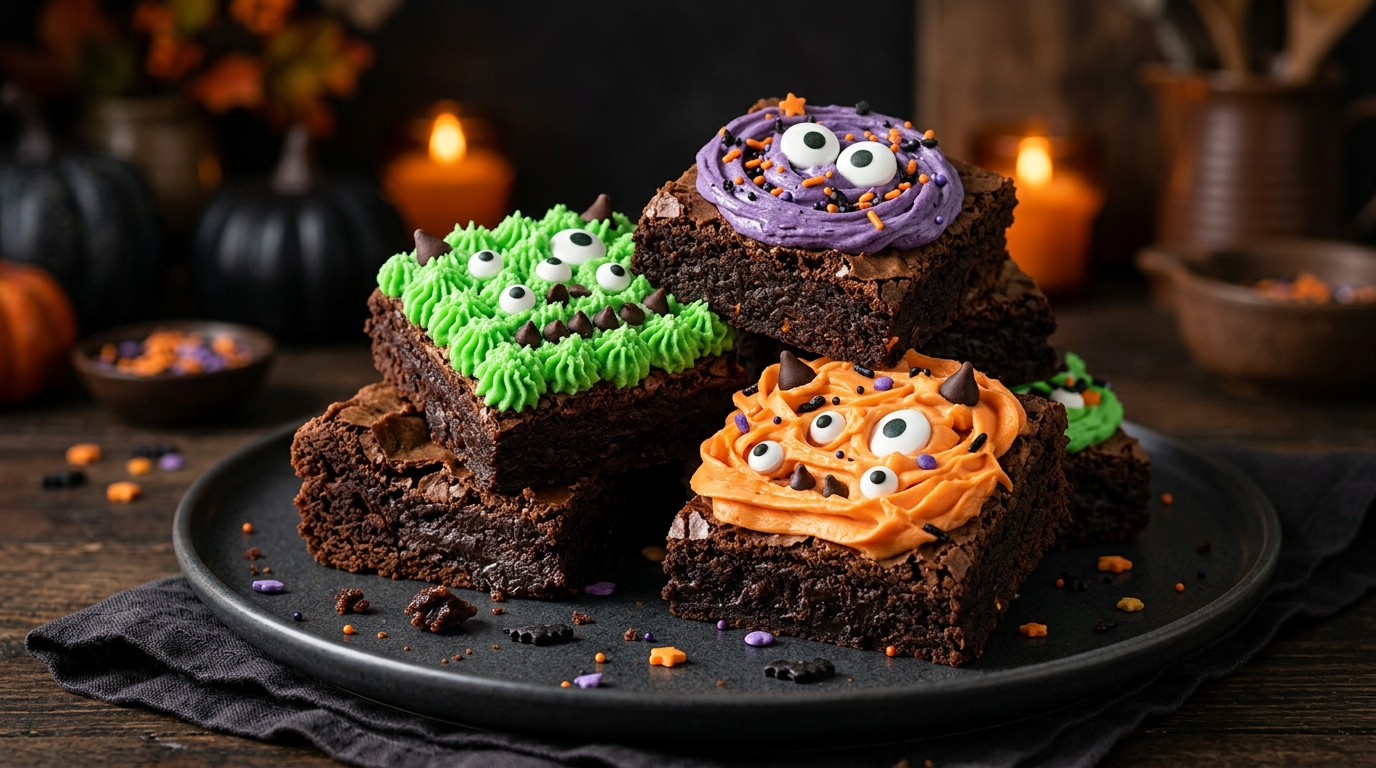
Some of my favorite Halloween nights have nothing to do with crowded parties or complicated costumes. Give me a chilly evening, a scary movie, fuzzy socks, and something warm coming out of the oven, and I’m perfectly happy.
One Halloween, I planned an ambitious baking night with several complicated desserts. About halfway through, my kitchen looked like a flour bomb had gone off, and I still had icing on the ceiling. That was the year I decided Halloween baking should be fun, not a second job.
These Halloween Monster Brownies became my answer.
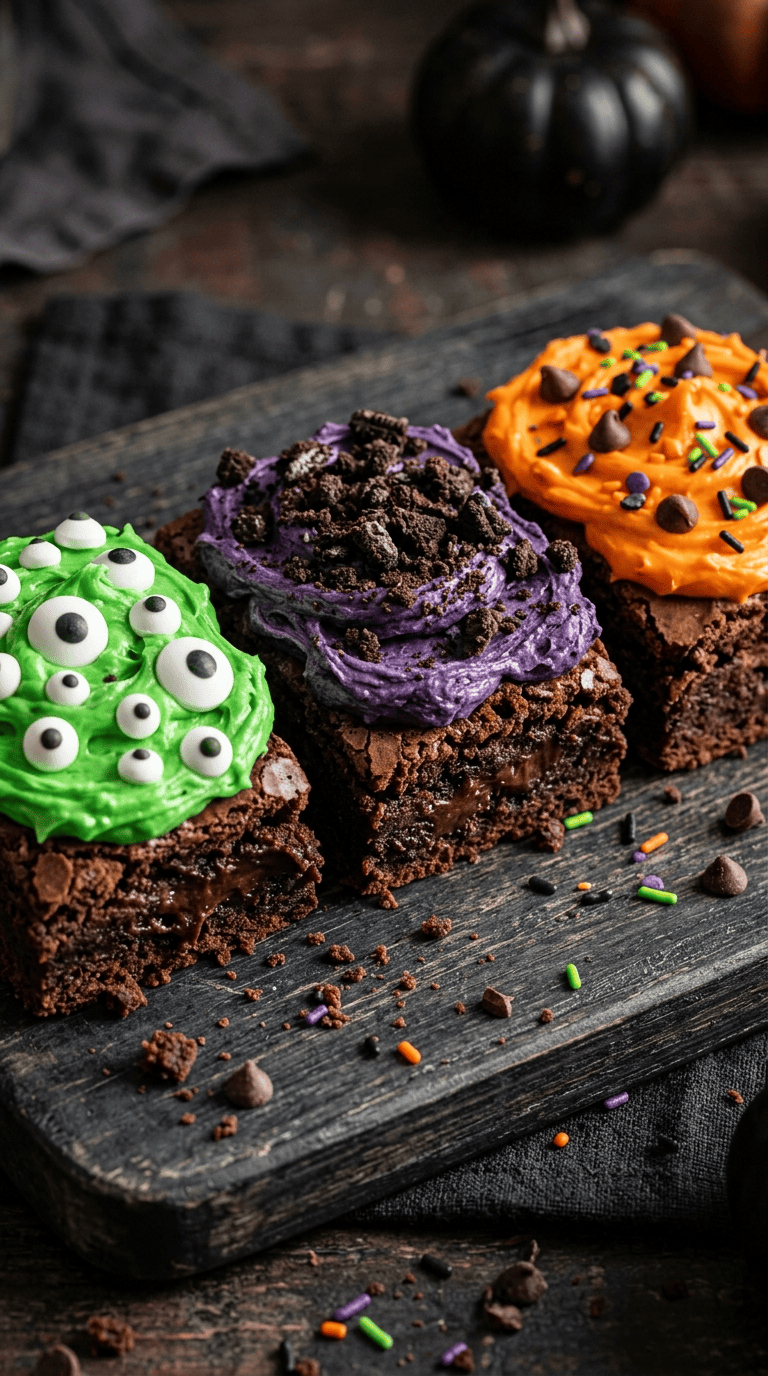
They have that rich, fudgy chocolate center I always want from a brownie, but the decoration turns them into something much more playful. I use candy eyes, colorful frosting, and a few simple Halloween sprinkles to make each brownie look like its own little monster.
The best part? You don’t need fancy decorating skills. My first batch looked slightly more “friendly blob” than “terrifying monster,” but everyone ate them anyway.
If you’re searching for Halloween baking ideas for a spooky night in, these brownies are exactly the kind of treat I’d make again and again.
Why You’ll Love This Recipe

- Easy enough for beginners: You only need basic baking equipment and simple decorating supplies.
- Rich and fudgy: A little less baking keeps the middle soft and chocolatey.
- Perfect for Halloween: Candy eyes and colorful frosting do most of the spooky decorating work.
- Great for a cozy night in: Bake them earlier, then decorate while watching your favorite Halloween movie.
- Easy to customize: Make cute monsters, creepy monsters, or let everyone decorate their own.
Ingredients You’ll Need
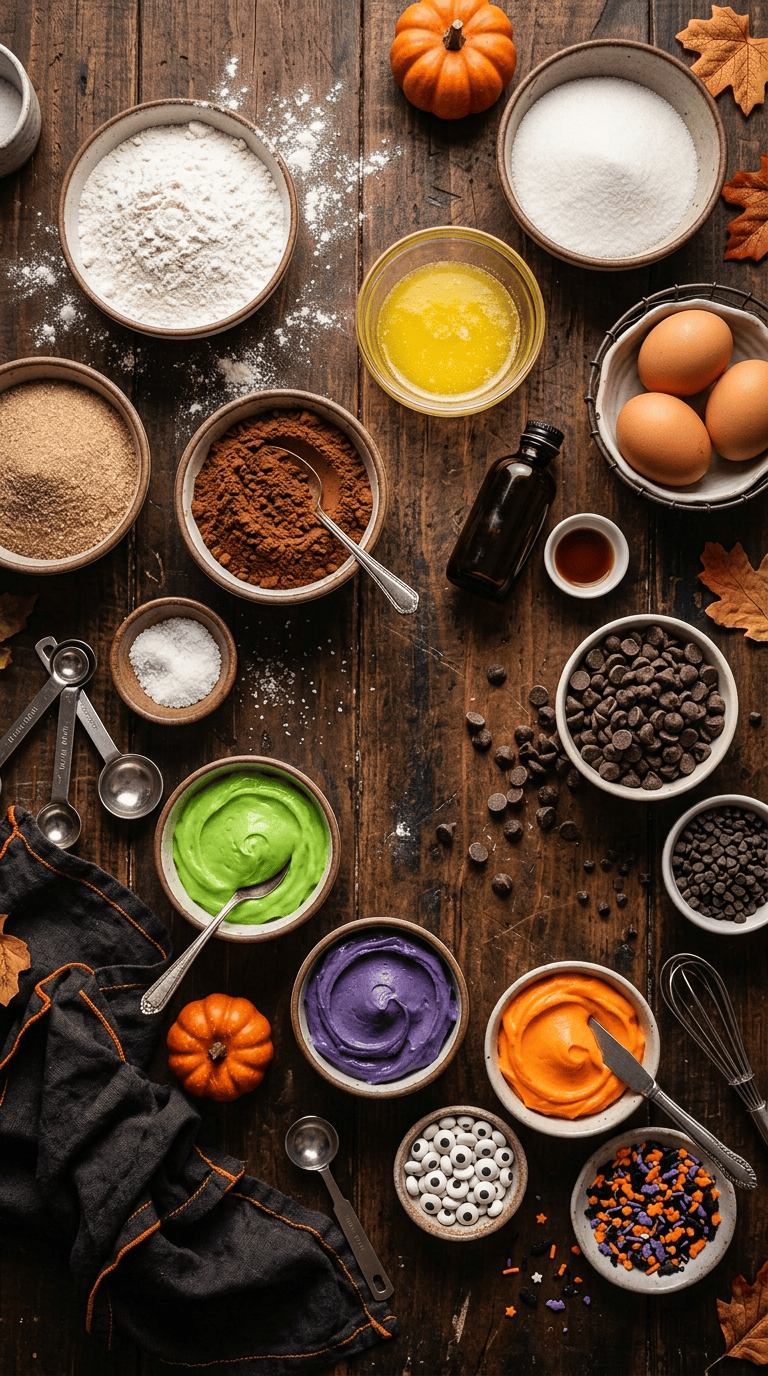
For the Brownies
- 1 cup unsalted butter, melted and slightly cooled
- 1 ¾ cups granulated sugar
- ¾ cup unsweetened cocoa powder
- 3 large eggs
- 2 teaspoons vanilla extract
- 1 cup all-purpose flour
- ½ teaspoon salt
- ½ cup semi-sweet chocolate chips
- ½ cup Halloween-themed chocolate candies or extra chocolate chips
You can use salted butter if that’s what you have. Just reduce the added salt slightly.
For an even deeper chocolate flavor, use Dutch-process cocoa powder. Regular unsweetened cocoa powder works perfectly well too.
For the Monster Decoration
- 1 cup prepared vanilla frosting
- Green gel food coloring
- Purple gel food coloring
- Orange gel food coloring
- ¼ cup chocolate frosting
- ½ cup candy eyes
- Halloween sprinkles, as needed
- 2 tablespoons mini chocolate chips
- 2 tablespoons colored decorating sugar
You don’t need every decorating ingredient listed above. Pick two or three colors and let the brownies do the rest.
I usually reach for gel food coloring because it gives the frosting stronger color without making it watery.
Step-by-Step Instructions
1. Prepare the Pan — 5 Minutes
Start by heating your oven to 350°F (175°C).
Line an 8-inch square baking pan with parchment paper, leaving a little paper hanging over two sides. This makes removing the brownies much easier later.
Give the parchment a light coating of cooking spray or butter.
I learned this trick after one particularly stubborn brownie batch refused to leave the pan. The brownies won that battle. Parchment paper wins it every time now.
2. Mix the Butter and Sugar — 2 to 3 Minutes
Pour the melted butter into a large mixing bowl.
Add the granulated sugar and whisk until the mixture looks glossy and well combined.
You don’t need a stand mixer for this recipe. A sturdy whisk and a little elbow grease work perfectly.
Make sure the butter feels warm rather than piping hot before adding the eggs.
3. Add the Eggs and Vanilla — 2 Minutes
Add the eggs one at a time, whisking well after each addition.
Pour in the vanilla extract and mix again.
The batter should become smoother and slightly thicker. If it looks glossy and cohesive, you’re right where you want to be.
4. Add the Dry Ingredients — 2 Minutes
Add the cocoa powder, flour, and salt.
Switch to a rubber spatula and gently fold everything together.
Stop mixing as soon as you no longer see dry streaks of flour.
This step matters more than people think. Overmixing can make brownies tougher and less fudgy. Once the flour disappears, put the spatula down.
5. Fold in the Chocolate — 1 Minute
Fold in the chocolate chips and Halloween chocolate candies.
Save a small handful to scatter over the top.
The extra chocolate melts into little pockets throughout the brownies, which makes every bite feel slightly more indulgent.
6. Bake the Brownies — 25 to 30 Minutes
Scrape the batter into the prepared pan and spread it into an even layer.
Scatter the remaining chocolate chips over the top.
Bake for 25 to 30 minutes.
Start checking around the 25-minute mark.
The edges should look set, while the center should still have a slight softness. Insert a toothpick into the center. You want a few moist crumbs rather than completely clean crumbs.
A completely clean toothpick usually means you’ve gone a little too far for the fudgy texture I want.
7. Let Them Cool Completely — About 1 Hour
Remove the pan from the oven and place it on a cooling rack.
Let the brownies cool completely before decorating.
I know this part tests your patience. Warm brownies smell ridiculous, and you’ll probably want to cut one immediately.
Don’t.
Warm brownies can crumble when you decorate them, especially when you spread frosting across the surface. Letting them cool gives you cleaner squares and a much easier decorating job.
8. Cut the Brownies — 5 Minutes
Use the parchment paper to lift the cooled brownie slab from the pan.
Place it on a cutting board.
For larger Halloween treats, cut the brownies into 9 squares. For party-size bites, cut them into 12 or 16 smaller pieces.
Use a sharp knife and wipe it clean between cuts if you want neat edges.
If you prefer rustic-looking brownies, don’t worry about perfect squares. These are monster brownies. A few crooked edges actually add character.
9. Prepare the Monster Frosting — 10 Minutes
Divide the vanilla frosting between three small bowls.
Tint one bowl green, one purple, and one orange.
Leave the chocolate frosting as it is.
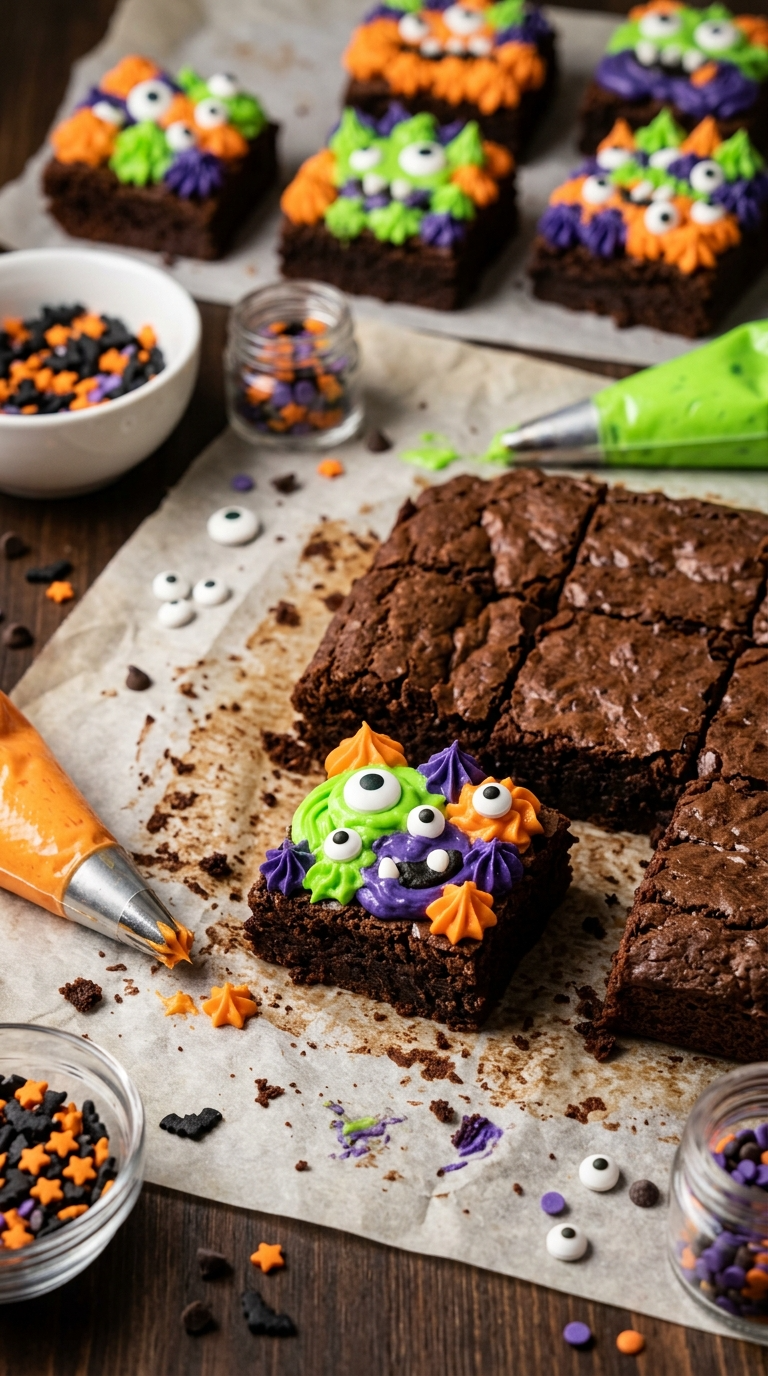
Transfer each colored frosting into a small piping bag. If you don’t have piping bags, use sandwich bags and snip a tiny corner from each one.
Pipe little zigzags, swirls, dots, or messy monster hair across the brownie tops.
Don’t overthink this part.
The less perfect the frosting looks, the more monster-like the brownies become.
10. Add the Candy Eyes — 5 Minutes
Press candy eyes into the frosting while it remains soft.
Use one large eye, two eyes, three eyes, or a whole cluster.
For a silly monster, place the eyes unevenly.
For a creepy monster, use lots of tiny eyes.
You can even add a chocolate-frosting mouth underneath the eyes.
11. Finish With Sprinkles
Add Halloween sprinkles, colored sugar, or mini chocolate chips.
Keep some brownies simple and decorate others heavily.
If you’re having a Halloween movie night with family or friends, put all the decorating ingredients on the table and let everyone create their own monster.
That’s honestly one of my favorite ways to serve these.
Pro Tips & Tricks
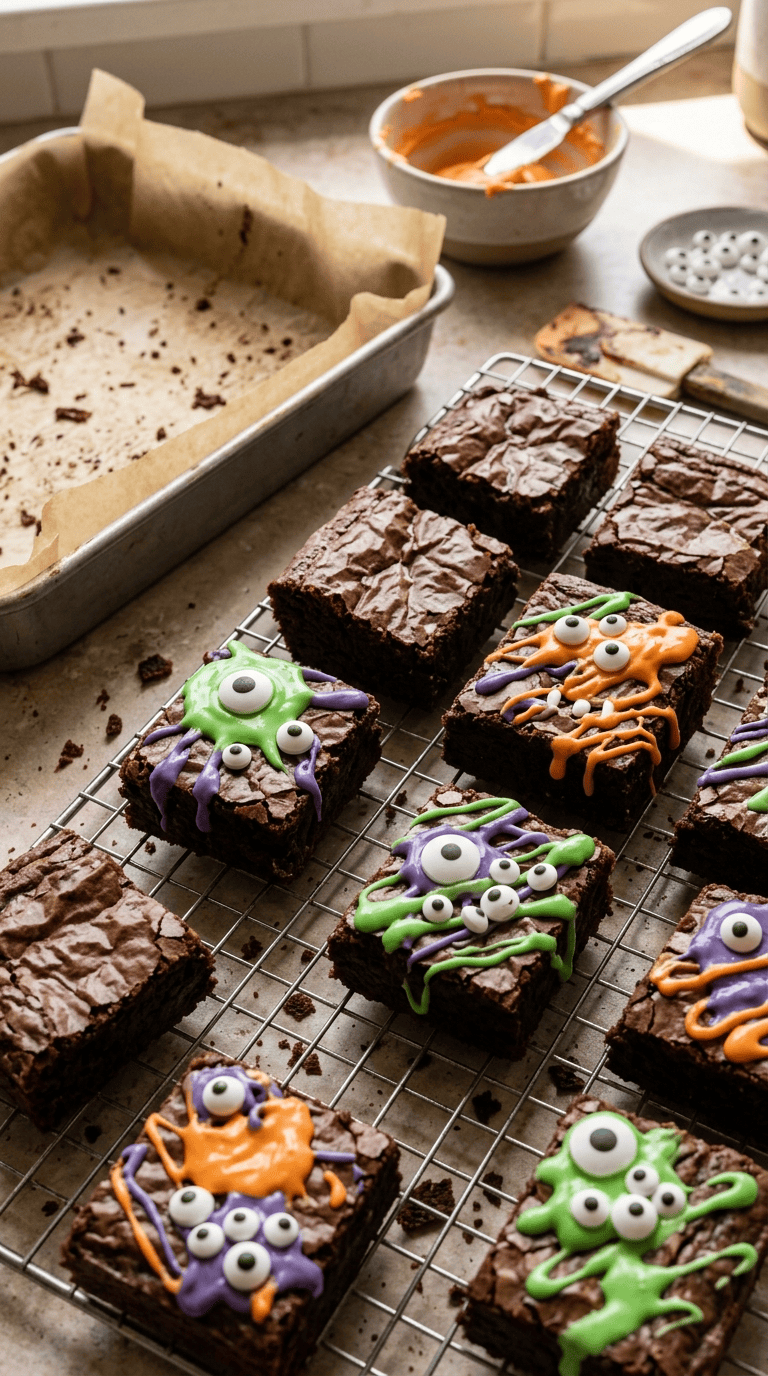
Don’t Overbake the Brownies
The biggest mistake you can make here is leaving the brownies in the oven until the toothpick comes out completely clean.
The center should still have a few moist crumbs.
Brownies continue cooking slightly from the residual heat after you remove them from the oven, so don’t wait for the center to look completely firm.
Cool Before Decorating
Give the brownies plenty of time to cool.
If you spread frosting over warm brownies, the frosting can soften and slide around. Candy eyes can also sink into the surface.
If you’re short on time, place the pan in the refrigerator for about 20 to 30 minutes after it cools slightly at room temperature.
Don’t Make the Frosting Too Thin
When you add food coloring, avoid adding too much liquid.
Gel coloring works especially well because you can create strong Halloween colors without changing the texture of the frosting very much.
Make Them Ahead
You can bake the brownies a day ahead and keep them covered at room temperature.
Decorate them a few hours before serving.
For a Halloween night in, I often bake them in the afternoon, let them cool, and decorate them before dinner. That leaves the evening free for movies, games, and absolutely no frantic baking.
Use Parchment Paper
This sounds boring, but it makes a huge difference.
The parchment gives you handles for lifting the whole brownie slab out of the pan. It also makes cleanup much easier.
Future you will appreciate it.
Variations & Substitutions
Peanut Butter Monster Brownies
Add small spoonfuls of creamy peanut butter over the brownie batter before baking.
Swirl it gently with a butter knife.
You can also add a little peanut butter frosting to the finished brownies before decorating them.
If you’re serving these to a group, check for peanut allergies before using this variation.
Cookies-and-Cream Monster Brownies
Crush about 8 chocolate sandwich cookies and fold half into the brownie batter.
Scatter the remaining crushed cookies over the top before baking.
After the brownies cool, add white frosting and candy eyes for a fun black-and-white monster look.
Dairy-Free Version
Use a dairy-free butter substitute and dairy-free chocolate chips.
Choose a dairy-free frosting for decorating as well.
Always check the labels on your specific products because ingredient formulas can vary between brands.
Gluten-Free Version
Replace the all-purpose flour with a 1-to-1 gluten-free baking flour designed to replace wheat flour.
Choose certified gluten-free chocolate and decorating ingredients if you need to avoid gluten strictly.
Serving Suggestions

These monster brownies fit perfectly into a relaxed Halloween movie night.
Put them on a large serving plate and surround them with a few Halloween decorations. You don’t need anything complicated. A dark plate, some orange napkins, and a few battery-operated candles can create a surprisingly fun setup.
For drinks, serve them with cold milk, hot chocolate, coffee, or apple cider.
If you’re making a full Halloween baking spread, pair the brownies with popcorn, salted pretzels, or fresh fruit. The salty snacks help balance all that chocolate.
For kids, I love turning the brownies into a decorating activity.
Set out bowls of candy eyes, sprinkles, and frosting, then let everyone decorate one or two brownies. Expect a mess. Embrace it.
For adults, serve smaller brownie squares alongside coffee after dinner.
They’re also a fun choice for a Halloween sleepover, family movie night, casual gathering, or a quiet evening when you simply want an excuse to bake something chocolatey.
Related Recipes :
- Halloween Chocolate Dessert Spooky Chocolate Graveyard Brownies Recipe
- Halloween Dessert Ideas You Can Make Ahead
- Halloween Treats That Look Like Monsters and Ghosts
FAQ’s
How should I store Halloween Monster Brownies?
Store the decorated brownies in an airtight container at room temperature for up to 3 days.
If your frosting requires refrigeration, follow the storage instructions for that specific frosting.
Keep the container tightly covered so the brownies don’t dry out.
Can I make these brownies ahead of Halloween night?
Absolutely.
Bake the brownies up to one day ahead and store them covered at room temperature.
You can decorate them on the day you plan to serve them. This method works especially well if you’re preparing several Halloween foods at once.
Can I freeze the brownies?
Yes.
For the best texture, freeze the undecorated brownies.
Wrap individual pieces tightly in plastic wrap, then place them in a freezer-safe container or bag. Freeze for up to 2 months.
Thaw them at room temperature, then decorate.
Why did my brownies turn out cakey?
You may have baked them too long or mixed the batter too much after adding the flour.
For fudgier brownies, stop mixing as soon as the dry ingredients disappear and start checking the brownies toward the earlier end of the baking time.
Can I use boxed brownie mix?
Definitely.
If you’re short on time, prepare your favorite boxed brownie mix according to the package directions, then use the same frosting, candy eyes, and sprinkles for the monster decoration.
Honestly, Halloween night is about having fun. Nobody needs to know you didn’t make the brownies completely from scratch.
Can I use regular frosting instead of colored frosting?
Yes.
Vanilla, chocolate, cream cheese, or buttercream frosting can all work.
You can even spread a thin layer of chocolate frosting over the brownies and add candy eyes directly on top for a super-simple monster design.
Final Thoughts
Halloween baking doesn’t need to become an all-day project.
Sometimes the best treats come from a simple brownie recipe, a few bowls of colorful frosting, and a pile of candy eyes scattered across the counter.
These Halloween Monster Brownies have become one of my favorite spooky-night treats because they give me that perfect combination of rich chocolate and playful Halloween fun. They don’t need perfect piping, expensive equipment, or professional decorating skills.
And if one monster ends up looking a little strange?
That’s the point.
Put on your favorite Halloween movie, make a warm drink, get the frosting bags ready, and let everyone create their own little monsters.
I hope these brownies bring the same kind of cozy Halloween feeling to your kitchen that they bring to mine. If you make them, have fun with the decorations and make them as spooky, silly, or downright weird as you like.
Leave a Reply
You must be logged in to post a comment.