

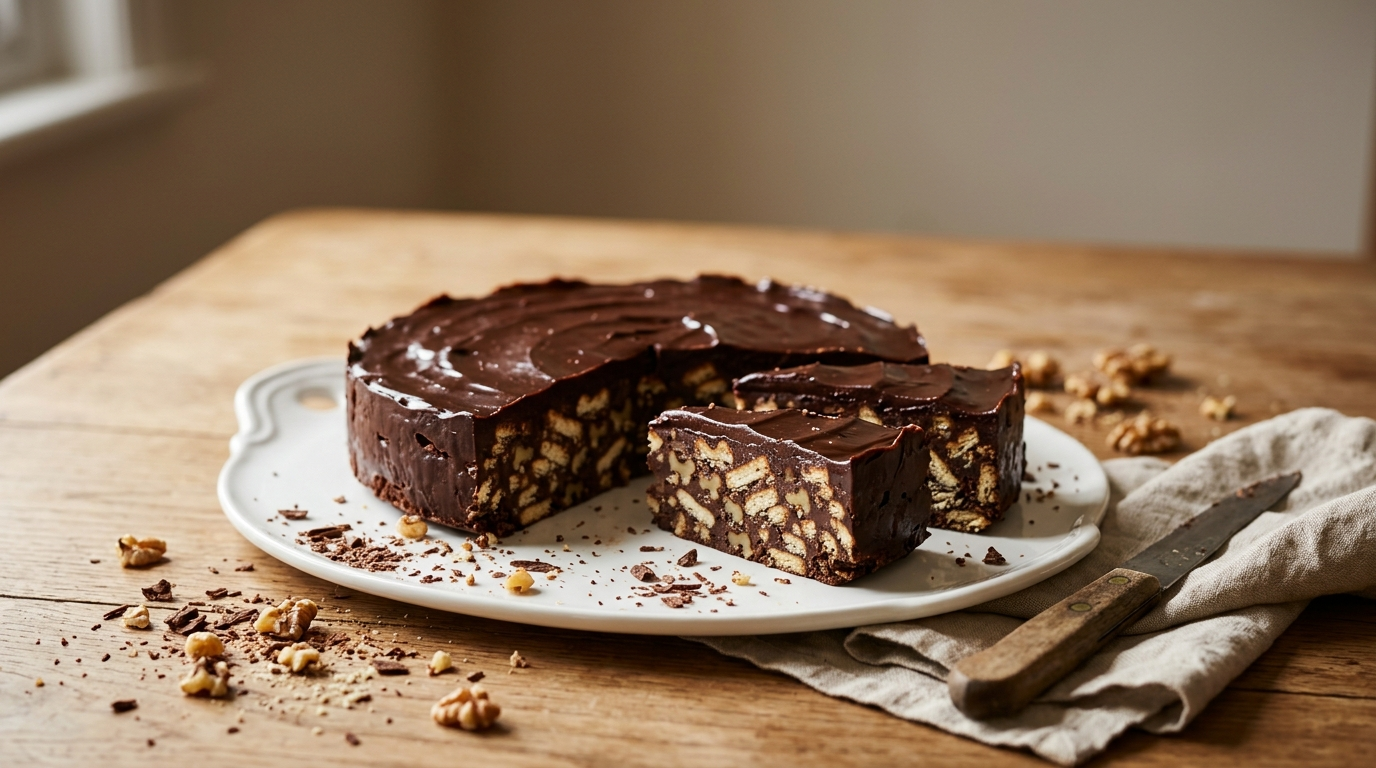
Some desserts make you pull out three mixing bowls, preheat the oven, and somehow cover half the kitchen in flour. This is not one of those desserts.
I first started making this no-bake chocolate biscuit cake on evenings when I wanted something homemade but had absolutely no interest in spending an hour baking. I had a packet of plain biscuits in the cupboard, some cocoa powder, and a little cream in the fridge. I figured I had enough to experiment.
The first version looked a little rough around the edges, but it tasted so good that nobody cared.
Since then, I’ve made this dessert more times than I can count. I’ve served it after family dinners, brought it to small gatherings, and made it when unexpected guests showed up. I’ve also learned a few little tricks that make a surprisingly big difference, especially when it comes to getting the chocolate mixture smooth and giving the cake enough time to chill.
The best part? You don’t need an oven.
You simply crush the biscuits, prepare a quick chocolate sauce, mix everything together, press it into a pan, and let the refrigerator do the hard work.
Why You’ll Love This Recipe

- No oven required: Perfect when you want dessert without turning on the oven.
- Simple ingredients: Most of them are easy to find at an ordinary grocery store.
- Beginner-friendly: You don’t need fancy baking skills or special equipment.
- Easy to customize: Add nuts, coconut, dried fruit, or a little extra chocolate.
- Great for sharing: One chilled cake gives you plenty of neat little slices.
It also has that wonderful combination of soft, chewy biscuit pieces and rich chocolate that makes you want to sneak into the refrigerator for “just one more piece.”
Ingredients
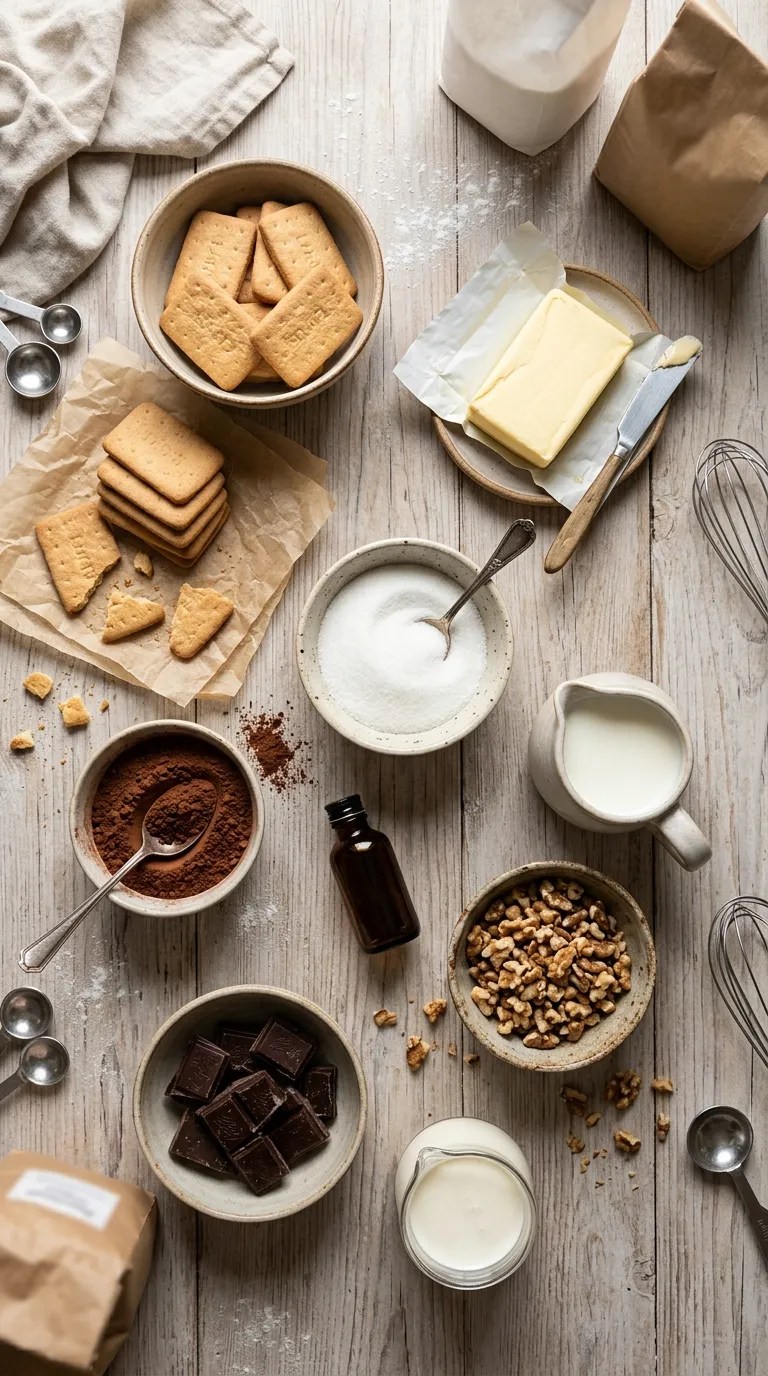
For the Chocolate Biscuit Cake
- 250 g plain tea biscuits or digestive biscuits
- 100 g unsalted butter
- 100 g granulated sugar
- 3 tablespoons unsweetened cocoa powder
- 120 ml whole milk
- 1 teaspoon vanilla extract
- 60 g chopped walnuts or almonds, optional
- 50 g chocolate chips or chopped chocolate, optional
For the Chocolate Topping
- 100 g chocolate, chopped
- 80 ml heavy cream
- 1 teaspoon butter
Helpful Substitutions
You have some flexibility here.
If you don’t have digestive biscuits, plain tea biscuits work beautifully. Graham crackers can also work, although they create a slightly different texture.
You can replace walnuts with almonds, pecans, or hazelnuts. If you prefer a nut-free dessert, simply leave them out.
For the milk, whole milk gives the chocolate mixture a lovely richness, but regular milk also works.
I recommend using unsweetened cocoa powder rather than hot chocolate powder. Hot chocolate mixes contain added sugar and other ingredients, so they can change the texture and sweetness.
Step-by-Step Instructions
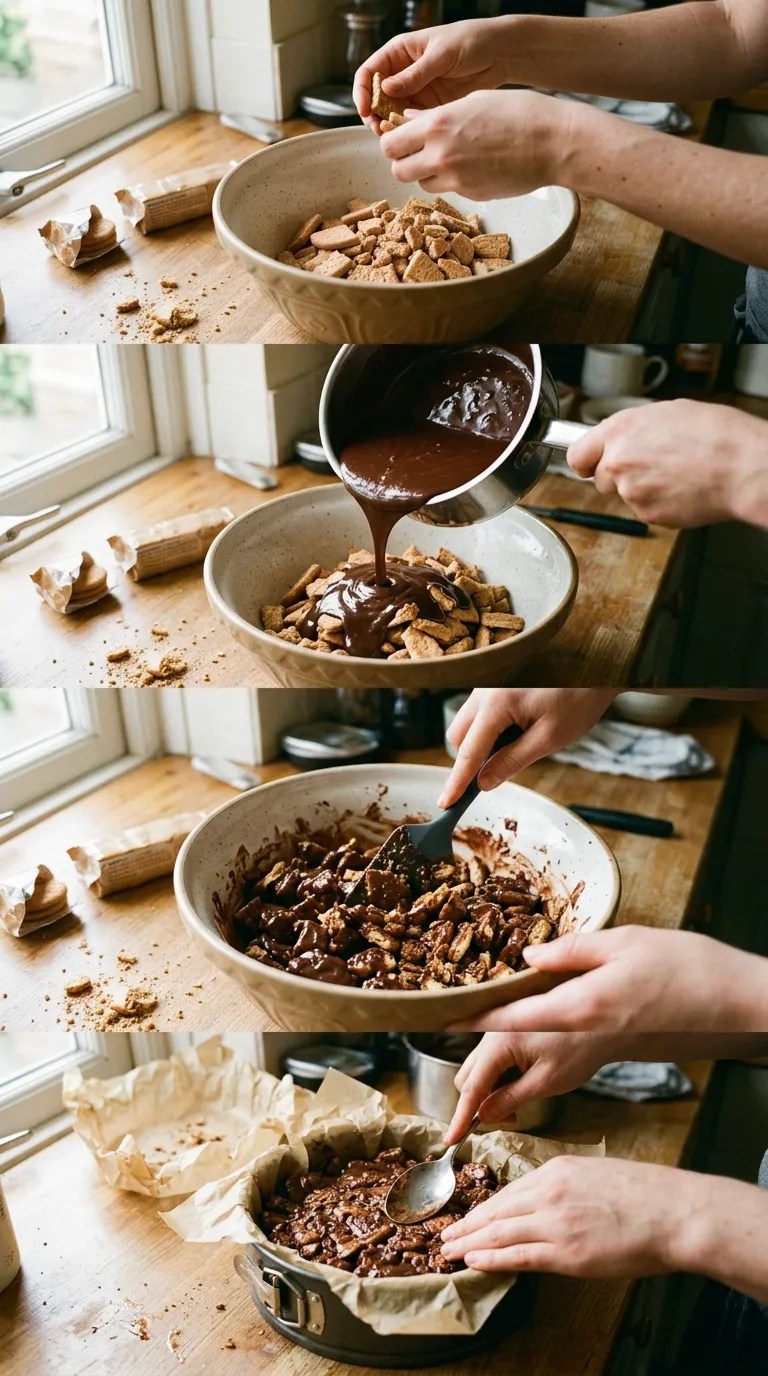
1. Break the Biscuits — 5 Minutes
Place the biscuits in a large bowl and break them into small pieces using your hands.
Don’t crush every biscuit into fine crumbs. You want a mixture of smaller chunks and a few larger pieces.
Those little chunks create the texture that makes this cake so satisfying.
If you prefer a more uniform cake, you can crush about one-third of the biscuits more finely and leave the rest in chunks.
Set the bowl aside.
2. Prepare the Chocolate Mixture — 7 Minutes
Place the butter, sugar, cocoa powder, and milk in a small saucepan.
Set the pan over low to medium-low heat.
Stir constantly as the butter melts and the ingredients come together.
You’re looking for a smooth, glossy mixture. It should become warm and slightly thicker, but you don’t need to boil it aggressively.
Once everything looks smooth, remove the saucepan from the heat.
Stir in the vanilla extract.
This is where I learned one of my favorite little tricks: don’t rush this step by turning the heat too high. A gentle heat gives you a smoother sauce and makes it much easier to control.
3. Add the Chocolate to the Biscuits — 3 Minutes
Pour the warm chocolate mixture over the broken biscuits.
If you’re using chopped nuts or chocolate chips, add them now.
Fold everything together gently with a spatula.
At first, it may look like there isn’t enough chocolate. Keep folding.
The biscuit pieces will gradually absorb the mixture, and everything should become evenly coated.
Try not to stir too aggressively. If you turn the biscuits into crumbs, the finished cake can lose some of its pleasant texture.
4. Line Your Pan — 3 Minutes
Line an 8-inch or 20-cm round or square cake pan with parchment paper.
Leave a little extra parchment hanging over the sides. This small trick makes removing the chilled cake much easier later.
You can also use a loaf pan if you want rectangular slices.
Transfer the biscuit mixture into the prepared pan.
5. Press Everything Firmly — 3 Minutes
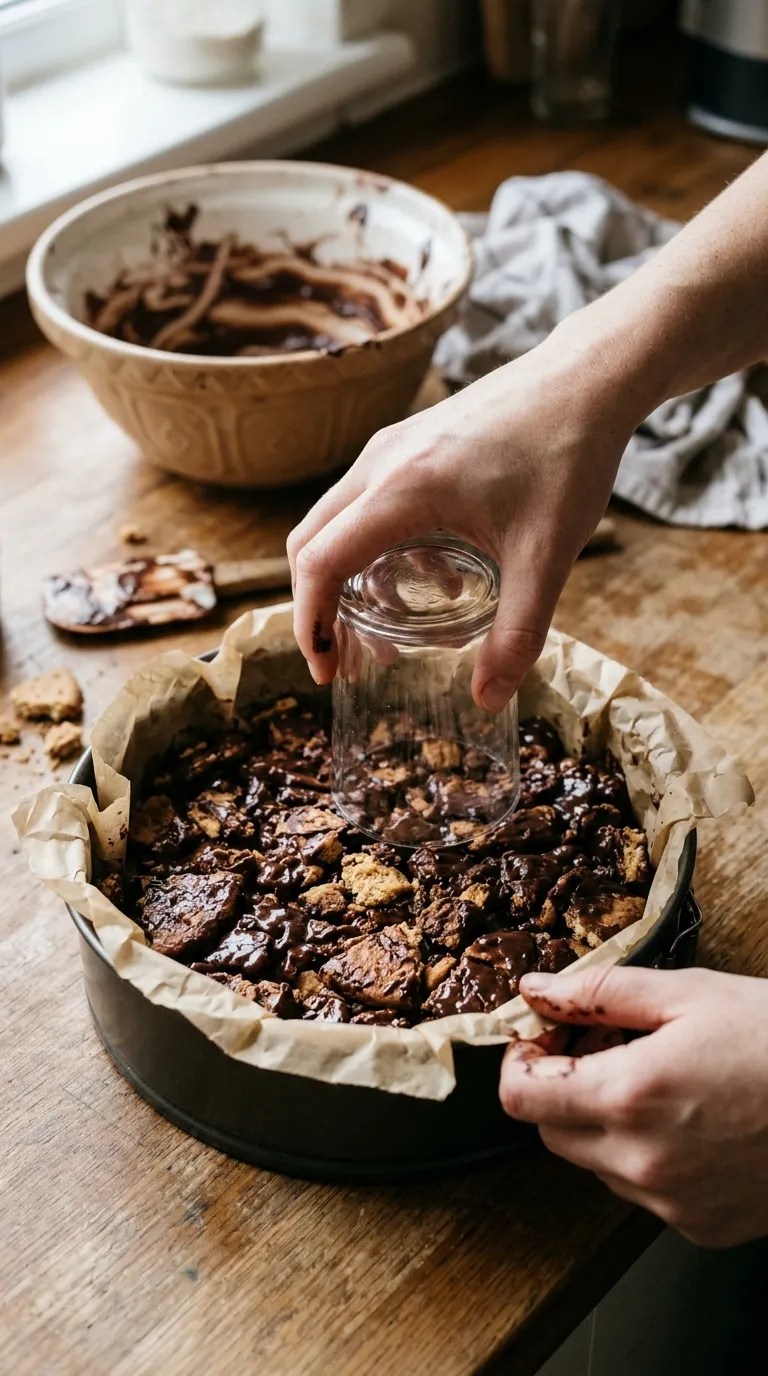
Use the back of a spoon, spatula, or the bottom of a glass to press the mixture down.
Press firmly, especially around the corners and edges.
You want the pieces to hold together once the cake chills.
Don’t worry if the top looks slightly uneven. The chocolate topping will hide most imperfections.
6. Make the Chocolate Topping — 5 Minutes
Place the chopped chocolate in a heatproof bowl.
Warm the heavy cream in a small saucepan until it becomes hot but not boiling.
Pour the warm cream over the chocolate.
Let it sit for about 2 minutes.
Then stir slowly from the center outward until you get a smooth, glossy chocolate mixture.
Stir in the teaspoon of butter.
If you see a few stubborn pieces of chocolate, give the bowl another 15–20 seconds over a gentle double boiler, then stir again.
7. Spread the Topping — 2 Minutes
Pour the chocolate topping over the chilled or slightly cooled biscuit mixture.
Spread it evenly with a spatula.
If you want a simple finish, leave it smooth.
If you’re feeling a little fancy, sprinkle chopped nuts, chocolate shavings, or a light dusting of cocoa powder over the top.
8. Chill Until Firm — At Least 4 Hours
Cover the pan and place it in the refrigerator.
Let the cake chill for at least 4 hours.
Overnight works even better.
I know it’s tempting to cut into it early, but this is one of those desserts where patience actually pays off. The biscuits need time to absorb the chocolate mixture, and the cake needs time to firm up.
When properly chilled, it should feel firm when you gently press the surface.
9. Slice and Serve — 5 Minutes
Remove the cake from the refrigerator.
Use the parchment paper to lift it from the pan.
For cleaner slices, run a sharp knife under hot water, wipe it dry, and then slice.
Repeat between cuts.
You’ll get much neater pieces this way, especially if your chocolate topping has firmed up considerably.
Pro Tips & Tricks
Don’t Pulverize All the Biscuits
This is probably the most common mistake.
If you crush every biscuit into fine crumbs, the cake can become dense and paste-like.
Keep some pieces chunky. The contrast between the soft chocolate mixture and the biscuit pieces makes every bite more interesting.
Keep the Heat Gentle
When making the chocolate mixture, low to medium-low heat works best.
You’re melting and combining ingredients, not trying to cook them quickly.
If the mixture becomes very hot or starts boiling hard, remove it from the heat and let it cool slightly before continuing.
Press the Mixture Firmly
A loose press can lead to slices that fall apart.
Spend an extra minute compacting the mixture into the pan. Pay particular attention to the corners.
I like using the flat bottom of a drinking glass because it gives me a nice even surface.
Give It Enough Chilling Time
Four hours is the minimum I recommend.
If you can make it the night before serving, even better.
The texture becomes firmer and the flavors settle together beautifully after a long chill.
Store It Covered
Keep leftover cake in an airtight container or cover the pan tightly with plastic wrap or a reusable food cover.
It should keep well in the refrigerator for about 4–5 days.
The biscuit texture may soften slightly over time, but I actually enjoy that softer texture on the second day.
Variations & Substitutions
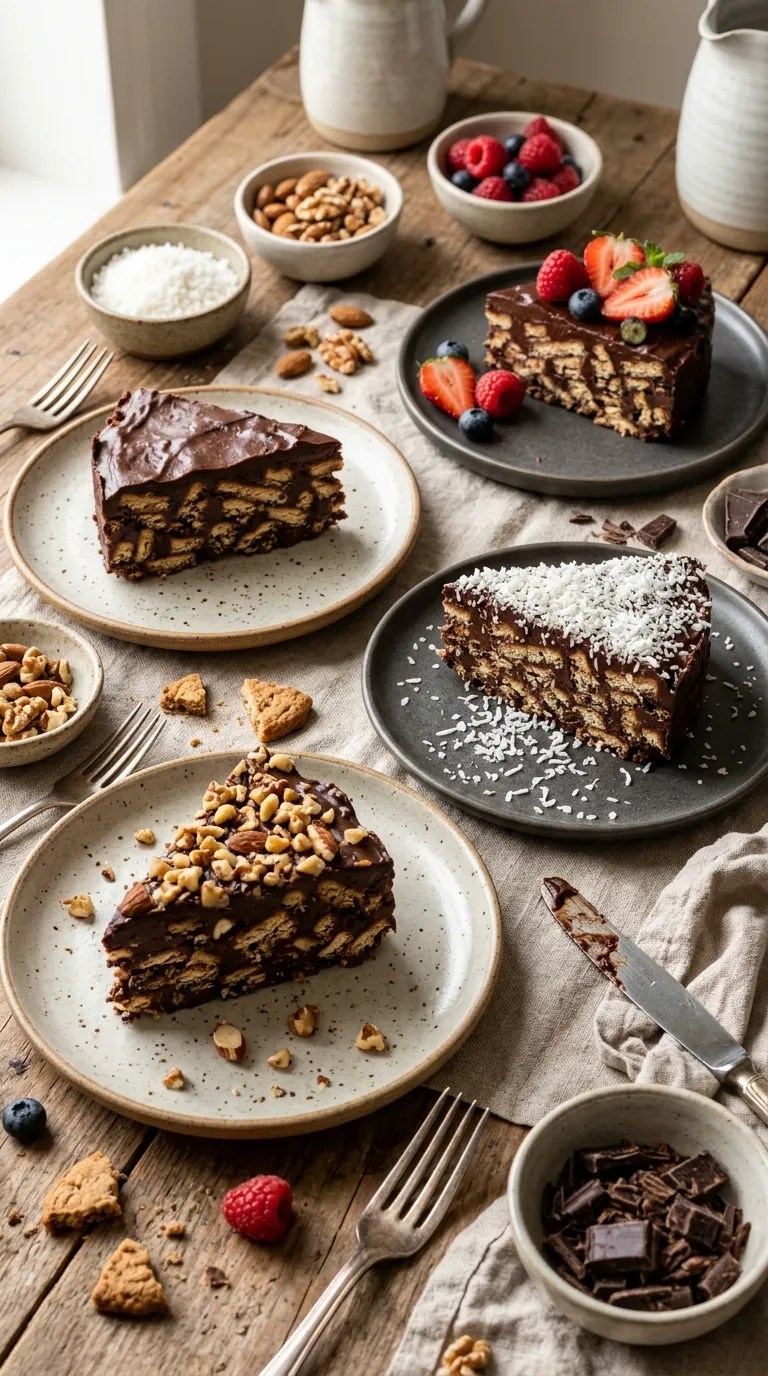
Add Coconut
For a tropical twist, stir 40–50 g of unsweetened shredded coconut into the biscuit mixture.
Coconut pairs especially well with chocolate and adds a little extra chewiness.
You can also sprinkle a small amount over the chocolate topping.
Make a Nutty Chocolate Version
If you love a little crunch, use toasted chopped almonds, walnuts, or hazelnuts.
Toast the nuts in a dry skillet over medium-low heat for about 3–5 minutes, stirring frequently.
Let them cool before adding them to the cake.
That quick extra step makes the nuts much more flavorful.
Make It Egg-Free and Oven-Free
This recipe already contains no eggs and requires no baking.
For a dairy-free version, use plant-based butter, a dairy-free milk, dairy-free chocolate, and a suitable dairy-free cream alternative.
Check the biscuit ingredients as well, since some brands contain milk or other dairy ingredients.
Try a Coffee-Chocolate Flavor
For a deeper chocolate flavor, dissolve 1 teaspoon of instant coffee powder into the warm milk before adding it to the saucepan.
You won’t necessarily taste a strong coffee flavor. Instead, it can make the chocolate taste richer.
If you’re serving this to children, you can simply leave the coffee out.
Serving Suggestions

This cake works especially well after a casual family dinner because you can make it hours ahead and keep it chilled until dessert time.
For a simple presentation, cut it into small squares and serve them cold.
If you want something a little more special, add a spoonful of whipped cream beside each slice.
Fresh berries also make a lovely contrast with the rich chocolate topping. Strawberries, raspberries, and sliced bananas all work well.
For a party, cut the cake into bite-sized squares and arrange them on a serving platter. You can add a few chocolate curls or chopped nuts on top to make the platter look festive without doing much extra work.
I also like serving this with tea or coffee when friends come over. The slightly bitter drink balances the sweetness nicely.
And if you’re making it for a birthday or celebration, don’t be afraid to decorate it. A few colorful sprinkles, chocolate curls, or a light drizzle of melted chocolate can turn this humble refrigerator cake into something that looks party-ready.
Related Recipes:
- Easy Puff Pastry Dessert with Simple Ingredients
- Sweet Potato Dessert Perfect for Fall
- Easy Pear Dessert for a Sweet Fall Treat
- Dirt and Worms Desserts for Halloween Parties
FAQ’s
Can I make this dessert ahead of time?
Yes. This dessert actually benefits from being made ahead.
Prepare it the day before, cover it well, and refrigerate it overnight. The cake will have plenty of time to firm up, and the biscuit pieces will develop a softer texture.
How long does chocolate biscuit cake last in the refrigerator?
Store it covered in the refrigerator for around 4–5 days.
Keep it chilled when you aren’t serving it, especially because the chocolate topping contains cream.
Can I freeze this dessert?
Yes, you can freeze the cake.
Wrap individual portions tightly or place them in a freezer-safe airtight container. For the best texture, use the frozen cake within about 1 month.
Move a portion to the refrigerator and let it thaw gradually before serving.
The texture may change slightly after freezing, particularly if your biscuits contain a lot of moisture, so I prefer the refrigerated version when possible.
Why did my biscuit cake fall apart?
The mixture may not have been pressed firmly enough, or it may not have chilled for long enough.
Make sure the chocolate mixture coats the biscuits evenly and compact everything firmly into the pan.
If the cake still feels soft after several hours, give it more refrigerator time.
Can I use a different type of biscuit?
Absolutely.
Digestive biscuits and plain tea biscuits are my favorites, but you can experiment with graham crackers or other firm, plain cookies.
Keep in mind that sweeter biscuits will make the finished dessert sweeter.
Can I make this without nuts?
Definitely.
The nuts add crunch, but they aren’t necessary for the recipe to work.
Simply leave them out or replace them with shredded coconut, chocolate chips, or a few tablespoons of dried fruit.
Why is my chocolate topping too thick?
Your cream may have cooled too much before you mixed it with the chocolate.
If the topping becomes difficult to spread, warm it gently for a short time and stir until smooth.
Avoid overheating it. You want a soft, spreadable ganache rather than a thin chocolate sauce.
Final Thought
There’s something wonderfully comforting about a dessert that doesn’t demand perfection.
This easy dessert recipe came from one of those “let’s see what happens” moments in my kitchen, and it has stayed in my recipe collection because it simply works.
You don’t need complicated equipment. You don’t need decorating skills. You don’t even need an oven.
Just break up some biscuits, make a quick chocolate mixture, press everything into a pan, and let the refrigerator take over.
The first time you make it, keep an eye on the texture as you mix. Once you’ve made it once, you’ll probably start changing things to suit your taste — extra chocolate here, some toasted nuts there, maybe coconut or a handful of chocolate chips.
That’s exactly how I like home cooking.
Start with the basic recipe, make it your own, and don’t worry if your first cake isn’t perfectly shaped. Mine certainly wasn’t.
What matters is that when you finally cut that first chilled slice and take a bite, you get that rich chocolate flavor, those soft biscuit pieces, and the satisfying feeling that you made a really good dessert without making a huge mess.
And honestly, sometimes that’s all a dessert needs to do.
Leave a Reply
You must be logged in to post a comment.